Happy 6th Birthday to my thread :lol:
I mounted the cowl for the occasion ...and to finally figure out what I want to do with it.
IMHO, it would be a crime to strip and paint 45 years of battle scars.
I'll try to remove any scuffs, maybe do some light touch-ups...but mainly just wax and shine.
[IMG2=JSON]{"data-align":"none","data-size":"full","src":"https:\/\/i.imgur.com\/gfFFATA.jpg"**[/IMG2]
appleo had asked me a few questions in PM however i can't seem to draft a reply due to a flashing marquee at the bottom of my PM screen.
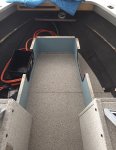
The Horizontal distance is 23" from the center of the pedestal to the bow header.
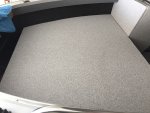
I spent quite a bit of time laying-out and fabricating this deck. Plenty of leg room for me (5'10).
I mostly anchor fish in rivers and this bow deck was designed for:
- 2 full grown adults retrieving / emptying a gillnet
- retrieving a 25# richter anchor in heavy current
- throwing a 20' cast net.
- posing for pictures holding massive fish :madgrin: :lol:
they are very sturdy and I added perimeter reinforcement in the form of aluminum U-channel (go back a few pages in my thread for details.)
The models i used are:
Tempress Dark Gray 1115 Cam Hatch Without Lock, 10.75 X 15 X 1.5
Tempress Dark Gray 1317 Cam Hatch Without Lock, 13 X 17.25 X 1.5
My hull had alot of corrosion. These ports give me access to all of the limber holes to ensure that they're clear of debris and that I'm getting good drainage.
I'm using the same chair as the other 4. (Wise Blastoff) however a leaning post can be used as well. The bow pedestal height is 13".


 arty:
arty: