Mid 1960's OMC Evinrude gull-wing, a work in progress.

Quantumn

Petty Officer 2nd Class
Joined
Jul 17, 2012
Messages
142
Though we did not get as much accomplished yesterday as we had planned. The temperatures were below average and very high winds, so mixing up chemicals was not in the cards. What we were able to accomplish was laying down the flooring and making plans for installing the cross members, (for seat mounting brackets):


Though I am able to muscle the decking solo, with the weight and tight layout of the decking, I called upon the Admiral to help. She was really excited to get involved, even making measurements and marking locations for screws. Bless her heart and dedication. Here is a quick picture of the deck layed down in the stern of the boat:
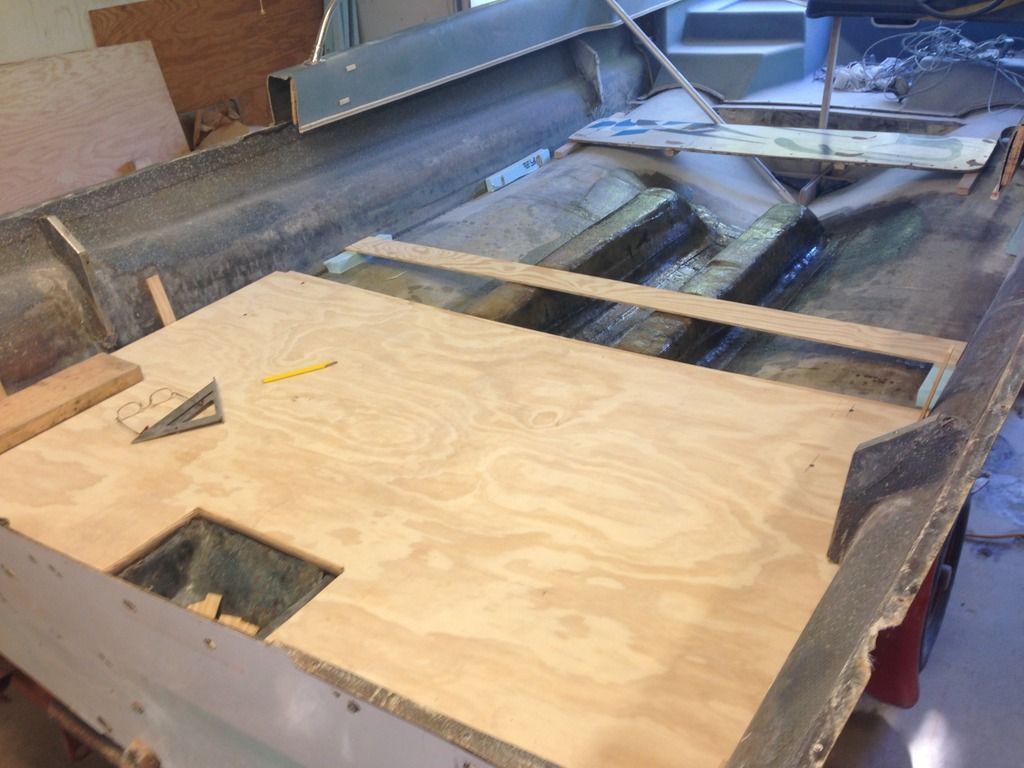
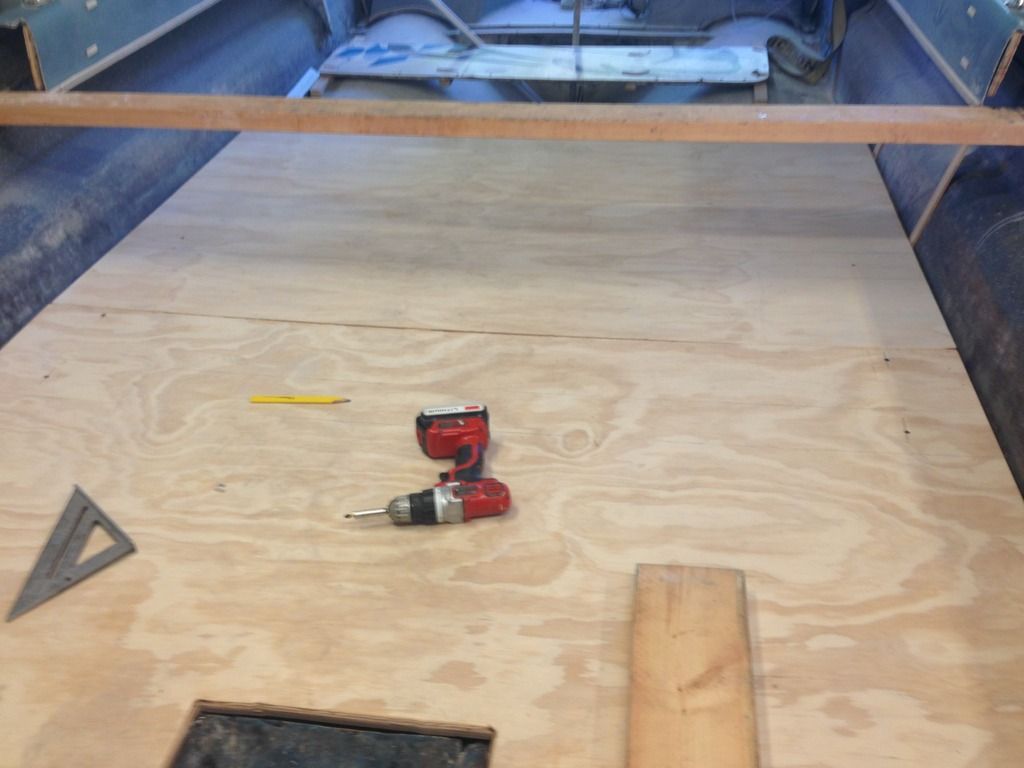


Later on this afternoon, once I get home from work, it will be time to start on the construction of mounting holes, t-nut placement, pb'n and resin/csm application. The plan is to get the back two sheets of 4x8 3/4" acx all prepped for installation then possibly work on the front sheet tomorrow. She is slowly coming together.

Thanks everyone for the help and look. More updates today, stay tuned....:behindsofa:
 

Woodonglass

Supreme Mariner
Joined
Dec 29, 2009
Messages
25,927
You might consider Glueing some reinforcement plates under the deck if your planning on pedestal type seating and mounting the T-Nuts in them That'll give you a full 1 1/2" of plywood and when you lean back in the seats you won't have to worry about flexing the deck.
 

MTboatguy

Fleet Admiral
Joined
Jul 8, 2010
Messages
8,988
Yes, 100% on what Wood said, make sure and glue re-enforcement in the areas you are mounting the seats, you will thank him later, been there done that, do it now instead of trying to back track! Do it even if you will not be using pedestal seats right now, because at some time in the future, you probably will want them.


Cripes, now I see my drill in one of the pictures, you sneaky devil!!!!!!

:lol:
 
Last edited:

Mark72233

Ensign
Joined
Jul 11, 2014
Messages
926
Yep, that is what I did on mine. 3/4 ply prep just like the deck in resin then wrapped in CSM. The pieces are about 24" wide by 24" long which gives me options on where I want to put my seat bases without having to be sure there is something under the deck. I made some cleats 7/8" below the top of the stringers, attached the cleats and the 24" squares using SS screws and 1708. When I put the 3/4 deck down onto the stringers I covered the seat base pieces in PB so they would attach solidly to the underside of the deck boards and put extra SS screws around that area as well. Over 1 1/2" thick.
 

Mark72233

Ensign
Joined
Jul 11, 2014
Messages
926
MT, quick check that the rest of your tools are secure before you see another one on Quantumn's next post :peep:
 

gm280

Supreme Mariner
Joined
Jun 26, 2011
Messages
14,604
MTBoatguy, I hope you and Quantum live fairly close together. Otherwise I think Quantum is spending too much time on the road to "borrow" your tools... :pound:
 

sphelps

Supreme Mariner
Joined
Nov 16, 2011
Messages
11,462
I am interested in the t-nut installation . I guess if you know right where the pedestal is going you can mark and drill holes as needed but how do they install and how do you keep them from filling up with resin ?
MTB , just except it like Ned Flanders ... :D
 

Quantumn

Petty Officer 2nd Class
Joined
Jul 17, 2012
Messages
142
In the back of my mind, I thought of pedestal seat locations, but never really considered the option. The profile of this type of boat is already very shallow, which is why I felt the need to restore it. And lucky for me, I was able to get the original seats/frames in the purchase:


That being said, and under the advice from WOG and MTboatguy, I will be installing 3/4" additional under the 2 possible locations for pedestal seats. As it stands, the cross boards I am installing will be for the installation of SS t-nuts which will be the mounts for the original seating. And Sphelps, once you know the location of where the SS bolts for the original seating goes, and you install the t-nuts, I plan on using simple vaseline to fill the holes to prevent the resin from encapsilating the threads. Fingers crossed this will work.

AS A DISCLAIMER: I have to admit, MTBoatguy and I must shop at the same hardware store. I promise that I have not acquired any of my tools from anyone thru false pretenses, lol. I've got dna to prove these tools are mine, well, now they are, HaHa. As a matter of fact, I found out today that I need more clamps, must have more clamps:


Last edited:

Quantumn

Petty Officer 2nd Class
Joined
Jul 17, 2012
Messages
142
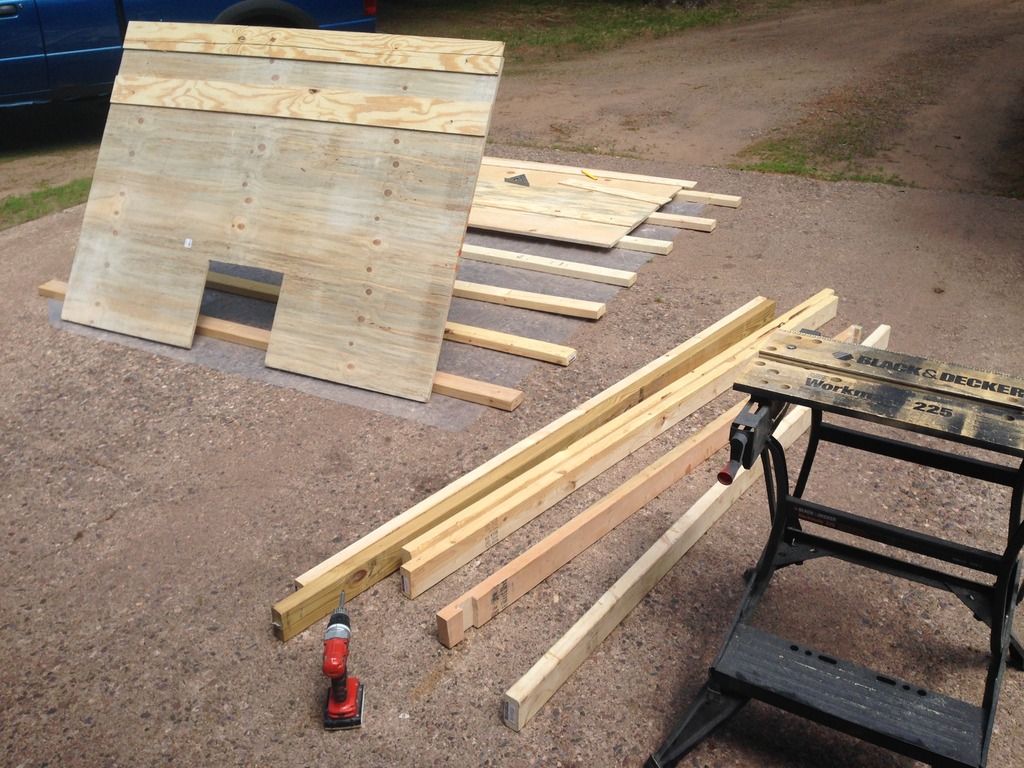
Yesterday was a beautiful day, so was able to work outside for once, YAY!!!:victorious: Started by laying down plastic and 2x4's for support. Neighbors had no clue what I was building, and kept peeking, lol:


Utilizing multiple clamps and 2x4's for complete clamping pressure, was able to titebond III the wood panels together:


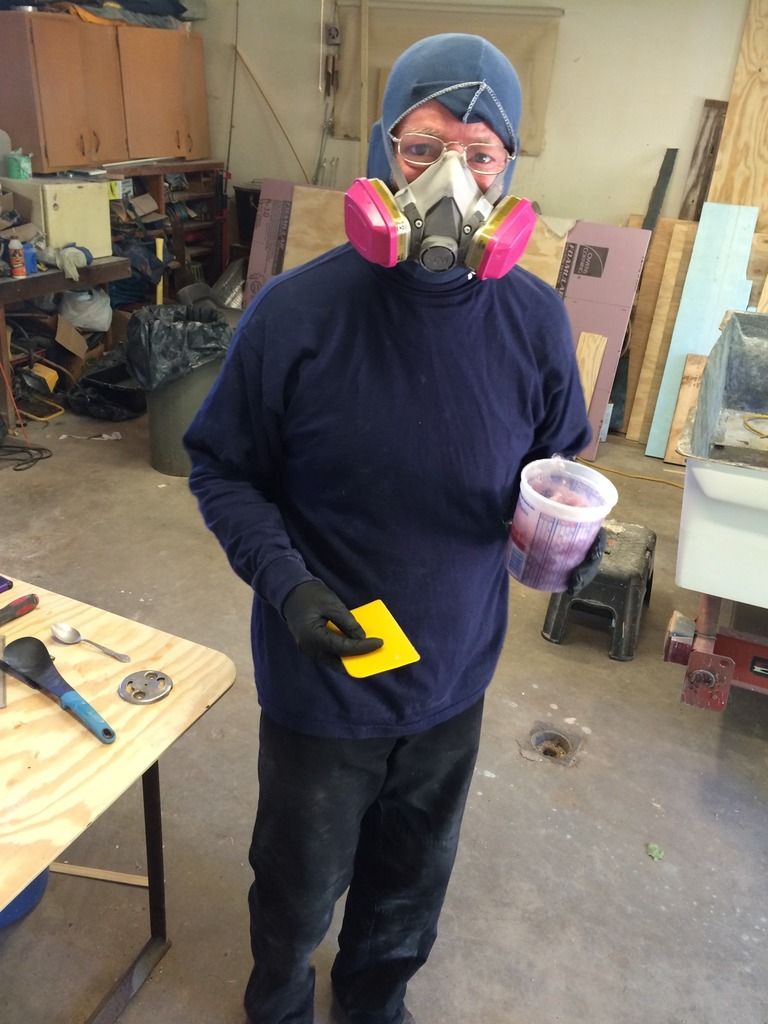
Time to mix up some pb and get at it. Started with just 16 ounces but eventually had to mix up another 16 ounces to finish up:


What a gooey mess, but was able to clean it up nicely once the poly started to kick:


Today is supposed to be rainy for most of the day, but will work in the garage and attempt to lay down resin and csm. Also will need to install the ss t-nuts. Updates coming soon.
 

gm280

Supreme Mariner
Joined
Jun 26, 2011
Messages
14,604
WOW Quantum, such neat interesting work. I love watching pictorial results of boat projects. It gives me that extra boost to get going again on my project. Clamps....oh yea, you can never ever have too many clamps. I've always said that. I have lots and lots of clamps and even with all them, I still have times when I wish I had a few more. Your idea for the "T" nuts is a great idea and makes sense. However, make really sure that the "T" nuts are perfectly spaced because once installed, there is no moving them a little...don't ask me how I know that...:facepalm: As for the poly getting into the "T" nut threads, don't really worry too much about that. If when you are ready to use them and they are filled with polyester, simply drill a little hole through them and use a tap and it cleans them out like magic. So no real worry about plugging them. Again don't ask me how I know that either... :facepalm: I like the reconstruction phase about rebuilding boats. It is a great feeling seeing everything come together from your ideas. And you have everything looking great... Keep posting, I'm watching for certain. :thumb:
 

Quantumn

Petty Officer 2nd Class
Joined
Jul 17, 2012
Messages
142
Thanks GM280, this vessel seems to be built on different construction principles. We are attempting to recreate the original techniques to best of our ability. The t-nuts have been a concern for quite some time, but I have a little wiggle room so should be ok. Actually they will be installed with the seat bracket pucks before any poly is layed down. I am at work right now, but once I get home, I will post a few pictures of the bracket pucks which are held in with just 2 ss machine screws while the seat brackets are twist locked in when needed or able to be removed to prevent tripping hazards. The seats themselves are actually designed to be removed so that they can be used as beach chairs for picnics or kegger parties, lol.
 

Quantumn

Petty Officer 2nd Class
Joined
Jul 17, 2012
Messages
142
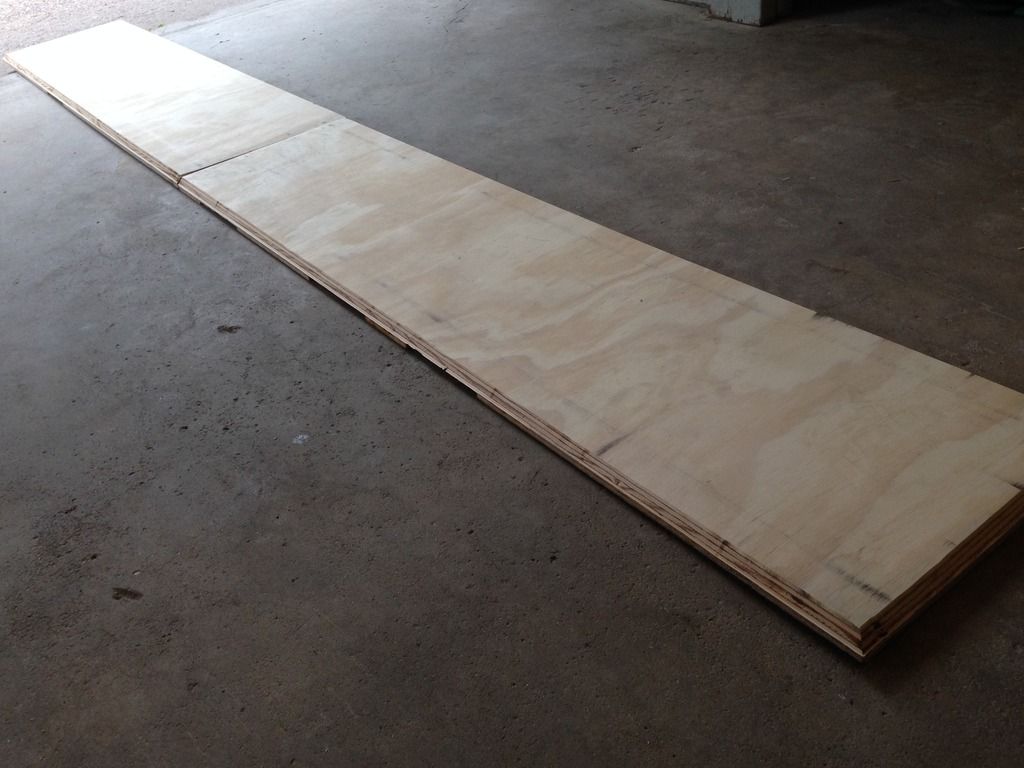
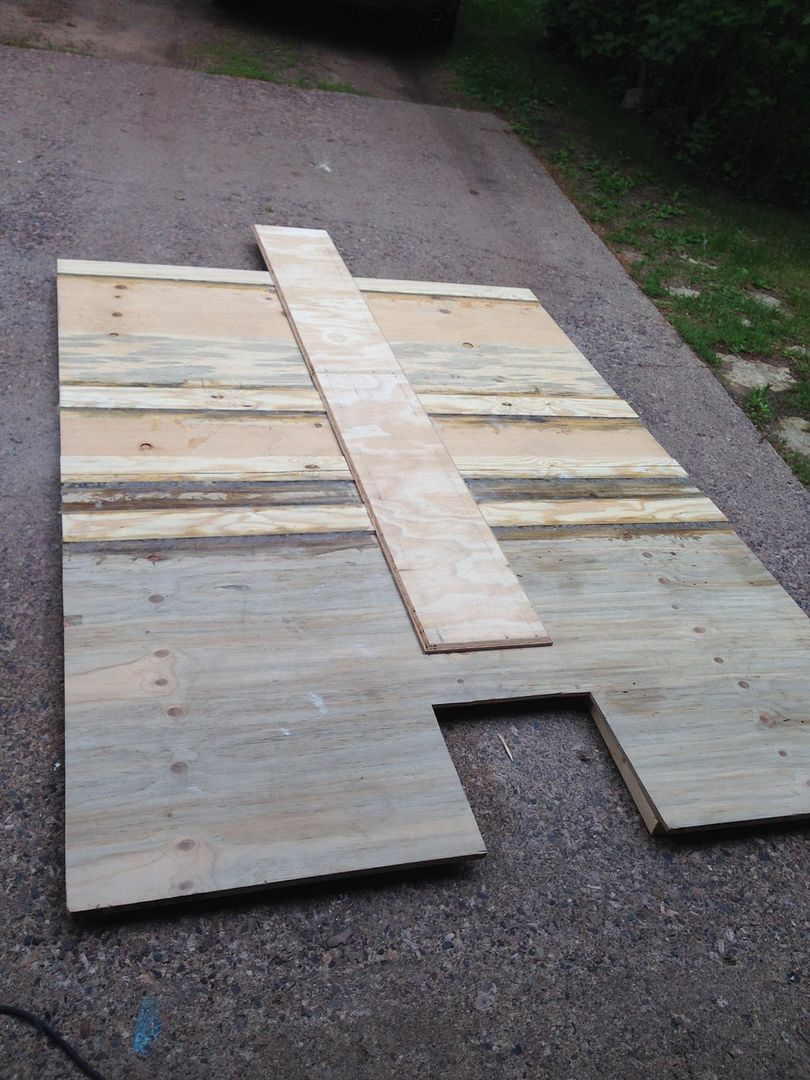
Thinking about the advice from WOG and MTboatguy concerning providing enough support for "possible" pedestal seat brackets, I moved in that direction. With the current setup of stringers, I have 14" distance between the two stringers so decided to install 12" x 12' x 3/4" support plate down the center of the flooring underneath. This requires cutting cross grooves to mate up to the main seat supports:


I will need to grind down the pb that was applied in the area where this new 3/4" strip will be mounted, no biggie. Also this will provide addition support for the floor. Should be rock solid and built like a tank. Only issue is that I will not be able to install the t-nuts as I have no template for a pedestal seat base, oh well. I have other ideas in mind when its time to cross that road. More pictures hopefully later today.

Have a great day Iboater's and Happy Fathers day to you all!!!
 

Quantumn

Petty Officer 2nd Class
Joined
Jul 17, 2012
Messages
142
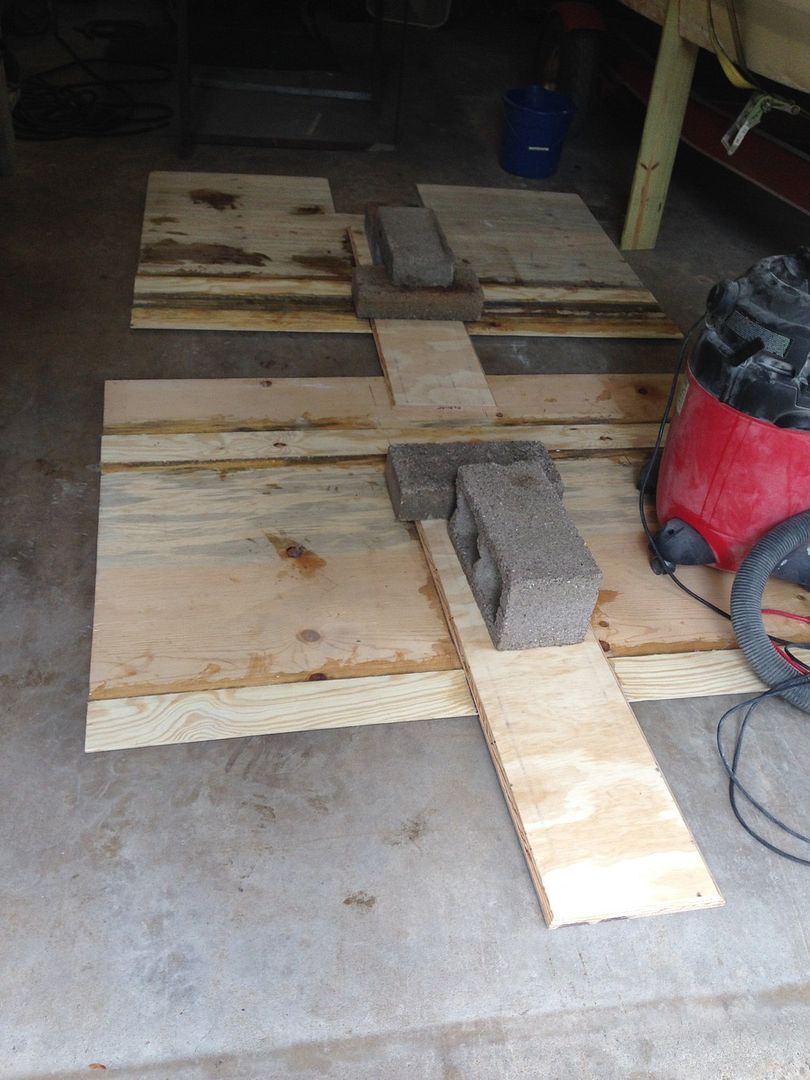
Good morning Iboaters, hope everyone is well. If I seem to be posting boring pictures, I apologize in advance. Looking for advice as the process continues to ensure I make only small mistakes and can be corrected with your expertise. :peep: So I was able to make some small progress yesterday after work and before spending fathers day helping dad fix his garden tractor. Grinded down the pb on the deck bottom side to allow the center 3/4" boards to fit properly:


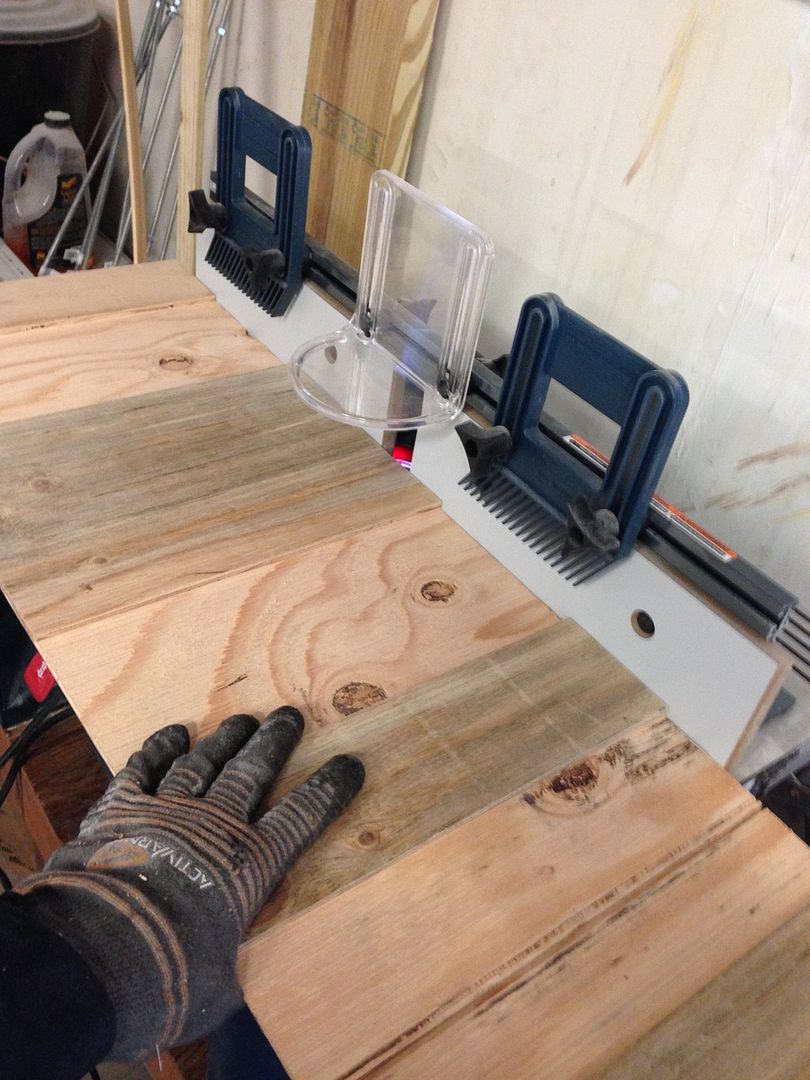
To help minimize the amount of pb needed to clean up the edges once attached, prior to csm, I was able to router the edges with a 1/4" angle, worked out nicely:


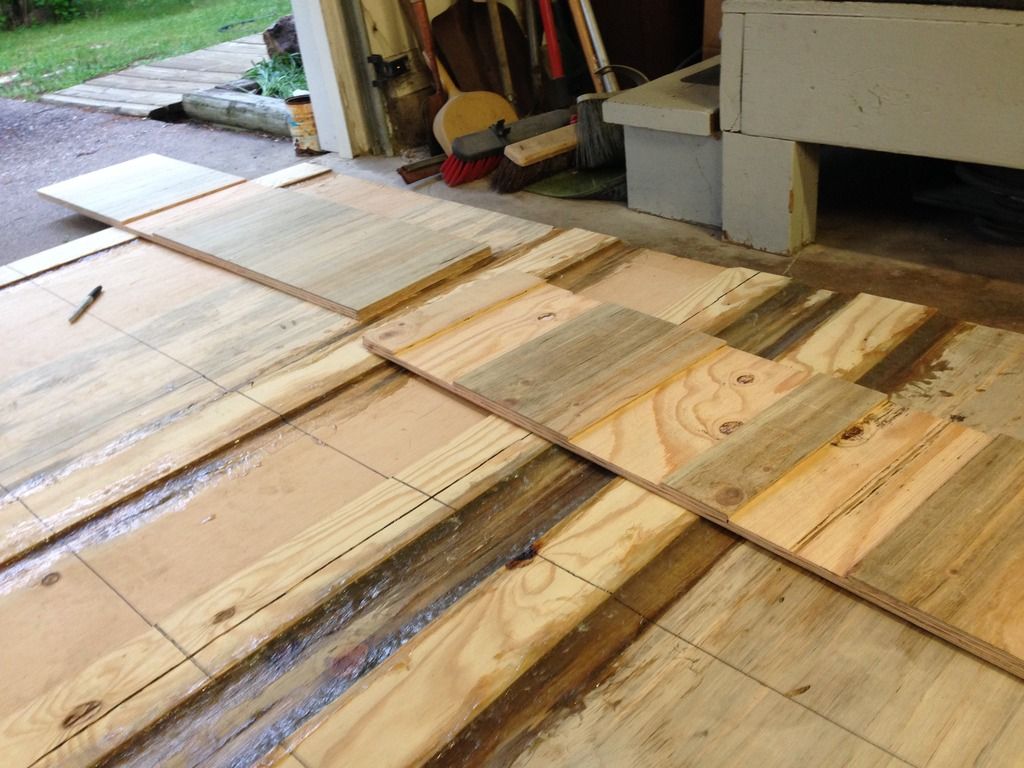
Doing a test fit, looks like everything lines up nicely. To avoid any confusion, this is the underneath part of the deck, hence it will be flipped over before installation:


Last but not least, mixed up some pb and secured everything together, in 48" sections, also filled up any voids, and now to give it time to cure:


Hoping to get a coat of resin and csm on this afternoon after work, but our weather, is still not cooperating. 100% chance of rain but temps should top out at 70 deg. We will see. Thanks for the look everyone, and feel free to comment with advice or playing devil's advocate.
 

gm280

Supreme Mariner
Joined
Jun 26, 2011
Messages
14,604
Quantumn, I'm watching with interest to see what you're doing presently. So keep the pictures flowing... :thumb:
 

thomas15

Seaman Apprentice
Joined
Aug 13, 2014
Messages
43
Quantumn


Thanks for taking the time to show all your excellent work. Really enjoying this thread.


Did you decide not to put foam in the stringer cavities? Also, when you want to double (reinforce) the deck under the seat mounts, how will you glue the plywood reinforcement to the deck? Resin and CSM or some other means?

Growing up as a kid we built two boats, wood of course. It seemed like we were always working on one or the other. My dad really knew what he was doing and we learned a lot. However wooden boat construction is not glass or aluminum so I'm learning it all new.

As an adult I have stayed away from boats completely. Finally my interest is back in full swing and I have a small 16' utility fishing boat to spend my time with. But I'm thinking maybe I might give a rehab a go. When I visualize such a project I cannot even make up my mind if I want to do a tin or glass, outboard or I/O. I do think that if I do get infected I would like something in the 18-19' range, something that I can use on big water.

Your discussion about clamps is of great interest to me as I have my Dad's old clamps. Would be funny if I got them back in service after many years on a boat project?


Really love your dedication and great work. Thanks!

Tom
 

Quantumn

Petty Officer 2nd Class
Joined
Jul 17, 2012
Messages
142
Thanks Thomas15 for your praise. Getting into this type of restoration was not something I ever planned. But once the opportunity presented itself, I just knew it could be done. Albeit with alot of work, moola and determination. The Iboats team is extremely helpful and they keep you on target no matter your rebuild, very knowledgeable. I will be filling the stringers up as well with 2 part foam, as I will need all the safety floatation as I can muster. My current outboard is just shy of 350 lbs by itself, add 3 or 4 adults and you can see the necessity.
About your question of adding the bracing under the deck, I have pb'd them into place, with 1 1/2" stainless steel screws spaced 8" apart. After that is done, it will be completely covered with poly resin and csm. Should be quite solid at that point.
And the discussion about clamps is just a temporary setback, as I envision within a year, I will have clamps to even rival GM280. His collection is off the hook and would even make Tim Taylor proud.
My suggestion to you is to not force yourself into a project such as this. The time will come, you will see it, and have that gut feeling, this is the one, I CAN DO IT!!!
Thanks for the input and tight lines to you all. More pictures to come very soon. :ranger:
 

Quantumn

Petty Officer 2nd Class
Joined
Jul 17, 2012
Messages
142
Poly'd down my first big strip of csm, wow, talk about soaking up some resin, but we are baking now and will see the results in the morning. :)
 

Quantumn

Petty Officer 2nd Class
Joined
Jul 17, 2012
Messages
142
Status update, was able to finish up the last of the grinding on the rear 1/3 deck bottom (current setup will require 3 48" x 71" wide sheets to complete the floor) and installed some stainless steel screws from the top side temporarily. Predrilled, countersunk, and will apply 3m 5200 upon installation into the hull:


Tools of the trade, it gets annoying having to change drill bits each time for every screw, so time to pull out multiple drills:


One thing that I noticed while removing the floor initially, for some odd reason, they had the back keel corners chopped off and only used fiberglass matting to finish up the floor. So wanting to replicate this without causing myself issues, I decided to just round the corners off instead. I am sure there was a reason OMC had those corners removed though. Going to apply pb instead and glass over that:


Just as things were going well and we were making great progress, guess what, yep, it decides to downpour again. I am getting really tired of the weather lately, lol. It seems while I am at work, the weather is perfect, and when home, it either goes high humidity, low 50's temp or massive rain storms. Oh well, this will not impede my progress. Will post a few pictures of the poly/csm pictures soon.
 

Quantumn

Petty Officer 2nd Class
Joined
Jul 17, 2012
Messages
142
Getting ready to lay down some 1.5 oz csm, highly recommended to use a good set of shears/scissors. Any of the big box stores have inexpensive models to choose from. I was able to find my titanium scissors from lowes, and seem to work very well. Mat cut to size and ready to apply:


As per WOG's advice, pre-coated the wood with polyester resin mixed at 1%, and warmed up in a bucket of hotwater to facilitate soaking into the wood. Allowed to get tacky, about 90 minutes. Layed the pre-cut csm in place and proceeded to soak the mat with alot of resin. Using a 4" roller and fiberglass stainless steel rollers, worked the whole board to ensure complete coverage. Easy Peasy:


Really happy with the results. Today after work I will be working on the middle board of the decking doing the same process. After this is complete, installation of the seat t-nuts and hopefully tomorrow I can start to install the deck into the hull. Woo Hoo!!!
 

gm280

Supreme Mariner
Joined
Jun 26, 2011
Messages
14,604
Quantumn, you are going to have to slow down a little. You're making my "stopped" progress look even worst. I hope I can get back to working my project this week, weather permit. You have cool/cold temps to deal with. I have 100 plus degrees presently to deal with. And feeling weak presently the heat works me over real quick. So while I'd rather be working on the boat, my body says not so fast yet... Keep up the progress and pictures. I can see ideas daily as I read and look at your progress... :thumb:
 
Top