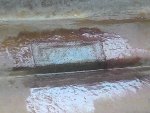
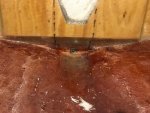
Just acquired a 170 Horizon. Assembly required.

chevymaher

Commander
Joined
Mar 29, 2017
Messages
2,924
Sadly I miss that smell.....is that wrong?? Lol.
I like it to. I do car bodywork using fiberglass. I just didn't have the education i do now on the glass. Using the waxed polyester. I even got 3 square foot of 1.5 oz csm around from that. And a quart left of the polyester waxed resin and hardener.

I use it fixing rust for people. Cut it out and use it on the back of the metal to seal it where the new and old metal are joined. Stops the new rust. Problem is I mix it way to hot for bodywork. Quicker it hardens quicker I can get back to work.

I had a talk with the admiral last night. I told her it is going to smell like fiberglass. I don't want to hear it smells. I told her No sheet Sherlock. Anywho I broke the ice. She said just open the doors and use the ventilation fan I use when I paint cars motorcycles whatever the flavor of the day is.

As usual It is clear out now but supposed to rain as soon as it gets light. So between taxi runs to college and school and work. I will put the van outside and set the benches up at the door. Open the other door and set up the fan. Keep her happy I did what I could.

So if the rain holds off into the boat and cut the sections I need for the keel and bulkheads. If it does do the transom. I am already fired up and excited to get that spot fixed four winns stapled through the hull. That bugs me. As my buddy said "Oh Charlie Anal wont be having none of that will he. He won't be able to sleep."

I am replacing the floatation foam everywhere it was and adding it in another spot. I found the proper formulas for density of metals and fiberglass. I know it is rough calculating square footage when everything is curved. But i did my best. I did it for 2 reasons. One to see how much I will need. 2 to see how much of a comfort margin I got in case of disaster. Roughly 450 lbs to spare. For gear and whatnot. That isn't counting the wood. That weight I threw in with the glass weight as a fudge factor.

I knew I had a circle cutting set in that mess somewhere. For putting in the foam. I tore the garage apart yesterday morning hunting for it. I found it. For what ever reason It was in a box of bodywork supplies. Grinder disk and scotchbrite pads. I guess I was using it doing bodywork for something and forgot. Anywho it is on the engine cover now ready for action.

So get my fill of coffee now while I read other post and keep up on everybodies progress. Then down to the man cave and set up. Going to get one or the other done once the admiral goes to college.
 

chevymaher

Commander
Joined
Mar 29, 2017
Messages
2,924
No Title

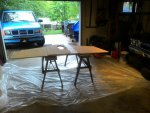
Well one side is done. I don't think this is happening in the house again. either outside or nothing LOL. Took off the mask and wow she gonna kill me LOL.
 

Attachments

  • photo276665.jpg
    photo276665.jpg
    88.5 KB · Views: 8
  • photo276666.jpg
    photo276666.jpg
    96.6 KB · Views: 8

chevymaher

Commander
Joined
Mar 29, 2017
Messages
2,924
No Title

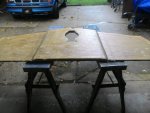
Okay we airing out the house now. Cleaned all the mess up. Once it reached that magic cut like butter stage I took the razor and trimmed the edges. It is hard now and the stink is over. Once it cures I will knock the edges off the rest of the way and do the other side with chopped strand. And do the outdrive hole. Make sure the chopped strand covers the sides as well next round. So it is well sealed. Went well no bubbles.

Definitely more glass on it than it had originally. Right now before chopped strand on the other side and putting it in. it is right at 2 1/8 total thickness. So I think we gonna be gold on thickness when it is done. It was originally only 1 7/8 total in the boat before.

All I can say is wow I am glad the admiral wasn't home when this went on. Avoided a nuclear holocaust situation. Outside from now on parts can come in after they harden.
 

Attachments

  • photo276674.jpg
    photo276674.jpg
    84.8 KB · Views: 3

AShipShow

Lieutenant Commander
Joined
Jul 8, 2016
Messages
1,803
From past experience, you hang around it enough and you don't smell it anymore, but when the admiral gets home, theres still possibility of that nuclear holocaust haha :laugh:
 

chevymaher

Commander
Joined
Mar 29, 2017
Messages
2,924
I was feeling a little to rambunctious last night. Wanting to get to much done to fast stressing out. Had to pull the reins back a little. As my brother always says when we work. Just don't panic it will get done.

LOL I was wanting the transom in NOW. It gonna take a few days. Do some glass and let it harden. Do some more rinse repeat. Clean up and small details. Then it can go in.

So get the back glassed and go fix the staple holes in the hull and mess with the front of the keel.

I dawned on me last night thinking. There I go hurting myself again. I got to get a system where I got the resin in cups. and the hardener pre measured in something else. Stir stick and a table to set all this on in the boat. So I can work in the boat. I sure dont want to be climbing in and out to get resin. Get it all over the gel coat.

Rain is stopping now waiting for the sun to come up.
 

vietcu

Seaman Apprentice
Joined
Aug 5, 2017
Messages
37
That's what I did too with the resin not the hardener. Did this for peanut butter, saw a video where a guy added everything in separate containers premeasured minus the hardener. Only thing I did different was use the same container that I added the hardener again and again. That way the other containers were clean after I poured them out. I didn't bother with pre measuring the hardener as it was a small bottle and I can just add every time I ran out of resin. Saved me some time doing that, I just used a small board to hold all the containers in the boat.
 

chevymaher

Commander
Joined
Mar 29, 2017
Messages
2,924
No Title

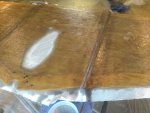
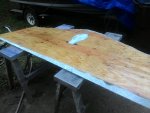
Got the other side of the transom done. Now I just got to do the edges. Trying to roll it over the edge was pulling it up on the part I was doing. Not that tough to just do it separate. Got to do the gimble hole anyway.

Got four winns winns staple holes fixed. And did the keel from the front bulkhead forward. In the pic it looks like there isnt any fiberglass just wet. But there is almost a gallon of resin there csm and alot of 1708.

I basted it like a Thanksgiving turkey till it gelled. It was all running to the low spots. But we got it handled.

first pic some silly old guy out before the crack of dawn doing something.

second csm on back of transom.

third 3 layers of 1708 in progressively bigger patches to fix 2 pinholes 1/4 inch apart.

fourth believe it or not a ton of csm and 1708 and resin where it looks like i basically whiped it down with water.
 

Attachments

  • photo276753.jpg
    photo276753.jpg
    35 KB · Views: 9
  • photo276754.jpg
    photo276754.jpg
    73.3 KB · Views: 9
  • photo276755.jpg
    photo276755.jpg
    86.8 KB · Views: 9
  • photo276756.jpg
    photo276756.jpg
    55.1 KB · Views: 9

chevymaher

Commander
Joined
Mar 29, 2017
Messages
2,924
No Title

Got the keel under the tank done. Covered the bulkheads. Got the transom sealed and in. Nobody was here but me no work. So I dogged it all day.

I think I got enough resin left to peanut butter around the sides and do the tabbing on the transom. Most important thing is that everything in the boat permanently now is sealed correctly.

What a mess to clean up after it is clamped. Squirting out everywhere. All the holes on the outside.

I took the calipers to the transom when I was done 2 1/8 inches.

I been lagging on my yardwork so no boat for me tomorrow. Got to do my duty.

I will be Peanut buttering the side gaps next. Getting the drain plug squared away. Drill all the through holes and sealing them while I am peanut buttering. So lots of work nothing that looks like anything in pics. Just get all the small details taken care of.
 

Attachments

  • photo276801.jpg
    photo276801.jpg
    77 KB · Views: 8
  • photo276802.jpg
    photo276802.jpg
    55.1 KB · Views: 8
  • photo276803.jpg
    photo276803.jpg
    67.5 KB · Views: 8
  • photo276804.jpg
    photo276804.jpg
    66.5 KB · Views: 8
  • photo276805.jpg
    photo276805.jpg
    60.2 KB · Views: 8

chevymaher

Commander
Joined
Mar 29, 2017
Messages
2,924
No Title

I did my yard work. Mower died I basically had to rebuild the fuel system Yea!

Anywho I did do some boat work mostly whittling. While I was resting from doing what I was supposed to be, at lunch. I made a new drain hole. It will allow the screws for the bilge drain. I angled it to the bottom so most if not all the water would drain when tilted. As opposed to before it held quite a bit. Sure be pretty under the motor where you can't see it once I do the tabbing and paint the bilge area.

I was knocking on the outside of the transom with my knuckles real hard. Yea it does sound different now than it did.
 

Attachments

  • photo276874.jpg
    photo276874.jpg
    50.7 KB · Views: 5
  • photo276875.jpg
    photo276875.jpg
    67.5 KB · Views: 5

kcassells

Fleet Admiral
Joined
Oct 16, 2012
Messages
8,737
So you whittled yourself a pc. of wood to put back in the wettest spot of the transom for all days instead of filling with epoxy/pb/poly pb and then drilling out for a flanged drain?
 

chevymaher

Commander
Joined
Mar 29, 2017
Messages
2,924
What is a flanged drain. It has a stainless drain with a pipe plug now. But it has 3 screws that got to go in something.
 

Baylinerchuck

Commander
Joined
Jul 29, 2016
Messages
2,726
No Title

What is a flanged drain. It has a stainless drain with a pipe plug now. But it has 3 screws that got to go in something.

I agree with kcassells on this one. The three screws on the drain can screw into and be held securely by the fiberglass. In my Chaparral the transom wood stops above the bilge drain, so there is no backer wood for the screws to drive into. The screws drive into the 3/8" thick fiberglass. I sealed them and the drain flange with 5200. I really believe in keeping the wood away from the drain as much as possible.

I attached a picture of mine, right about the same place you are now.
 

Attachments

  • photo276898.jpg
    photo276898.jpg
    139 KB · Views: 6

Baylinerchuck

Commander
Joined
Jul 29, 2016
Messages
2,726
Nice work BTW. Trust me I totally understand about the admirals sense of smell, lol. That resin is powerful!!!!
 

kcassells

Fleet Admiral
Joined
Oct 16, 2012
Messages
8,737
Where you were going to place the wood, fill with solid pb mix. So in that area there is no wood. Redrill out for the transom drain. Set in pb or adhesive of choice. When you screw it to secure the drain the screws will now be set in the pb, not the wood.I hope I explained this correctly.
 

chevymaher

Commander
Joined
Mar 29, 2017
Messages
2,924
Where you were going to place the wood, fill with solid pb mix. So in that area there is no wood. Redrill out for the transom drain. Set in pb or adhesive of choice. When you screw it to secure the drain the screws will now be set in the pb, not the wood.I hope I explained this correctly.


Okay I wasn't being smart I really am just new to this. I looked it up after your post and DUH I already got a flanged drain. I did a ton of looking and the subject is pretty dry on info. Can I get a piece of aluminum or brass and tap it for stainless screws with normal threads. Bolt it down and then put the PB. Issue is the drain isnt coming out. Best I see from learning about this it is in with the gm 5200 it is sealed and it isnt coming back out. Easily anyway without ripping things loose. I already was tugging on it when the transom came out. It isn't budging.

So my existing plan was the friscoboater route of using a PVC as a drain and pb around that. Somehow have the screws in and tightened already. Then I drifted to the wood plug idea I just whittled. Just seal it real well.

If I seal it well assembling it. It souldn't be getting wet to corrode the threads correct on the tapped aluminum thought. I tend to be to much of a gorrilla sometimes I just see me stripping the firberglass with the existing screws. I like the peanut butter being there better tho. It can't rot if it isnt wood.

I got some time to sort this out. Maybe I am just over thinking it. I stress the small details alot. I got my nickname Charlie anal for a reason. I mean who else but charlie would whittle the wood and plan on bodywork on a part nobody would ever see. Just so it looked nice if the engine ever had to come out.

My phone has been ringing off the hook for extra work. I got a lincoln getting dropped today for dome minor bodywork. Forced break.

Mom and dad came over last night. I had to put a belt on their mower. Looked at the boat for the first time. I said you wanna look at my new bathtub. Mom thought that was funny.
 

chevymaher

Commander
Joined
Mar 29, 2017
Messages
2,924
I agree with kcassells on this one. The three screws on the drain can screw into and be held securely by the fiberglass. In my Chaparral the transom wood stops above the bilge drain, so there is no backer wood for the screws to drive into. The screws drive into the 3/8" thick fiberglass. I sealed them and the drain flange with 5200. I really believe in keeping the wood away from the drain as much as possible.

I attached a picture of mine, right about the same place you are now.
Okay forming new plan. I will experiment with the hockey pucks left over fro glassing and see if i can manage not to strip screws going into them. That was a good looking drain that will sit up on the wall with the rotted boat stringer. I always keep a piece of all my restorations as a memory. I got little rusted strips of metal up there hanging. From fixing quarters over the years. Conversation pieces basically.

I can see now i am just putting to much on this drain hole thing.
 

chevymaher

Commander
Joined
Mar 29, 2017
Messages
2,924
Okay panic averted. Test holes and screwed them in the pucks. I am good with it. I got the drain flange out now clean it up. So Peanut butter it is there. Thank you gents.
 
Top