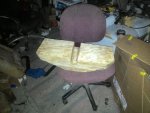
Just acquired a 170 Horizon. Assembly required.

chevymaher

Commander
Joined
Mar 29, 2017
Messages
2,924
Got the port side engine cut out assembled glued and drying. Got the under the tank piece done.

Both the side cupholder arm rest deals are made. Wood was floppy and curled. Because it was 1/2 inch. I used several blocks on each to screw to. Now it held shape. Run a bead of glue inside and screwed it together along the length. So the blocks can be removed later for glassing. But they are study enough now to do the trim rinse and repeat dance to get the side curve of the boat. They had cupholders for the reverse facing seats. I am going to add 2 more for the rear seats.
 

SHSU

Lieutenant Junior+Starmada Splash Of The Year 2019
Joined
Mar 8, 2017
Messages
1,746
Do I see black drywall screws being used or am I seeing things?
 

chevymaher

Commander
Joined
Mar 29, 2017
Messages
2,924
Do I see black drywall screws being used or am I seeing things?
Sharp eye. They will come out when the glassing goes on but for now they hold things real well for the mock up.

I am done now and watered the gardens. I got a few pics today fo the circus.As i said before i cant post them untill I get to the image reducer in the easyboy's computer
 

chevymaher

Commander
Joined
Mar 29, 2017
Messages
2,924
No Title

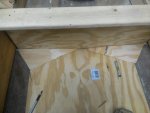
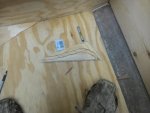
Biggest problem this boat had was water not draining out of the skii locker and tank area. Combined with poor sealing. So I got out the level to see how far the boat should be tilted to drain. And it is sitting on a angle in my yard so water would still be held in the corner. To eliminate this I am adding these guides that make the drain hole the lowest point even when sitting level. This is the tank compartment but i will make a set for the skii locker as well.

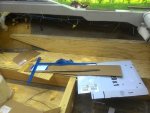
Second half of the program was making the armrest/shelf/cupholder dealies fit. And yes that is the scientific term for them.

I found the correct circle cutter for the drain size in my mess I call a tool box. Always a plus having the tool and not having to buy it.
 

Attachments

  • photo274193.jpg
    photo274193.jpg
    61.1 KB · Views: 10
  • photo274194.jpg
    photo274194.jpg
    67.1 KB · Views: 10
  • photo274195.jpg
    photo274195.jpg
    75 KB · Views: 10

SHSU

Lieutenant Junior+Starmada Splash Of The Year 2019
Joined
Mar 8, 2017
Messages
1,746
Sharp eye. They will come out when the glassing goes on but for now they hold things real well for the mock up.

I am done now and watered the gardens. I got a few pics today fo the circus.As i said before i cant post them untill I get to the image reducer in the easyboy's computer


LOL, figured I would ask. I guess it doesn't make a big deal on a glasser, but on a tinny (Like mine) its a big deal.


Biggest problem this boat had was water not draining out of the skii locker and tank area. Combined with poor sealing. So I got out the level to see how far the boat should be tilted to drain. And it is sitting on a angle in my yard so water would still be held in the corner. To eliminate this I am adding these guides that make the drain hole the lowest point even when sitting level. This is the tank compartment but i will make a set for the skii locker as well.

Second half of the program was making the armrest/shelf/cupholder dealies fit. And yes that is the scientific term for them.

I found the correct circle cutter for the drain size in my mess I call a tool box. Always a plus having the tool and not having to buy it.

That is a smart idea to test and see before you did the final install
 

chevymaher

Commander
Joined
Mar 29, 2017
Messages
2,924
No Title

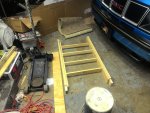
Had to go to the lumber yard get a few 2x4's for clamping the transom and some various stuff for the floor bracing and tank install.

Remade the cross braces from the old rotting ones WRONG. Had to remake them longer. Got to enjoy ripping a couple pieces of 2x4 the hard way. Not enough room for the tank.

I looked in the destruction pics for what they did. They used multiple layers of plywood and shims top to bottom. Nailed into the stringers at the bottom in the water level. I just cut the pieces of wood the size I need to fit. Same width as they had at the top. Will attach them to the stingers and bulkheads.
 

Attachments

  • photo274284.jpg
    photo274284.jpg
    97.9 KB · Views: 7

SHSU

Lieutenant Junior+Starmada Splash Of The Year 2019
Joined
Mar 8, 2017
Messages
1,746
Had to go to the lumber yard get a few 2x4's for clamping the transom and some various stuff for the floor bracing and tank install.

Remade the cross braces from the old rotting ones WRONG. Had to remake them longer. Got to enjoy ripping a couple pieces of 2x4 the hard way. Not enough room for the tank.

I looked in the destruction pics for what they did. They used multiple layers of plywood and shims top to bottom. Nailed into the stringers at the bottom in the water level. I just cut the pieces of wood the size I need to fit. Same width as they had at the top. Will attach them to the stingers and bulkheads.


Let me guess, the old nails were completely rusted through. Aren't photos great? LOL
 

chevymaher

Commander
Joined
Mar 29, 2017
Messages
2,924
Let me guess, the old nails were completely rusted through. Aren't photos great? LOL
There was pretty much nothing at the bottom anymore. Just a little rusted something into the stringer in various places letting the water in. Life jackets chewed up by the mice. So that nice waterproof material blocking the drain. Little standing water.

Pretty much nothing was at the bottom black greasy mud. My resident mouse I got with the boat chewed up a couple life jackets to build nest. And blocked the drains with that waterproof material. Standing water under the tank. Just little rusty nubs going into the studs letting water in and out.

Mouse got his in my ac unit when the fan started one night. That was a trip. It was loud I thought someone was in the yard tearing something up. Nope just mouse tail a little fur. And mouse everywhere all on the sides.

Once I got it open in there the stringers themselves drained pretty much untill I cut them out. It looked like the end of the world under that tank.
 

SHSU

Lieutenant Junior+Starmada Splash Of The Year 2019
Joined
Mar 8, 2017
Messages
1,746
There was pretty much nothing at the bottom anymore. Just a little rusted something into the stringer in various places letting the water in. Life jackets chewed up by the mice. So that nice waterproof material blocking the drain. Little standing water.

Pretty much nothing was at the bottom black greasy mud. My resident mouse I got with the boat chewed up a couple life jackets to build nest. And blocked the drains with that waterproof material. Standing water under the tank. Just little rusty nubs going into the studs letting water in and out.

Mouse got his in my ac unit when the fan started one night. That was a trip. It was loud I thought someone was in the yard tearing something up. Nope just mouse tail a little fur. And mouse everywhere all on the sides.

Once I got it open in there the stringers themselves drained pretty much untill I cut them out. It looked like the end of the world under that tank.


Can't remember, was the tank Polymer or Aluminum?
 

chevymaher

Commander
Joined
Mar 29, 2017
Messages
2,924
Tank is aluminum.

I was working on motor mounts today I got 3 layers done. Only way I can see to do it. Is cut the sharpest angle the saw has. Then use the grinder. Then block sand it with the electric sander. Takes forever but it works.

I only got enough 3/4 scrap for one or 2 more if I am lucky. So I am going to have to get some more to finish them. No biggie. Got a full sheet and a 1/3 of the half inch left. And all I got is the floor in the skii locker tank cover and a few rips in the deck I am set there.

Brother came over I got to do some lower control arm bushings on his car and a blower motor. I said you know that money is going straight into the boat thank you very much. It is supposed to rain the next couple days so no harm no foul there. I am about done with what I got to do anyway. Then back to the transom sealing the bolt holes for the remainder of the time i got.

Weather will shift and I be doing interior and motor stuff a while. Tank is still clogged I got to take the sender unit out and clean that and get whatever nasty is in there cleaned out.
 

SHSU

Lieutenant Junior+Starmada Splash Of The Year 2019
Joined
Mar 8, 2017
Messages
1,746
I am sure you are already aware, but be careful cleaning the tank. Don't want it to go BOOM :target:
 

chevymaher

Commander
Joined
Mar 29, 2017
Messages
2,924
I am sure you are already aware, but be careful cleaning the tank. Don't want it to go BOOM :target:


It has been open since I started the demo. It doesn't even smell like gas anymore. I drained it and took that nasty stuff to the state for disposal. 2-5 gallon buckets full sitting there open and there was no gas smell. It was a nasty color. Bluish ethanol going on in the tubes. I wouldn't even use that nasty stuff in the lawnmower.

He said it was loosing power last time he had it out. I don't doubt it. We tried to light a fire in a 55 gallon drum with it wouldn't even light. Couldn't draw gas out the outlet tube it is blocked. Fuel pump was blocked. I fixed that before I got the boat. Completely disassembled and cleaned it all. Like they said in the Bruce Willis movie Armageddon. All you had to say was worst case scenario.

I got one more of the motor mount pieces made today before I had to go to work. I am apparently rebuilding the entire front end on this Honda and brakes and a blower motor. I put a new engine in it 2 years ago. It is all good more boat money.
 

SHSU

Lieutenant Junior+Starmada Splash Of The Year 2019
Joined
Mar 8, 2017
Messages
1,746
It has been open since I started the demo. It doesn't even smell like gas anymore. I drained it and took that nasty stuff to the state for disposal. 2-5 gallon buckets full sitting there open and there was no gas smell. It was a nasty color. Bluish ethanol going on in the tubes. I wouldn't even use that nasty stuff in the lawnmower.

He said it was loosing power last time he had it out. I don't doubt it. We tried to light a fire in a 55 gallon drum with it wouldn't even light. Couldn't draw gas out the outlet tube it is blocked. Fuel pump was blocked. I fixed that before I got the boat. Completely disassembled and cleaned it all. Like they said in the Bruce Willis movie Armageddon. All you had to say was worst case scenario.

I got one more of the motor mount pieces made today before I had to go to work. I am apparently rebuilding the entire front end on this Honda and brakes and a blower motor. I put a new engine in it 2 years ago. It is all good more boat money.


I found something similar with the tank I got that came with the boat. Mine, however, wasn't quite as bad and I was able to burn off in my 4 stroke mower/weed wacker. I guess people just don't think about fuel stabilizer or maybe it was sitting for that long...
 

chevymaher

Commander
Joined
Mar 29, 2017
Messages
2,924
I guess people just don't think about fuel stabilizer or maybe it was sitting for that long...

It had been sitting 3 years according to him. He got the baja blew it up and rebuilt it. Then just gave up and got a new boat.

I get 4 wheelers and weed whackers here all the time look just like this inside. And won't run or run like crap. One winter is enough to do it. The ethanol gas is just garbage. I saw a video on it. And boats due to having such a well vented system it starts almost immediately. Guy put it in a quart mason jar and a fan on it to simulate conditions in a boats gas tank while in use. In 5 minutes you could see water settling out and running down the sides of the jar. Within 30 minutes there was a pool of water at the bottom.

Lucas injector cleaner dissolves the mess it makes. And the 2 stroke oil labeled TC-W3 encapsulates this non sense and keeps it from settling out. When things are brought to me I drain them add fresh gas with these 2 things in them. Within a tank of running the carbs are usualy cleaned out and work perfectly. First I will put some kerosine in there and some pea gravel and shake it around to get this crap out of there. That is how we do the old muscle car tanks that are trashed inside. I got some tank treatment sealer I will use on it once it is clean.

Like I said I got plenty of other things to do once I get this caught up in the winter months. I am sure the carb is coming off and getting soaked and cleaned make sure it is ready after finding this mess everywhere else. I am sure its little idle galleys are loaded with this stuff to. Take the head off inspect the valves and see if they need anything. Check cylinders for rust from sitting. It has rediculous oil pressure i already checked that. Turned the pump through the distributor hole with a oil gauge on it.

My buddy who has had a boat for 30 years and blew up quite a few has inspected the outdrive and taught me what to look for. It seems in good shape. It is a sickness doing this stuff. It carries over from the old POS cars I do. I am going through everything before it hits the water. It is apart anyway. Now is the time.

As was mentioned elsewhere on this hull portion of the forum. Half the fun is building these things. I just like old restored junk over newer stuff. I have the bug now. I really look forward to just working on this old barge. I been shopping new stripes for the boot stripes to match the new interior colors. Since they go under the gimble housing and it is off. Again now would be the time.

I am learning and often wonder now. Why didn't I get one of these things long long ago.
 

chevymaher

Commander
Joined
Mar 29, 2017
Messages
2,924
Well got the front end of the Honda rebuilt.And a few other things done on it. They sent the wrong part for the caliper bracket. Waiting. It isn't supposed to rain till 11 or so.

I went and got a piece of 3/4 plywood to finish the motor mount pieces. So until my Brother shows up with the part or it rains I gonna go whittle some wood. I meant to get some dowel rods for the transom while I was at Lowes yesterday.

The gimbal holes, Pitot deal, and the lower swim platform braces I am going to drill and seal before it goes in I decided. I got time and it isn't going to hurt that is for sure. One spot on the gimbal hole needs trimmed. I am going to glass over that inside as well.

This is the longest I haven't un-tarped the boat since I have had it. It is time.
 

chevymaher

Commander
Joined
Mar 29, 2017
Messages
2,924
No Title

Hours of grinding later. I stacked the pieces in one by one in the hull so they fit. Ground the angles in the bottom piece by piece. Then drove a long screw through it all to hold it together. Backed the screws out one piece at a time. Glued clamped and screwed them back together to dry.
 

Attachments

  • photo275177.jpg
    photo275177.jpg
    78.7 KB · Views: 10

Baylinerchuck

Commander
Joined
Jul 29, 2016
Messages
2,726
Well got the front end of the Honda rebuilt.And a few other things done on it. They sent the wrong part for the caliper bracket. Waiting. It isn't supposed to rain till 11 or so.

I went and got a piece of 3/4 plywood to finish the motor mount pieces. So until my Brother shows up with the part or it rains I gonna go whittle some wood. I meant to get some dowel rods for the transom while I was at Lowes yesterday.

The gimbal holes, Pitot deal, and the lower swim platform braces I am going to drill and seal before it goes in I decided. I got time and it isn't going to hurt that is for sure. One spot on the gimbal hole needs trimmed. I am going to glass over that inside as well.

This is the longest I haven't un-tarped the boat since I have had it. It is time.

I glassed over the inside of my keyhole as well. It's the waterproofing details like this that will make her last a very long time.
 
Top