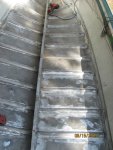
I have returned... with a Starcraft this time!

Watermann

Starmada Splash of the Year 2014
Joined
Jan 12, 2013
Messages
13,797
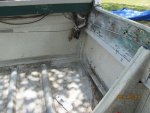
Those tiny pits just need cleaned up is all, I wouldn't even worry about them. The pitting that goes along with galvanic corrosion is what needs to be filled. Like this...

pitting-corrosion.jpg


What the heck? Post another pic of that after you get it all cleaned up. Please.

fetch
 

classiccat

"Captain" + Starmada Splash Of The Year 2020
Joined
Dec 20, 2010
Messages
3,412
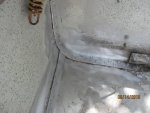
Them coming up short on the seam metal is just crazy...totally reliant on the seam sealer to plug the hole.

Looking at that for a bit, you could try forming an external patch backbuttered with 5200... that angles around and covers the no-metal region (corner of where the bottom hull skin was cut and bent-up to form the seam). You would have to remove some seam rivets in both seams.
 

Decker83

Commander
Joined
Apr 5, 2011
Messages
2,593
Looks like someone at the factory notched the bottom panel seam to deep..
 

classiccat

"Captain" + Starmada Splash Of The Year 2020
Joined
Dec 20, 2010
Messages
3,412
Think I should contact Starcraft about it?

I was out doing some work in my SS's transom area...and it looks very similar to yours...and I'm starting to think that the 2 seams do indeed overlap as they should...based on how the stern-seam bulges out.

Remove that dried-up sealer to verify.

You can try rebucking those seam rivets. If that doesn't clear-up the leak, carefully remove the rivets to open-up the seams and squirt a healthy dose of 5200 in there, then close-it back up with some fresh solids.
 

BWR1953

Admiral
Joined
Jan 23, 2009
Messages
6,201
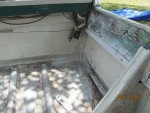
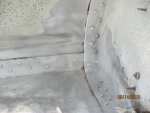
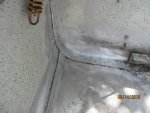
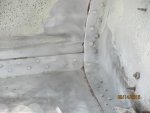
Good news, everyone! Turns out that it was just a big ol' glob of sealer! WHEW!

So what would be the best thing to seal the gaps with? JB Weld or something else? good news.jpg


seam2.jpg seam1.jpg seam3.jpg
 

Attachments

  • seam1.jpg
    seam1.jpg
    101.7 KB · Views: 13
  • seam2.jpg
    seam2.jpg
    136.8 KB · Views: 13
  • seam3.jpg
    seam3.jpg
    119.2 KB · Views: 11

Watermann

Starmada Splash of the Year 2014
Joined
Jan 12, 2013
Messages
13,797
Gluvit into the seams would be the standard way most of us choose. That runny stuff will seek out any and all voids, filling them with gooey epoxy goodness. :D

fetch
 

GA_Boater

Honorary Moderator Emeritus
Joined
May 24, 2011
Messages
49,038
Before you drill holes and weld tubes in the knee brace, raise the bow an throw some water on one side of the brace and see how it flows to the other side. Knee braces aren't exactly seals to the hull. Mine aren't anyway and water makes it past them easily.

Glad the corner was just goop. The first pic didn't look so good.

I think if you call SC, they will have a good laugh over a 39 year old warranty issue. :smile:
 

BWR1953

Admiral
Joined
Jan 23, 2009
Messages
6,201
Gluvit into the seams would be the standard way most of us choose. That runny stuff will seek out any and all voids, filling them with gooey epoxy goodness. :D
Mmmm... gooey epoxy goodness! Gluvit it shall be!
 

BWR1953

Admiral
Joined
Jan 23, 2009
Messages
6,201
Before you drill holes and weld tubes in the knee brace, raise the bow an throw some water on one side of the brace and see how it flows to the other side. Knee braces aren't exactly seals to the hull. Mine aren't anyway and water makes it past them easily.

Glad the corner was just goop. The first pic didn't look so good.

I think if you call SC, they will have a good laugh over a 39 year old warranty issue. :smile:
Yah, I've already done the water flow thing. The water still tends to pool on the starboard side. It isn't because of the knee brace design. It's because my property is sloped everywhere. And my tractor's busted (again!) so I can't scrape out a level spot. Arghh.

And I was only considering contacting SC to see if they may have seen such a gap before and to get their recommendations on how to effect repair. Not for a warranty claim.

But thorough cleaning turned out to be the solution! :D
 

BWR1953

Admiral
Joined
Jan 23, 2009
Messages
6,201
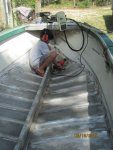
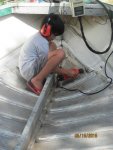
Made some good progress this morning with the assistance of Mr. Helper. The boy is learning and really enjoys using the power tools!

I modified my morning routine today in order to get out there and get started when it isn't so smoking hot. Gets hotter out there than my sweet bride! LOL!

And by getting started earlier I was able to not only work more with fewer breaks, I was also able to work longer. I reckon we put in 2.5 hours total today doing the grinding/polishing thing.

It's starting to feel like the project will actually get DONE at some point! :lol:

CLICK TO VIEW VIDEO


work1.jpgwork2.jpg work3.jpg
 

BWR1953

Admiral
Joined
Jan 23, 2009
Messages
6,201
Just about ready for Gluvit! Got 99% of the grinding done. Then we pressure washed the interior. The favorite part of the job for the boy! :laugh:

There was quite a bit of sediment in there after all that grinding/sanding/cleaning and my cheap little pressure washer did a great job of cleaning it out. It's an AR Blue Clean 1600 psi unit. This was our first time using it and I'm very pleased with the results.

Letting everything dry now and will check on it later this evening. If all is good I'll pull the boat off the trailer tomorrow and prepare to apply the Gluvit.

Making progress... :D

washed1.jpg washed2.jpg
 

GA_Boater

Honorary Moderator Emeritus
Joined
May 24, 2011
Messages
49,038
You mentioned pulling the hull off the trailer several times to do the Gluvit. You are putting it inside the hull, aren't you? Just making sure.
 

BWR1953

Admiral
Joined
Jan 23, 2009
Messages
6,201
You mentioned pulling the hull off the trailer several times to do the Gluvit. You are putting it inside the hull, aren't you? Just making sure.
Yes, inside the hull.

But I know that I'll need to tilt and maneuver the hull into odd positions in order to get the Gluvit to flow to the correct spaces. Doing that off the trailer should be easier, plus I'll be able to do some touch-up work on the trailer while the Gluvit sets up.
 

BWR1953

Admiral
Joined
Jan 23, 2009
Messages
6,201
More progress today. Did a final check inside the hull and found a few rivets and places where I'd missed grinding. Got those cleaned up then did a water test. Found some more leaks around the chine rivets and got everything marked... with a colored pencil because the Sharpie tip got wet and became ineffective! D'oh. :facepalm: :lol:

All the water is now drained, the leaks are marked and I'll apply the Gluvit as the next step. May not be tomorrow though. Have to cut the grass again so that'll eat up my morning.

As can be seen in the pix, I cleaned up only around the rivets and seams. Am not planning on using Gluvit anywhere else, nor am I planning on painting all of the inside of the hull. Paint will only be on the Gluvit as UV protection. Probably not needed since the deck will cover it but what the hey, might as well.

Is it recommended to do another leak test AFTER the Gluvit is applied?

The video shows the worst leak... up front where the bow hits the beach. Understandable. But it will require special attention. See bow pic as well.

QUESTION: Is Gluvit a "bigger the glob the better the job" kind of application? Or just use a moderate amount? Maybe a second application after the first?

CLICK TO VIEW VIDEO


Leak test2.jpg Leak test3.jpg Leak test4.jpg Leak test1.jpg Leak test5.jpg Leak test6.jpg
 

Attachments

  • Leak test3.jpg
    Leak test3.jpg
    63.9 KB · Views: 11
  • Leak test3.jpg
    Leak test3.jpg
    63.9 KB · Views: 11

Watermann

Starmada Splash of the Year 2014
Joined
Jan 12, 2013
Messages
13,797
Nice detective work there! Set a fan in the boat to help dry out the crevices that hold water. Always do a leak test after the gluvit application just so you know.
 
Top