Fuel Tank Shape - Lesson Learned

Dubed

Petty Officer 1st Class
Joined
Sep 3, 2021
Messages
373
Just seems like too many pressure points. Cool idea.
Like I said, the pads on the tank were larger which should disperse the weight. Installed it last year, so far so good. Im hoping everything works out long term.
It was a good install and I'm (fairly) confident. 🤔
 

76SeaRay

Lieutenant Junior Grade
Joined
Aug 24, 2017
Messages
1,071
I use painters plastic in Lou of saran wrap, not as prone to tear.

Why could you not lay your plastic down for a barrier...
Then apply a liberal amount of 5200 or marine PL on your tank pads, set your tank in place on top of the plastic let it settle in place and cure, mark exactly where you had tank, then after cured, pull tank, remove plastic and now your ready... maybe.

Welcome to my world where everything has to be done 15x's

It looks like I need as much as a quarter to 3/8 inch build up. I would be afraid that putting it on the pads would cause it to run off more before I get it in place than if it is build up on the hull. I noticed when using the 5200 to bed the pads that it had a tendency to run easily. I had to make sure the surface that I was padding was absolutely level and even then the pads tended to slide sideways on the 5200.

I just finished wrapping with saran wrap but I may put a layer of painters plastic as you suggest. Definitely don't want the tank permanently bonded to the hull.
 

froggy1150

Master Chief Petty Officer
Joined
Nov 3, 2017
Messages
843
I used 10 mil plastic. Didn't want it to melt when my resin cured. Plus I had a bunch
 

tpenfield

Moderator
Staff member
Joined
Jul 18, 2011
Messages
18,040
Any thought to re-foaming the tank in as per OEM? It will take a lot of guess-work out of the process.

If the tank was foamed in before, it probably contributed to the structural strength of the boat. Use 4lb. USCG approved foam for the foaming and seal off any cut edges of foam around the top of the tank with a urethane paint.
 

Dubed

Petty Officer 1st Class
Joined
Sep 3, 2021
Messages
373
In my experience the foam holds on to any moisture, fuel, and nasty odors. This leads to rotted fuel tank, stringers, bulkheads, and decking. I would never want it again. Custom fuel tanks are expensive and prep work will keep you out of the water for a season.

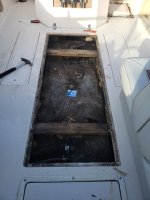
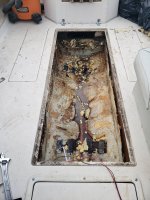
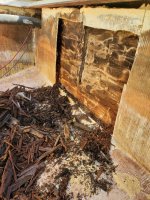
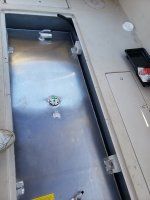
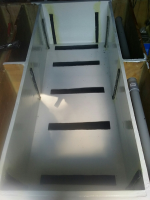
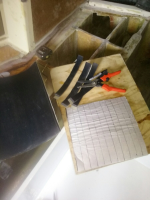
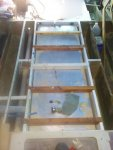
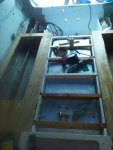
Before and after photos.
 

Attachments

  • 20201121_093332.jpg
    20201121_093332.jpg
    1.8 MB · Views: 15
  • 20201121_145814.jpg
    20201121_145814.jpg
    2.5 MB · Views: 13
  • 20210408_145058.jpg
    20210408_145058.jpg
    2.8 MB · Views: 15
  • 20210630_160411.jpg
    20210630_160411.jpg
    1.6 MB · Views: 15

76SeaRay

Lieutenant Junior Grade
Joined
Aug 24, 2017
Messages
1,071

Foaming would be easier but my original tank was foamed in place and it captured a lot of water over the years. There was a lot of corrosion under the foam and rotted stringers. Plus, here are a couple of concerns from the Coast Guard regs:

From 33 CFR 183.550

(a) Each fuel tank must not be integral with any boat structure or mounted on an engine.
(d) Water must drain from the top surface of each metallic fuel tank when the boat is in its static floating position.
(e) Each fuel tank support, chock, or strap that is not integral with a metallic fuel tank must be insulated from the tank surface by a non-moisture absorbing material.

Foam around the sides even if the top is not foamed would trap water on top of the tank. All foam has a tendency to absorb water over time and would trap it next to the tank. Additionally, foaming the tank in place voids the tank warranty.
 

76SeaRay

Lieutenant Junior Grade
Joined
Aug 24, 2017
Messages
1,071
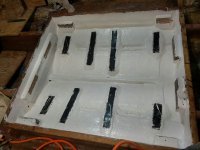
So, back to the pad landing build up. Right now I am thinking I will put peanut butter in strips where the front, middle and rear neoprene pads land with enough to squish out and form the right height landing pad. Set the plastic wrapped tank in place and let the peanut butter cure. I will pull the tank out and then use a straight edge to fill the other pad landing strips with peanut butter. Again set the tank and cure. Once that is complete, go back in and layer some CSM over each of the peanut butter landing pads as the finish step. I may try my expired gelcoat to see if it kicks and, if so, then cover with gelcoat.
 

Scott Danforth

Grumpy Vintage Moderator still playing with boats
Staff member
Joined
Jul 23, 2011
Messages
49,574
I would have done a thick strip at the V and a thinner strip just under the vertical sides
 

76SeaRay

Lieutenant Junior Grade
Joined
Aug 24, 2017
Messages
1,071
Well Dang.... I piled up some peanut butter and set the tank down on top... The peanut butter did squish out. I was overly optimistic for the thickness that I will need though. On the outside ends, the neoprene contacts the hull but near the center there is a gap as much as 3/4 inch or slightly more... So, it looks like I need to build some wedges and glass those into place to bring the hull taper up to the bottom of the neoprene pads...

Thinking about these wedges on Amazon:

Mobile Home Hardwood Shims 4" x 9" x1" 30 Pack of Wedges​

 
Last edited:

tpenfield

Moderator
Staff member
Joined
Jul 18, 2011
Messages
18,040
whatever you come up with, do make sure that the load is well distributed via the rubber pads and the tank is not supported by anything hard or the tank is not touching the hull.

Else, the tank could punch a hole in the hull . . . or a hard spot of the hull in contact with the tank could punch a hole in the tank.
 

Chris1956

Supreme Mariner
Joined
Mar 25, 2004
Messages
27,852
So you are not going to try polyester putty? It won't run and gets as hard as peanut butter. You could use the kitty hair putty, which is even thicker and latterly stronger...not that you need any lateral strength.
 

76SeaRay

Lieutenant Junior Grade
Joined
Aug 24, 2017
Messages
1,071
The neoprene pads are 2 inches wide by 8 inches long. I would use wood shims that are 4 inches wide by 8 inches long with a thin layer of peanut butter on top of the glassed shims to bed them all evenly.

I have a small amount of Polyester Structural Putty but that stuff is expensive and it will take quite a bit. There are 16 neoprene pads to set so that would take a lot of peanut butter or putty at 3/4 to 1 inch thick on the inside ends. Do you have a link to the putty that you reference so I can see what that costs?
 

76SeaRay

Lieutenant Junior Grade
Joined
Aug 24, 2017
Messages
1,071
In a little delay on finishing this up. Yesterday, I had to drive 3 hours one way to pick up another 5 gallons of poly resin, some 3 inch vent duct, and starboard spacer pads for the tank mounting tabs. So, now waiting on the Bondo product and some shims from Amazon to play with them a bit to see the best way to get this done. In the meantime, going to lay a straight edge over the peanut butter that I put in to see how much gap there is across all the pads.
 

Wildey

Petty Officer 1st Class
Joined
Nov 24, 2021
Messages
202
We have done this in similar situations.
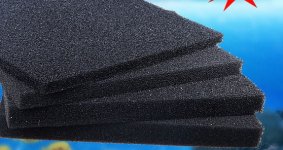
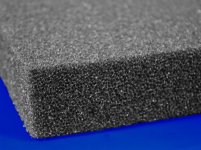
Choose the proper thickness and density of a polyurethane open cell filter type foam.
Mix a pot of epoxy resin in a tray and saturate the precut blocks of foam completely. Lay in place and put your tank in position on them. They will compress to fill any voids completely and provide a very firm base for the tank when the epoxy sets. With 16 pads the size that you have, there should be no chance of crunching the set epoxy. And, being open cell foam, they will not retain water if they get wet.
Test a piece, stand on it, it will surprise you how well it supports.
 

Attachments

  • OC Foam.jpg
    OC Foam.jpg
    139.3 KB · Views: 5
  • open cell speaker - filter foam.jpg
    open cell speaker - filter foam.jpg
    88.4 KB · Views: 6

kcassells

Fleet Admiral
Joined
Oct 16, 2012
Messages
8,720
We have done this in similar situations.
Choose the proper thickness and density of a polyurethane open cell filter type foam.
Mix a pot of epoxy resin in a tray and saturate the precut blocks of foam completely. Lay in place and put your tank in position on them. They will compress to fill any voids completely and provide a very firm base for the tank when the epoxy sets. With 16 pads the size that you have, there should be no chance of crunching the set epoxy. And, being open cell foam, they will not retain water if they get wet.
Test a piece, stand on it, it will surprise you how well it supports.
Are they fuel and oil resistant? I know you can buy them that way.
 

76SeaRay

Lieutenant Junior Grade
Joined
Aug 24, 2017
Messages
1,071
Well, the wood shims came it today that I ordered on Amazon. They are garbage. They advertised 4" x 9" x 1"... They aren't and the tapers are inconsistent... I am tied up this weekend so will come back to this issue the first of next week...
 

kcassells

Fleet Admiral
Joined
Oct 16, 2012
Messages
8,720
So I may have missed this..whats the shims for? Ok read it got it. You know the neoprene can get order to thicknesses and cut to make angled wedges.
This seems way over complicated.
 

froggy1150

Master Chief Petty Officer
Joined
Nov 3, 2017
Messages
843
20190917_213831-3024x2268.jpg
So this is what mine looked like. I had bed one side of the neoprene first and set to cureThe last thing I did was coat the other side of the neoprene with 5200 and set the tank in. When I set the front/rear rubbers I pushed the tank forward and glued in the rear then had to push the tank to the back with a porta power to get the other rubbers in. I also had 4 corner pieces that held the tank down.
 
Top