Formula 27PC Transom Work

Status
Not open for further replies.

alldodge

Moderator
Staff member
Joined
Mar 8, 2009
Messages
42,054
Need Help with cutting stringers

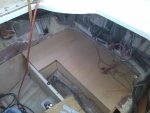
Been making progress and now need to determine what is the best way to fit new transom. Still need to do a lot more grinding before we start the install.

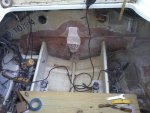
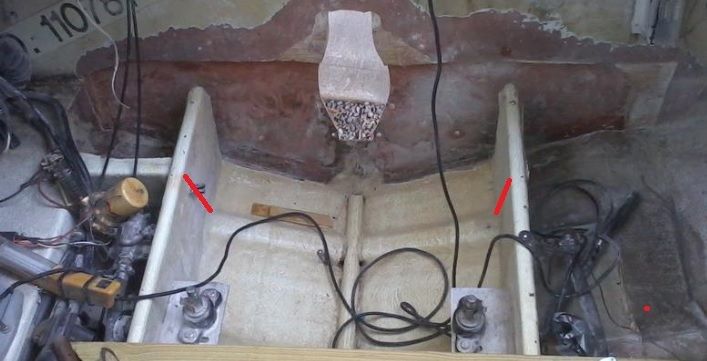
Current process is we made a cardboard template and cut wood. Was thinking of cutting using the black line perpendicular to the transom. Stringer is 1 inch plywood and glass. Slide the pieces of the transom in one at a time in stages.

Mix up some resin and Chopped up CSM making peanut butter consistency. Resin coat both sides and edges of first piece and slide in place.

Add layer of 1708 to first piece and wet down getting bubbles out.

Resin coat inside and edges of second piece and install on first piece. Then install clamps and let setup.

So is plan OK, and what should I change?
Also what is best way to cut stringers and replace?
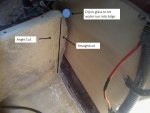
Stringer cut.jpg
 

tpenfield

Moderator
Staff member
Joined
Jul 18, 2011
Messages
18,040
Can we see a picture of the transom without the new wood in place?
 

kcassells

Fleet Admiral
Joined
Oct 16, 2012
Messages
8,715
Scratch caring about the stringers. And just place the transom. From there you'll make it all tight. If that stringer is in place then you will have a hard time placing the transom. Then again maybe not, looks like a drop in from the top.
 

alldodge

Moderator
Staff member
Joined
Mar 8, 2009
Messages
42,054
Scratch caring about the stringers. And just place the transom. From there you'll make it all tight. If that stringer is in place then you will have a hard time placing the transom. Then again maybe not, looks like a drop in from the top.

After cutting two pieces we are going to see if we can just drop the thing in but don't think it will work
 

tpenfield

Moderator
Staff member
Joined
Jul 18, 2011
Messages
18,040
I'd probably cut the stringers on the slight angle that you showed, if that is what it will take to get the transom laminates installed as single pieces. Then stick a similar shaped 'wedge' of plywood in the gap to get a tight fit.

Grind back the glass on the stringers a bit to get a good bonding of the tabbing.

I would glass the transom in before finishing up the stringer with the wedge piece and tabbing.
 

Woodonglass

Supreme Mariner
Joined
Dec 29, 2009
Messages
25,927
I'd like to see a backed off full perspective picture. IMHO you're worrying about saving too much of the stringer. I THINK but I haven't seen the pics yet, I'd cut it back a foot or so and get as much room as possible so you can put the transom in in one piece and do your full lams of glass and then "sister" in the cut out pieces later. Pics will tell the tale.
 

alldodge

Moderator
Staff member
Joined
Mar 8, 2009
Messages
42,054
OK what I get from you guys is cut what ever is needed to be able to put the transom in, as one solid piece. Once the transom is in and glassed in, then add wood to make a solid piece between the new transom and the engine stringers. Make it a rock solid fit, then tab and glass until it is a good fit
 

Tail_Gunner

Admiral
Joined
Jan 13, 2006
Messages
6,237
There is nothing in a boat that is square or can be worked out within 1/8 of a inch it just not going to happen. I posted a very good filler (VOIDS) that is 3m
8609 and by the way its used on the space shuttle to secure the winsheilds....it's fairly decent stuff...If you want a very defintive answer PM Ondarvr for advice he has been playing with boat's for a very long time and not as a novice .....some of the best advice you could ever get will be frome that person.
 

alldodge

Moderator
Staff member
Joined
Mar 8, 2009
Messages
42,054
Thanks will do. Maybe I'm getting to worried about cutting the engine stringers. No matter what I have to add something (wood, resin, epoxy 5200) between the transom and the stringers. The stringers appear to be made from 1-inch plywood wrapped in 1/4 inch of glass then epoxy paint.
 

Woodonglass

Supreme Mariner
Joined
Dec 29, 2009
Messages
25,927
You'll be tabbing the stringers to the transom with resin and glass. That's where your strength will come from the gap between the end of the stringer and the transom will be of little consequence.
 

Woodonglass

Supreme Mariner
Joined
Dec 29, 2009
Messages
25,927
The picture indicates where I'd cut the stringers if I was doing it. Cutting in front of the side brace on the starboard side allows you to screw the new piece back into it an then fillet and tab on the back side and then resin and glass on the inside. On the port side I'd butt joint the new piece and then use a couple of 12" pieces of 1/4" plywood to sister in the stringer, as long as that didn't/wouldn't interfere with the motor mounting in any way. But again, that's just the thoughts of an Old Dumb Okie, so make sure to take this into consideration.:D;)


alldodge

Moderator
Staff member
Joined
Mar 8, 2009
Messages
42,054
Thanks WOG, appreciate it. We just cut the stringers before seeing your email, we only took about 4 inches. Will take more later if need be, just right now didn't want to get into the area of the humps. Also thinking about all the paint and glass that will need to be removed to make ready. Received a PM back from ondarvr and he is with your thought but did not say how far to cut.

Thanks much
 

alldodge

Moderator
Staff member
Joined
Mar 8, 2009
Messages
42,054
Guess I'm missing something with your last comment. What is the reason to use a longer new piece compared to a short piece?
 

grewvin1

Petty Officer 2nd Class
Joined
Apr 2, 2012
Messages
189
Very interesting rework have just read the adventure to this point wanted to mention for others as too late now, for tank removal with foam a Saw Wire is a good tool to cut free the tank on the bottom from one end to the other with ease. Hope to see lots more pic's when the tabbing in of the replacement parts happens.
 

alldodge

Moderator
Staff member
Joined
Mar 8, 2009
Messages
42,054
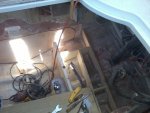
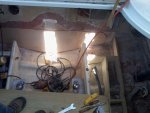
Well we made the braces for under the port side, completed the pieces for the transom and then made the port side deck. Need to do some major grinding over the next few days to get it ready for reassembly. Still need to make the pieces for over the gas and water tank, and one small piece for the starboard side

Photo551.jpg


Photo552.jpg


Photo553.jpg

After all the pieces are done plan to resin coat everything prior to initial install
 

tpenfield

Moderator
Staff member
Joined
Jul 18, 2011
Messages
18,040
With the cuts to the stringers, I assume you got a good look at the core. Looked OK?

You have more wood pieces going in than on my Formula 330 repair, But . . . one thing I did for longevity was to wrap a layer of CSM/resin on the underside of the structural members (before installation) so that they would not have an easy way of wicking up moisture. I also coated both sides of the bulkhead and the decking pieces with CSM/resin, so that they too would not want to absorb moisture.

You have quite a few more individual pieces to wrap/coat, but something to consider being worth the effort.
 

alldodge

Moderator
Staff member
Joined
Mar 8, 2009
Messages
42,054
I like the idea of wrapping with CSM but wouldn't a good coat or resin also seal the wood? Thinking or resin coat everything before assembly.

I believe water go in from all the screws which held the batteries and such caused the build up over time. Will make sure to seal all the screw holes this time
 
Status
Not open for further replies.
Top