Formula 27PC Transom Work

Status
Not open for further replies.

alldodge

Moderator
Staff member
Joined
Mar 8, 2009
Messages
42,056
Appreciate the insight. I'll make sure to have it secured down before any pouring. May want to mix just enogh to pour under the tank without the top deck in place. Have the tank secured in place and give it time to harden. Then pour some more in the areas that are empty . Do small pours a bit at a time and then lay the deck on for the final pours. Will think on it and bounce things off you all for checks
 

Tail_Gunner

Admiral
Joined
Jan 13, 2006
Messages
6,237
Some of my redneck engineering was to take a 4" pvc pipe cut 6 pieces 1 inch thick glue them to the tank bottom and poof instant leg's as to top that's to easy. With foam one big pour and tightly strapped in tank will get you maxium compaction and uniform support. Its air cavities your trying to avoid.
 
Last edited:

tpenfield

Moderator
Staff member
Joined
Jul 18, 2011
Messages
18,040
I think my 'foaming video' got zapped during the forum web site conversion issues last June . . . . but here it is for reference.

Hotter materials and working conditions is better than colder.


I preheated the chemicals to about 85 degrees and had the fuel bay up to about 70 degrees F. the heat from the foam made the tank hot to the touch . . . actually could not touch it for a while.
 

tpenfield

Moderator
Staff member
Joined
Jul 18, 2011
Messages
18,040
Home Depot . . . they are paint bucket liners . . . about $1 each. Regular measuring buckets/containers were about $4-6 each. I think I used about 28 containers of the 2 different sizes. I drew fill lines on the bucket liners and prefilled everything before starting. The key thing was to mix in small batches to keep under the 30-45 second mix & pour, and evenly distribute the liquid around the tank.

So, I used about 8 'pours' around the tank so as not to pour too much in 1 location. Another thing I did was to put down the neoprene in several pieces rather than 1 long strip along the ribs. (refer to my 330 bulkhead thread) The several pieces along the ribs provided air gaps in between them so the expanding material could vent and overflow into an adjacent 'rib chamber' if it needed to. This was all in hopes to get an even amount of foam under and around the tank and avoid any air pockets/voids.
 

alldodge

Moderator
Staff member
Joined
Mar 8, 2009
Messages
42,056
Doing some ordering today, mixing cups, rollers, brushes and other stuff. Winder what would ya'll think about how much cloth (biaxial, regular) I should start with, and weight of cloth. Maybe an idea of how much resin and hardener it might take. Plan to resin everything. both sides of all wood. Use cloth on the bottom half Like Formula to secure 3/4 plywood to hull and stringers. It's getting so cold, I can keep the resin inside if needed, don't know if there is a shelf life on VE resin
 

alldodge

Moderator
Staff member
Joined
Mar 8, 2009
Messages
42,056
What is the typical VE resin shelf life and does cold effect it?
 

tpenfield

Moderator
Staff member
Joined
Jul 18, 2011
Messages
18,040
When doing things during the cold months, I kept my stuff in the house prior to use, just so it would not be exposed to winter and would be at a higher temp. You should have a 3-month shelf life, but the web site may have specific info.

Also order some extra MEKP, as you will probably need a 2% ratio of catalyst, rather than the standard 1%, since you will be working in colder temps. In my experience, VE resin does not 'kick' very fast at all, unlike poly resin, which gives you only about 15-20 minutes of working time.

I'm no help on how much cloth to order . . . on my 330 repairs I used cloth that was left over from the time I ordered too much cloth for my 242 repairs. :rolleyes:
 

alldodge

Moderator
Staff member
Joined
Mar 8, 2009
Messages
42,056
Just read though the document from Fiberglass site.com. It was a good read, but did not go into VE resin. Indicated for repairs epoxy should be used, and new should be poly due to bonding strength of the epoxy over poly. The site also doesn't sell VE resin. Need to look into it more.

Guess the best thing is to not buy any resin until I figure out how to get the temp up or wait for spring. Hope I don't have to wait
 

tpenfield

Moderator
Staff member
Joined
Jul 18, 2011
Messages
18,040
Yea, the lead time on the resin should be only about 1 week, so you can wait until you are ready. I *think* iBoats sells VE resin as does US Composites. I used Fiberglasssite when I built my Fiberglass dinghy, but IIRC they did not carry VE resin.

As we discussed earlier in the 'project', VE gives you a good balance of strength, adhesion, and cost as compared to epoxy or poly resin. Your boat is made of VE. I particularly enjoy the longer open time of VE, but the fumes will have you orbiting Mars . . . so chemical respirator is a must.
 
Last edited:

alldodge

Moderator
Staff member
Joined
Mar 8, 2009
Messages
42,056
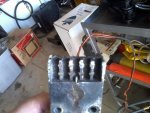
Replaced the Mercathode anode on the new transom assembly which made me go look at the one which use to be on the old one. Appears the wire was gone from the anode.

Photo488.jpg

So with the wire being gone is telling me that the anode was not working. So years ago when my annual inspection showed signs of my drive being corroded away, was when I added the additional anodes. If I didn't add the extra anodes then there would probably be no tearing into the transom from water damage. No tearing into the transom, then no telling how long it would have been before the other trouble would have shown up.

Oh well dang if you do, dang if you don't
 

alldodge

Moderator
Staff member
Joined
Mar 8, 2009
Messages
42,056
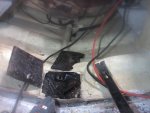
Always talked highly of Formula design, while it could use a bit of improvement in most cases they did a better job then many builders. Then I see what is in the pic and say, what kind a dipstick designed the bilge pump setup? Don't know why there is a PVC pipe running from under the bilge pump to the stern, but to leave the end open so water gets under the wood installed to hold the pump takes the cake. They didn't even glass the underside of the wood, it is soaking wet.

Photo489.jpg

My restoration pan is to try and do what Tommy Monza mentioned on OSO, and build the whole area up and flat so very little water will not be put overboard. Need to plug up both ends of the pipe permanently.
 

tpenfield

Moderator
Staff member
Joined
Jul 18, 2011
Messages
18,040
I am wondering if the factory deviated slightly from the product design by putting too large a plywood piece there and blocking off the drain tube that runs along the keel. :noidea:

I had similar concerns at the base of my bulkhead where both the bilge pump and the shower bilge were located. Same idea, a piece of plywood just glassed on one side.

On my boat, I cut the whole thing out and installed some smaller mounting pads, which left the area open and the drain holes more accessible. You can see some pictures on my Bulkhead Replacement thread, if you want to reference them.
 

alldodge

Moderator
Staff member
Joined
Mar 8, 2009
Messages
42,056
I remember what you did and it was a nice job. Will ponder which way to go, and I have time, and plenty of cold to go along with it :(

Cut out a lot of the left over ruff stuff, still have the transom to do and part of one engine bulkhead corner, lower section. After that I can start sanding all the areas clean and get ready for wood and glass. Need to get some more real coarse stuff to get the wood off the transom. Router looks appealing but think it might not work except for a small area
 
Status
Not open for further replies.
Top