First attempt at boat repair

jbcurt00

Moderator
Staff member
Joined
Oct 25, 2011
Messages
25,017
Re: First attempt at boat repair

Once you get ready to start taking the stringers out, if not previously done, you'll want to build a cradle to support the hull, WoodOnGlass & Andgott both built really sturdy wheeled cradles. Look thru their threads to find some pix & details. You do not want to permanently set any sag or waves in the hull by glassing the stringers into place over an area of hull that has sagged or bulged. And if the hull sides sag or droop once the cap is removed, the cap may not fit properly after you tab & glass the stringers & deck.

Does that ^^^ all make sense?
 

jbcurt00

Moderator
Staff member
Joined
Oct 25, 2011
Messages
25,017
Re: First attempt at boat repair

Now to your heights & thickness Q's:

Using this photo of your hull:
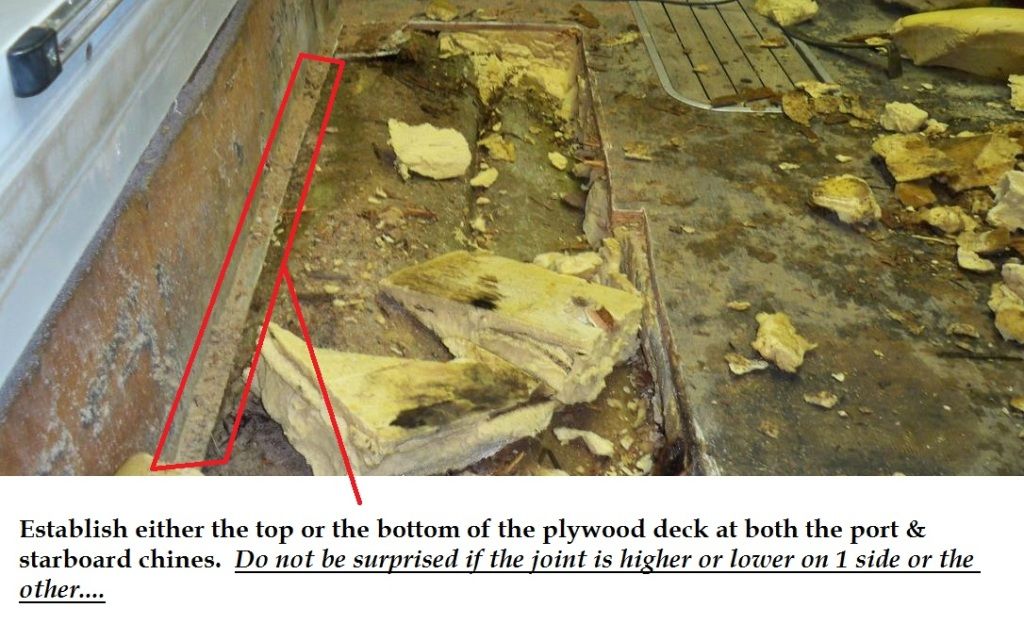
Railcarsdeck_zpsbbcb2bb7.jpg


You'll want to do your best to level the boat in your cradle as best you can. A long level or a nice straight edge across the transom and another location across the gunwales toward the bow. Boat building is unfortunately not nearly as accurate or as precise as piano building. Do not be surprised if you need to step back & make it 'appear' straight & level by eye. It will need to appear correct, whether the port & starboard gunwales & hull/deck joint actually are or not. With time & use, fiberglass does tend to sag some, particularly heavily constructed gunwales, consoles & decks that support super-structure above like a large roof & windshield assembly on a cuddy cabin or cabin cruiser. I didn't bookmark the thread, but somewhere around here someone rebuilding a Sleekcraft had almost a 1" deflection in a 6" wide gunwale surrounding the cabin roof & consoles on a 26' Sleekcraft Ambassador (may not be wholly accurate, but generally a large boat w/ a cabin that sagged). You will need to find a balance between level, straight & appearing correct....

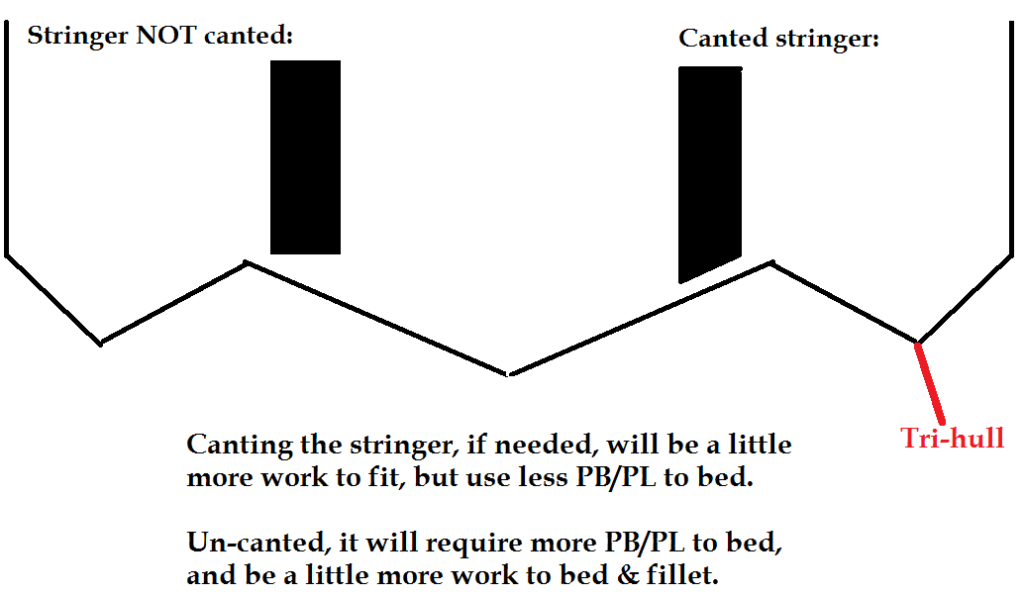
From the bottom of the plywood deck at the port hull, pull strings across to the starboard side in several locations... If there is drastic changes in the elevation heights from the string down to the hull, or lots of hull contours, more strings will give you more points & a much closer initial test fit. Measure down as square & perpendicular to the a cross the hull string lines as possible, at about what you think should be the centerline of the stringer. If the hull cants at the measured location, the stringer can, but doesn't need to, also cant. It will be bedded in PB or PL, a canted (beveled) edge will be harder to glass & harder to keep 1/4" off the hull prior to bedding. This is the MAXIMUM stringer height at any 1 location. From this #, you need to subtract 1/4" for spacing the stringer off the hull & bedding it in the PB or PL, this is your stringer height at each location.

Since you will be adhering the deck to the stringers w/ PB or PL and mechanically screwing or weighting the deck until the PB/PL cures, I'd suggest using 1 layer of CSM on both the top & bottom edges of the stringers, and 1 layer of CSM on the down side of your deck. I'd use 3/32" as my thickness per layer of CSM, so 1 on each surface is a total of 9/32". Allow an extra 1/32" to make it an easier # to work with: 10/32". Take this 5/16" from your stringer height (from above, already 1/4" reduced dimension).

So your from the original height at each location, your plywood stringers have been reduced by 9/16". For the PB & PL to adhere the deck down, let's add another 1/16", so our final stringer height at each location needs to be reduced by 5/8" +/-...

Does that ^^^ all make sense?

By using the bottom of the original plywood deck height at the chine, it doesn't matter if the factory did or didn't bed the stringers, did or didn't CSM the down side of the deck, and doesn't matter if they did or didn't CSM the top or the bottom of the stringers. You are pulling elevations off of the existing hull, and making allowances for how you'll put the stringers & deck back together. This also assumes you are able to tell what thickness plywood was used originally on the deck so you can replace it with the same. If you think the original deck thickness was insufficient, and want to use 5/8" or 3/4" instead of the likely 1/2" original deck, start at the TOP of the plywood deck at the chine, and deduct the thickness of whatever plywood you intend on subbing for the original when you measure the heights & start deducting for build up. Then your strings will need to be pulled across from the top edge of the deck at the chine.....

This gives you a flat, straight deck from port to starboard. Many manufacturers (Glastron did on my 1960 FireFlite) cant the deck towards the gunwales (the center is high) and have slight channels/coves at the deck/hull joint to direct the water rearward, but not into a bilge. Just out thru the deck drain hole in the transom. Mine is not quite an 1/8" higher along the centerline of the boat. If you want to cant the deck towards the center of the boat, where it will likely find it's way into the ski locker, make sure to plan to direct the water away once it's in the ski locker. Much more then a 1/8" cant, and you'll likely find that the cant will make fitting the consoles and seat boxes more complicated, and may even be noticeable when moving about the interior of the boat.

Hope that ^^ in both posts make sense.......
 

jbcurt00

Moderator
Staff member
Joined
Oct 25, 2011
Messages
25,017
Re: First attempt at boat repair

This thread addressed what I was trying to say about the 2 sides aren't the same:
Decided to get back on the boat and make templates for the deck before i did some more sanding . Hopefully the pictures are sized right -- If you can see in the picture the deck on port side where it would meet with the hull sits right at the top on a lip there. The starboard side sits below the lip , where the angle is .

Using a level across the stringers , the stringers are perfectly level . Ive tried the boat on trailer , tried it on a blocked 3 point stance ( 2 at aft and one at bow ) And also tried on a cradle ( 3 supports full width = 1 at aft , 1 at abeam are i guess its called , and 1 at front area . the result is the same . From what i have read the deck doesn't need to be touching the inside of the hull 1/4 away is ok just use PB to fill it there . But shouldn't the deck but sitting in the same spot on both sides , either above the angle or below it ? I actually thought it should be where the inside hull is flat above the angles but now iam lost . Do i glass it in sitting where it sits , or decide if i need to look for a hull ?

The second picture is of the Transom from the back , so you can see the lines / angles it has .

both.jpg


SDC12931.jpg
On older hulls (even some new ones) it's very common to have the two sides different from each other, it was all just done by eye and faired quickly, plus the guy doing it coudn't see both sides at the same time. If the hull is as level as you can get it, and the stringers are level, then it is what it is.
plus one ^^^^^ that is exactly correct.
 

Railcar

Petty Officer 2nd Class
Joined
Sep 10, 2012
Messages
143
Re: First attempt at boat repair

Thank you for the info JB. I am not sure how I will be bracing the hull, but due to certain circumstances, I will not be removing.g the hull from the trailer. Since it is a trihull, I was thinking just blocking the outer edges and let the trailer do the rest. As far as leveling, I spent 4 hours getting it as close to perfect as I could, but I have to pull my leveling jacks so we can get the engine out.

As far as canting the hull, I am putting in a rather large drainage port, but for me the locker is strictly decorative. Pretty teak on the floor, and a place to store my emergency paddle. I have tried ski, and tube and honestly didn't care for either. If I had my way I would just drive around the lake all day. The wife and kids like the tube, but ski just doesn't appeal.
 

jbcurt00

Moderator
Staff member
Joined
Oct 25, 2011
Messages
25,017
Re: First attempt at boat repair

I meant as your stringer runs fore & aft on the hull, they may cross an area of the hull that isn't flat:

CantedVSUn-cantedstringers_zps4f31ebd0.png


The stringers themselves may or may not need to be canted to match the angle of the hull...

Not that you might be canting the hull.... Or that you needed to... Better description?
 

Railcar

Petty Officer 2nd Class
Joined
Sep 10, 2012
Messages
143
Re: First attempt at boat repair

I see where you are at on that. I was referencing the cradle. I am just going to have to brace the hull as it sits on the trailer, or pay a ton of money to store the trailer till spring. 6 month minimum lease on a storage unit, at $125 a month, or haul the thing 5 hours to my moms house in Iowa. With snow laws, I can't put it in the street, being next to a church, I can't out it in the front yard, and landscaping makes it impossible to get it in the back.

After the motor is out, I will wheel it back, take the tires off the trailer, and use leveling jacks to keep it solid and steady. With the trihull design, I should be able to brace the outside edges, and let the roller/bunk trailer brace the center. I also need the space under the bow to store the motor and outdrive for the winter.
 

gear79

Cadet
Joined
Oct 8, 2012
Messages
18
Re: First attempt at boat repair

Interesting story and build here, new here, first post, first read based on a search. I don't want to hijack your thread RC, but I am subscribing to follow. I have the same thing going on myself, new boat, total noob, and a quick google led me to this thread and registering. Seen some good help and info here, I too want to make my story/progress build thread with q&a. Good luck and I will read on many many more threads cuz it's interesting to see all this new world of boating.
 

Railcar

Petty Officer 2nd Class
Joined
Sep 10, 2012
Messages
143
Re: First attempt at boat repair

I can't wait to get home tomorrow. Long to do list. Remove outdrive, pull engine, finish deck measurements (300 left). Assess the stringers, then I start leveling the boat, and possibly remove stringers. Still hoping for a miracle, where I won't have to pull the cap, and where I only have to replace part of the stringers, but reality is I will probably have to do it all. I will keep you all posted.
 

Railcar

Petty Officer 2nd Class
Joined
Sep 10, 2012
Messages
143
Re: First attempt at boat repair

Great day in the garage today. I got the outdrive off and put on a stand, motor is unbolted, and the measurements are taken for the deck. I will have photos up later this weekend. Tomorrow is the big day, the motor lift is scheduled for the morning, I already have a heavy pallet to set the motor on, and put casters on the pallet so I can move the motor out of the way. After the motor is out, it is demo time. Get the rest of the floor out, and see what I have for stringers.
 

Railcar

Petty Officer 2nd Class
Joined
Sep 10, 2012
Messages
143
Re: First attempt at boat repair

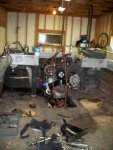
Real busy day today. I got the motor out in the morning, and finished cutting the floor out this evening. The first bulkhead is totally rotten, but the stringers sound good along the ski locker. Might actually be able to salvage them, I just have to finish cleaning out the scraps from demo and start drilling. I did find what has to be the best tool ever for foam removal. It is called an Ice Chipper, they sell them all winter in the hardware stores. A steel blade on a long handle. Sink it in the foam like a shovel, and then slide it up the hull, and it comes out in HUGE chunks. I got the entire Starboard side stripped of foam in less than 10 minutes with it. Still have to use a Wonderbar for the scraps, but it makes it super fast.
 

Railcar

Petty Officer 2nd Class
Joined
Sep 10, 2012
Messages
143
Re: First attempt at boat repair

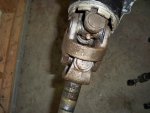
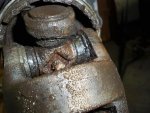
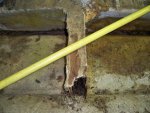
Just a few things I have noted along the way. Outdrive seems to have water in the boot. Dont know if this is noremal or not.100_4797.jpg100_4798.jpg100_4799.jpg100_4802.jpg
 

jbcurt00

Moderator
Staff member
Joined
Oct 25, 2011
Messages
25,017
Re: First attempt at boat repair

Probably not, that is what the bellows are supposed to prevent I'm fairly sure. Comparable to CV joint in a car, boot to keep water OUT..
 

Railcar

Petty Officer 2nd Class
Joined
Sep 10, 2012
Messages
143
Re: First attempt at boat repair

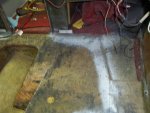
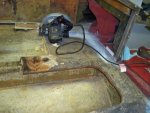
And the last of the pics I have right now. More and more rot, and the Ice Chipper. A defiante must have for anyone trying this
100_4810.jpg100_4828.jpg3.jpg

And a tip for Cutting. When I am cutting away from a guide, i use Locators paint. It is cheap spray paint, designed to be sprayed upside down, and it dries Extremely fast, just a minute or 2 and it is good. Gives a high contrast background for cutting.
100_4825.jpg100_4826.jpg
 

Trooper82

Commander
Joined
Nov 21, 2011
Messages
2,648
Re: First attempt at boat repair

Making quick work of the demo I see RC...man where was that idea with the scraper when I was tearing my foam out with a cold chisel? Tore the carp out of my elbows the way I did it..that would work a heck of a lot better I'm sure....and the contrast paint for seeing marks...nice idea as well...
 

Railcar

Petty Officer 2nd Class
Joined
Sep 10, 2012
Messages
143
Re: First attempt at boat repair

I shot a video of using the scraper last night when I took the last of the foam out.


camera fell over at the end of the video. I guess you cant leave it on the stern on a tripod when rocking the boat. Minimal damage, i got it working again. More pics later today
 

Railcar

Petty Officer 2nd Class
Joined
Sep 10, 2012
Messages
143
Re: First attempt at boat repair

And for anyone who is bored, I have about 10 mins or so of boat demo that I recorded before the foam. Cutting out the front tapered area under the consoles.


jbcurt00

Moderator
Staff member
Joined
Oct 25, 2011
Messages
25,017
Re: First attempt at boat repair

Demo w/ no talking to yourself & no cursing may not be healthy :facepalm:

But nice work & music selection :)
 
Top