Finnish fishing boat overhaul [Splashed 2017]

Red Herring

Chief Petty Officer
Joined
Oct 1, 2012
Messages
536
Ahh. Now I get it, those mounting holes! There's so much info in those datasheets that I totally missed that detail. I'll let you know when I get them.
 

Red Herring

Chief Petty Officer
Joined
Oct 1, 2012
Messages
536
Hmm, now that I can see the engine panel clearly I'm thinking if the switch panel border should be omitted to make them look more like siblings.

I really like that outer border though. Not a big issue at all and I'm very happy these are the current problems :) (no need to change anything Gm, just musing around, what do you guys think?).
 

gm280

Supreme Mariner
Joined
Jun 26, 2011
Messages
14,602
Hmm, now that I can see the engine panel clearly I'm thinking if the switch panel border should be omitted to make them look more like siblings.

I really like that outer border though. Not a big issue at all and I'm very happy these are the current problems :) (no need to change anything Gm, just musing around, what do you guys think?).
Well there is always the option to make a new panel for that one as well with the lined border. But I would certainly have to have all the cutout dimensions and the diameters of everything that is installed in that panel to make it work. And those dimensions have to be really precise as well.

I take it that panel is the exact same dimensions as the one you ask me toe layout for you so they both looked equal. Is that right?

BTY, here is a drawing of how the switches will fit now from the back side view. I may add a very little space between the switches so they are not that tight together. Even a few thousandths of an inch (mm) will help.

Red's Panel Layout Back Side.jpg
As you can see the switches are really tight. A couple millimeters separation should help. JMHO
 

Red Herring

Chief Petty Officer
Joined
Oct 1, 2012
Messages
536
Oh wow, it sure is crowded. You do whatever you think is worth it, just don't overdo it without letting me repay you somehow. I'm getting a real professional service for free here!

I'll photoshop around a bit and see what the border does until I'll get the switches.
 

Red Herring

Chief Petty Officer
Joined
Oct 1, 2012
Messages
536


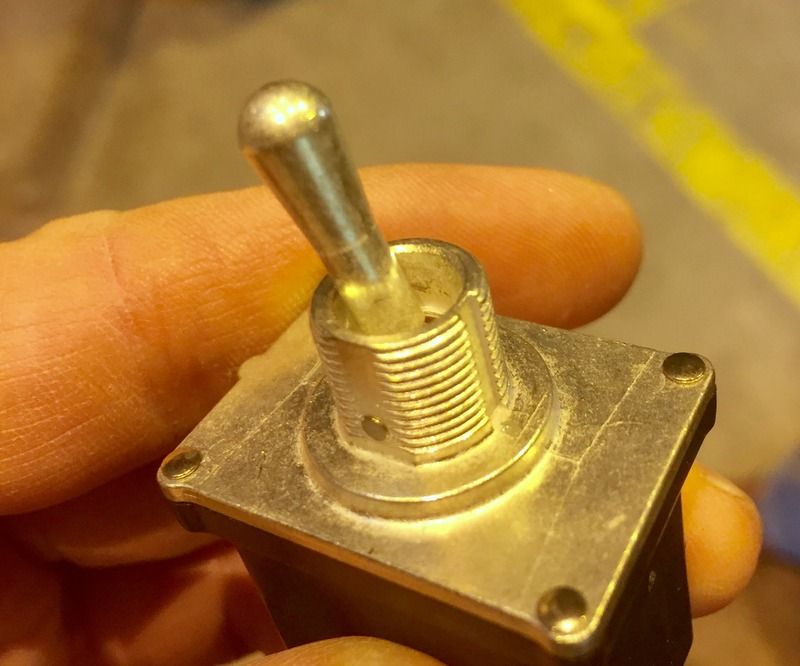
The switches are here! They're all of the type with a keyway and a flat.

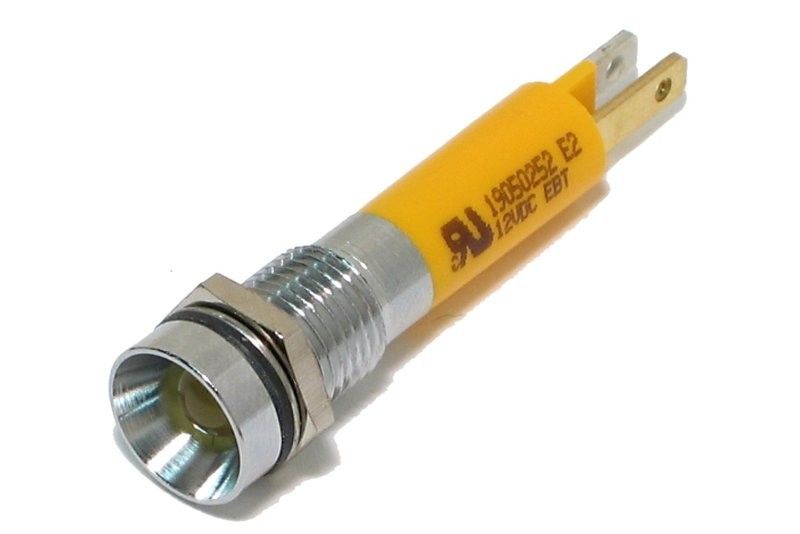
And I just realized that the leds I ordered will need some fiddling around with due to voltage restrictions. I've got these available now at the site free of charge:


The mounting hole is 8mm, the outer visible bezel is 9.5mm and the inner fastening nut/plate is 10mm flat to flat.

I realize it's a whole new led again and I'm sorry to cause you all this work since you're doing me a huge favor Gm, but I hope it's doable. My own solution would include drills and files and the result would probably be miles away.

I photoshopped the last draft and I'd be prepared to leave the outer border out but keep the middle divider between the two rows.

But you're the boss and I'll take whatever you feel will work and doesn't cause too much of a hassle!


(I don't know if you can tell but I'm really bad at receiving favors, feels stupid to ask for more and more and causing extra work for someone who's doing it all just out of generosity).
 
Last edited:

gm280

Supreme Mariner
Joined
Jun 26, 2011
Messages
14,602
Okay Red, now I know what type toggle switch mounting is needed and can update the panel. And those LED's are near identical to the ones I've used. They really do look nice on a finished panel. I will update for them as well. I'll post when I get a prospective layout for you to critique. :thumb:
 

gm280

Supreme Mariner
Joined
Jun 26, 2011
Messages
14,602
Well here is a new design with the latest components you now have. I removed the lines
like you stated and allowed a little more room for the switches to mount. I also updated the new LED sizes and mounting holes as well. See what you think;

Red's Panel 2-15-2017.jpg
This is, of course, not actual size, but it is to scale.

So let me know.
 

Red Herring

Chief Petty Officer
Joined
Oct 1, 2012
Messages
536
Aaand that's a wrap as far as I'm concerned! Looks great and it's like it came out of the same factory as the Bmw panel!
 

Red Herring

Chief Petty Officer
Joined
Oct 1, 2012
Messages
536
Oh yeah, the boats name kind of leaked during this process :)

What's the next step Gm?
 

Red Herring

Chief Petty Officer
Joined
Oct 1, 2012
Messages
536
Nemo is latin and means: "no one". I've always looked up to the idea where personal growth begins with a realization of ones shortcomings and failures. We're all equal, individuals and communities all at the same time.

https://en.m.wikipedia.org/wiki/Captain_Nemo

Captain Nemo(Prince Dakkar)in Jules Verne novels had many humane and very progressive views on equality, compassion and the world in general. He kind of lost some of his marbles on the way though.

Call me pretentious but I tried to avoid ironic jokey names since the project is dead serious from my point of view :)
 
Last edited:

gm280

Supreme Mariner
Joined
Jun 26, 2011
Messages
14,602
Well Red if that is a final, then I can finish up the layout with either measured holes and spacing measurements, OR I can roll this up in a program that we usually use to send to a LASER Engraver. You wouldn't be able to open and see the LASER Engraver version. But it would be transferable to some place that could make it for you. We use Corel Draw which is a vectoring / rastering programs for most LASER Engravers. However, If you want a machine shop to do the work (and that depends on what material you want it made from and who is doing the work), then I can send a more drafting type layout. Your decision.
 

Red Herring

Chief Petty Officer
Joined
Oct 1, 2012
Messages
536
Ok thanks!

The Bmw one is 3mm powdercoated/painted aluminium sheet, and I guess that they'll need to do it in 2 passes as you described to get the outer edges black (holes, corner shapes and screw countersinks first. Then paint and finally engraving?).
 

gm280

Supreme Mariner
Joined
Jun 26, 2011
Messages
14,602
Ok thanks!

The Bmw one is 3mm powdercoated/painted aluminium sheet, and I guess that they'll need to do it in 2 passes as you described to get the outer edges black (holes, corner shapes and screw countersinks first. Then paint and finally engraving?).

Okay, I make the designs up and send you everything I have. Then you can decide how and where to get it made.
 

Pusher

Lieutenant
Joined
Sep 2, 2014
Messages
1,273
Nice work gentleman!

I like the idea of the name. I usually think of that general idea when someone pays me a complement. You became the person you were raised to be, only know what the last guy taught you, and return to the same earth as your greatest friends and enemies.

It is only by grace that we get the freedom of free choice within that framework, IMO.

That said, my boat's likely getting a jockey's name... Or a Disney character's name if my wife gets her way :)
 

Red Herring

Chief Petty Officer
Joined
Oct 1, 2012
Messages
536
Haha, well this one has a relation to Disney as well... And nicely put all in all, something to remember and live by.
 
Last edited:

Red Herring

Chief Petty Officer
Joined
Oct 1, 2012
Messages
536


Been installing nav lights, wipers and other small stuff. Almost done with the extended engine space that will house all the pumps, the raw water strainer, exhaust muffler, diesel filters etc.

And the frp pipes turned out well!
 

gm280

Supreme Mariner
Joined
Jun 26, 2011
Messages
14,602
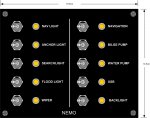
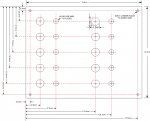
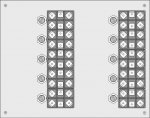
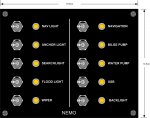
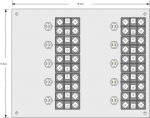
Red here are three drawings to show the panel as a finished setup, the back side of the panel, and the measurement drawing for most any shop to go by. Let me know if this is what you need or if there are additional drawings you need.
Red's Panel Layout A 2-16-2017.jpg
This is a scaled drawing of the front of the panel. If you used the measurements from this drawing to scale it out, everything will scale accordingly.
Red's Panel Layout B 2-16-2017.jpg
This is what the back side will look like once assembled. Again if you scale the drawing per measurements, It will be true size.
Red's Panel Layout C 2-16-2017.jpg

And this is the measurement drawing that all holes can be drilled from. I converted the inches to millimeters because I think you use that where you live.
If anybody follows the measurements, the will reproduce this panel.

Hope this helps and is what you need. If not, let me know.
 
Top