Ebbtide Tri-Hull Restoration

TriadSteeler

Petty Officer 1st Class
Joined
Oct 26, 2006
Messages
237
Let the Painting Begin

Let the Painting Begin

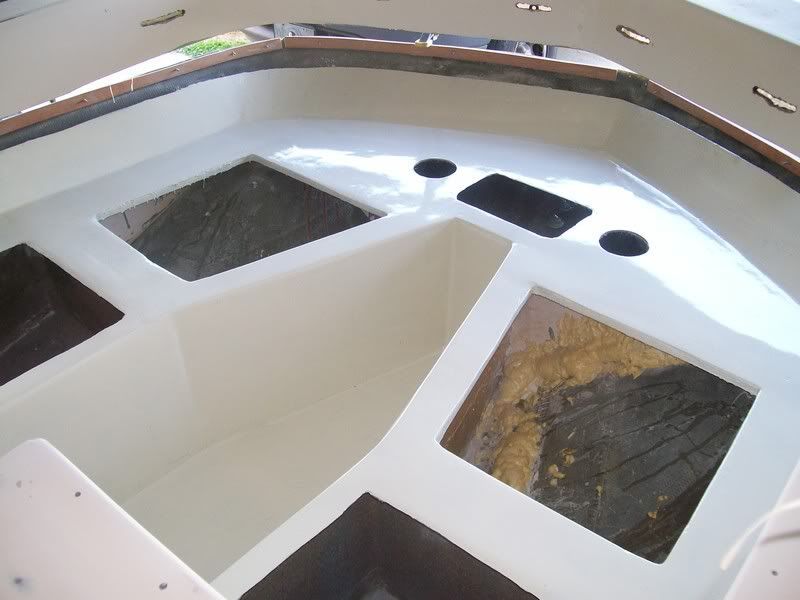
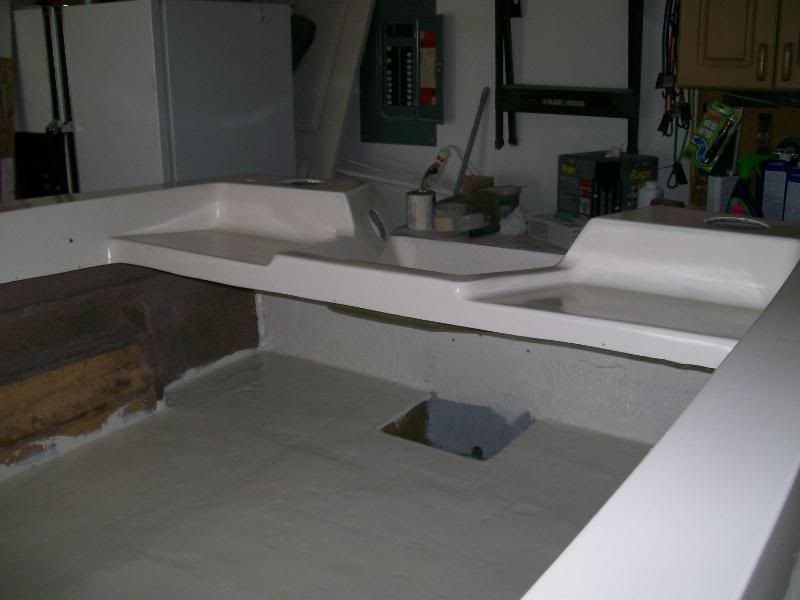
I have now primed and painted the deck and the bow area. as soon as I get another coat on the bow area, I can lower the cap and finish it off.

Primed Bow Area
101_0639.jpg


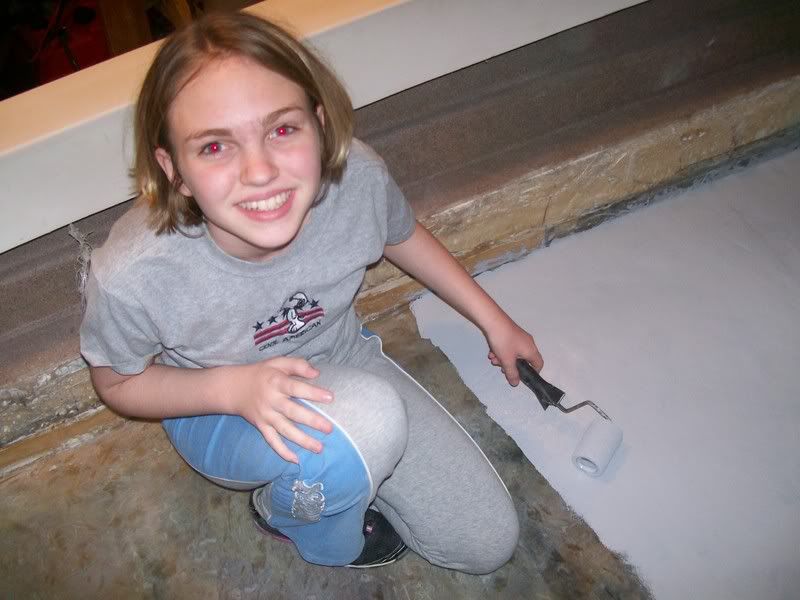
Third Mate Helping out with painting the floor
101_0640.jpg


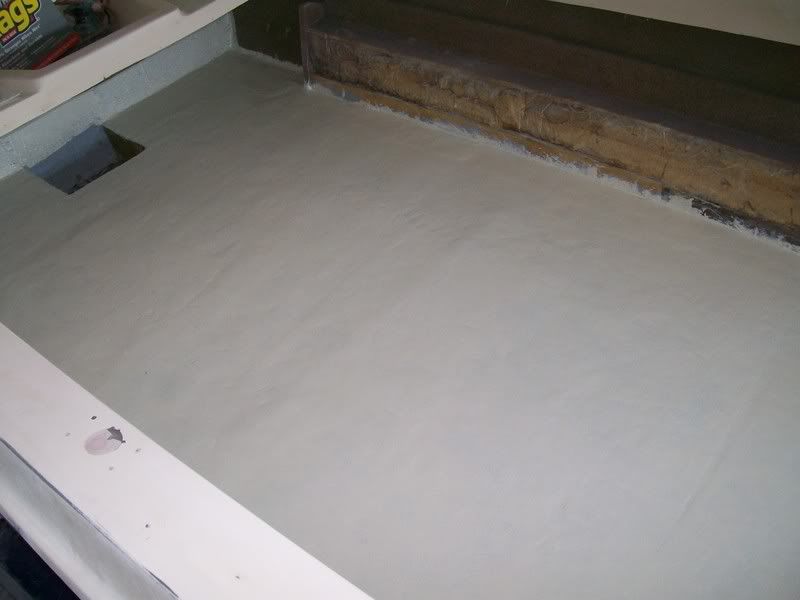
Bow Area with First Coat of Paint
101_0649.jpg


Deck with First Coat
101_0650.jpg
 

TriadSteeler

Petty Officer 1st Class
Joined
Oct 26, 2006
Messages
237
Re: Ebbtide Tri-Hull Restoration

What kind of paint?

Petit Easypoxy (Off-White) cut 80/20 on 1st coat and 60/40 on succeeding coats with brushing thinner.

I have always had good results with this stuff. It levels smooth with a hard shiny finish. I am using the off white this time because on another resto I did the brite white is just too bright.
 

oops!

Supreme Mariner
Joined
Oct 18, 2007
Messages
12,932
Re: Ebbtide Tri-Hull Restoration

looks great..!

how hard was it to get on it after the long lay off?
 

TriadSteeler

Petty Officer 1st Class
Joined
Oct 26, 2006
Messages
237
Re: Ebbtide Tri-Hull Restoration

looks great..!

how hard was it to get on it after the long lay off?

The layoff started last July when the long neglected honey-do list grew out of control. My wife (and after 7 months working on this boat almost nonstop, she had a point) wanted some things done. I installed a new pergo floor and windows in the dining room, completely remodeled our upstairs den, installed a new toilet that had been leaking and causing our water bill to skyrocket. Then Christmas came.

Thus, the boat was in the garage filled with scraps of wood from my projects, boxes from Xmas, etc.

In addition, I was at a point on the boat where I was making little progress. That change of the bow seating area was a total PITA, and I would be fishing right now had I not decided to do it.

The hard part was getting up the gumption to get the boat cleared out and the garage cleaned up. Once that was done, I jumped back on the boat project full force. It was actually fun to get back on it. I also had lots of time to think about how I was going to proceed and formulated the method of making the dash modifications.

You are scaring me though oops. You absolutely CANNOT have a layoff. What will Me and the thousands of other faithful readers of your resto post do without a daily update on your Sea Ray. DON'T DO IT!!!!!!!!!!
 

TriadSteeler

Petty Officer 1st Class
Joined
Oct 26, 2006
Messages
237
Re: Ebbtide Tri-Hull Restoration

I'm starting to see the light at the end of the tunnel.

I put the cap back down and sealed it with PL and rivets.

I then painted the cap and the portion of the sides that will be off-white. I also put a second coat on the floor and the bow area.

For the first time since this project began, I'm actually starting to visualize getting her ready for the water. I think it is because all of the grinding and cleaning the layers of dust in my garage portion of the project has ended. When reading oops' posts I know, albeit on a smaller scale, exactly what he is going thru when he grinded the whole hull down. The inches of dust, the itch, the clouded goggles, getting undressed in the garage, and the almost brand new shop vac that literally "bit the dust".

To all of the folks who are going to be painting using a roller. I tried something new yesterday and the results were really good. Instead of tipping with a brush, I decided to try one of those foam rollers for ultra smooth surfaces. This thing worked great. All rollers create bubbles, however this roller creates really small bubbles. After I paint a section, I'd wait 5-6 minutes and with the roller all but dry, go over it very lightly with the roller. The remaining bubbles would disappear and the finish was smooth like glass.

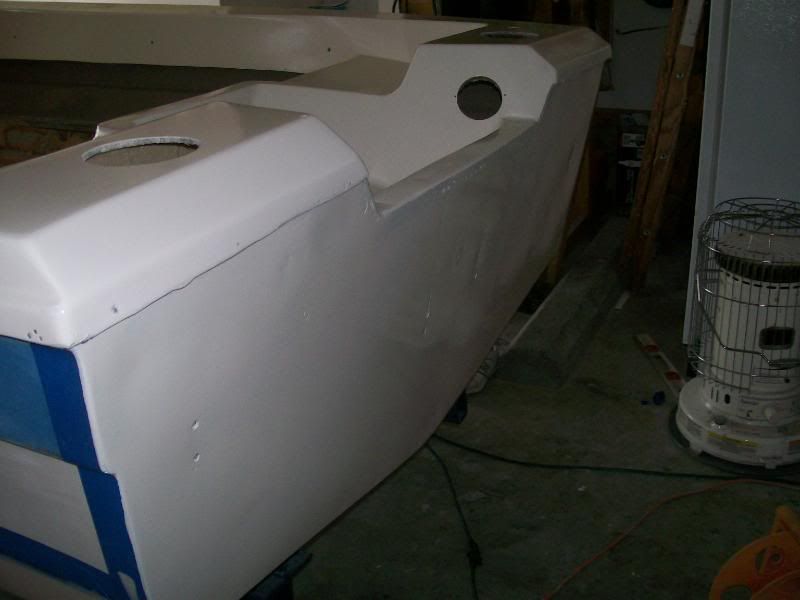
Here are some of the latest shots.

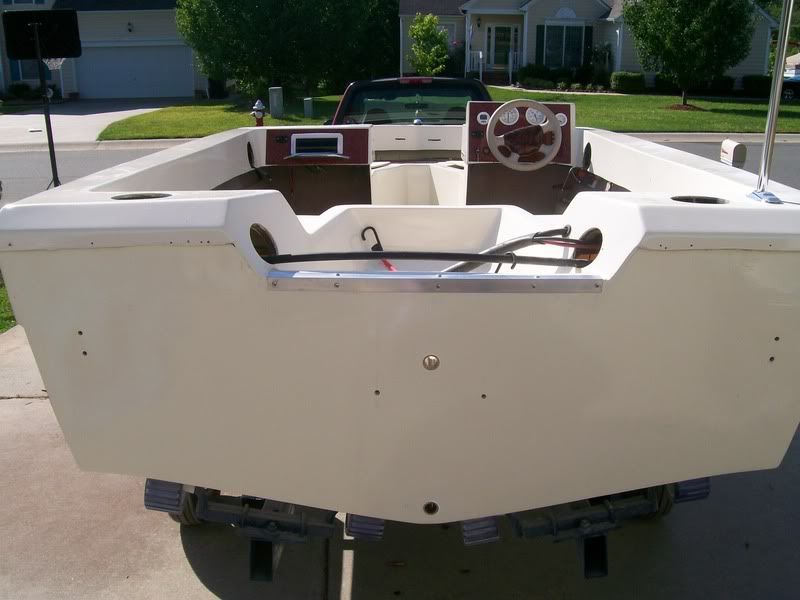
The transom looks rough, but it was because the paint was still drying and my light from the side was casting funny shadows.

101_0655.jpg


101_0654.jpg


101_0652.jpg
 

TriadSteeler

Petty Officer 1st Class
Joined
Oct 26, 2006
Messages
237
Re: Ebbtide Tri-Hull Restoration

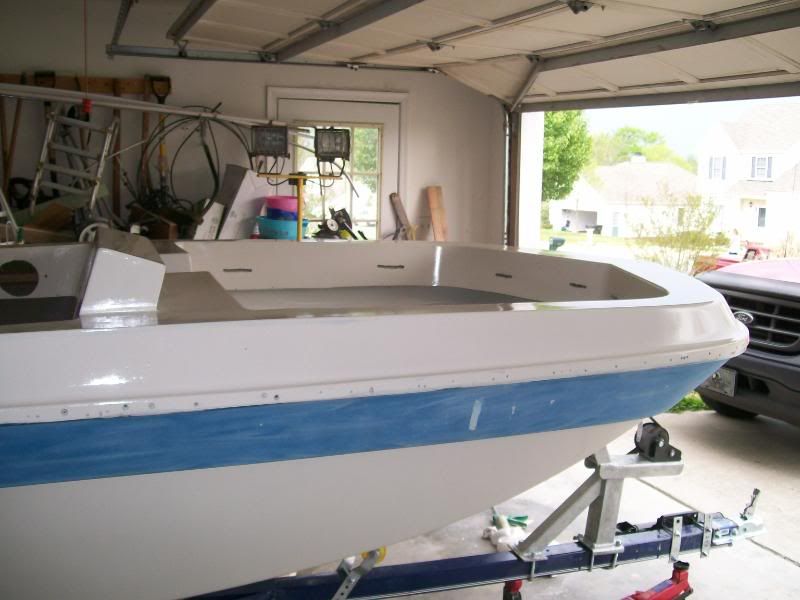
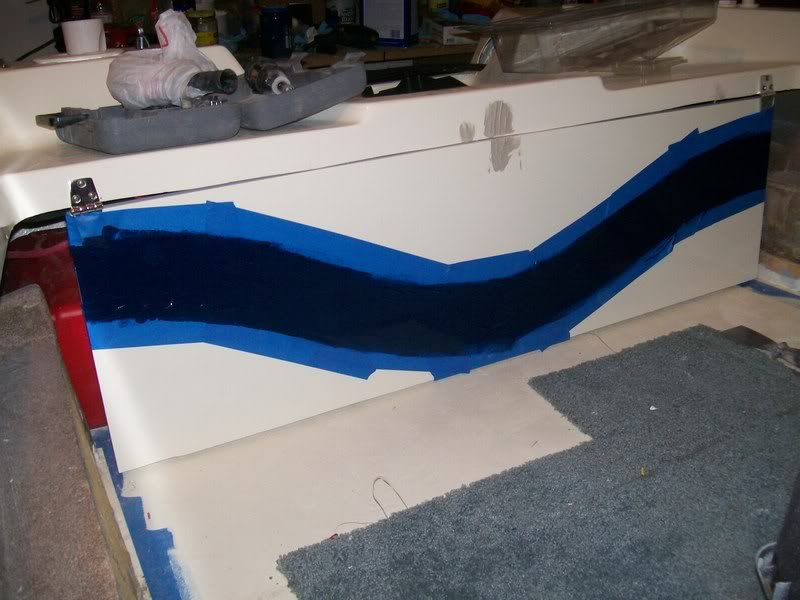
Got some more work done. Painted the accent color and the name plates with spray paint designed to paint plastic.

After the 1st Coat
100_0660.jpg


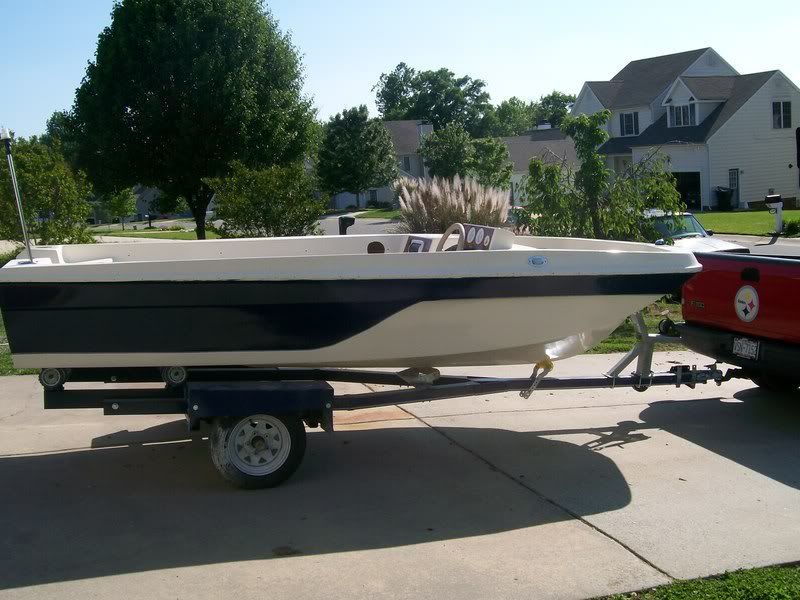
After Tape Removed and Pinstriping in place
100_0663.jpg


Name plates
100_0659.jpg


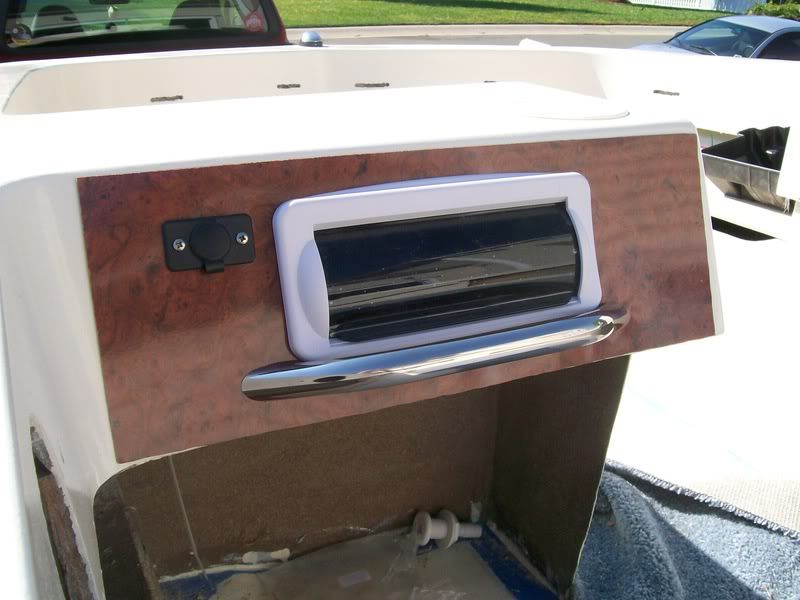
I also cut the wood for the side panels and coated them with several coats of polyurethane
100_0662.jpg


I also constructed a frame for the bilge area cover. I decided not to put in a vinyl curtain because of keeping it up in the air while you are working under there can be a pain. I took a piece of plexiglass and affixed a frame of PVC molding with CPVC Cement. I am then going to paint the plexi with the topside paint and Affix a slam latch and magnets to hold it fast. I am then planning to install gas springs to keep it up when it is raised.
100_0661.jpg
 

fishdog4449

Chief Petty Officer
Joined
Jul 16, 2007
Messages
462
Re: Ebbtide Tri-Hull Restoration

wow man it looks great! your really going to town on this one
keep us updated!
did you use easypoxy for the accent too?
 

TriadSteeler

Petty Officer 1st Class
Joined
Oct 26, 2006
Messages
237
Re: Ebbtide Tri-Hull Restoration

wow man it looks great! your really going to town on this one
keep us updated!
did you use easypoxy for the accent too?

No that was Interlux Briteside. The it was the correct color and it was in stock.
 

TriadSteeler

Petty Officer 1st Class
Joined
Oct 26, 2006
Messages
237
Re: Ebbtide Tri-Hull Restoration

That light at the end of the tunnel keeps getting brighter all the time. The painting of the hull is complete and the outfitting has begun.

The boat has been completely wired, the steering cable is in place, but won't be hooked up until I put the engine on. I have cut the wood for the new bow seats and am in the process of getting the boxing sewed to the vinyl.

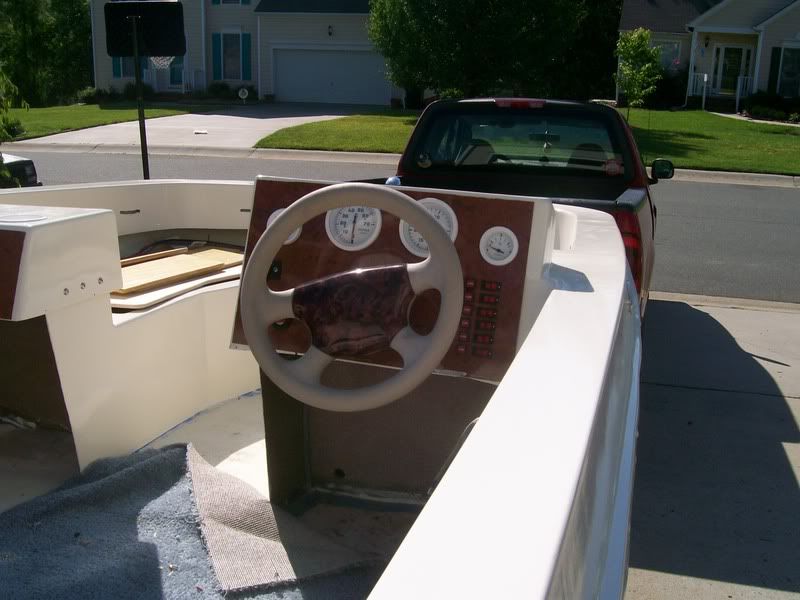
The dashboards consoles have been covered with formica and I only have to put the trim around them. The gauges, lights, horn, ignition switch, 12V outlets and switches are wired and working.

Port Side
100_0690.jpg


Starboard Side
100_0691.jpg


I am almost finished with the bilge area cover. The plexiglass has been painted with the base color and I am now painting the accent stripe.
100_0693.jpg


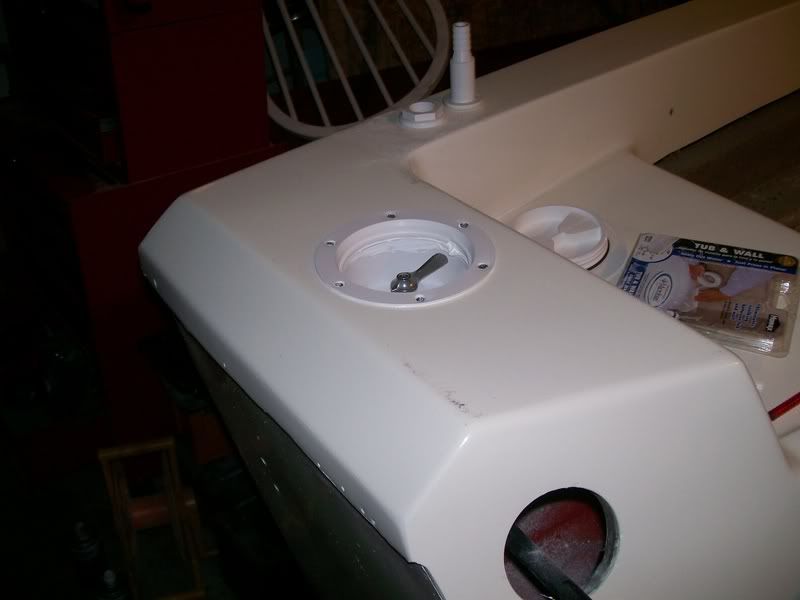
I have installed a fuel tank selection valve (3 way) in an access hatch on the stern. No more climbing under to change tanks over!!
100_0695.jpg


The brass drains have been installed and a new aluminum trim piece on the top of the transom is in place. I haven't installed the smart tabs yet because of having to walk around the stern in my garage.
100_0689.jpg


This is a shot of the whole works.
100_0692.jpg
 

TriadSteeler

Petty Officer 1st Class
Joined
Oct 26, 2006
Messages
237
Re: Ebbtide Tri-Hull Restoration

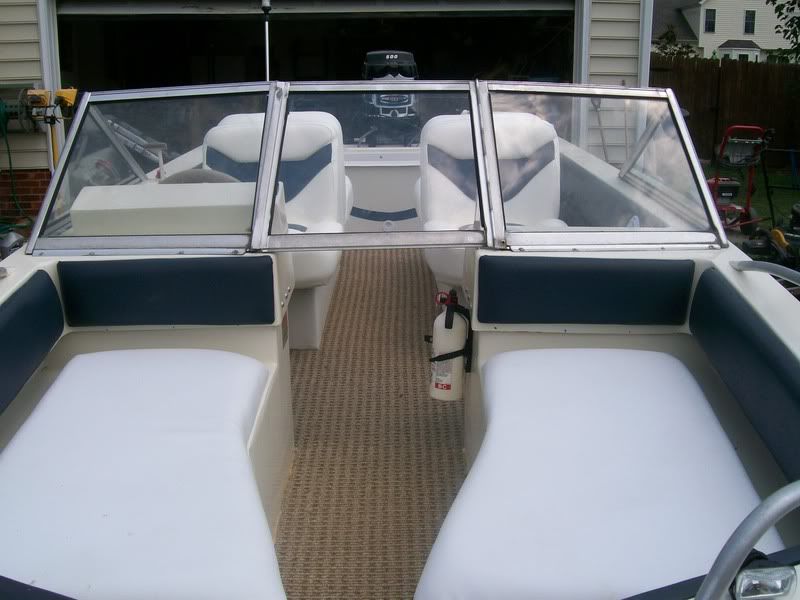
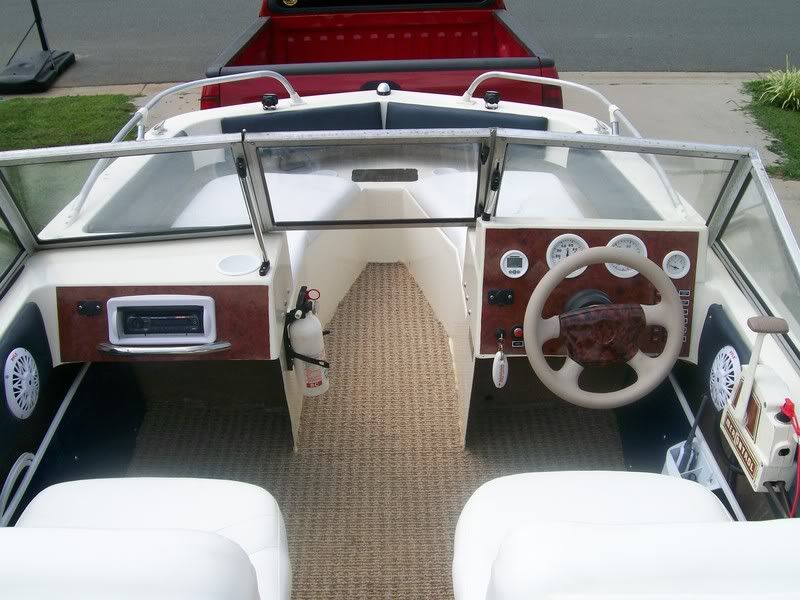
FINALLY READY FOR THE WATER!!!!!!

After almost two years, I'm getting ready to water test.

This project started in October of 2006. Here is some info on the materials invested.

Boat & Outboard
------------------------------
10 Gallons Polyester Resin $350
Fiberglass Chopped Mat $150
Fiberglass Cloth $120
Fiberglass Tape $35
Woven Roving $60
Marine Tex (2) $26
Bondo-Glass $24
Microballoons (2) $35
Fiberglass Roller $13
Mixing Cups $10
Sandpaper $50
5 boxes Nitrile Gloves $50
3 qt Petit EasyPoxy Off White $105
1 qt Interlux Brightside Dark Blue $35
Pin Striping $12
4 cans Quicksilver Phantom Black $44
2 cans Interlux Primer $25
New Lettering, Metallic Striping , & Accent Paint (Outboard) $100
Carb Kit (2) $50
Fuel Pump Kit $4
Fuel Lines & Fittings $70
Water Pump Kit $60
Water Jacket Gasket $4
Battery $54
Wiring $120
Speedometer $35
Tachometer $65
Fuel Guage $30
Depth Finder $100
Ignition Switch $20
12 V Outlet (2) $20
Switch Panel $25
Radio & Speakers $120
Horn $35
Horn Push Button Switch $8
Kill Switch $15
Docking Lights $40
Navigation Light $20
Anchor Light $30
Fuel Tanks (2) $50
Fuel Selection Valve $35
Quick Connects $40
Lexan (Access Hatch & Middle Windshield Panel $40
VHF Radio $40
Boat Mate VHF Holder $10
Panel & Cushion Vinyl $40
Foam $120
Seats $700
Carpet $125
Bilge Pump $20
Hardware (Eyes, Cleats, etc) $80
Stainless Nuts, Bolts Screws $110
Steering Wheel $50
Steering Helm & Cable $125
MerControl, Cables, Harness (Ebay) $50
Rub Rail $160
Electrical Connectors, Zip Ties, Wire Protectors, Heat Shrink $120
Battery Switch $25
Grab Rail $20
Smart Tabs $120
Boat Cover $120
Taco Flex Trim $35

-------------------
Total $4404

Trailer
-------------------------
Paint $20
Pin Striping $7
Winch Post(Ebay) $40
Bow Stop $15
Wobble Rollers $70
Keel Roller & Bracket $40
Spool Roller & Bracket $25
Winch $25
Wheels $80
Tongue $20
Wiring Kit $25
Jack $25
Hardware $30

Total $422

Grand Total $4826


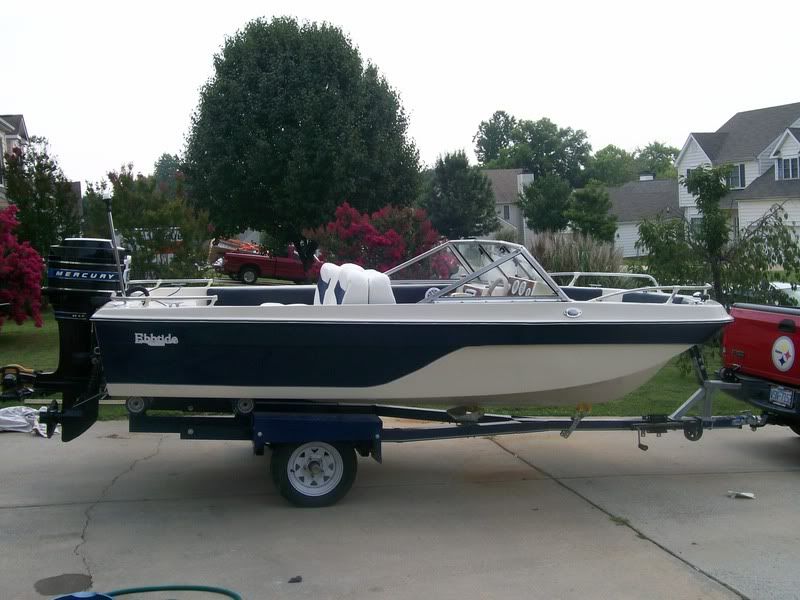
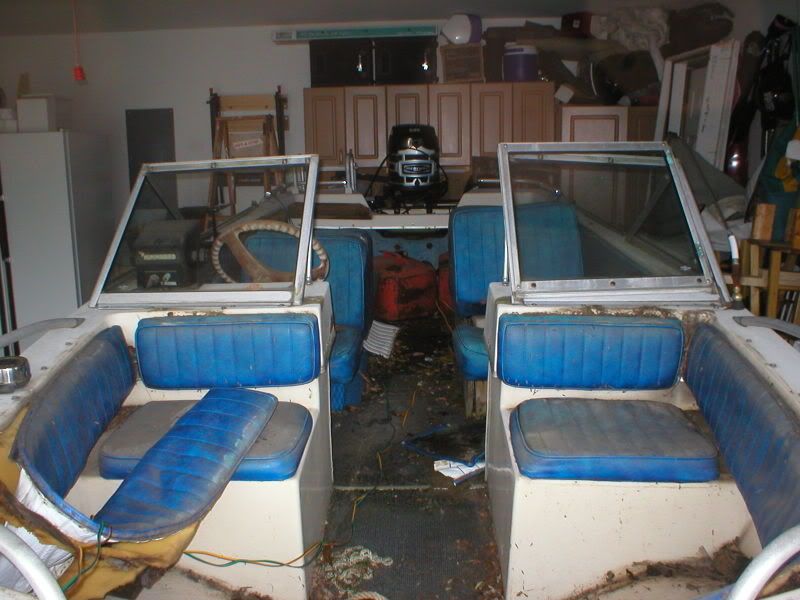
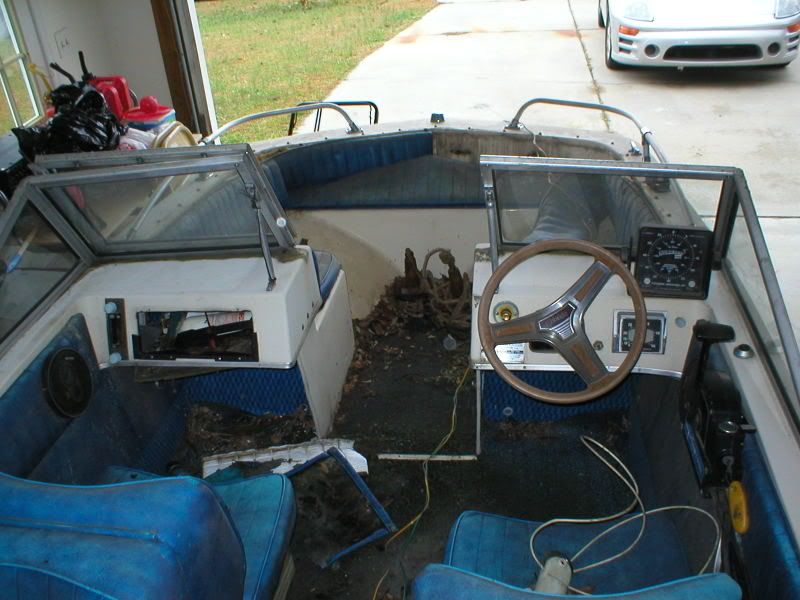
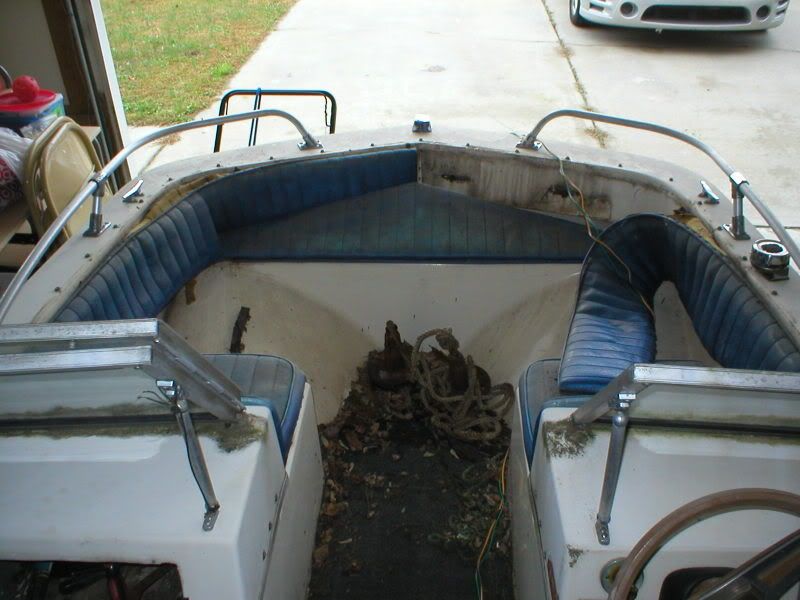
Here are some before and afters
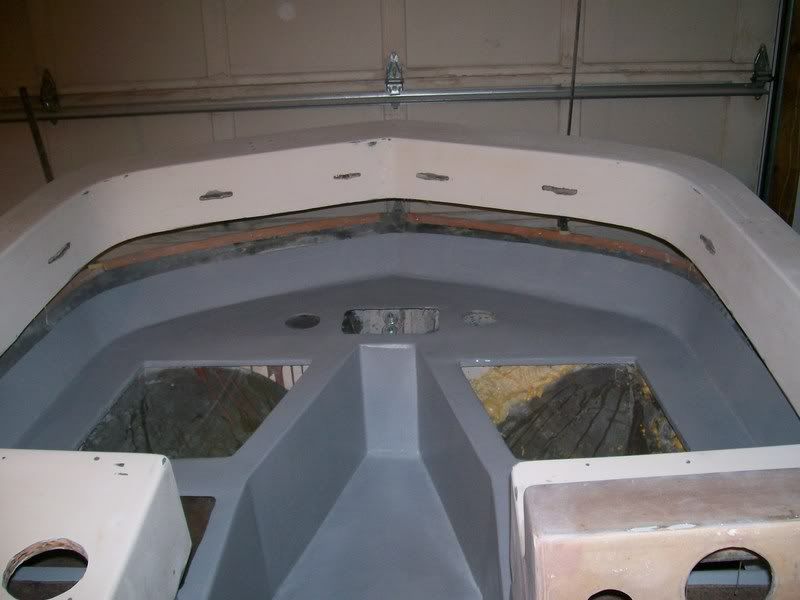
StbdBefore.jpg


101_0724.jpg


OpenBowBefore.jpg


101_0727.jpg


ForeConsoleBefore.jpg


101_0728.jpg
 

lundnisswa

Petty Officer 1st Class
Joined
Mar 2, 2008
Messages
245
Re: Ebbtide Tri-Hull Restoration

Nice job! You are going to be enjoying that boat for years to come.
Lund
 

jcsercsa

Captain
Joined
May 21, 2007
Messages
3,401
Re: Ebbtide Tri-Hull Restoration

WOW brand new !!!! she really looks great !!!! congrads great job !!!! John
 

tmcalavy

Rear Admiral
Joined
Aug 29, 2001
Messages
4,005
Re: Ebbtide Tri-Hull Restoration

That is S-W-E-E-T, Triad. Please post some on the water pix.
 

TriadSteeler

Petty Officer 1st Class
Joined
Oct 26, 2006
Messages
237
Re: Ebbtide Tri-Hull Restoration

After a long and sometimes frustrating battle getting this boat back into fighting trim, I would now like to take the time to express my sincere gratitude to the membership of this forum. I would have probably spent twice the money and spent double the time without the expertise here.

This craft is truly an "iboats" boat.

While it is true that I asked several questions which were answered that helped me when I was stuck or felt overburdened, but in addition, I also got many tips and tricks just from reading the forum on a daily basis from many members.

Tashasdaddy, you are undoubtedly the master of boat restoration, and I have heeded your sage advice from the beginning of this project. From the choice to install smart tabs instead of a hydrafoil, to making the decision to remove the cap, and several other challenges. There were many decisions made during this project that were a direct result of your thousands of responses to questions on this forum. Thank you for being a huge part in making this restoration a reality.

Laddies, (on the merc portion) saved me countless hours and $$$ getting that 10 year dormant outboard running like a top. Having laddies on this forum is like having 24hr tech support from Mercury.

oops!, your thread has kept me going even when I was starting to get complacent when another round of grinding or sanding was staring me in the face. After seeing what you were going thru, my problems seemed very minor indeed.

tmcalavy, thanks for the water pump advice (along with Scaaty) I was still an extreme novice way back then, also, thanks for all of the encouragement and enthusiasm. It is cool to talk to someone who had the exact same hull/OB setup. ("You shouldn't have sold it!!!!!!!!). BTW, I hope to be heading to the lake next weekend. As long as I don't run into any issues getting it registered action pics will be up next Monday.

ondarvr, thanks for all of the fiberglass related information. Your responses to various posts on all sorts of issues led me in the right direction on more than one occasion.

reelfishin, thanks for the fairing ideas, your advice finally got me over the biggest challenge which was the re-designed bow section.

plainsman, thanks for the help with the water jacket. Especially the warning about snapping off the bolts.

OldMercsRule, JasonJ, emckelvy, and laddies, thank you for the advice on getting my telltale/cooling issue straightened around. It is now flowing like a champ.

pman and ricksrster, thank you for helping me build the new internal wiring harness. The tach worked flawlessly without having to tweak a single thing.

I would also like to thank iboats.com as well. Most of the parts in that list above were purchased thru you at a significant cost savings and never waiting more than 3-4 days from order to shipment arrival.
 

Scuda11

Chief Petty Officer
Joined
Jun 16, 2004
Messages
434
Re: Ebbtide Tri-Hull Restoration

All I can say is WOW!!! Amazing job. In the last few years I have gone through a major overhaul of my boat. Similar but not to the magnitude you did. As a result I will tell you this, there will not be a day that you don't sit there at anchor, or cruising along slowly with family and friends that you won't look that boat over and say to yourself "Damn, this looks good, remember what it was?"

The pride you will feel has been earned, enjoy it!!!

Scuda
 

TriadSteeler

Petty Officer 1st Class
Joined
Oct 26, 2006
Messages
237
Re: Ebbtide Tri-Hull Restoration

Haven't had a chance to take any action shots, but I have taken it out on a shakedown cruise. There are a couple of issues. Basically some carb/throttle adjustments and I moved the trim angle from the second hole to the first.

It was bogging out a little and a change of tanks fixed that. I think it was running a little rich on the tank that I added some extra 2-cycle oil to when awakening it.

On the good side, I was able to get the boat (with two people) up to about 28 mph running about 5000 rpm. After some more adjustments are made, I'm hoping to top that off at about 33-34 mph.

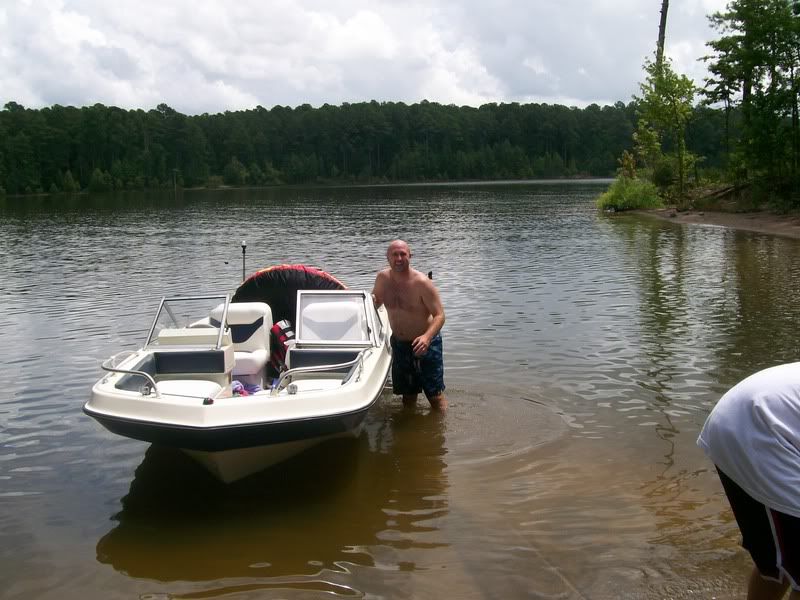
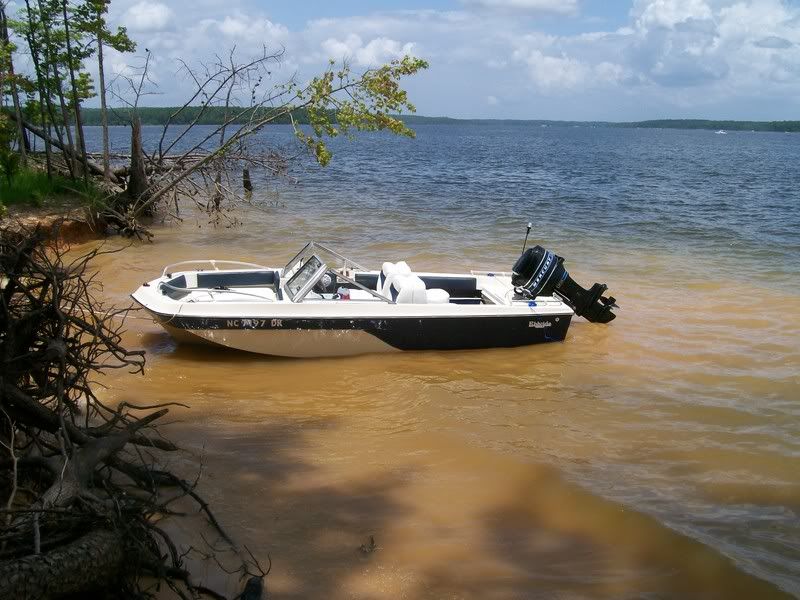
Here are some shots in the water from this morning. I hope to have a few action shots later this afternoon.

At the launch
101_0771.jpg


Tied up at the campsite
101_0777.jpg
 

reelfishin

Captain
Joined
Mar 19, 2007
Messages
3,047
Re: Ebbtide Tri-Hull Restoration

Nice job, I like the expanded console, lots of room for modern gauges.
 
Top