Ebbtide Tri-Hull Restoration

TriadSteeler

Petty Officer 1st Class
Joined
Oct 26, 2006
Messages
237
Re: Ebbtide Tri-Hull Restoration

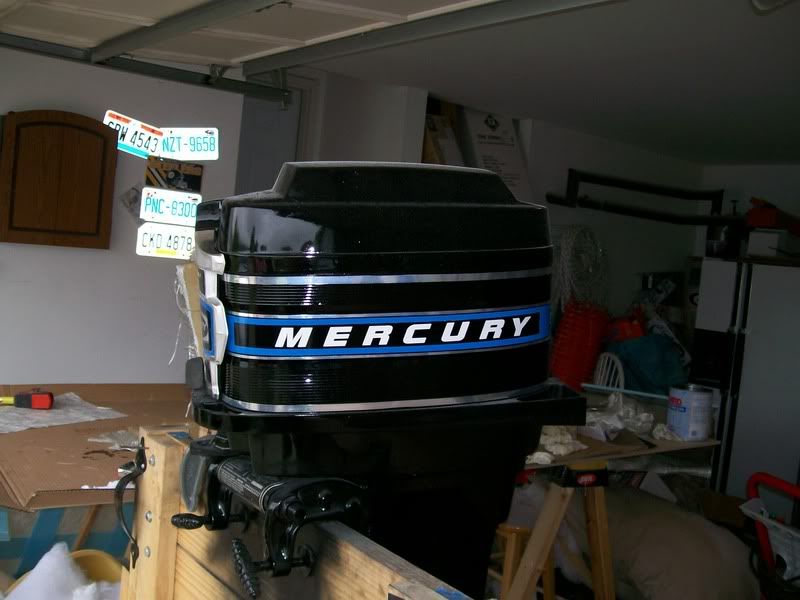
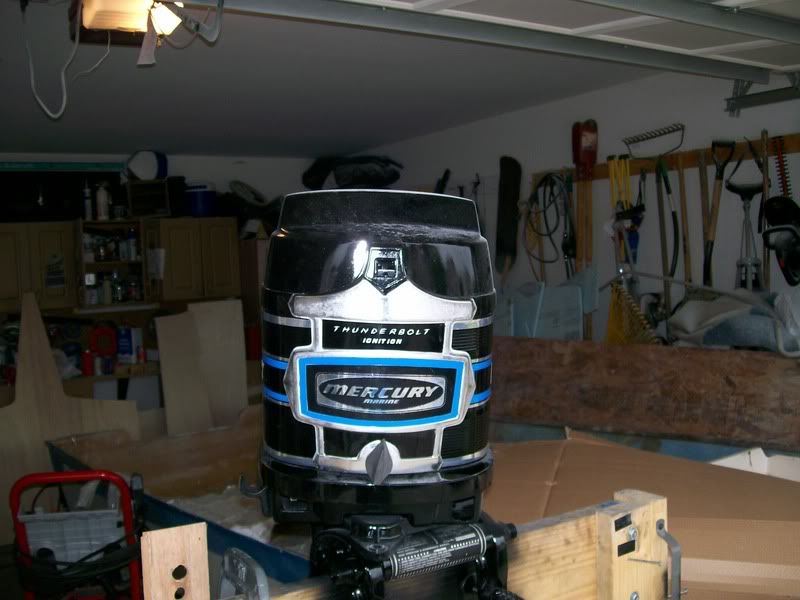
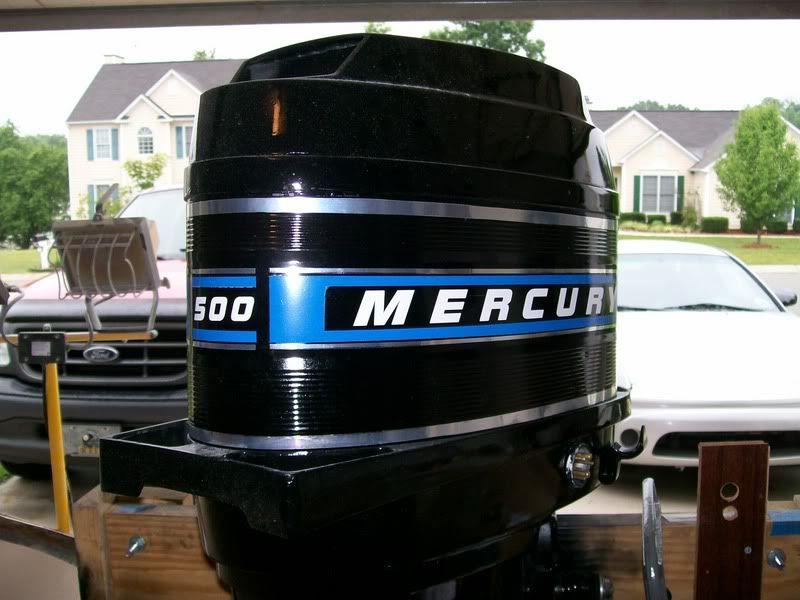
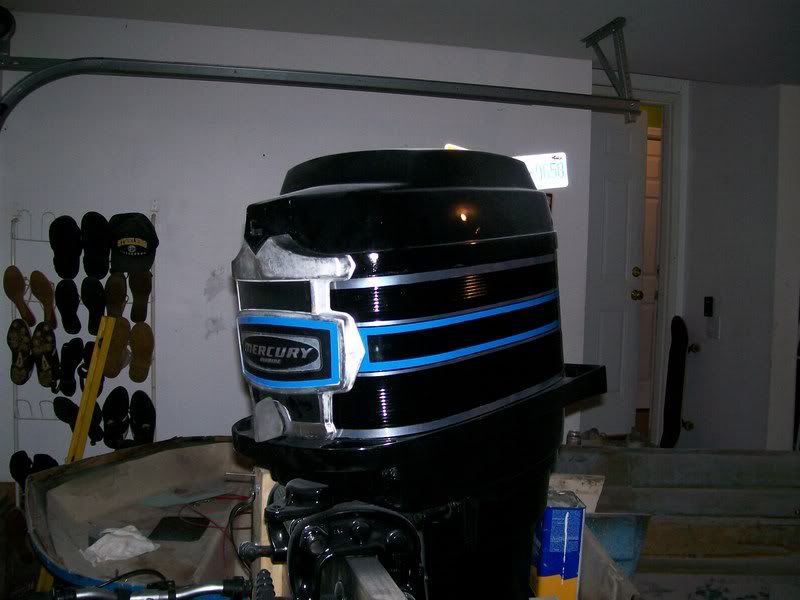
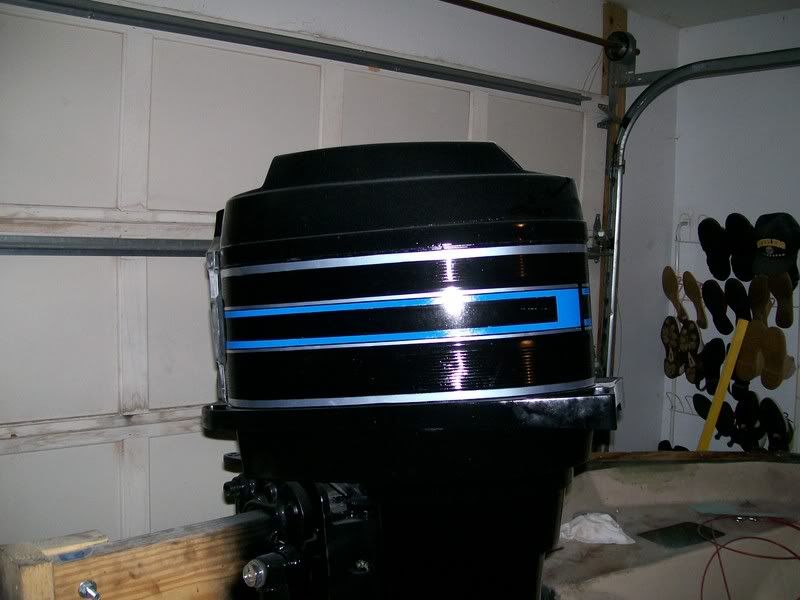
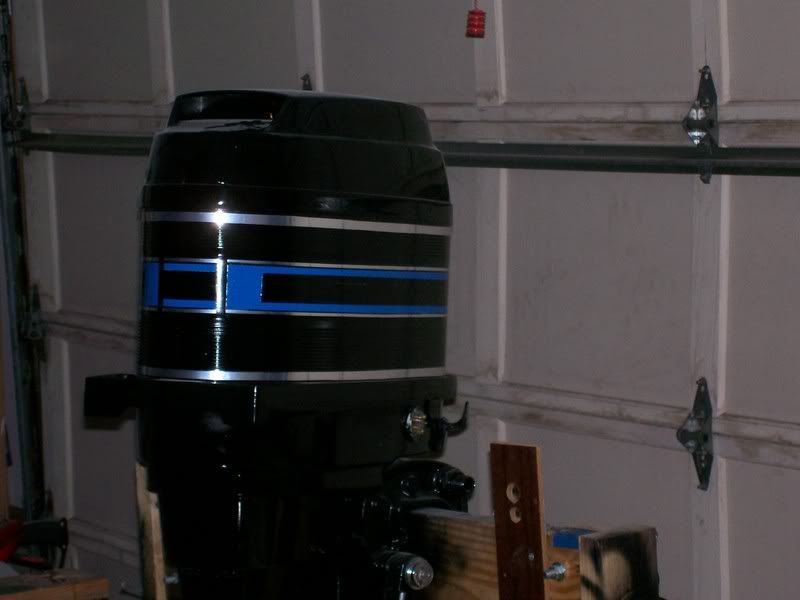
I also did some work on the wraparound installing the metallic strips and I painted on the blue bands. All I have left is waiting on my vinyl lettering to arrive.

Here are a couple of pics of the engine with updates to the "Canned Ham"
BlueBandFore2.jpg


BlueBandPort1.jpg


BlueBandStbdAft.jpg
 

AZ_Ron

Seaman Apprentice
Joined
May 13, 2007
Messages
30
Re: Ebbtide Tri-Hull Restoration

AWESOME!! You're making VERY quick work of this resto... I'm new to boats, but have been a mechanic and woodworker and am really impressed at what you're able to do and how quickly. We'll be bringing our first boat home (In my tagline) next weekend.
She seems very solid, but I go through and read all these posts to see what's involved with replacing/restoring things JUST IN CASE!! ;)

Ron
 

TriadSteeler

Petty Officer 1st Class
Joined
Oct 26, 2006
Messages
237
Re: Ebbtide Tri-Hull Restoration

Getting into putting the aft floor section back in. I ran some roving around the sides and bottom of the transom and then laid up the new bilge box. Instead of just having two drainage holes drilled in the side of the box (which is what caused it to totally rot, I put in small sections of PVC laid up with 5200 as drains and then glassed the box to the floor and the transom.

TransomBilgeBox2.jpg


TransomBilgeBox1.jpg


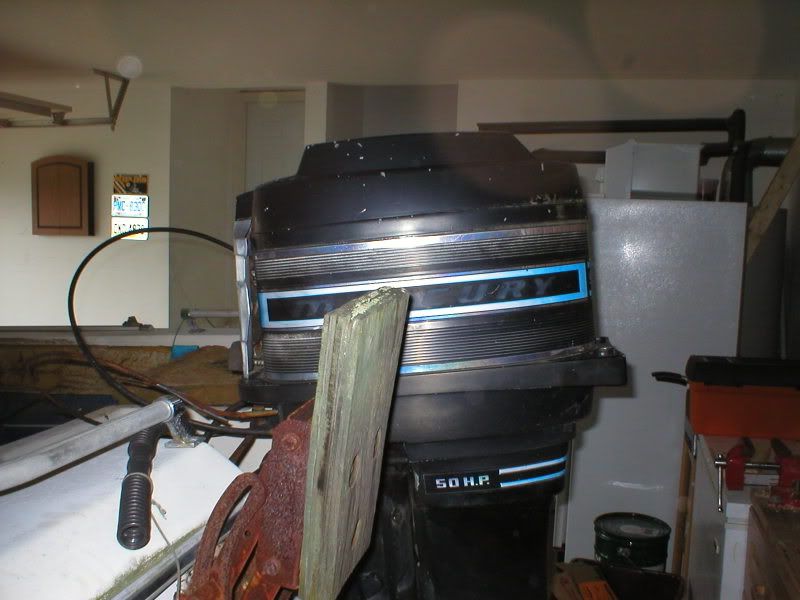
I also got my vinyl lettering in and have put the letters on the front cowl and the wraparound cowl. I still need to paint the midsection before I install those decals and the metallic stripes. Even though the "m" in Mercury was in upper case (the lowercase just didn't look right), I still like the way this turned out. The outboard looks practically brand new.

Before:

PortMotorBefore.jpg


After:

EnginePortWrapCowl.jpg


FrontCowlComplete.jpg


EngineStbdWrapFromAft.jpg
 

banana.boat

Recruit
Joined
Jun 18, 2007
Messages
2
Re: Ebbtide Tri-Hull Restoration

the restoration is looking great !
what kind of fiber glass did you use to bond both 3/4 pieces of transom wood ? I heard of some people using some kind of mixture of catalyst and a fiber I can't recall at the moment to laminate the transom wood together. also is what you used to make the transom and outer skin bond the same materials ? I am rebuilding a boat also and its my first time.
 

tmcalavy

Rear Admiral
Joined
Aug 29, 2001
Messages
4,005
Re: Ebbtide Tri-Hull Restoration

SWEEEET! But can't hardly bring myself to follow your posts...makes me yearn for the old 73 Ebbtide with Merc 500 that I sold a few years back. Hope her new owner is still taking care of her. Keep up the good work.
 

TriadSteeler

Petty Officer 1st Class
Joined
Oct 26, 2006
Messages
237
Re: Ebbtide Tri-Hull Restoration

the restoration is looking great !
what kind of fiber glass did you use to bond both 3/4 pieces of transom wood ? I heard of some people using some kind of mixture of catalyst and a fiber I can't recall at the moment to laminate the transom wood together. also is what you used to make the transom and outer skin bond the same materials ? I am rebuilding a boat also and its my first time.

I just went old school on it. Bonded it with polyester resin and fiberglass mat. When you mention catalyst. Normally all resins utilize some type of catalyst to create the chemical reaction that hardens the resin. Polyester uses a Methyl Ethyl Ketone catalyst at approx 12 drops of catalyst to an ounce of resin, while Epoxy resins use a quantity of 1:2 catalyst:resin. The difference between the two is that with polyester the amount of catalyst used determines the gel time, and with epoxy you use the catalyst type you need slow-medium-fast cure and put in the same amount.

If you are going to do this, make sure you have everything ready before you add the catalyst to the resin. And I mean everything.

STOP: Did you do a gel test on your resin to see how long it takes to cure. If not, waste one or two ounces. You'll thank yourself later.

1. Make sure your mat is cut and ready to apply.
2. Make sure your clamps are out and ready to put on.
3. SS Screws at hand
4. Power Drill plugged in and ready to go.
5. Paint Brushes/Rollers/Fiberglass rollers at hand.
6. Acetone wash and rinse containers filled and ready to be used (for your tools)
7. Nitrile gloves (get a whole box) near your work area. I use 5-6 pairs everytime I bust out the resin. Maybe I'm a slob, but laying up fiberglass makes a huge mess.

Nothing is worse than when you have a pot of catalyzed resin sitting while you're searching thru 4 different tool boxes looking for your #2 Phillips screwdriver bit. Don't ask me how I know this.

I debated using epoxy resin, but with all of the fiberglassing I have to do on this project (~6-7 gallons of resin needed) I just couldn't swing $500-$600 on resin alone.

Other considerations for using polyester are that this boat when finished will be strictly a trailered boat that will be garage kept when it is not at the lake.
 

TriadSteeler

Petty Officer 1st Class
Joined
Oct 26, 2006
Messages
237
Re: Ebbtide Tri-Hull Restoration

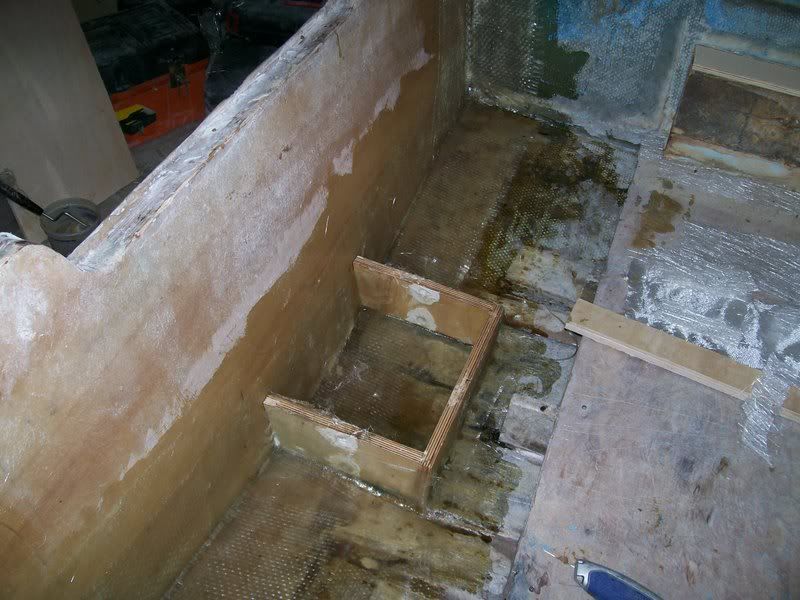
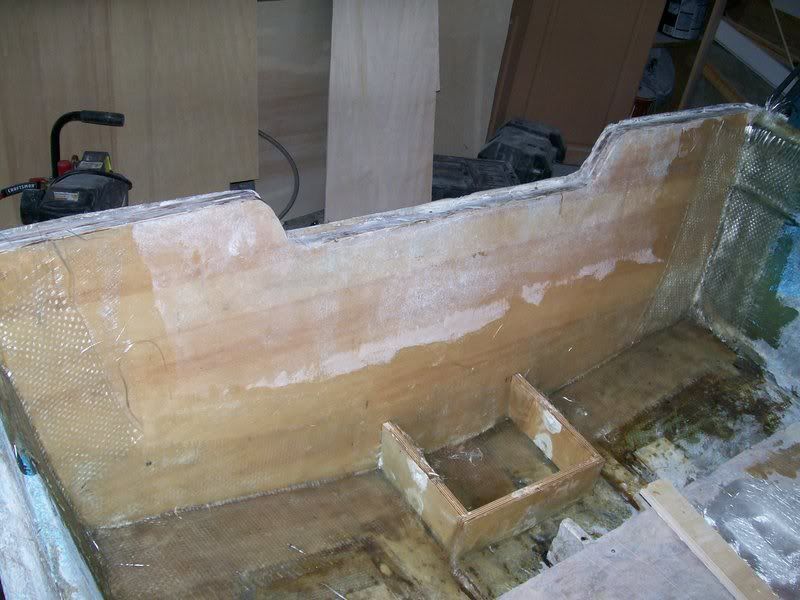
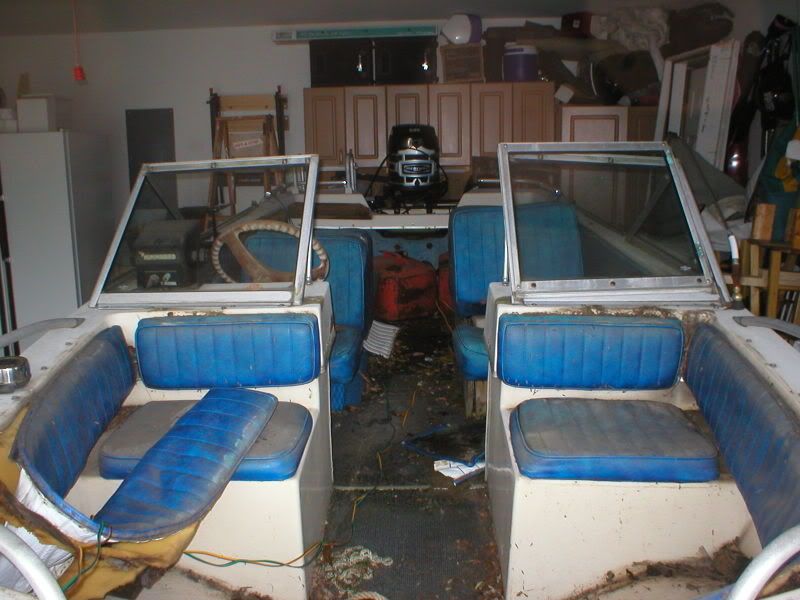
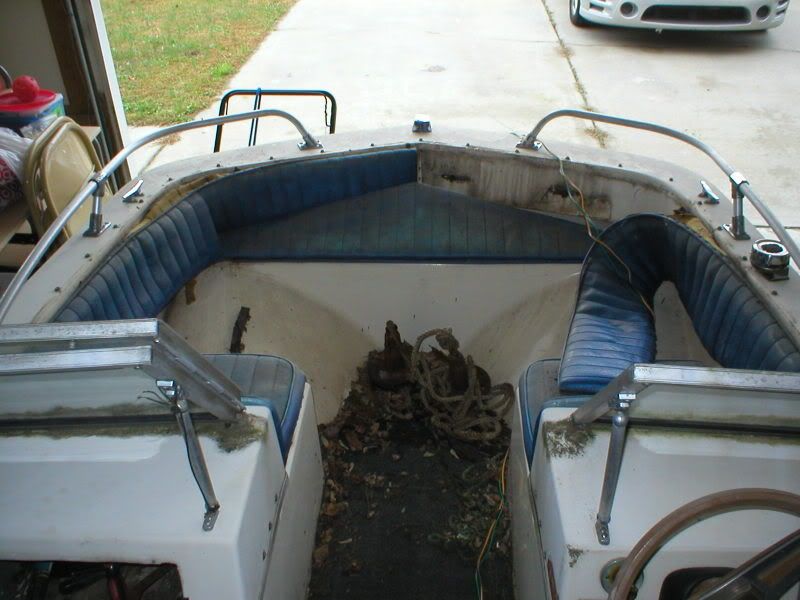
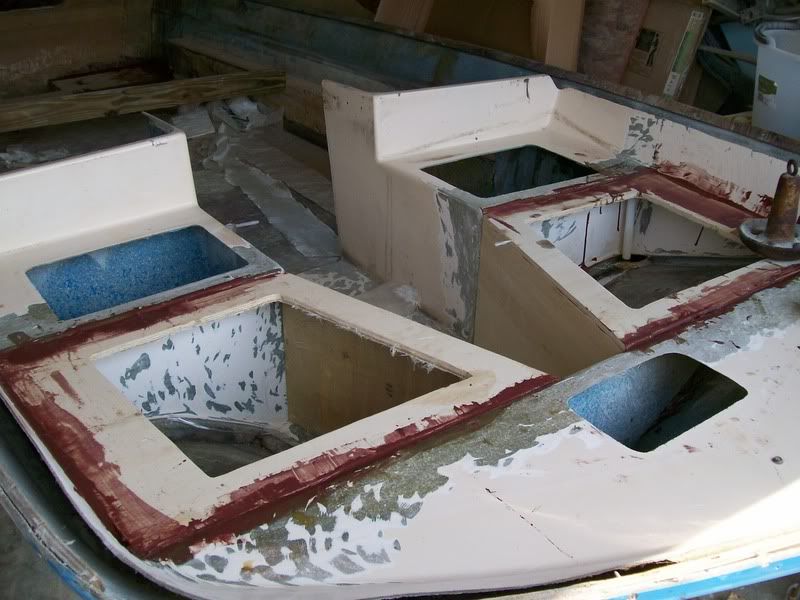
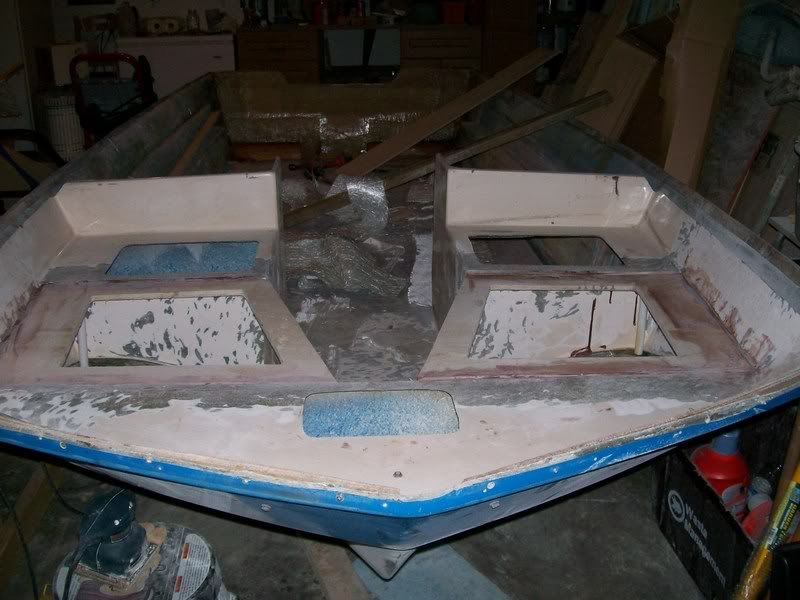
In addition to the new transom, I have decided to change the seating configuration in the bow section. Instead of the two small seats directly afore the port and stbd consoles, I am putting in larger cushions. The curved area of the inner hull in the picture below was very weak and could not be stepped on and it seemed like wasted space.

Before
OpenBowBefore.jpg


ForeOpenBowBefore.jpg


So I decided to change the seating configuration and layed up some plywood in the following manner. In the triangular space in the very front of the bow, I'm not replacing the cushion that was there. Instead I'm going to install a small hatch cover over the Bow Eye access hole (use that cavity for anchor storage) and place two countersunk cupholders on either side of the new hatch.

BowSeats.jpg


BowLayup1.jpg


BowLayupFromAft.jpg
 

TriadSteeler

Petty Officer 1st Class
Joined
Oct 26, 2006
Messages
237
Re: Ebbtide Tri-Hull Restoration

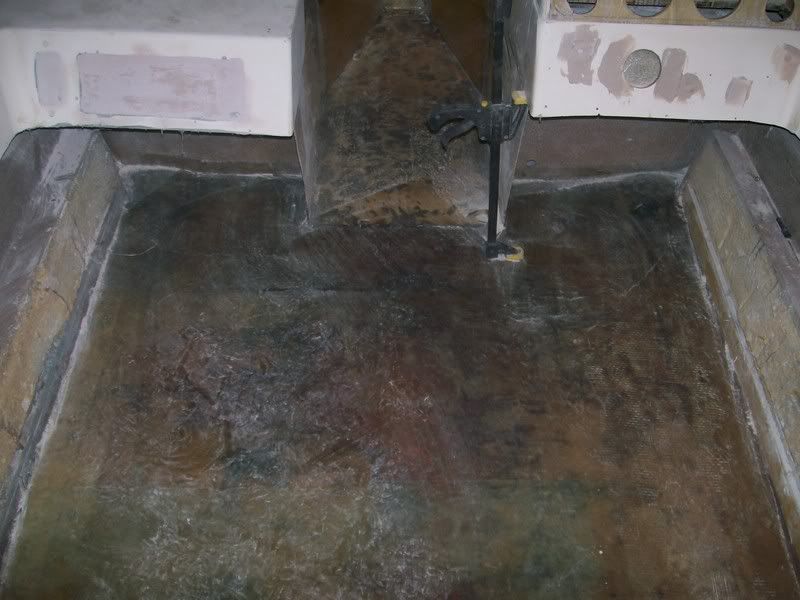
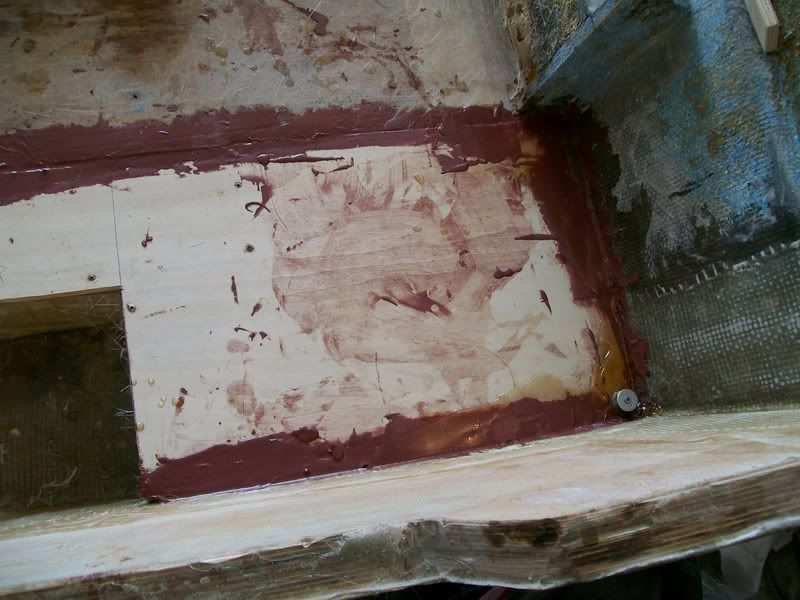
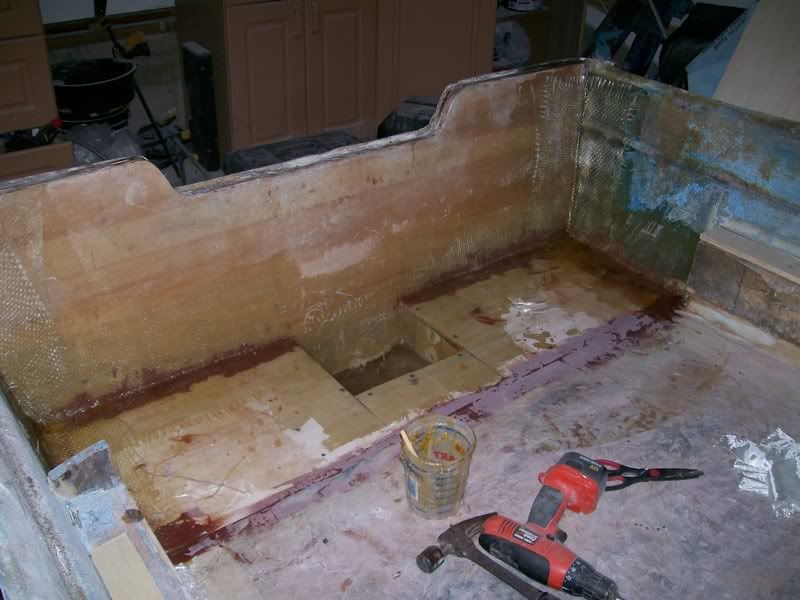
I have also replaced the section of floor under the splashwell. This was laid up with woven roving both on the sides of the hull and to the new transom. The new transom is vastly superior to its predecessor in that there was only a thin layer of cloth and a top coat of mat on the inner skin which flaked away when I was removing it. While I kept the new transom at 1-5/8" where the deck connects, it is pushing a little over two inches around the hull and floor joints with the added roving and I still have a top coat of mat left to go.

I filled the floor joints with a microballoon-resin mixture after laying up the underside of the new floor piece and letting it cure as well as putting some new resin on the underside and rear surface of the existing floor for good measure. I also coated the bilge cavity with cloth and mat.

You'll notice the screw with the washer in the corner. I needed this to get the floor to seat down in the mat layed up underneath in the corner. I put the screw thru the bottom of the hull!! OOPS!! No problem, I'll repair that later.

AftFloor.jpg


SplashwellFloor.jpg
 

banana.boat

Recruit
Joined
Jun 18, 2007
Messages
2
Re: Ebbtide Tri-Hull Restoration

I just went old school on it. Bonded it with polyester resin and fiberglass mat. When you mention catalyst. Normally all resins utilize some type of catalyst to create the chemical reaction that hardens the resin. Polyester uses a Methyl Ethyl Ketone catalyst at approx 12 drops of catalyst to an ounce of resin, while Epoxy resins use a quantity of 1:2 catalyst:resin. The difference between the two is that with polyester the amount of catalyst used determines the gel time, and with epoxy you use the catalyst type you need slow-medium-fast cure and put in the same amount.

If you are going to do this, make sure you have everything ready before you add the catalyst to the resin. And I mean everything.

STOP: Did you do a gel test on your resin to see how long it takes to cure. If not, waste one or two ounces. You'll thank yourself later.

1. Make sure your mat is cut and ready to apply.
2. Make sure your clamps are out and ready to put on.
3. SS Screws at hand
4. Power Drill plugged in and ready to go.
5. Paint Brushes/Rollers/Fiberglass rollers at hand.
6. Acetone wash and rinse containers filled and ready to be used (for your tools)
7. Nitrile gloves (get a whole box) near your work area. I use 5-6 pairs everytime I bust out the resin. Maybe I'm a slob, but laying up fiberglass makes a huge mess.

Nothing is worse than when you have a pot of catalyzed resin sitting while you're searching thru 4 different tool boxes looking for your #2 Phillips screwdriver bit. Don't ask me how I know this.

I debated using epoxy resin, but with all of the fiberglassing I have to do on this project (~6-7 gallons of resin needed) I just couldn't swing $500-$600 on resin alone.

Other considerations for using polyester are that this boat when finished will be strictly a trailered boat that will be garage kept when it is not at the lake.



Thanks for the valuable information for this is will be my first time rebuilding a transom!

Currently I am at the stage of fitting both 3/4 plywood pieces for the transom, tommorow I am going for more clamps and friday me and 3 other people are going in on a drum of polyester resin for $850, and some wood flour as a general filler, 1 1/2 oz fiberglass cloth, roving,screws, gloves and aluminum rollers. I have some MEKP, and mixing cups probably need more acetone for cleanup though...what kind of fiberglass did you use 2 oz or 1 1/2 ? or different? what do you recommend as far as materials that i have mentioned? thanks for your time!
 

TriadSteeler

Petty Officer 1st Class
Joined
Oct 26, 2006
Messages
237
Re: Ebbtide Tri-Hull Restoration

You will need some fiberglass mat.

Any time you lay up fiberglass on virgin wood, you don't want to use cloth directly against the wood. The use of chopped mat will infuse into the wood better. Also, make sure you don't mix the resin too hot. You want it to cure as slow as possible to give the resin time to bond really well with the wood.

This has been debated over and over but anytime I put down cloth or roving, I put down a layer of mat 1st and Last. That gives the cloth or roving a place to bond good and the finish layer creates a smooth finish. The drawback to using mat is that is a major pain. when you are laying it up it gets everywhere. On your gloves, containers, rollers, everything. When laying up mat on the top and sides of the new bow section, I think I used 15 pairs of gloves.
The only other thing I would recommend is a really sharp pair of scissors to cut your stuff with. If you live near Harbor Freight Tools, they have a special on 1" paint brushes. They're like 36 for $4.

You will probably be OK with mixing cups because half the fun is popping out the remainder of the resin after it cures and reusing the container. I have some really cool looking artwork in my garage complete with paint brushes standing on its bristles encased in resin.
 

TriadSteeler

Petty Officer 1st Class
Joined
Oct 26, 2006
Messages
237
Re: Ebbtide Tri-Hull Restoration

Finally back on the job. Before my project hibernated for the last 7 months, I did put the top back on and did a few little jobs.

About a month ago I cleaned up the garage and got back to work.

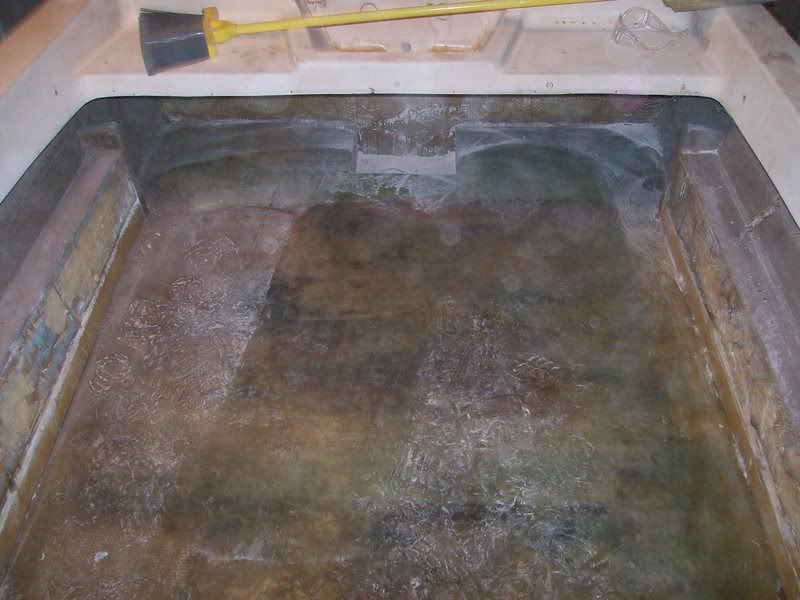
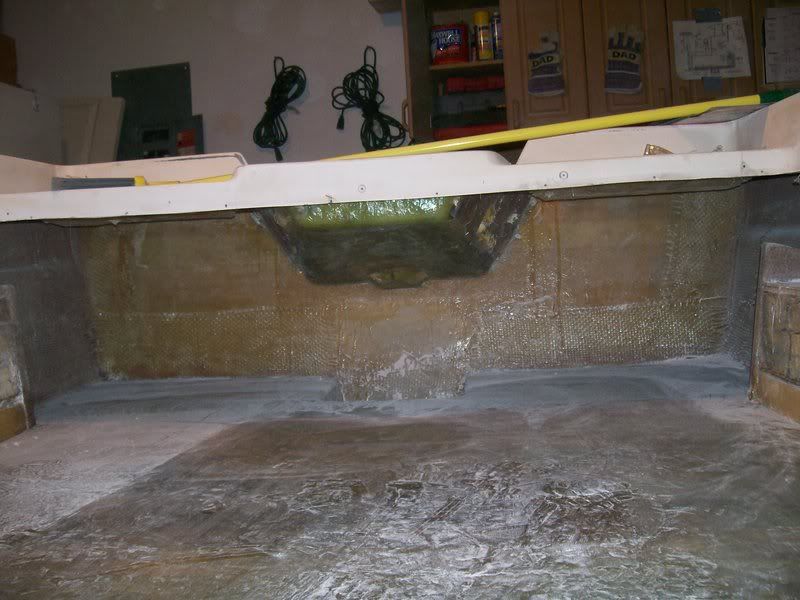
I spent a few weeks restoring the trailer (New winch post, rollers, paint job) and am now getting ready to paint the topside. I have completed the glassing in of the deck and have added two topcoats of premium resin to sand smooth.

I also experimented with that stone textured spraypaint for painting the inside of the hull. I kinda like the way it turned out. It cleaned up some of those rarely seen areas and the texture hides any imperfections.

I have seen the error of my ways and will not be reinstalling the carpet (TD will be most relieved). I'm going to paint the deck with non-skid and be done with it.

I have also coated the new bow section parts with topcoat, filled holes with marine-tex and bondo and am getting ready to sand the top down and paint.

Here are a few shots:

Bow Section
101_0627.jpg


Deck With Topcoat
101_0630.jpg


101_0629.jpg


Finished Transom and Bilge Area
101_0637.jpg
 

TriadSteeler

Petty Officer 1st Class
Joined
Oct 26, 2006
Messages
237
Re: Ebbtide Tri-Hull Restoration

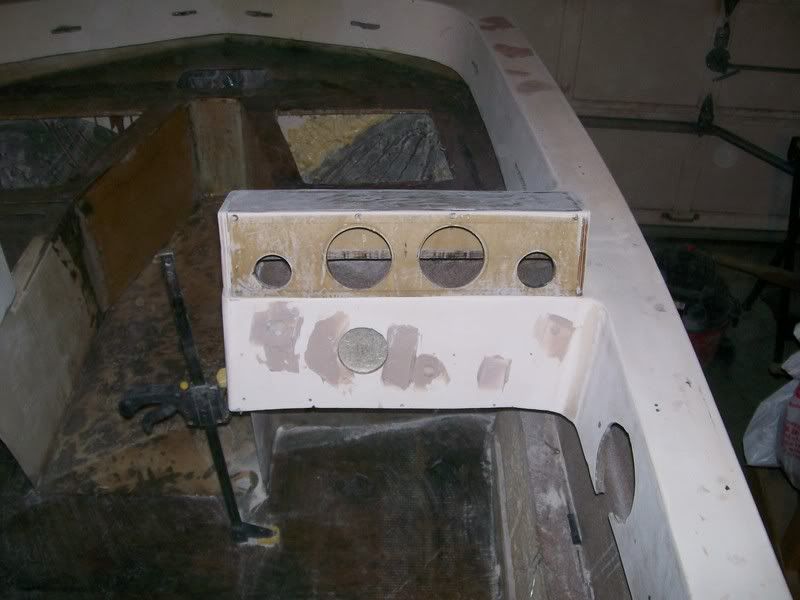
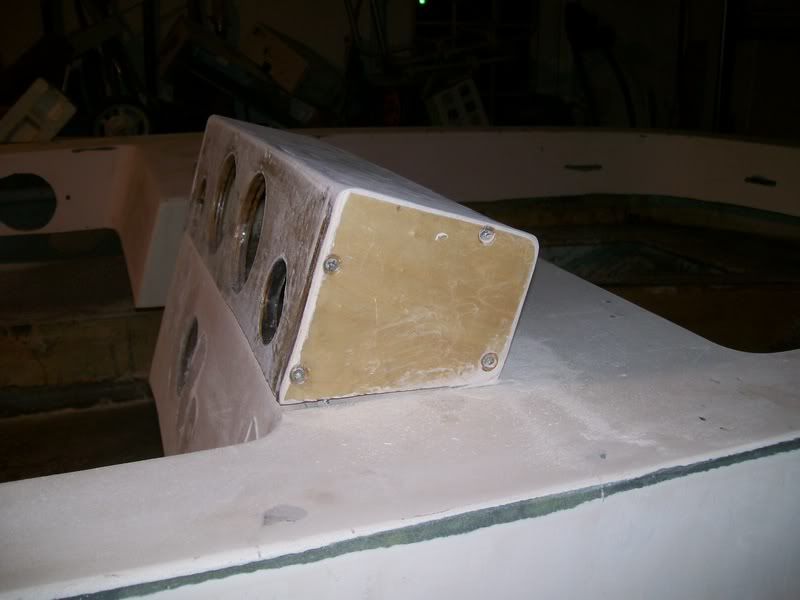
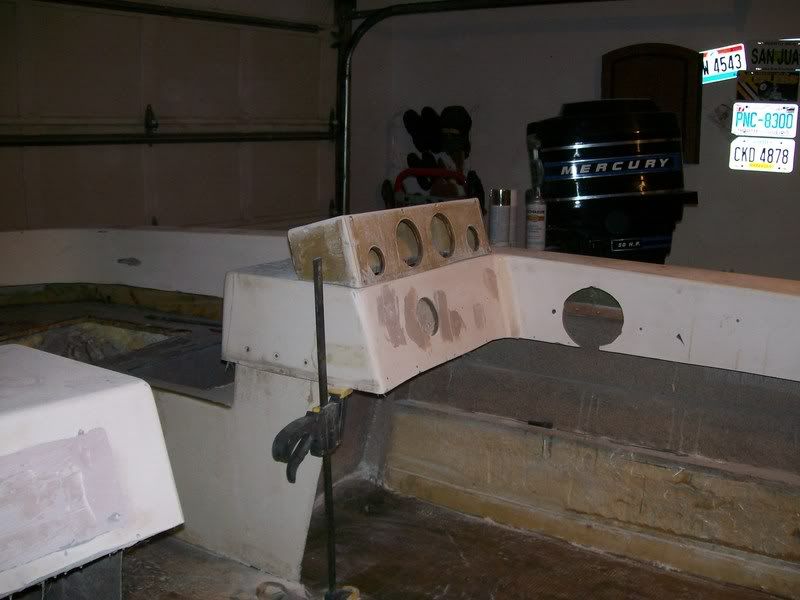
I have also begun a modification to the dash to accomodate some additional gauges. I will be glassing this over and fairing it into the existing console.
101_0632.jpg


101_0633.jpg


101_0638.jpg
 

Scuda11

Chief Petty Officer
Joined
Jun 16, 2004
Messages
434
Re: Ebbtide Tri-Hull Restoration

wow, you have done a ton of work, and it looks great! I did a top deck re-do last year so I have an appreciation for what you are going through. The scope was no where near yours but gave me an appreciation. I am going to repaint my outboard this year (Johnson 130) and wondered where you got your decals?
 

tmcalavy

Rear Admiral
Joined
Aug 29, 2001
Messages
4,005
Re: Ebbtide Tri-Hull Restoration

Looking good Triad...keep posting pix, want to see how she turns out. Still kinda miss my 73 Lakemaster and Merc 500.
 

TriadSteeler

Petty Officer 1st Class
Joined
Oct 26, 2006
Messages
237
Re: Ebbtide Tri-Hull Restoration

wow, you have done a ton of work, and it looks great! I did a top deck re-do last year so I have an appreciation for what you are going through. The scope was no where near yours but gave me an appreciation. I am going to repaint my outboard this year (Johnson 130) and wondered where you got your decals?

I got those decals from one of the do it yourself pick a size, font, websites. I compared fonts for days to get one close. The only difference is that on the original the word "MERCURY" is a lowercase "m" that is the same height as the other letters. No biggie.

I measured the height and overall width of each word on the old decals, entered my info and they made it to order. I ordered the word Thunderbolt in a lightning font for something a little different and unique.

Spent about $80.00 for all of the lettering (2 Mercury, 2 50 H.P., 2 500, and Thunderbolt Ignition)

The blue bands are just spray paint and the silver metallic strips were cut from a roll of silver metallic piping bought at AutoZone.

We'll see how it all holds up when I get it in the water.
 

TriadSteeler

Petty Officer 1st Class
Joined
Oct 26, 2006
Messages
237
Re: Ebbtide Tri-Hull Restoration

tmcalavy,

I figured you would check in. You know when I get this thing done I'm going to use that deep sense of loss you feel for your lakemaster against you and sell this one to you at an outrageous price. :D
 

tmcalavy

Rear Admiral
Joined
Aug 29, 2001
Messages
4,005
Re: Ebbtide Tri-Hull Restoration

Might work...if you get a chance check out my latest project, look for the Texas Maid posts in this forum. She's a real keeper.
 

TriadSteeler

Petty Officer 1st Class
Joined
Oct 26, 2006
Messages
237
Re: Ebbtide Tri-Hull Restoration

I'm in a little bit of a rut.

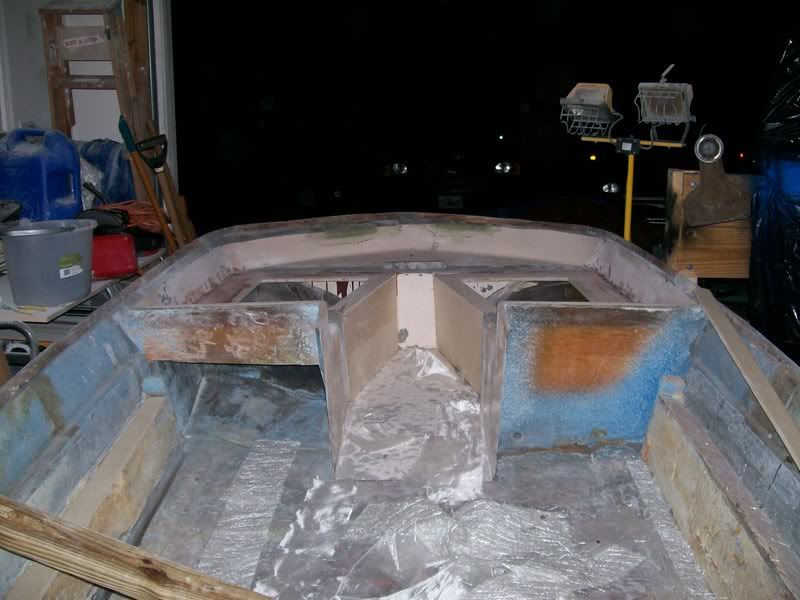
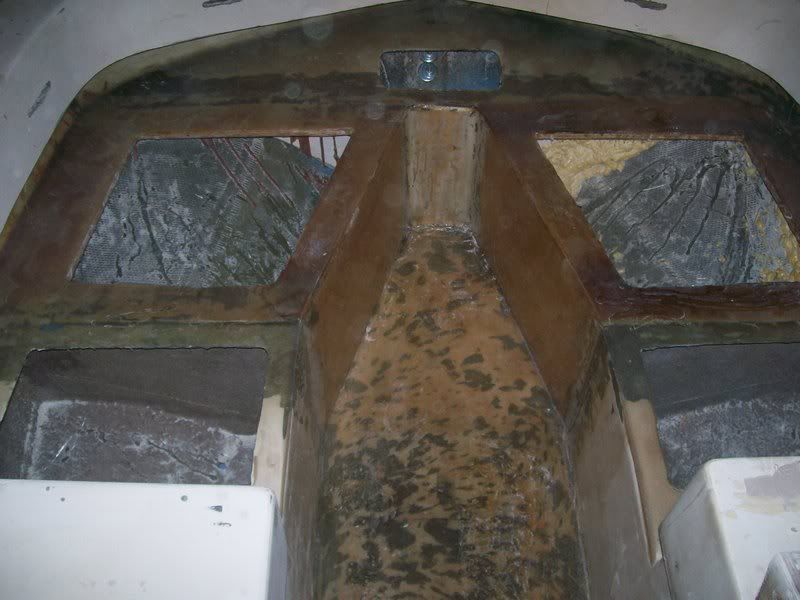
I'm having some issues fairing out the bow section additions. The top is fine, but the verticals that extend to the floor are giving me fits.

I have added 3 coats of surfacing resin to them, but it seems to be way too thin to sand it to a smooth finish because of the mat layup and grinder score marks.

Would adding a few layers of gelcoat or some other fairing compound be a better option here?

101_0627.jpg
 

jcsercsa

Captain
Joined
May 21, 2007
Messages
3,401
Re: Ebbtide Tri-Hull Restoration

Great Job !!!! thanks .. I was wondering what to do when i get to my motor !!! like the pin stripe for the silver !!! I got a merc 1000 1962 , so that will help alot !!! great tread ... keep the pic comming!!!! John

ps I not to sure what you should do ?? mybe ondarvr will stop by , hes the man with the know how !!! John
 

reelfishin

Captain
Joined
Mar 19, 2007
Messages
3,047
Re: Ebbtide Tri-Hull Restoration

You could try adding some resin thickener to the resin, it will allow you to add more to the vertical surfaces. Evercoat 615 is what they sell locally here.

I suppose Cabosil or something similar would work too.

It sounds more like you may need a filler not more resin?
I used a light body filler to smooth out a few spots on my one boat that where I wanted a smooth surface to match the rest of the glass work. Body filler is far easier to sand than gel coat. Being that it's not an exterior area, I see no problem in using regular automotive type filler.
Theres also a filler/primer called Micro Balloons that can help fill minor imperfections and it can be sanded easily. I think they sell it here at iBoats as well.
 
Top