Chaparral 2000 SL Sport floor, and more?? [SPLASHED Sept 2017]

Baylinerchuck

Commander
Joined
Jul 29, 2016
Messages
2,726
I can't believe you had to order those parts! I live in PA as well and can find brass plugs at ACE hardware, lowes, homedepot, etc... not sure whats going on in Chambersburg, lol...

Those usual suspects had plenty of brass IPS or straight thread plugs. Brass NPT is a bit harder to find which is a tapered thread. All I know is 1/4" NPT brass plugs were not on the shelf in my area. APR is a very sizable plumbing supply company in York, Adams, and Franklin Co. They carry very little brass NPT due to fines that could be imposed on them if someone uses it in a domestic water system. My brother in law is a plumber, and he says he has trouble finding brass NPT at times. Like I said, IPS was everywhere, just not what I needed. I dunno.
 

AShipShow

Lieutenant Commander
Joined
Jul 8, 2016
Messages
1,792
That's so weird... one of my other hobbies is snowmaking... Yea, you read that right lol... and I've probably bought one of every brass fitting in the county and all npt... maybe something happened in the last 6 months that I didn't know about...
 

ripazka

Petty Officer 1st Class
Joined
Jul 30, 2016
Messages
246
Hey guys. You should come to here and try to find stuff :D we use metric threads so its nice to own imperialistic system boat = everytime I miss a nut or a bolt I really have to think where to get one. Especially on boats because zinked carbon steel isnt gonna do the thing. But it keeps local shops busy ordering stuff for me, hah!
 

Baylinerchuck

Commander
Joined
Jul 29, 2016
Messages
2,726
Why plumbers putty to fill the transom Hole? Why not marine silicone?

Well, since you asked, plumbers putty is used to seal sink fittings, (drain basket), into the basins, among other things. It never gets hard, and stays completely water proof for as long as you need it to. It's easy to remove if I decide I need to install another transducer or change my pitot tube. Since my devices pass through the hull above the water line, plumbers putty is a sound choice. Silly con is much more messy, and is hard to make stay put in this application when wet. A gigantic blob could take quite some time to fully cure.
 

Baylinerchuck

Commander
Joined
Jul 29, 2016
Messages
2,726
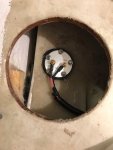
Few more items checked off the list. I finished running the fuel gauge wiring into the existing wire loom all the way to the helm. I connected the wiring at the sending unit using solder to tin the wire, ring terminals, liquid tape and heat shrink.
IMG_0198.JPG


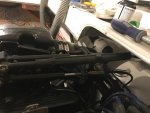
Installed my shift cable and adjusted everything to Mercruiser specs.
IMG_0199.JPG


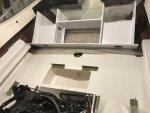
Pushed my bench forward and put two coats of gelcoat where the bench will be mounted.
IMG_0200.JPG


We'll see if this motor wants to wake up from its slumber this weekend.....
 
Last edited:

JASinIL2006

Vice Admiral
Joined
Feb 10, 2012
Messages
5,673
Well, since you asked, plumbers putty is used to seal sink fittings, (drain basket), into the basins, among other things. It never gets hard, and stays completely water proof for as long as you need it to. It's easy to remove if I decide I need to install another transducer or change my pitot tube. Since my devices pass through the hull above the water line, plumbers putty is a sound choice. Silly con is much more messy, and is hard to make stay put in this application when wet. A gigantic blob could take quite some time to fully cure.

Personally, I'm not sure I'd trust plumbers putty as it gets way too soft when warmed (as on a hot day in the sunlight). I would much rather use 3M 4200 or similar.
 

kcassells

Fleet Admiral
Joined
Oct 16, 2012
Messages
8,715
Well plumbers putty is great when compressed between two surfaces. Like a flat washer and nut, a kitchen sink basket strainer etc. When exposed to air it will dry out and crack eventually. Movements like a boat has will also compromise the putty. Pick it out and go with a good silicone. Some of those putties have an oil base the can wick into the paint and stain. :joyous::joyous: It will work for a leetle while.
Looking real nice!
 

Baylinerchuck

Commander
Joined
Jul 29, 2016
Messages
2,726
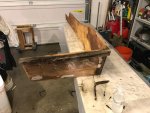
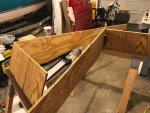
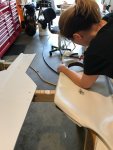
Added another layer of gelcoat with wax tonight. I'll move the bench into its final resting place tomorrow. I started working on my bolster pads tonight. The goal is to replace all the rotten plywood.
image_270400.jpg

image_270402.jpg
 

Attachments

  • image_270401.jpg
    image_270401.jpg
    138.5 KB · Views: 4
  • image_270403.jpg
    image_270403.jpg
    129.1 KB · Views: 4
Last edited:

Baylinerchuck

Commander
Joined
Jul 29, 2016
Messages
2,726
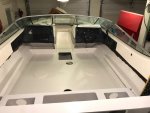
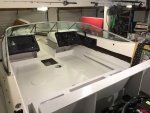
Bench installed with stainless hardware. Installed the fuel filter/separator. The Mercruiser sure looks nice against all that white.
IMG_0205.JPG

Final coat of gelcoat with surfacing wax on the deck. Funny how a few gnats wanted to be fossils. Oh well, this area is getting covered in carpet.
IMG_0209.JPGIMG_0208.JPG
 

Attachments

  • IMG_0207.JPG
    IMG_0207.JPG
    79.4 KB · Views: 6
  • IMG_0206.JPG
    IMG_0206.JPG
    80.2 KB · Views: 8
Last edited:

chevymaher

Commander
Joined
Mar 29, 2017
Messages
2,921
Paint bugs my brother and I call them. Never see them till there is something to get stuck in. It attracts them.
 

Baylinerchuck

Commander
Joined
Jul 29, 2016
Messages
2,726
No Title

Got a lot of prep work done today for the vinyl pads. Old timer sealer, and white paint to seal them. The bow cushion was completely shot.

Got one of the bolster pads 100% complete. Sure is nice to see color in this boat again. Also installed a conduit for wiring.
 

Attachments

  • photo269271.jpg
    photo269271.jpg
    152.2 KB · Views: 7
  • photo269272.jpg
    photo269272.jpg
    149.7 KB · Views: 7

Baylinerchuck

Commander
Joined
Jul 29, 2016
Messages
2,726
No Title

More interior work. The Admiral was all too happy to begin using her throne.....
 

Attachments

  • photo269381.jpg
    photo269381.jpg
    140.4 KB · Views: 15

Baylinerchuck

Commander
Joined
Jul 29, 2016
Messages
2,726
No Title

Lots of interior work completed today.

Glued down a little carpet for the side pocket, as well as where the sun deck pads rest. Pulled all the wiring for the stereo and LED lighting. I had to get this done before installing the lower pads.

Reattached the vinyl to the lower pads the cleaned all the vinyl with Starbrite mold and stain remover. I wrestled those into position. Also secured the seat back pads to the bench.

I simplified the battery connections as the PO had multiple ring connectors for various accessories attached to the studs. I cut all the wiring and crimped the accessories to one connector, properly fused of course.

I also installed hinges on the sun deck pads. The PO took the piano hinge off and had the pads laying on a 2x2. I hinged all three pads separately.

I was really happy with the progress.
 

Attachments

  • photo269474.jpg
    photo269474.jpg
    139.3 KB · Views: 13
  • photo269475.jpg
    photo269475.jpg
    153 KB · Views: 12
  • photo269476.jpg
    photo269476.jpg
    147.7 KB · Views: 12
  • photo269477.jpg
    photo269477.jpg
    157.6 KB · Views: 12
  • photo269478.jpg
    photo269478.jpg
    157.7 KB · Views: 13
  • photo269479.jpg
    photo269479.jpg
    141.3 KB · Views: 12

Baylinerchuck

Commander
Joined
Jul 29, 2016
Messages
2,726
No Title

got to be soon right? Put her in the water.

Very, very soon.

Installed the battery box tonight. Bedded four 1/2" thick UHMW blocks in 5200 to lift the box off the floor. Screwed through the blocks into the deck to secure the box. Installed the battery and connected it.

A buddy of mine gave me some LED pickup truck bed lights. I installed those under the sun deck and wired them to a switch. The storage areas on either side of the motor are now lit. I also lit the motor compartment. While I was at it, I wired my LED strips to the court light circuit. These strips are controlled with a remote and can be changed to any color I choose.
 

Attachments

  • photo269655.jpg
    photo269655.jpg
    142.9 KB · Views: 10
  • photo269656.jpg
    photo269656.jpg
    131.8 KB · Views: 10
Top