Building a '93 Caravelle 1750 Classic Bowrider

Reserector_

Chief Petty Officer" & 2021 Splash of the Year Win
Joined
Oct 15, 2019
Messages
609
I've always gone for the ridiculous projects because they can be the most rewarding when done. This boat will be no exception.
The PO disassembled it and removed the rotten floor and stringers. It sat for five years and several small items were robbed off of it during that time. I ended up with it because I needed a small trailer for another project boat. I was told I could have it as long as I took the boat that was on it.
The trailer was too big for my needs, and the boat was junk at that point. Long story short, I hauled it off to help a friend who was going through a divorce. I later went back and got the garage-kept OMC/Mercruiser engine collaboration, the windshields, rub rail, bow rails, and a few odds and ends. In hindsight, I think all of the interior parts were in the garage, but I had no idea what I was looking at, so I left all that behind.
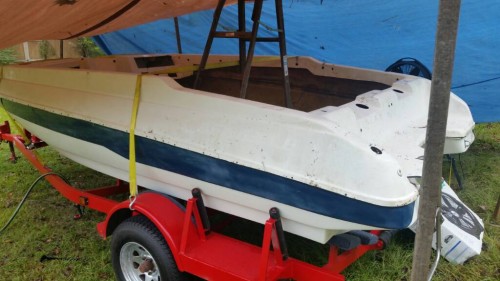
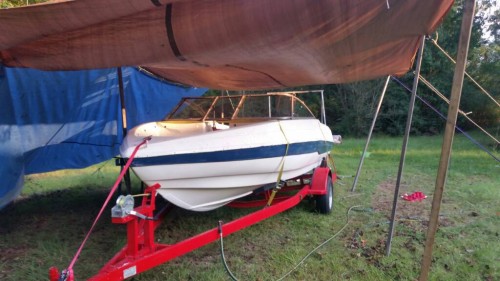
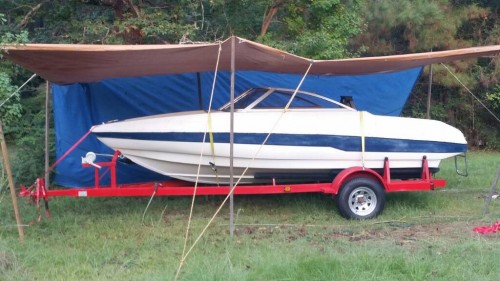
Here is how it looked when I towed it home. That is the cap on top, inverted and set into the hull. Loose junk piled in.
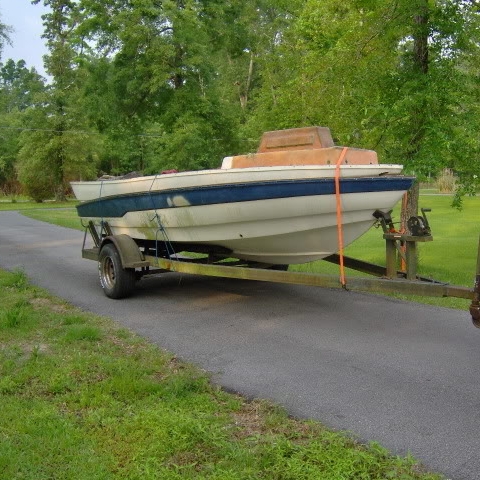


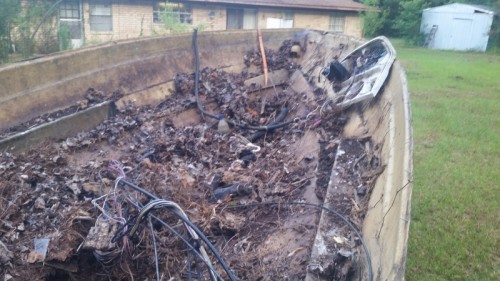
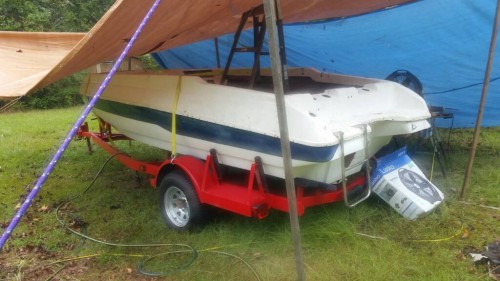
I just pulled it around back and parked it...for another ten years. Untill it looked like this with a hedge growing out of it. It was at this point that I decided I wanted to restore it.


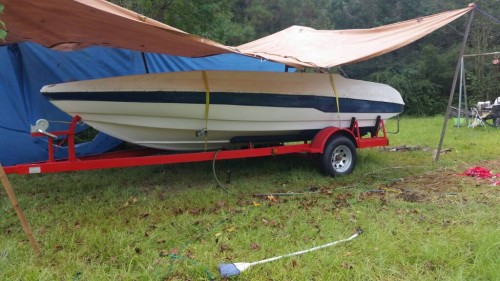
I hauled it out into the light, cleaned it out, and took inventory of what was left.
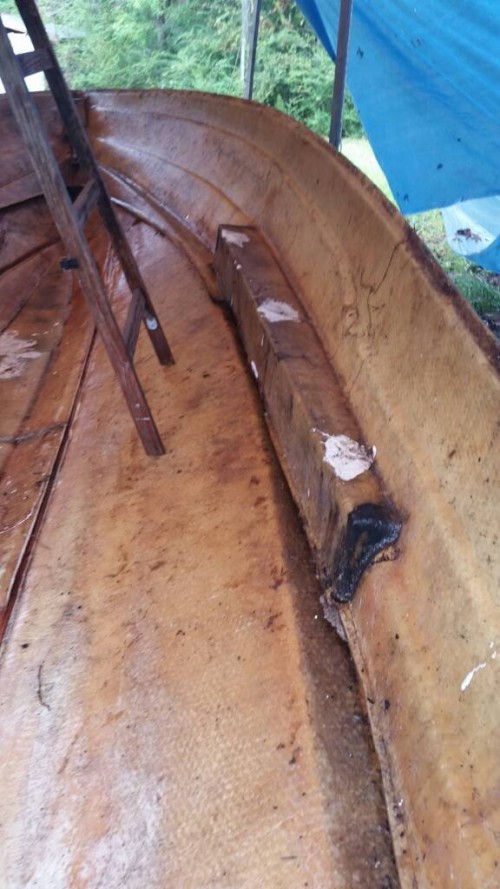
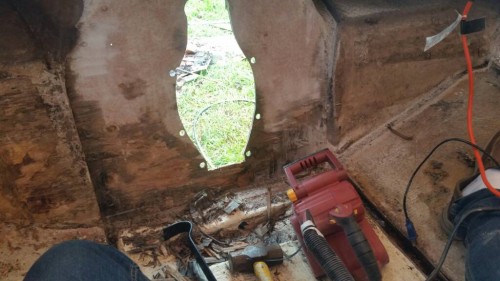
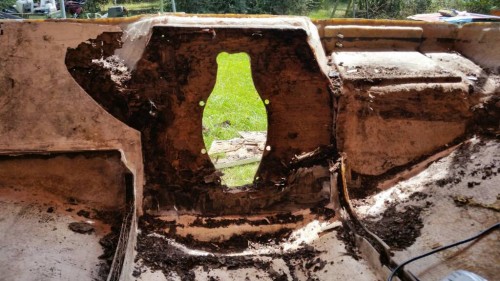
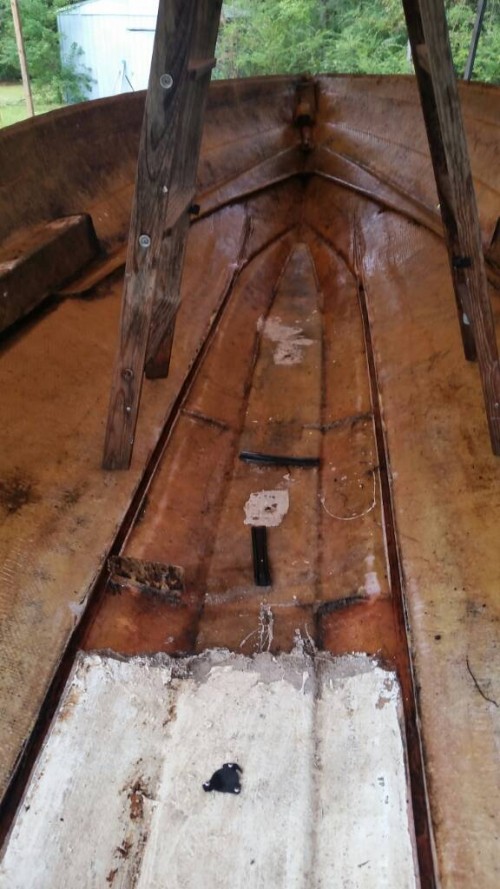
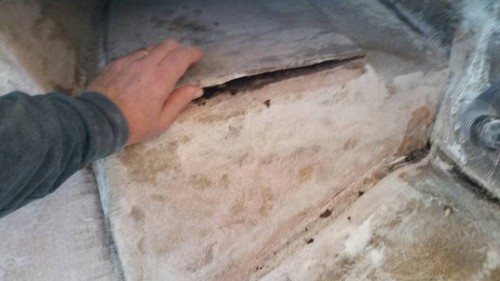
The hull and cap were in usable condition, but with some small damaged spots that would need repair. But mainly, any wooden reinforcements that were not fully encapsulated in in fiberglass were gone. Termite food. Transom included. If there was a hole for a thing, and the thing had been removed, the wood is gone. Only a handful of reinforcements remain. All of the others will need to be replaced, unless I deem them unnecessary.

Some pics of the boat at the start of the project:


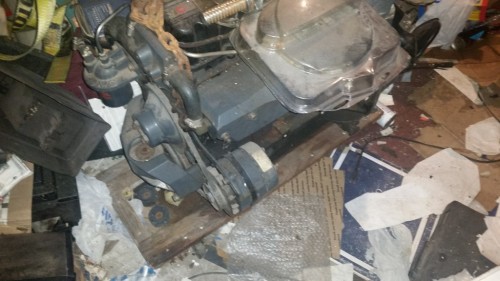
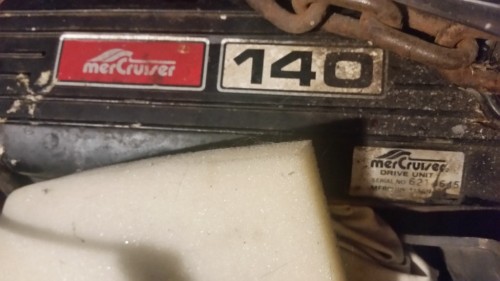
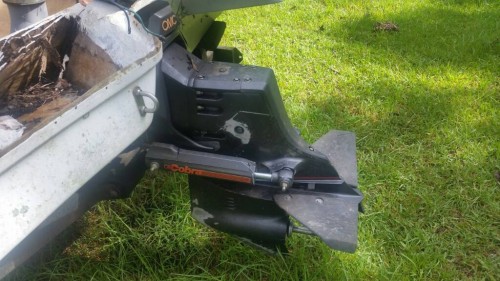
The seats are rebuildable. I only have the upper seat mounts, not the pedestals. The tank is brittle, so that will not be going back in. I have a frame for a ski locker. Steering was frozen. Tilt motor was frozen. Controls are stiff. Gauges are toast. The 1982 Mercruiser 4 cyl was a replacement for the original OMC. I'm told it has less than 100 hours on it. Teh outdrive seems servicable. Still full of clean gear oil, but now that I have rotated the shafts by hand, the oil is drooling out. Needs a full overhaul.


Pics of some of the parts that I pulled out and sat on a different old boat for the time being.


Stay tuned. More to come.
 

Reserector_

Chief Petty Officer" & 2021 Splash of the Year Win
Joined
Oct 15, 2019
Messages
609
If anyone has one of these boats, I have some very specific questions that I have not been able to figure out by searching online. Please let me know if you do.
I'd also be interested in any parts boats listings.
 

Reserector_

Chief Petty Officer" & 2021 Splash of the Year Win
Joined
Oct 15, 2019
Messages
609
I predict I'll be done with this in less than a year for under 5K. I do all of my own work. I'm 56 years old, and have spent a lifetime with hands-on, all-in projects of all kinds. I'm keeping track of the costs, including parts, materials, and consumables.
The project is pretty far along, actually. I just need time to post up more story and photos to get you guys caught up to the current state.
It's going to be quite a transformation. I hope you find it entertaining at least.
 

Reserector_

Chief Petty Officer" & 2021 Splash of the Year Win
Joined
Oct 15, 2019
Messages
609
Got three new galvanized wheels with Kenda tires. I think the boat looks way better just by having nice looking rims. It's less depressing to look at.
The spare will need a mount fabbed up.


I replaced the tilt motor. That all works now. The solenoid and breaker are shot, but easy to replace with common parts. I'm just thrilled that it will move up and down under its own power.


The project is lumbering along. (Pun intended)
I finally found 3/4 marine plywood at Phillips Building Supply in Laurel.
It looks like good quality. Not high-end, but very good. Price was right, too. $89 per 4x 8.


I removed the outdrive. I noticed a little gear oil leaking from the water inlet. I can only figure that the seals started leaking merely from me rotating the input by hand.
This thing definitely needs an overhaul.


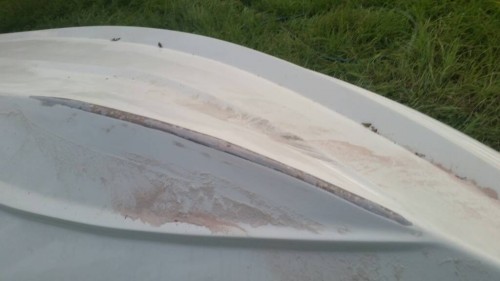
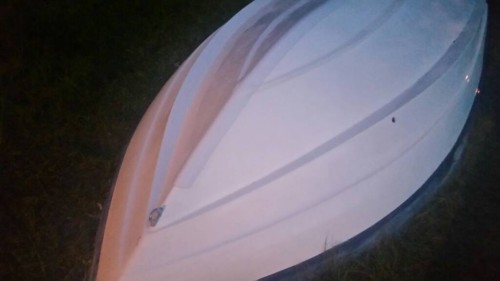
The boys helped me capsize the bare hull so I can get the bottom in shape. It needs some ramp rash repaired, and a keel guard added.
It also has a little ramp rash, and needs an overall buff.


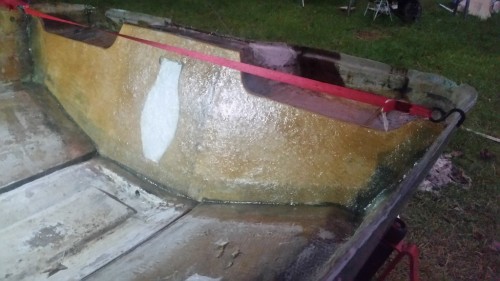
The place on the transom that looks like a lightning hit is actually termite trails. It all cleaned off with some effort.

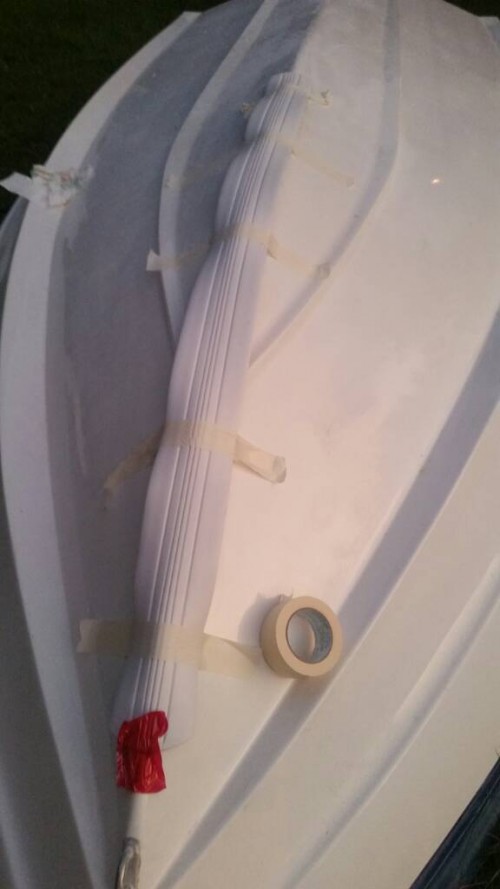
Repaired the ramp rash with long strand filler, and then prepped it for a Keel Guard. I skipped the gel coat step since it will never be seen.


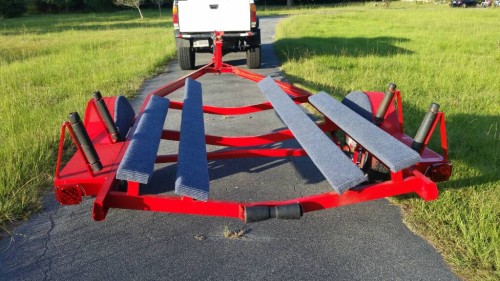
The trailer is in great shape for its age. It got paint, a fresh winch, ja bunk carpet, and lights.


Attachments

  • photo322161.jpg
    photo322161.jpg
    91.4 KB · Views: 4
  • photo322162.jpg
    photo322162.jpg
    107.9 KB · Views: 4
  • photo322163.jpg
    photo322163.jpg
    49.3 KB · Views: 4

matt167

Rear Admiral
Joined
Sep 27, 2012
Messages
4,159
just junk it .. without the support, the fiberglass relaxes and takes a different shape. that's why they are restored on cradles. After 10 years, the cap will be a different shape than the hull and probably won't ever go back right

However, you have a Mercruiser alpha Gen 2. a very nice drive. Would fit into another rotted boat well, that you can take apart and restore yourself.. Edit, you have an older Mercruiser MR and a junk OMC.. Decent, but not great unless you know it's good
 

Woodonglass

Supreme Mariner
Joined
Dec 29, 2009
Messages
25,927
With the use of nylon strap clamps you can form the hull back to shape to fit the cap but do it NOW before you install stringer or Transom once it fits, use 1x4's screwed across the beam to keep it in shape until ALL structural wood is glassed in. IMHO this is very doable. Is the Motor a runner? If so Rebuild the outdrive, get the motor running and do compression checks and replace all gaskets. Your 5K estimate and time estimate seem a bit LIGHT but IF you work 6-8 hours a day EVERYDAY for that year, you'll probably make it. It's funny how LIFE always seems to change I BEST PLANS!!
 

Reserector_

Chief Petty Officer" & 2021 Splash of the Year Win
Joined
Oct 15, 2019
Messages
609
Thanks. Just the encouragement I was hoping for.

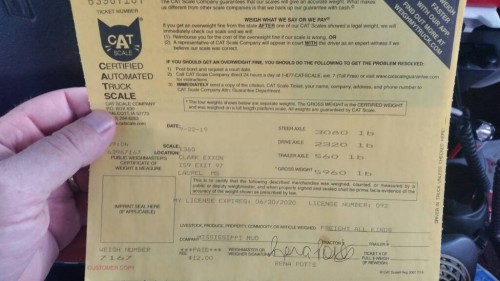
While the trailer was empty, I weighed it. When the boat is finished, I will weigh it again, and subtract the trailer weight.

f7c93172a64e7abee37995f48636cdb9.md.jpg


With the bottom in good shape, we got it back onto the freshly recarpeted bunks.


05ecb983e0483f5abb55918b01eff4f6.md.jpg
​​​​​

I got the rest of the wood structure out, along with the fiberglass tabbing that held it in place. Only exception was the outer edge where the floor was, and those mystery bolsters along the sides. I think they are nothing more than flotation boxes.


3ae94ee04e51318ebad449788eb300e8.md.jpg

e366b47d8db0c56e15fb80f7e55425c4.md.jpg

e0ff675ae3bfd62ebd1a6a64fe9ce5e7.md.jpg

d190c97868afa16d4a4778aeaeecb694.md.jpg


I took advantage of some visitors by having having them help my son and
I test fit the cap. Let me tell you; that was a struggle. The hull has relaxed a lot in the past 15 years. Having the deck inverted and wedged in the hull only made things worse.

But now I can mock-up, measure and mark where things need to go.

d50859e29d5fe91c22b35daf855bfff7.md.jpg

c0da9bd4bdfaaea1ddcffbed6b83b4d0.md.jpg

8d9f8d77c028a687a61832bccb906d1b.md.jpg


I couldn't resist putting the windshields on, and I'm glad I did. I thought I was being childish, but when I tried to close the center section, it missed by about 1 1/2". The hull and deck were still spread too wide!


​​​​​
I used a ratchet strap to draw the cap together. I'm pretty sure I need to do the same elsewhere before I put the floor in.

e0e30a4847d02d072e49191db0611405.md.jpg

c539752d6a531e7cc85fdedbcd8b2a72.md.jpg


The cap would be in the way, so I had to find another way to hold the shape.
 
Last edited:

Reserector_

Chief Petty Officer" & 2021 Splash of the Year Win
Joined
Oct 15, 2019
Messages
609
I added straps across the beam to draw the hull into shape and hold it there while I remove the cap again.

I went back to rebuilding the transom. I'll get more pics up as I get time.
 

Scott Danforth

Grumpy Vintage Moderator still playing with boats
Staff member
Joined
Jul 23, 2011
Messages
49,766
I predict I'll be done with this in less than a year for under 5K. I do all of my own work. I'm 56 years old, and have spent a lifetime with hands-on, all-in projects of all kinds. I'm keeping track of the costs, including parts, materials, and consumables.
The project is pretty far along, actually. I just need time to post up more story and photos to get you guys caught up to the current state.
It's going to be quite a transformation. I hope you find it entertaining at least.

a full restoration for $5k and less than a year is very ambitious. you must not have a significant other, or maybe they will be helping. if you spent 36 hours every weekend and about 5 hours ever night during the week days maybe you could get it done in a year.

The hull alone will cost you about $2-3k in PPE, consumables and materials. if you have to ship the materials in, keep in mind the EPA fee.
the interior will be between $2k and $3k
the drive rebuild will be $500 at a minimum, assuming that the drive isnt toast
then there is the motor, wiring, gauges, etc etc etc
toss in a bunch of the parts that have been missing or lost and you will be closer to the $8 -10k range in a boat that is only worth $3k

long prior to building the floor, you have to finish the removal of the old tabing, etc. you will also need to make a cradle to hold the shape.

if you need another one for parts, here you go https://www.laniermarine.com/Pre-Ow...ravelle-Boat-1750-Dawsonville-Georgia-3556619
 

Chris51280

Ensign
Joined
Jan 24, 2018
Messages
932
Do you have a garage to work in? Don't need the marine plywood. ACX is ok to use and half the price. Temps are dropping and to glass you need at least 60F
 

Chris51280

Ensign
Joined
Jan 24, 2018
Messages
932
your case may be a bit extreme with the work needed, or maybe thats just the it looks like. At least the demo was started, that saved you some time and sweat.
If we would get the money back what we put in, more people would do it. Unfortunately, boats are a luxury hobby where the return is the pleasure of boating, not the value added.
I always look at it this way, that no matter the hobby, they all cost money and things loose value over time. Model airplanes, computers, motorcycles, cars.....
Unless you have a hobby where you don't count hours and sell for a profit which I have yet to discover.
 

Reserector_

Chief Petty Officer" & 2021 Splash of the Year Win
Joined
Oct 15, 2019
Messages
609
Like I said, just the encouragement that I need.
Good find on that used boat. I appreciate you searching, and I appreciate everyone's desire to help. I like that about this site.
I actually found that ad while researching, but I doubted that they still have it since the photos were taken 12 years ago. I may give them a call, though.

From what I have seen in videos such as the tri hull that jmink posted on YouTube, I should probably have some sort of cap supports just below where the windshields attach, but there are no indications of this on the inner hull or the underside of the cap. Hard to get a photo of stuff like that on the interweb.
 

Scott Danforth

Grumpy Vintage Moderator still playing with boats
Staff member
Joined
Jul 23, 2011
Messages
49,766
encouragement is one thing, we have that all day long.

Not saying this project cant be done, just indicating that the time and $ budget may need to be doubled.

Im coming up on the end of 4 years in January since our boat has been in the water, and that was a simple re-power and color change on the hull. I estimated I have 4000 hours in the project so far as well as a few hospital visits and i quit counting the receipts after the motor. Then again, I have done 95% of the work myself and nearly everything on the motor, exhaust, bilge vents, wiring, etc is all custom. (its the hot-rodder in me)

life gets in the way of life

if you love projects, you have one cut out for you. the amount of demo done was about 8 hours of work into your 2000 + hour project.

since this is a complete bow to stern restoration, I would abandon the 3.0/drive you have and get a running 1996 or newer 4.3 and drive and simply bolt it in. you should be able to source for much less than rebuilding what you have.
 

Reserector_

Chief Petty Officer" & 2021 Splash of the Year Win
Joined
Oct 15, 2019
Messages
609
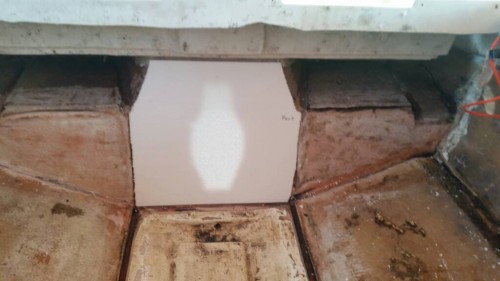
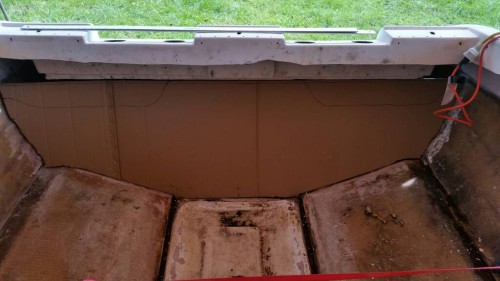
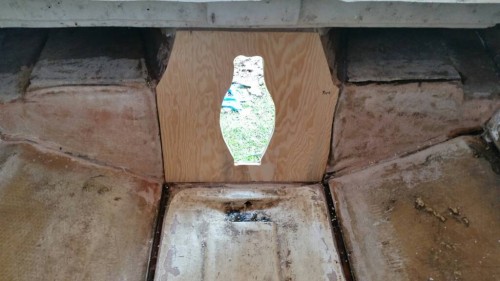
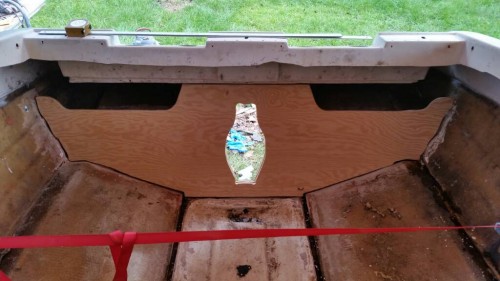
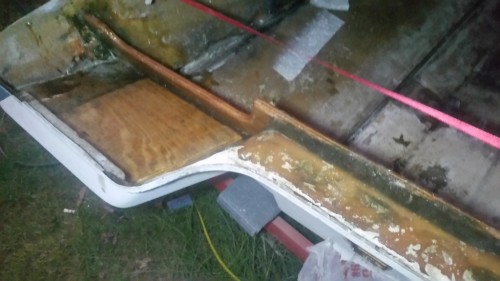
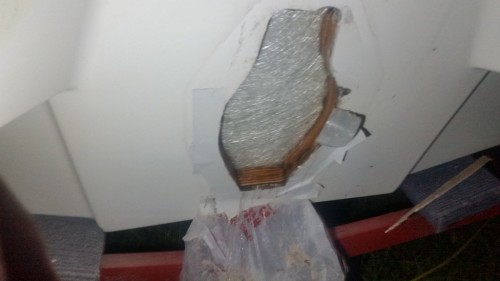
More pics of the progression. I decided that I needed to cut out more rotten wood hiding behind the transom, up on top, and move forward with the transom before figuring out the stringers and cutting out the rest of the old tabbing.

0c3229131f0850d1bb7d8af3aa20aa70a2650322a1850aba.md.jpg


The plywood layup is a bit backwards in that the small middle part is aft of the main plate. My plywood was almost 1/8" thinner than the inset left behind by the factory wood.

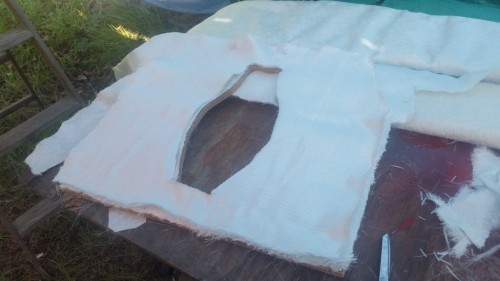
I made templates and cut out the plywood parts. When it came time to glass them in, I ended up cutting three layers of 1708 and one layer of csm, test clamping it all in place as I went. Once I got the correct dry thickness that made it level with the next surface, I was ready for resin.

ee798a37730d23d26dcd61571c2438deac2963328351ee00.md.jpg


41bdd75e99d2645d011adb7bec4f7b58432e0eb12d1f2f5e.md.jpg


d9f0a36ba073c98e9d6c96b9734c49d8d29cb47c8382902c.md.jpg


I wetted out the wood, and layed up each piece, working the air out with a hard roller. The final layer was the csm which I wetted out more liberally. I wetted the hole that it set into and clamped it in place. Got a mice squish, clamping from the hole outward. I let that set up, did a little filling around the edges where I still had gaps, and prepared the main plate.

20191020_140233.md.jpg


Lucky for me, the main plate has a slight bow that left it high in the middle. I say lucky, because that ultimately applied its own pressure on the outer legs before I even clamped them. The main plate got two layers of csm and a liberal wetting. I clamped it from the bottom up, and middle out to work the air out.


4e6372af7bdf13c5b208903d0bef935d3b2cc28974ed6d82.md.jpg


No pictures of the glassing operations, or afterward because I was working alone and racing daylight.
All of the layup was done with the cap off and one more strap across the aft of the hull.
 
Last edited:

Reserector_

Chief Petty Officer" & 2021 Splash of the Year Win
Joined
Oct 15, 2019
Messages
609
Do you have a garage to work in? Don't need the marine plywood. ACX is ok to use and half the price. Temps are dropping and to glass you need at least 60F

I don't have a shop to work in, however, I live in Laurel Mississippi which stays above 60 degrees most afternoons well into winter.

I've heard that ACX is good enough, but the ACX around here was warped up junk. The marine grade that I bought, at least to me, was like high-quality ACX. It's not real high quality and not real expensive, but it was the best solution I could find in my area. To order stuff and have it delivered would have been exorbitant. This stuff actually stays flat enough that I can make stringers out of it that won't be curved.
 

archbuilder

Vice Admiral
Joined
Sep 12, 2009
Messages
5,697
Looking forward to following your progress, looks like you are heading in the right direction! I will also comment on I think you budget is low, but if you can make it happen for that good for you!
 

Reserector_

Chief Petty Officer" & 2021 Splash of the Year Win
Joined
Oct 15, 2019
Messages
609
Rain on Saturday cut my boat time down to Sunday, after church. But the weather cooperated, and I was able to replace the plywood behind the transom, get everything tabbed in, and covered in csm. Tabbing was csm followed by 1708.
The layup I did was about double what the factory did. But in all fairness, the boat did not fall because the minimal fiberglass on the wood made it weak. It failed because water got to the wood.

Two gallons of resin so far.
​​​​​​​
20191027_18232670634ec1e938f748.md.jpg

20191027_182454.md.jpg

20191027_182507.md.jpg
 
Top