Building a '93 Caravelle 1750 Classic Bowrider

chevymaher

Commander
Joined
Mar 29, 2017
Messages
2,915
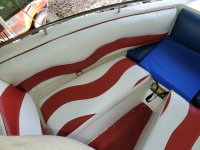
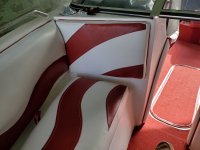
Yes the wrinkle will smooth out and yes the original was the same. Look for boats like yours online. Like you said they were all like that.

I went through it. Now I just see beautiful I am going boating yippee.

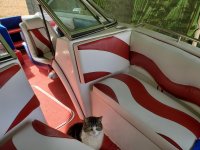
Come by my house i will show you some wrinkles and stitches I don't like. The screw shows between the 2 pads in the bow. Then we can go on the river and fish and worry about the nasty sludge on the boat.

Mostly after a few times on the river. You will look and smile ear to ear. It is time and she is beautiful.
 

Reserector_

Chief Petty Officer" & 2021 Splash of the Year Win
Joined
Oct 15, 2019
Messages
592
Thanks for the reassurance. She is beautiful. You guys are the only ones I would mention boo-boos to. We all learn from each others errors as well as accomplishments.
Besides, compared to the riff-raff, rag tag boats in my area, this baby will be stunning. It's pretty much "Redneck Yacht Club" around here.
 

Reserector_

Chief Petty Officer" & 2021 Splash of the Year Win
Joined
Oct 15, 2019
Messages
592
Went camping last weekend.
Got a few more cushions done this weekend.

On these side panels, each section of foam has to be shaped and wrapped separately. It's quite a process. The seat backs and bottoms will be box cushions like the inserts of the bucket seats. Trying to stay consistent.
20210220_130740.jpg20210220_131143.jpg20210220_142851.jpg


I'm counting on the seat bottoms to pull the stripes together and make sense of it all.
20210220_204201.jpg20210221_123950.jpg20210221_124003.jpg
 
Last edited:

Reserector_

Chief Petty Officer" & 2021 Splash of the Year Win
Joined
Oct 15, 2019
Messages
592
The interior is finished!
Please check out my quick video. Let me know what you think of the throwable device.
 

Attachments

  • 20210228_154851.jpg
    20210228_154851.jpg
    2.9 MB · Views: 7
  • 20210228_154651.jpg
    20210228_154651.jpg
    5.3 MB · Views: 7
  • 20210228_154638.jpg
    20210228_154638.jpg
    5.6 MB · Views: 7
  • 20210228_154622.jpg
    20210228_154622.jpg
    3.3 MB · Views: 7
  • 20210228_154615.jpg
    20210228_154615.jpg
    2.9 MB · Views: 6
  • 20210227_191724.jpg
    20210227_191724.jpg
    7.1 MB · Views: 6
  • 20210227_160929.jpg
    20210227_160929.jpg
    6.9 MB · Views: 6

todhunter

Canoeist
Joined
Sep 15, 2020
Messages
1,252
As much sewing as you've done, if the throwable ends up bothering you, just sew a cover for it out of the matching vinyl.
 

Reserector_

Chief Petty Officer" & 2021 Splash of the Year Win
Joined
Oct 15, 2019
Messages
592
I'm tearing down my OMC Cobra sterndrive to inspect and reseal it. The upper and lower units both turn smoothly. The gear lash in the upper feels non-existent... like perfect.

The lower unit has a little backlash in the gears if I hold the input and turn the output. The output shalt also has a slight amount of end play.

Question: is there any information that can tell me what is acceptable? Clymer manual is no help, and can't seem to find anything online.
I've found info on using a special tool to set pinion depth, but nothing on measuring backlash or end play of the assembled unit.
 

chevymaher

Commander
Joined
Mar 29, 2017
Messages
2,915
Replacing all the seals is a real good deal.

Mine is a mercruiser but the places your finding play they consider normal on mine, No I don't have or know of videos for yours.
 

Reserector_

Chief Petty Officer" & 2021 Splash of the Year Win
Joined
Oct 15, 2019
Messages
592
Thanks. I hadn't thought to look for videos of Mercruiser for an example. I'll search for that when I get a chance.
 

chevymaher

Commander
Joined
Mar 29, 2017
Messages
2,915
Some internal parts got a rediculous amout of slop and the pressure of the power being put to the gears makes them tight. Thus why you dont free rev outdrives hard on muffs. Not good.
 

Reserector_

Chief Petty Officer" & 2021 Splash of the Year Win
Joined
Oct 15, 2019
Messages
592
It occurred to me last evening that what I feel is not backlash in the gears. It is the spaces between the drive dogs in the dog clutch. There has to be room between the dogs to allow it all to engage.
I have no reason to suspect any problems with this drive other than age, so I will reseal it, pressure test it and roll on with the project.
 

Reserector_

Chief Petty Officer" & 2021 Splash of the Year Win
Joined
Oct 15, 2019
Messages
592
Progress has been slow and cautious. trying to keep mistakes to a minimum.
I've been referring to the Seloc manual and the YouTube videos by Wayne Coll.
So far I am pleased with what I have found. Gears and bearings are it great condition. Seals and o-rings are still pliable, but old and set in their ways. All this thing needs is all of the seals replaced.
More good news: of all the OMC Cobra versions, this one has ALL of the factory updates. It has the 1 1/4" prop shaft, no internal snap rings, and the bearing housing that is retained by the two tabs instead of the four bolts way down inside.
I've had to rig some special pullers so far, but as I said, I am being cautious and it is paying off. The fact that this was a fresh water boat had been a huge help as well. The only corrosion I found was on the bearing housing anode, and there is plenty of that left.
I have attached some gearbox porn for you hardcore guys to enjoy.

There was about an ounce of water in the bottom.
20210306_150342.jpg
The WP housing was cracked and repaired with JB Weld. The impeller had not failed, though. I have a complete new pump for this.
20210306_153432.jpg20210306_153739.jpg20210306_154032.jpg
Wasp nests in both sections.
20210307_151950.jpg20210307_151953.jpg20210307_152021.jpg
Acorn shells under the front anode.
Used a rigged puller and about 60psi to free the bearing carrier.
20210307_152844.jpg20210313_131102.jpg20210313_132417.jpg
Gears and dogs were in great condition.
20210313_133135.jpg20210313_133147.jpg20210313_133211.jpg20210313_133334.jpg
Used a rigged slide hammer and a propane torch to liberate the old prop seals. They were glued in good.
20210313_175955.jpg20210314_145839.jpg20210314_145848.jpg20210314_145856.jpg
Kittah was good company as she sunned herself.
20210314_154252.jpg
Rigged-up o-ring installer. Stiff plastic wrapped around to guide it over the first two grooves.
20210314_172607.jpg
 
Last edited:

Reserector_

Chief Petty Officer" & 2021 Splash of the Year Win
Joined
Oct 15, 2019
Messages
592
The lower unit is back together.
20210320_191550.jpg
I've moved on to the upper gear box.
20210320_191602.jpg
Gears are great. A couple of bearings need replacement. Looks like corrosion or overheating or both.
20210321_172509.jpg20210321_172702.jpg I'm replacing Timken with Timken, so the same shims should produce the same preload and gear lash.

The input shaft has a seal groove, but I can offset the new seal. I was able to debur the groove and polish the seal journals on the lathe.
20210321_182555.jpg
 

Scott Danforth

Grumpy Vintage Moderator still playing with boats
Staff member
Joined
Jul 23, 2011
Messages
47,592
doesnt matter if you are replacing timken with timken. you need to go thru the proper shimming process. each bearing is slightly different from the next.
 

Reserector_

Chief Petty Officer" & 2021 Splash of the Year Win
Joined
Oct 15, 2019
Messages
592
I use "set-up bearings in Dana axles on my 4x4 truck to determine the shims needed, and then press on the permanent bearing and it always works out. That's how axles are set up around the world. Pretty much the same thing as this gear box.
So, based on that experience and the fact that backlash was in spec with these bearings and shims , I predict that when I install new bearings (especially the same brand and part number in OMC boxes) it will be correct. That's what I predict.
If not, I will need to play with shims. Either way, these bearings need to be replaced. I suspect that they ran dry of oil at some point in their life. The gears are great (Lucky me!), and so is everything below these upper bearings, so I would guess that the gears still had oil. Likely the seals and impeller failed as a result. Someone definitely had this apart to replace the input seal.
But I digress. Rest assured that this will be done right, because I don't feel like doing it again anytime soon. :)
 

Chris51280

Ensign
Joined
Jan 24, 2018
Messages
918
I have to agree with scott. I replaced my main bearing too. I looked up the tolerance spec on the tapered bearing and it can be as much as 0.02mm.
You may be lucky, but you could also screw it up and a kill the gears.
Here is what I did. I have an indicator and I measured the old bearing height assembled, Cone and cup, on a flat surface. Then I zeroed the indicator and I slid the new bearing under and looked if there was a difference. Then I knew if I had to add or subtract shim thickness. This way, the clearance stayed with factory setting
 

Chris51280

Ensign
Joined
Jan 24, 2018
Messages
918
1616589225303.png
actually more than that. This is from the timken catalog. Nothing is always the same. There are obviously machine tolerances +- that something has to be within. nothing gets ever to absolute 0 100,000 times
 

Reserector_

Chief Petty Officer" & 2021 Splash of the Year Win
Joined
Oct 15, 2019
Messages
592
Good plan, measuring and comparing the actual bearings. Data is truth. That could save me some time.
Thanks for taking the time to dig that up.
 

Reserector_

Chief Petty Officer" & 2021 Splash of the Year Win
Joined
Oct 15, 2019
Messages
592
The new bearings were within .001" combined, so I reinstalled the factory shims. That was good news.
Pressing on...
 

Attachments

  • 20210327_104628.jpg
    20210327_104628.jpg
    3.1 MB · Views: 5
  • 20210327_105120.jpg
    20210327_105120.jpg
    2.7 MB · Views: 5
  • 20210327_110653.jpg
    20210327_110653.jpg
    1.2 MB · Views: 5
  • 20210327_110842.jpg
    20210327_110842.jpg
    1.2 MB · Views: 6
Top