Building a '93 Caravelle 1750 Classic Bowrider

Reserector_

Chief Petty Officer" & 2021 Splash of the Year Win
Joined
Oct 15, 2019
Messages
607
Well, I didn't get much done on the boat on account of the world being screwed up, and me being part of the world.
I got my gauges. 7-piece Faria Chesapeake with black face, huge numbers, chrome bezels, and curved glass lenses. I chose these because they will be easy to read in spite of my damaged retinas.
To install them, I must first remove the old ones and refinish the cluster panel.
I decided that the wise thing to do was to document and label the wiring. That took hours to free up and clean the main harness, find a wiring diagram that is close to what I have, and then label each wire.
I still have more to label, but I'm close.
I've learned from other projects that electrical is no place to take short cuts.
I have all new switches, breaker, terminals, etc.

20200321_172255.jpg
 

archbuilder

Vice Admiral
Joined
Sep 12, 2009
Messages
5,697
Yep you are correct on wiring. Did you test continuity on each of the wires from the cannon plug to where ever they went? I did that on my engine wiring harness and from the cannon plug to wires that terminated at the helm. All checked and sure enough the electrical worked fine. I also used a label maker to identify most of my under dash wiring, which is helpfully if you have an issue 5 years from now. I love my Chesapeak gauges, I used them on my sleekcraft. Did you get the GPS speedo? I want to upgrade mine, that wasn't an option when I did that build. Pito tubes are a pain! I also like the heatshrink crimp connectors, water tight and they also glue the wires together. I bought mine from Del City Wire. The picture looks par for the course! Hang in there!
 

Reserector_

Chief Petty Officer" & 2021 Splash of the Year Win
Joined
Oct 15, 2019
Messages
607
I will be doing continuity test on all while I can reach both ends with a tester.
I am labeling wires for future ref.
I was not aware that there was a GPS speedo option. I will check into that. (Update: It's $135) Maybe hold off on installing the pito setup. What sort of problems do you have with pito gauges?
 

archbuilder

Vice Admiral
Joined
Sep 12, 2009
Messages
5,697
They aren't very accurate, and will quit working if you get dirt or junk in the pickup hole. Also just more holes in the transom that can leak and it looks cleaner without it in my opinion.

My Mercury outboard on my Sleekcraft actually has the pickup built in the lower unit, but i have problems with the hose getting crushed in the tilt trim. There is no real good place to secure it with clamps so it kind of flops around. Once I saw the GPS unit, I put it on my list to upgrade too.

I have the factory gauges in my Powercat, I found all new old stock units. I am going to look into having the factory speedo converted to GPS. I am sure that will be expensive, so that is on down the road when I have money burning a hole in my pocket lol. For now it is just installed and not hooked up.
 

Reserector_

Chief Petty Officer" & 2021 Splash of the Year Win
Joined
Oct 15, 2019
Messages
607
It looks as though my brand new pito gauge has little resale value, so I think I will use it to fill the hole for now, and put my money into things that will get it on the water. I can use a phone app to see how fast it goes. After that, it's just a reference to see if it is running properly. I will likely go with the GPS gauge once I get the thing running and sorted out. I'd rather not have that pickup on the transom for all the reasons you mentioned.
 

archbuilder

Vice Admiral
Joined
Sep 12, 2009
Messages
5,697
That is more or less what I did on my powercat. And I did use the phone app the first time I took it out, lol!
 

Reserector_

Chief Petty Officer" & 2021 Splash of the Year Win
Joined
Oct 15, 2019
Messages
607
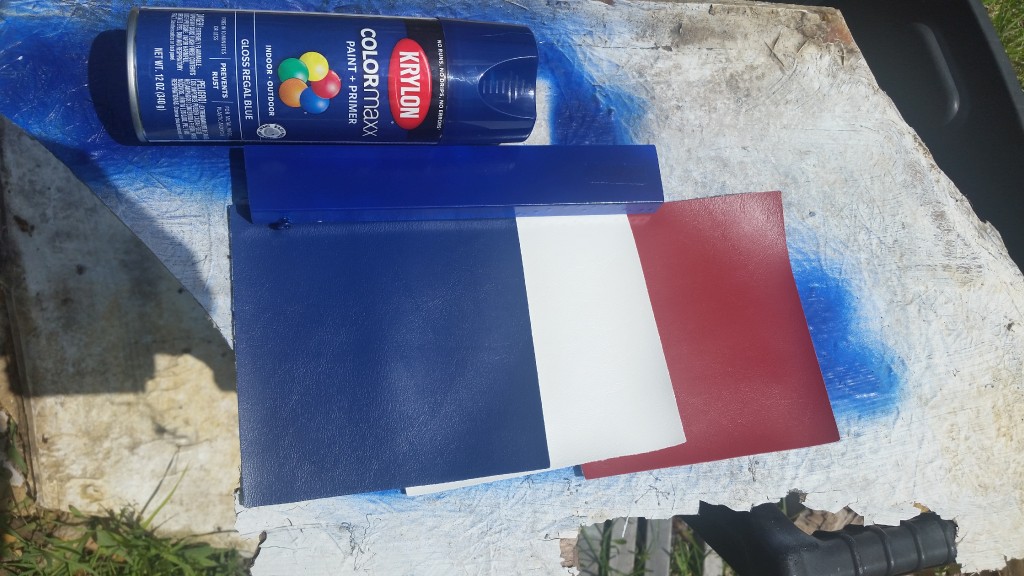
I got some vinyl samples in the mail. I'm going with American flag colors because I like it, and because it makes it easy to buy color coordinated accessories.
I picked up some Krylon for the cluster that matches the blue vinyl close enough.

20200324_135012.jpg


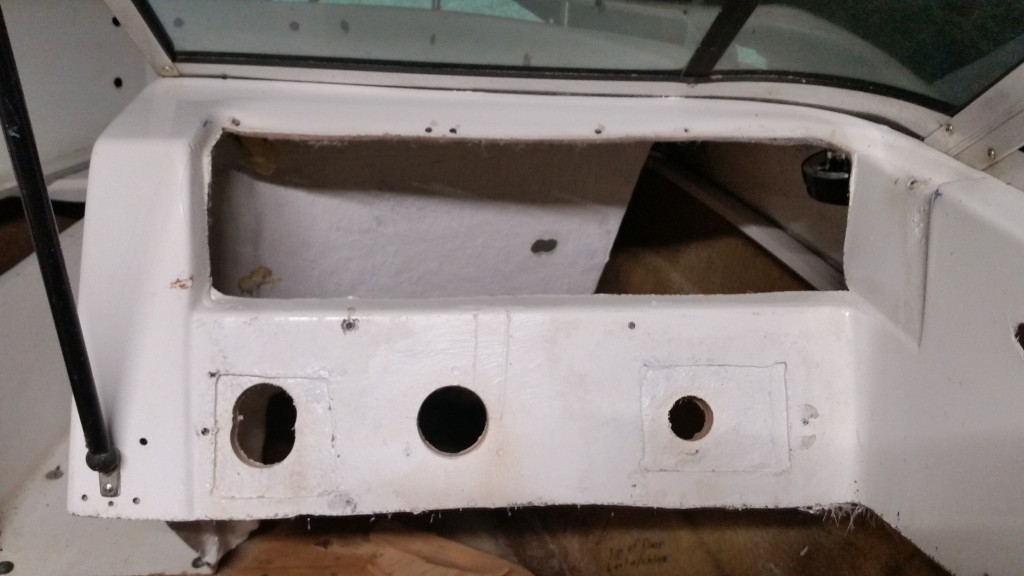
I disassembled, cleaned, primed and painted the cluster.

20200324_172846.jpg

20200324_171100.jpg


While the paint was drying, I bored the holes in the new dash board. The original cutouts were a horrible hack job.
Next, I installed the Teleflex steering. I compiled it from Ebay parts. It is upgraded to the wide rack and the "no feedback"

20200324_190250.jpg


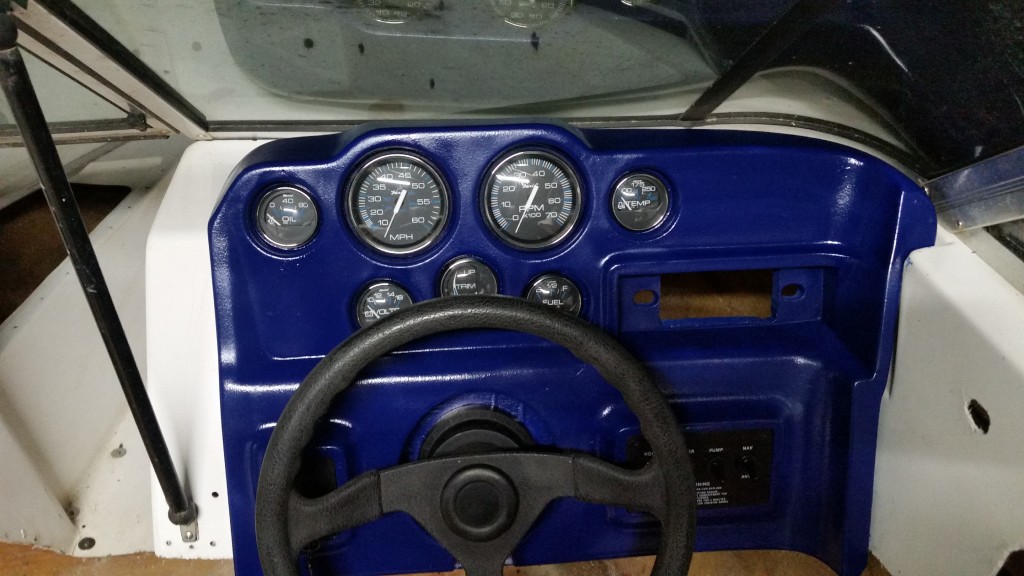
Finally I set the dash in place, and dropped the gauges in for a glamour shot.

20200324_201006.jpg

20200324_195256.jpg


Funny story. I turned the wheel lock to lock, and then back to center by dividing the number of revolutions by 2. The wheel was upside down. No key slot 180° off, so no easy fix. I figured I needed a different wheel to match the gear that I bought. (It was late. I was tired.)
I started looking on Ebay but couldn't remember which way I needed the key slot to go; up or down. So I drug my carcass back out to the boat and was about to yank the wheel off again when I thought to look behind me at the end of the cable. Low and behold, it was moving the wrong direction. I had put the pinion on the rack in the wrong direction. LOL
I took it apart and swapped it around and now it was actuating in the proper direction...but the wheel was still upside down at center position.
Brain fart: It then occurred to me that I could simply unbolt the pinion, rotate the wheel 180° and bolt it back together to fix that problem. That worked, but it took two attempts because of my lack of gracefulness and being limited by only having two hands.
With that all sorted out, I then realized that the mount plate was now upside down. Ugh.
But I digress. All's well that ends well.
 

archbuilder

Vice Admiral
Joined
Sep 12, 2009
Messages
5,697
You will be happy you got the no-feedback well worth the money. I can't remember what area you live in, but if it gets hot you might be careful where you use the red and blue on the seats. Here in OK those get about 1000 degrees in our sun, ask me how I know lol. I had a Searay with a red like that, man that hurt if you didn't put a towel over it!
 

Reserector_

Chief Petty Officer" & 2021 Splash of the Year Win
Joined
Oct 15, 2019
Messages
607
Thanks for that. From what I read, it seemed like the NFB steering was a must-do upgrade.

I was already strategically planning the color scheme to put blue on the panels that you see when looking forward: The cluster, glove box and dash pad, front panel of the bow seating, and the backs of the bucket seats. That will be done for anti-glare purposes, but it works with the theme as well. You see, from the blue fields aftward will be white and red wavy stripes.
The seat bottoms will be white or mostly white with a little red. Seat backs will carry the white/red theme.
I haven't got the engine enclosure and rear seating fully envisioned yet, but planning a dog house with a seat on the starboard side. Entry steps on the port side because my wife has arthritis.

Planning on red carpet. Again, to reduce glare.
 

Reserector_

Chief Petty Officer" & 2021 Splash of the Year Win
Joined
Oct 15, 2019
Messages
607
Question: When I set up my seat height, where should my eyeline be? Below the top of the windshield, or just above it. I really cannot tell what is ideal from photos on the internet.
There may not be a definitive answer, but I would appreciate some insight.
 

archbuilder

Vice Admiral
Joined
Sep 12, 2009
Messages
5,697
My preference would be to have my eye line about 2/3rs of the way up. That way you can see over the bow a little better as she is coming up on plane. I am sure there lots of other lines of thought on that.
 

Reserector_

Chief Petty Officer" & 2021 Splash of the Year Win
Joined
Oct 15, 2019
Messages
607
Not sure where you are located , but I pulled a 3.0 OMC from my current boat, cobra drive . all of it. Might be willing to trade it off for a good cup of coffee.Going 5.7 merc .. don't need any of the 3.0... You are pretty far along to modify into a dual 3.0.... but glass is cheapish... :)

Please check your messages...
 

kcassells

Fleet Admiral
Joined
Oct 16, 2012
Messages
8,715
Question: When I set up my seat height, where should my eyeline be? Below the top of the windshield, or just above it. I really cannot tell what is ideal from photos on the internet.
There may not be a definitive answer, but I would appreciate some insight.

I've found most pedestals stop @ 26" then their is the seat placed on top of that for final height.
Also you can add slider, height adjustment and rotation accessories.
 

briangcc

Commander
Joined
Jul 10, 2012
Messages
2,360
Stock height has been my head under the windshield - I'm 6'3". Problem is if someone is sitting in the bow then I have to either stand or kneel on the seat...except my Chap which has an adjustable bolster which is a godsend. I'd go that route IF I was redoing a boat.
 

Reserector_

Chief Petty Officer" & 2021 Splash of the Year Win
Joined
Oct 15, 2019
Messages
607
Oh, dang! I hadn't considered the ride angle. It's sitting on the trailer with the keel almost level, or slightly bow high.
 

Reserector_

Chief Petty Officer" & 2021 Splash of the Year Win
Joined
Oct 15, 2019
Messages
607
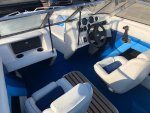
I found this photo on the web. This is the same make and model as mine. Looks like the seat is really low.
The pedestals I bought are over a foot tall. They will have to be cut off quite a bit.
I can also see the stock position of the throttle/shift controls.
 

Attachments

  • photo326893.jpg
    photo326893.jpg
    86.5 KB · Views: 8
Top