Another Maine Starchief

classiccat

"Captain" + Starmada Splash Of The Year 2020
Joined
Dec 20, 2010
Messages
3,412
all downhill from here Ron. Those vintage horns look sweet...bet you'll hear those babies a few counties away :D
 

MARUSS

Seaman
Joined
Jul 12, 2015
Messages
60
That nice new Coosa Bluewater transom should do the trick for that new merc you got there. ​
Nice work there mister.
 

StarTed

Senior Chief Petty Officer
Joined
Jul 14, 2015
Messages
694
Looking good. Boy are you moving along.

Those horns look great. Now I'm wondering about the old diesel truck horns lying around here.

At the rate you're going you'll be splashed before long. Then beware fish!
 

Watermann

Starmada Splash of the Year 2014
Joined
Jan 12, 2013
Messages
13,787
Nice forward progress! That's a ton of work you got accomplished, trust me I know :lol:

A couple words of wisdom for you on the gluvit, it has no UV inhibitors so sun is it's enemy. Any place you have gluvit other than the seams you should be very careful about walking inside the boat and flexing the AL that has gluvit on it, if you do you'll hear a snap as it looses it's grip. Put a piece of ply in the bottom if you're going to be working inside.
 

oldhaven

Chief Petty Officer
Joined
Aug 30, 2015
Messages
576
Thanks for that Rob, I did not know it could be snapped off that way. I'm tired of slipping around in there anyway, so a temp deck board or two will go in. It won't be long until the real one goes in anyway. I can see that the Gluvit has darkened in the few days since I did it, so covering it is a good idea.

I did a leak test yesterday and got only one slight (every 30 seconds or so) drip from one spot on the bow seam, so I'll give that another coat when it stops raining here. Next is fitting the fuel tanks and neoprene padding, stringers, tank hold downs, aluminum deck risers at the rib ends, foam flotation and then the deck. I got the remaining 1/4 truss head bolts I needed and finished fastening the transom except for the outer motor pad, and I will cut that today. The 5200 under the transom repair panel is taking forever to cure, and I expect parts of it will be a long time curing due to no air or moisture contact, but I have seen full tubes get cured after opening, so I know it will eventually be permanent. I ordered my paint yesterday too, so I am excited to start on that. I have sprayed paint before with a conventional gun, but never with an HVLP gun, so this will be a learning experience. I am going to start on the V berth support where looks do not matter much.

See ya later,

Ron
 

oldhaven

Chief Petty Officer
Joined
Aug 30, 2015
Messages
576
By the way, I used one of these General No. 36 drill guides for drilling the holes in the transom through the skin. It is not the most precision tool in the world, but all my holes drilled from outside hit the bracket and knee brace holes on the inside nicely, something I had worried about. I also used it with a 1" hole saw for the splash well drain holes to keep them perpendicular to the surface of the transom. I wonder if it would help with steering linkage clearance drilling for an I/O that someone talked about recently, since it can be tilted and bolted down rigidly to hold an angle. I have had mine for years and it was made in USA, but I see they are from China now.

Ron drill guide.jpg
 
Last edited:

Watermann

Starmada Splash of the Year 2014
Joined
Jan 12, 2013
Messages
13,787
Yeah Ron that drill guide is a super tool to have and would make life way easier for sure.
 

laurentide

Lieutenant Commander
Joined
Jul 24, 2011
Messages
1,869
Everything is looking pro so far, Ron! The POR 15 is a great idea. Between that, the coosa, and the giant patch plate you've got a 100 year transom on that boat. I'll be stealing a few ideas for my transom 2.0 job.

This isn't really advice, as I don't know what I'd do differently, but I applied gluvit very thoroughly and I still have a couple of leakers. It probably cracked like what Watermann was talking about. The good news is that some epoxy in a syringe applied around a cleaned and heated rivet head will stop any small leaks down the road without having to rip the deck out.
 

oldhaven

Chief Petty Officer
Joined
Aug 30, 2015
Messages
576
Thanks all, I am going to take a few days off and head North to stare at the woods instead of the boat for a few days. I need a break.

Russ, I ordered the paint through NAPA, PPG Omni automotive acrylic urethane with the matching system undercoats and metal prep. It was the best way to get the colors I wanted. I chose Wimbledon White and MGB Damask Red, and the boat will be somewhat, but not quite, painted the way it was when I got it, and the polished topsides will stay.

Andy, good to hear exterior repairs are possible. I may find this out when I strip the bottom later, since I am probably not going to do much to the bottom of the hull this year. I am going to follow your approach of just getting the thing going with the topsides and interior structure completed enough to use, then finish it off as time permits. I really want to use it this summer and if I make finished perfection my goal, it will be fall or next year before I am done. I can hang the boat from the beams in the barn and roll it like you did to get at the bottom, even with the motor on.

Ron
 

oldhaven

Chief Petty Officer
Joined
Aug 30, 2015
Messages
576
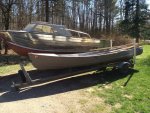
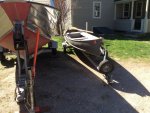
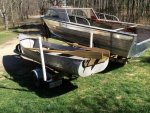
We had a great few days relaxing and I'm ready to get back at things. While we were there I brought back our "taxi" that we used for years to get to our remote camp across a lake. Now that the camp is sold, I can use it here. I caught many a togue from the stern of this boat. It is a Grumman Sport Boat, 15 1/2 feet, 135 lbs. and very versatile. With proper weight distribution it will plane with a 3 1/2, can be rowed or paddled, and they even made a sail rig for it. Unlike a Starcraft, it has flush rivets below the waterline. It has a really nice galvanized trailer. I plan to spruce it up a bit and will start a new project thread at that point, but it is good to go right now as soon as I get a current sticker for it. We were a bit out of the way in its previous life, and never saw a warden, so I never bothered to renew. In the meantime, back to getting the Chief in the water.
IMG_0394.JPG
IMG_0397.JPG
IMG_0396.JPG
 
Last edited:

Watermann

Starmada Splash of the Year 2014
Joined
Jan 12, 2013
Messages
13,787
Sure does show the size of the Starchief when compared to a 15.5' tinny. I measured my Chief when I had it all tore down naked and it was 18'9". I measured the SS I'm working on now and they short changed me on it, it's 17'6" so I guess it all works out in the end. :lol:
 

oldhaven

Chief Petty Officer
Joined
Aug 30, 2015
Messages
576
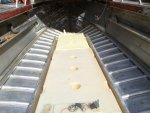
I had a productive day yesterday. I fitted the 3/4 deck risers at the rib ends, installed the longitudinal stringers at their new outboard positions to meet the increased deck height, and cut the two large sections of deck to fit.

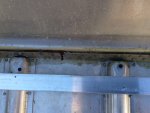
These were the 3/16 blind hole spotters I used to transfer the rib end rivet holes to the riser aluminum. I later doubled up the rivets, but these allowed me to find and use the same holes as original, preventing half a hole misses and adding more holes than necessary. these would probably work with wood decks too. Lay in the material, tap the hole locations, turn over and drill. Some of the holes in the ribs were drilled on outside edges of the curved rib and these were not as easy to transfer.
IMG_0398.jpg

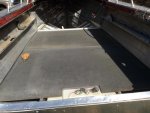
Deck risers installed. The random locations of original rivet holes meant that I also had to pick the second hole locations randomly to get best angles and coverage.
IMG_0403.jpg


Stringers moved and tanks. There is room for some foam around the tanks, and next is putting neoprene strips under them and adding a couple of bulkheads at the end of the tanks and between them. I will have to come up with some hold downs too.
IMG_0402.jpg

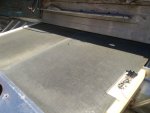
Deck material fitted. The decks are now out for finish work before final installation. I will be buying some foam sheets to fill open areas in the next couple of days. The risers allowed me to make the decks a bit wider than original and I did not have to be so exact about size since it puts the deck edges into the spray rail bend. I left plenty of space so there is no rubbing. You can see that the Coosa is pretty ugly, so finishing will be epoxy, then primer and paint with the final coat having non skid added. I plan to use snap in carpet over that, but this will allow me to choose whether to use the carpet or not, depending on how the boat will be used. It will also allow me to take the carpet out and store it out of the weather. I have to do some overdue paint removal and hole filling before I get too far along so I don't ruin work already done on the decks and interior/
IMG_0400.jpg
IMG_0401.jpg


I also ordered a new galvanized trailer axle, hubs, and galvanized wheels and tires. Ouch! Still, the trailer hubs are the last thing I want to worry about for a while after all this other work. Worth it for peace of mind.

Ron
 

Attachments

  • IMG_0399.jpg
    IMG_0399.jpg
    386.7 KB · Views: 6
Last edited:

Watermann

Starmada Splash of the Year 2014
Joined
Jan 12, 2013
Messages
13,787
Looking good! Yeah great idea on the new trailer parts. I'm waiting on the brown truck with some new hubs and LED taillight kit too..
 

oldhaven

Chief Petty Officer
Joined
Aug 30, 2015
Messages
576
It's snowing pretty hard here this AM. Not much outside work today due to depression and probably a nap waiting for spring to return.
 

StarTed

Senior Chief Petty Officer
Joined
Jul 14, 2015
Messages
694
Your work looks great. Makes me want to get back to my boat but other projects are now higher priority.

It looks like we're into some weather improvement coming up. I feel for you with new snow in the spring.

Should be flowers and birds.
 

oldhaven

Chief Petty Officer
Joined
Aug 30, 2015
Messages
576
Oh, we have flowers and birds too. They are as out of sorts as I am. It is pretty though with the daffodils poking through the snow, and it covers up the fact I will need to mow the lawn soon... I also got my first black fly bites yesterday while working on the boat. They make outside work kind of miserable for the month or so coming right up, but we deal with it by applying an assortment of evil concoctions and using head nets. The buffalo flies do tend to keep the summer complaints tamped down for a while.

Ron
 

Watermann

Starmada Splash of the Year 2014
Joined
Jan 12, 2013
Messages
13,787
Dang that weather sucks for anything outdoor related. :smow:

I've been enjoying a very warm spring for the past month upwards to the mid 80's recently but now more seasonable in the 70's. The admiral was out cleaning up the dust and dirt inside of the Chief last weekend. I guess she's telling me it's time to break the cruiser out of the winter lay up mode. :)
 
Top