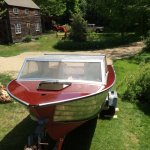
It has been two weeks and time to catch up on what I have been up to since May Day.
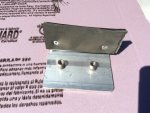
I left off with installing tank supports and divider bulkheads, and that went well. the 5200 cured and the neoprene strips are on for good. I also made the tank hold downs and this was my first experiment with rivet nuts. I used 1/4-20 stainless steel rivnuts and the neoprene was riveted to the angle. The 3/16 rivets pulled down below the surface of the neoprene, so no contact with the tank. I used Permatex Nickel based Never Seize with the SS truss head screws into the SS nuts. this contains no copper and is designed for use with SS. I also used bearing stake loctite between the rivnuts and the 1/8 angle brackets, though I don't think this was necessary as the SS ribbed nuts pulled up very tight and I don't expect them to loosen. I was more worried about the SS to SS thread joint galling or corroding eventually, but we'll see. My goal is to be able to disassemble to this point again without drilling rivets.
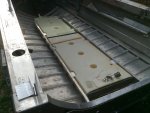
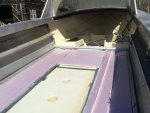
Next was starting to get some foam into the hull. The deck risers and stringers provided a nice hold down for the 1" foam between the ribs, and here you can see the tanks support structure.
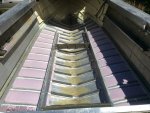
Also, a question about the sidewall end pieces for those of you with OB boats: You can see here that the base of this part has an angle that mounts to the deck. All the other projects I looked at have the angle on the bottom installed on the keel side of the part, while mine is mounted on the outboard side. I am sure this is original since the rivet holes do not allow any other configuration. . This makes it hard, but not impossible to install the fasteners, but I will go with it.
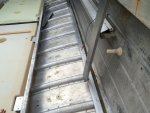
Next, I painted the interior of the cabin and the berth supports as the next logical step in the process. That all has to be done before the cabin bulkheads can be put in. I had to remove or wire brush all the loose paint from the cabin interior and strip the berth supports. This assembly had been modified to accept the forward tank. I used Rustoleum products for this part of the painting, since I will probably cover the cabin interior with carpet or vinyl eventually, and did not want to use expensive PPG paint for that base. So, SE primer in cans with a convenient handle to save my right finger, Clean Metal Primer in an HVLP gun and then Gloss Almond Rusto with Majic hardener. It turned out pretty nicely, and the hardener cured the paint in an overnight to a very hard finish that I have been able to handle roughly during installation and crawl around on without damage.
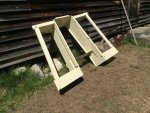
The decks and bulkheads are Coosa and were done with PPG Omni products over West epoxy. The paint is an acrylic urethane single stage automotive paint with hardener over a hardened high build primer. It was all done with a foam roller and turned out OK. It was a bit like roller painting the bedroom, except for the protective gear. This stuff is pretty toxic without a good mask, and I did it outside or in the opened up barn with a breeze blowing through. The color is Ford Wimbledon White. It is a bit lighter than the Rusto Almond, but I like the contrast where the two are used in the same space. The bulkheads turned out glossy, but I used Epifanes non skid beads on the decks final coat. This is an interesting product. When I mixed about two tablespoons full of what looked like a fine white powder into the urethane paint and waited about twenty minutes, the powder turned into a very fine grit that was distributed throughout the 300ml or so of paint. It absorbs the paint so it has the same color and is not hard on the feet or knees. Applied with a short fur roller it went on easily and looks right. This paint is hard and durable after an overnight and I am happy with it. I will eventually be putting snap in carpet over it so I have choices of what to use.
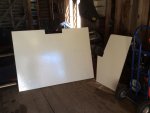
I finished up the tank installation and put in two full sheets + of 1 inch foam in prep for the deck and bulkhead install. I also ran some watertight flex conduit and put the forward tank fuel line in one of them. the other will be for wiring, though most will be above the deck under the gunwales.
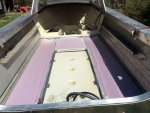
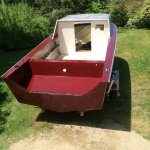
Then came the fun part, putting in the decks and the bulkheads. The bulkheads went in easily but the decks required several hours since I was installing rivnuts in the deck risers and stringers. Everything had to be done carefully so it all lined up in all the layers and so the nuts were centered in the stringers. The nuts in the rib end risers will double as the fasteners for both the deck and the sidewall base aluminum, so position was important here too. You can see the writing on the hull with the measurements needed for each nut location.
The good part here is that so far there is nothing in the decks, bulkheads or below that can rot, and I should be able to pull everything out again in an afternoon if I need to get to the tanks or the hull for maintenance or repair. I will depart from that from here on by installing wood parts, but will still use removable fasteners where it seems necessary. I just hope this works and I am not fated to be cursed by next owners after 40 year old thread joints lock up anyway.
You can see the rivet nut tool in the package shelf in one of the photos
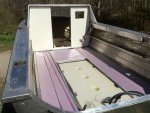
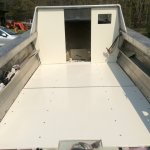
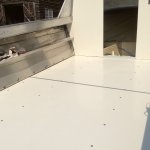
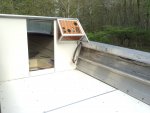
Finally, here are the cabin door and footrests I picked up used and refurbished. The door is too short for a standard Chief door area, but fits the area above the boxed in chase I will be building to cover the forward tank fill and vent. the forward cabin will be nore af a storage area for us, and access will be compromised by the tank , but that's fine.
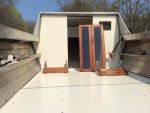
Next is the remaining foot of deck at the aft end of the boat and installing the sidewalls and steering/instrument console. the splash well is necessary, since i want to get the motor put on in the next few weeks. I will be launching it unfinished with just enough done to meet requirements, and it may take a while to get the outside of the hull done. I do have to paint the cabin top so the upper windshield can be put on, and the gunwales so I can reinstall hardware. In a car rebuild this would be called a rolling restoration. I'm not sure what it is called for a boat. Maybe a floating restoration?


