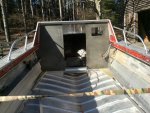
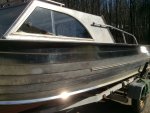
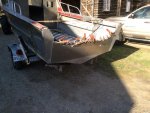
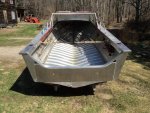
Another Maine Starchief

classiccat

"Captain" + Starmada Splash Of The Year 2020
Joined
Dec 20, 2010
Messages
3,409
That's some good progress oldhaven!

Clecos are a tin-man's best friend!

...well, maybe not as much as an oil can but they're up there!

tin-man.jpg
 

Watermann

Starmada Splash of the Year 2014
Joined
Jan 12, 2013
Messages
13,753
As you may know, I raised my Chief's deck 1" to allow space for a belly tank, no biggie. Looking good and keep in mind these restores of old boats are all about rebuilding the boat to fit your needs.
 

oldhaven

Chief Petty Officer
Joined
Aug 30, 2015
Messages
568
Things are getting crazy out there. A Jetson stern light like the one on my Chief just sold on Ebay for $124.72 plus $12.00 shipping, and it came without a base though the glass was intact.. I have been shopping for one to replace my pitted and broken glass original, but a new plastic generic will have to do. Someone should be doing repops of this and the now unavailable rub rail spears. Starcrafters don't seem to value originality as much as some car and boat enthusiasts, but I wouldn't mind having a few nice original looking touches at a good price.

Ron
 

classiccat

"Captain" + Starmada Splash Of The Year 2020
Joined
Dec 20, 2010
Messages
3,409
Things are getting crazy out there. A Jetson stern light like the one on my Chief just sold on Ebay for $124.72 plus $12.00 shipping, and it came without a base though the glass was intact.. I have been shopping for one to replace my pitted and broken glass original, but a new plastic generic will have to do. Someone should be doing repops of this and the now unavailable rub rail spears. Starcrafters don't seem to value originality as much as some car and boat enthusiasts, but I wouldn't mind having a few nice original looking touches at a good price.

Ron

$137 :eek:

I'm with ya there Ron. I immediately begin to drool whenever I see an all-original, minimally-modified vintage Starcraft! :madgrin:
 

MARUSS

Seaman
Joined
Jul 12, 2015
Messages
60
Hi Ron
Just spent the last couple of days catching up on your thread.
Nice read.
What did StarCraft change the style of the of the windows 66-67 from a square to a rounded side window?
I was looking a 66 on craigslist and it had a square side windows and yours has a rounded style like my Chieftain.
Things are looking good keep on keeping on.
 

oldhaven

Chief Petty Officer
Joined
Aug 30, 2015
Messages
568
Hi Russ, today should be a good weather day for outside work like fitting panels, but still too cold to do any JB Weld hole filling or gluvit, so that is holding me up a bit. Plenty else to do though.

SC did a lot of changes to the Chiefs in the mid 60's. '65s had bubble windshields, consoles and cabin bulkheads changed, '66's had flat windshields and rectangular side windows, (see post 5 in this thread),and in 67, the curved side windows like mine appeared. Things stayed basically the same for a while then. Every year had a different color scheme too. You can see the changes in the Starcraft brochures at:

http://forums.iboats.com/forum/owne.../s/starcraft-boats/358596-starcraft-brochures

Ron
 

oldhaven

Chief Petty Officer
Joined
Aug 30, 2015
Messages
568
Finally great weather here and I took advantage of it to get to the transom skin corrosion and holes. Sunday I used Marine Tex, JB Weld in tube and stick to fill the holes and pitting after using a SS brush, a nyalox brush and then POR-15 metal cleaner and metal prep and acetone. I used flashing on the inside as a backer and sanded and acetone cleaned both it and the transom skin in the area of the largest holes. Lots of other areas did not need that since they were not perforated, but the big hole required it. In that area I did both sides, and taped and mechanically fastened the flashing. I thought the flashing would be permanent, but it lifted the next morning and I peeled it off. It left a somewhat smooth surface of marine tex anyway, and that had adhered well to the aluminum and the hole was gone. A bit more filling of missed spots and some sanding to smooth things out and I am satisfied.

Today was coating with POR-15 in the areas behind the new transom and where the outside repair plate will be. This seemed to fill in the micro corrosion pitting spots, but was a bit of an experiment. I'm not sure it is necessary, and who knows what the next 50 years will bring under it, but I gave it a shot. Tomorrow will be putting the repair patch on the outside of the transom, well bedded in 5200. This will be done with clecos and mechanical fastening with temporary fasteners and the permanent fastening with solids and bolts done later.

I also managed to get the cabin bulkheads in for fitting and figured out how the deck and door will be done, and managed to get a start on polishing.
What works OK but not great for the polishing for me is wet sanding each strake with 600, 1000, 1500, 2000 grit paper by hand using linear strokes, then using a DA polisher with Mothers Mag polish on a foam Chemical Guys pad. I am not getting the mirror finish others have gotten, but this is just an experiment so far, and I'm not shooting for perfection. I am not going to try to remove all the scratches, since that would mean a lot more aggressive sanding. I will be trying a few other things I have seen used here, and may have to use a fabric pad and clay bars.

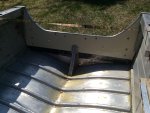
Unnecessary holes and through corrosion gone. The patch panel shown will cover the black POR-15 on the outside and I will probably polish the transom. I was lucky that almost every bad hole could be covered by the 5 foot long panel. The Z-brace was also treated.
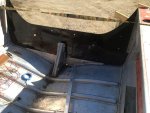
IMG_0386.JPG IMG_0383.JPG IMG_0389.JPG IMG_0387.JPG
I have only worked on the top two strakes and the spray rail so far. The rest of the polishing is going to take a while but I have realized that it would be best to do this at least most of the way before painting to avoid getting black swarf on the paint. The holes in the second strake are where the PO put on a number plate with ferrous steel machine screws and nuts, causing corrosion. Why drill holes like that instead of stick on numbers?

On to 5 days of good weather.

Ron

 

Decker83

Commander
Joined
Apr 5, 2011
Messages
2,592
The transom looks good.. From what I've read and seen the POR-15 should protect that aluminum for your grandchildren..
The polish looks great..
 

Watermann

Starmada Splash of the Year 2014
Joined
Jan 12, 2013
Messages
13,753
Oh yeah looking good and I bet it feels good too starting the repairing and rebuilding stage. :encouragement:
 

StarTed

Senior Chief Petty Officer
Joined
Jul 14, 2015
Messages
694
You're moving right along. I have better weather than you but you're getting more accomplished. Something's wrong! :joyous:
 

oldhaven

Chief Petty Officer
Joined
Aug 30, 2015
Messages
568
Thanks all, Yea, I have been looking forward to getting out and doing something constructive all winter, and working in a crowded cellar prepping for that is getting old, but it is paying off in time saved now. My polish job will not hold a candle to yours Decker, but we both seem to like the look. Judging by the scratches already there, this should be easier to maintain than a paint job, and less heartache when I get a few of my own.

I adhered to the instruction for the POR to the letter. Used their cleaner and metal prep acid first. I am thinking that otherwise it might not stick to the aluminum as well as it does to rusty steel.

The sun is coming up on another bright blue day as I type and get my first cup of coffee. I should make some more progress today, though spring brings a lot of less thrilling chores along with it..

Ron
 

classiccat

"Captain" + Starmada Splash Of The Year 2020
Joined
Dec 20, 2010
Messages
3,409
Great stuff Ron! Give you an inch of good weather and you take 18' of Tin! :thumb:
 

oldhaven

Chief Petty Officer
Joined
Aug 30, 2015
Messages
568
Repair plate is on. temporary fastenings, and the 5200 has 5-7 day cure in this situation, so I have plenty of time to refasten with permanent rivets and bolts. I plan to get the transom in in the next couple of days if I can decide on paint colors. After seeing it together, I think paint on the transom instead of polishing will look better and hide the plate more.

Ron
IMG_0390.JPG
 
Last edited:

Decker83

Commander
Joined
Apr 5, 2011
Messages
2,592
The transom plate has a really clean look to it.. It will look good painted or polished..
 

Watermann

Starmada Splash of the Year 2014
Joined
Jan 12, 2013
Messages
13,753
Yeap real nice work there Ron, with all the clutter that goes on the transom It'll mask the repairs and once underway busting some waves you'll never even see it!
 

oldhaven

Chief Petty Officer
Joined
Aug 30, 2015
Messages
568
Just got done doing the solid rivets on the Z-brace and knee through the patch panel. Using that rivet gun is very ad-d-d-d-d-d-d-d-d-d-d-dicting. I think I'll be using solids quite a bit.

Ron
 

Watermann

Starmada Splash of the Year 2014
Joined
Jan 12, 2013
Messages
13,753
I hear ya on the solids, we drove in a few today and looking forward to hammerings in more tomorrow.
 

oldhaven

Chief Petty Officer
Joined
Aug 30, 2015
Messages
568
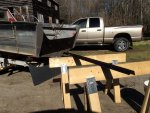
Another stellar two days of weather here. It seems like I did not get much done, but I was at it pretty straight out (for a retired guy anyway). Did a final clean up of the hull inside using Krud Kutter , a SS wire brush and a Nyalox cup brush, then thoroughly rinsed, acetone, and let it dry. Then on to Gluvit on the seams and independent rivets in the bottom. The Gluvit epoxy makes the old Goodyear Pliobond in the seams gleam like new, and I can see that it covered and filled the small amount of micro pitting in the very bottom of the hull that I had cleaned up. That was yesterday and today it is just about dry enough to get back into the boat. The sun was on it all day, and that helped. The other major thing done was getting the new transom into the boat. It is mostly fastened in, though I am waiting on a few more fasteners to finish things off on the knee and the outside brackets. The motor mount holes will be done when it is fitted. I did the splash well drains, and I now have to cut and fit an outside plywood motor plate. I have the transom cap and the two corners fitting well, but will wait on them until I am done painting. Tomorrow is paint ordering day, and I will leak test the hull.

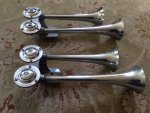
I also took apart and fixed two sets of air horns I had that were not functioning. One is a Signaltone Neiman set with chromed horns in great shape, and the other is a Sparton set (like came on the Chief) that had silver painted horns that I stripped and polished. The Sparton's that came with the Chief worked OK, but the chrome was shot on the horns. I will probably Sharkhide the horns on them both to help with future corrosion. I am sure the neighbors appreciated the mid morning testing session yesterday. Boy are they loud! Underway!.. Shift Colors.... One is going on the Chief and the other on the Fleetcraft. They use small on demand 12v compressors for an air supply.

It occurred to me today that I had better put the rear vents, stern light and cleats and chocks back on before I get the splash well back on. There is no way to reach the fasteners on these early SC's with the full width splash well.

Time for a beer and some chicken on the grill.

Ron IMG_0391.JPG
IMG_0392.JPG
IMG_0393.JPG
 
Last edited:
Top