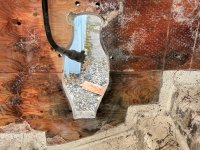
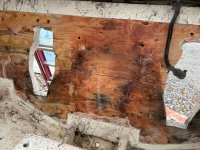
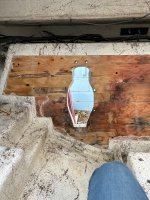
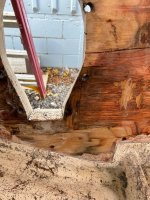
99 Monterey 276 Transom Replacement

Monterey276

Seaman Apprentice
Joined
Aug 11, 2023
Messages
35
Disregard my last question, guess I was overthinking that part. I went over there today and had someone inside the boat move the shift cable while I pulled the drive off. I was just careful not to force it so 1 down and 1 to go. Hopefully I can get to the transom assemblies this weekend.
 

Monterey276

Seaman Apprentice
Joined
Aug 11, 2023
Messages
35
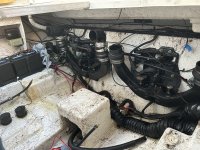
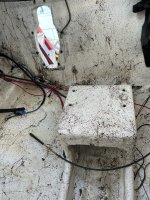
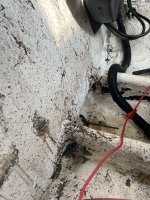
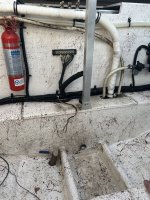
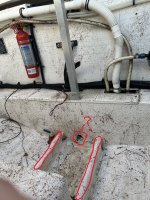
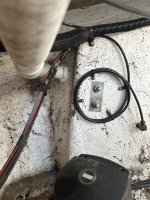
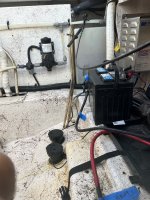
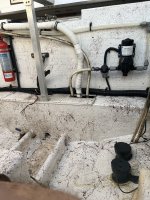
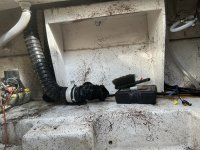
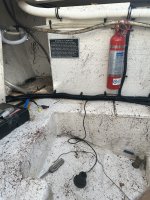
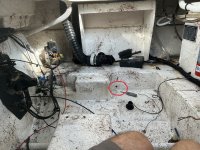
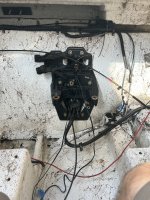
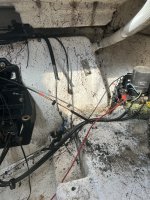
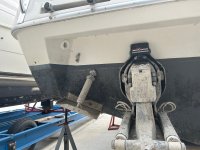
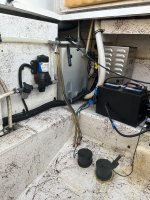
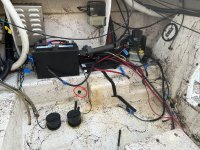
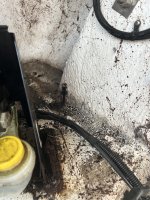
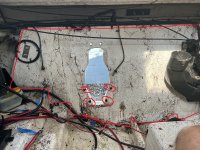
Hi everyone, I have some photos to share from last weekend's work. I have about 75% of the mechanical and electrical equipment removed and hope to have the rest emptied out this weekend. I actually put these images in a word doc and printed to PDF but the file was too large. Not sure what the max upload size is but the file was only 16MB. I've renamed some of the photos to indicate what you're looking at (in case it wasn't obvious). A few things to note:

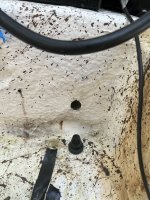
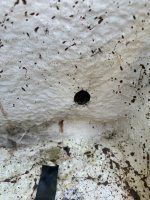
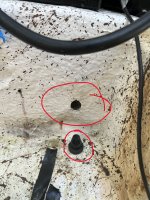
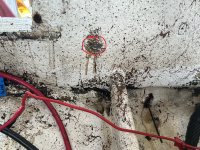
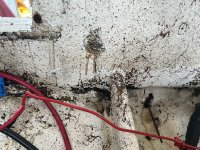
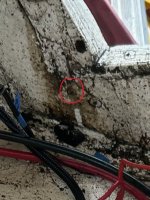
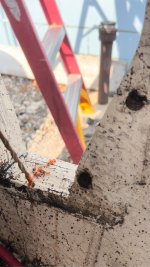
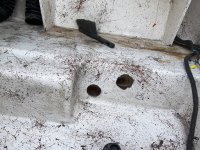
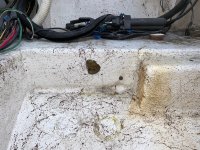
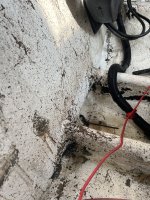
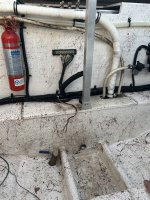
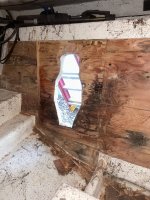
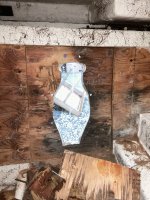
1) On both sides of the engine compartment I had these holes about 1/2" in diameter. The starboard side had a rubber plug and the port side had caulk or some type of putty jammed in there. These are labeled with a red circle in the image and the photo name says "hole" in it. Not sure what these were for but they are definitely wet inside. I assume they were filled with floatation foam. I have no idea about what to do with these side compartments. I'm open to any ideas, suggestions, or advice.
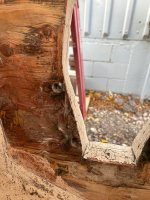
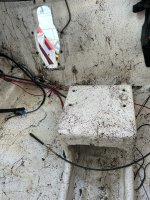
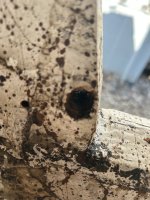
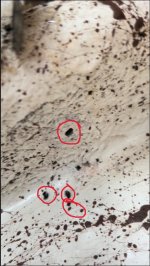
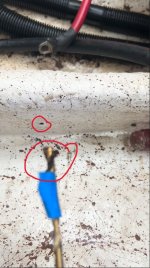
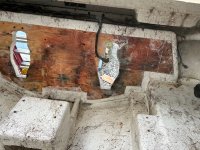
2) I drilled additional test holes as labeled by the photo name or the red circles in the images. Most of this was black pulpy wood.

3) There is a photo labeled "Forward engine compartment" with a red circle and ?-mark on it. I had assumed this was a 1/2" pipe connecting up to the cuddy and was used for some type of drainage system. I was confused to find that the hole was plugged. I stuck my fingers in there and it doesn't go anywhere. What was this for?

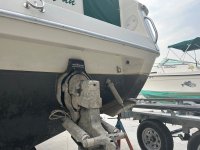
4) The major problem I had this season was the leak from the starboard transom assembly. I knew from the test holes I had some rot issues going on but I had really expected to see a bad Y-pipe gasket or possibly a small crack in the y-pipe itself. Neither of these situations were true though. Is it possible for a leak that bad to be coming through those bottom bolt holes? Both transom assemblies were rebuilt in 2018 with new bellows, senders, shift cables, bearings etc. Also, before doing any of this, the first thing done was to pull the drive off and everything looked good in there. No indication of water in the bellows. Since I have these transom assemblies entirely out, I plan on just rebuilding them for peace of mind. What is the average time before that stuff should be replaced?

5) My plan going forward after I complete the mechanical removal is to do the following.
A) Cut along the outer edge of the transom wall about 1/4" deep with my oscillating saw. This is shown in the image labeled "Transom assembly bolt holes". I'm not sure how far from the edge I should cut this. I assume it would be right near where the existing fiberglass folds over?? I'll peel this skin off and finally be able to see how bad this transom is.
B) I've watched several videos where stringers were repaired or reinforced by cutting the top section of glass off. After this, the old wood was drilled and dug out leaving just the fiberglass skin and some old wood fragments. Then penetrating epoxy was poured into this mold and allowed to cure. The final step was to glass back over this. I'm not sure how this would work in my boat because I have this center engine mount platform. I don't know how I'd go about reinforcing that section. I figured this would be a good starting point though, if it doesn't look like it will work I can always cut everything out entirely and rebuild this if I have to.

Anyway, this is where I stand right now. In case you can't tell, I have no idea what I'm doing here but I do enjoy puzzles lol. I'm pretty good with carpentry and a mediocre mechanic. My best skillset is researching how to DIY stuff. Look forward to hearing anyone's recommendations on my project. If you've made it this far, thanks for your interest.
 

Attachments

  • After engines removed.jpeg
    After engines removed.jpeg
    3 MB · Views: 13
  • Center motor mounts.jpeg
    Center motor mounts.jpeg
    3.4 MB · Views: 13
  • Center transom wall-drain plug.jpeg
    Center transom wall-drain plug.jpeg
    2.7 MB · Views: 13
  • Forward engine compartment.jpeg
    Forward engine compartment.jpeg
    3.5 MB · Views: 13
  • Forward engine compartment-2.jpeg
    Forward engine compartment-2.jpeg
    4.6 MB · Views: 12
  • IMG_6351.jpeg
    IMG_6351.jpeg
    2.7 MB · Views: 11
  • IMG_6365.jpeg
    IMG_6365.jpeg
    2.2 MB · Views: 11
  • IMG_6367.jpeg
    IMG_6367.jpeg
    2.7 MB · Views: 10
  • IMG_6368.jpeg
    IMG_6368.jpeg
    3.3 MB · Views: 9
  • IMG_6371.jpeg
    IMG_6371.jpeg
    2.9 MB · Views: 9
  • Mystery hole with rubber plug.jpeg
    Mystery hole with rubber plug.jpeg
    2 MB · Views: 10
  • Port side forwad engine compartment.jpeg
    Port side forwad engine compartment.jpeg
    3.2 MB · Views: 10
  • Port side hole.jpeg
    Port side hole.jpeg
    4.3 MB · Views: 9
  • Port side transom wall.jpeg
    Port side transom wall.jpeg
    3.2 MB · Views: 9
  • Port side transom wall-2.jpeg
    Port side transom wall-2.jpeg
    3.1 MB · Views: 9
  • Port Stearn.jpg
    Port Stearn.jpg
    631.1 KB · Views: 9
  • Starboard front engine compartment.jpeg
    Starboard front engine compartment.jpeg
    2.9 MB · Views: 9
  • Starboard side engine compartment.jpeg
    Starboard side engine compartment.jpeg
    4.4 MB · Views: 10
  • Starboard side hole.jpeg
    Starboard side hole.jpeg
    3 MB · Views: 10
  • Starboard side lower bolt holes.jpeg
    Starboard side lower bolt holes.jpeg
    1.6 MB · Views: 11
  • Starboard side transom bottom.jpeg
    Starboard side transom bottom.jpeg
    2.7 MB · Views: 11
  • Starboard side upper bolt holes.jpeg
    Starboard side upper bolt holes.jpeg
    1.9 MB · Views: 12
  • Starboard Stearn.jpg
    Starboard Stearn.jpg
    567.5 KB · Views: 12
  • Test hole prior to engine pull.jpeg
    Test hole prior to engine pull.jpeg
    4.4 MB · Views: 13
  • Test hole.jpeg
    Test hole.jpeg
    5.2 MB · Views: 11
  • Test Hole-2.jpeg
    Test Hole-2.jpeg
    115.3 KB · Views: 10
  • Test Hole-4.jpg
    Test Hole-4.jpg
    112.5 KB · Views: 9
  • Test Hole-5.jpg
    Test Hole-5.jpg
    135.4 KB · Views: 9
  • Test Hole-6.jpg
    Test Hole-6.jpg
    530.2 KB · Views: 9
  • Transom Assembly bolt holes.jpeg
    Transom Assembly bolt holes.jpeg
    4 MB · Views: 14

drewm3i

Petty Officer 1st Class
Joined
Dec 31, 1969
Messages
288
My advice for the first step is to cut the fiberglass skin off the center of the transom and into the main stringers a bit so you can get a better look at what you're doing. You need to see what material can be saved and what needs to be removed. You can make a filler for a reasonable amount of rot with either high-density foam sheets, coosa, plywood, or even epoxy thickened and strengthened with milled fibers and/or micro balloons.

I personally don't recommend the skinning approach with stringers...it is way easier to just cut them out and replace. The fiberglass skins on modern production boats are very weak and thin and will be damaged if you use a chainsaw in there to hollow them out--which is necessary--as you'll likely find dry wood on top and rotten wood on the bottom. I tried to do this on my Sea Ray 270 Sundancer rebuild and it was a massive waste of time and effort. I ended up cutting them out and rebuilding with new plywood and they came out good as new in that regard and didn't take that long to build to be honest.

You need an oscillating tool to cut out the stringers...they're very precise and cut stringers like butter after the initial plunge cut.

Also, I personally would advise against exotic materials. Exterior grade AB plywood is perfectly acceptable. I do however, MUCH prefer epoxy resin as it easier to work with, less tacky, much less brittle, and way better at sealing wood without fiberglass cloth. Polyester resin is frankly extremely toxic and poisonous garbage. The only downside is that it is more expensive, but if you seal the wood properly by overdrilling holes and then filling and redrilling with epoxy, the structure will last forever. It's not hard to keep a boat structure dry, it's just most builders suck at basic boat building skills and/or design.
 

tpenfield

Moderator
Staff member
Joined
Jul 18, 2011
Messages
18,039
Now would be a good time to figure out where the moisture/rot is and isn't. You can drill a bunch of test holes, use a moisture meter, etc. to map it out. That will determine your 'plan of attack' and what to cut and where.
 

Monterey276

Seaman Apprentice
Joined
Aug 11, 2023
Messages
35
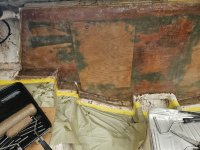
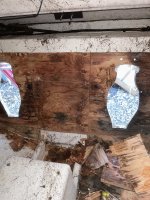
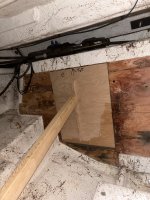
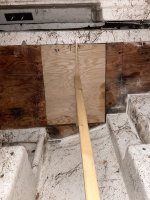
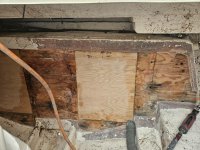
Hey all, wanted to give an update on my transom wall project. I've finally got to a point where I can see the condition of the transom and it's not too bad at all in my opinion. I had a few others from the marina look at it too and we all agree, it could probably just be patched up with some thickened epoxy after removing some of the water damaged areas. My bigger concern that I've discovered is the water that was trapped in the side bunks. In the pics attached you can see that on the port side bunk, there are now 2 holes. The bottom left hole is where there used to be a 1/2' diameter hole that had been filled with caulk. I knew this needed to be addressed so I used a hole saw to cut around it and was hopeful I could find out what was going on in there. I had planned to use the same hole saw and cut a blank out of marine plywood to epoxy back in place and then glass over the whole area. What I discovered though, was that for some reason, this has already been done on both the port and starboard side bunks in the same area. I'm not sure if this was a repair or if something used to be there but both of them had water inside once I removed them. In the areas I did expose, the wood is rotten. I've decided for the middle stringers, I'm just going to cut them out entirely about 1/4" from where they are currently tabbed in to the hull. I will use the middle stringers and attached motor mounts as a template for a new one I'll build. Once I have the new stringers and motor mount shelf built, I'll prep the hull and begin epoxying, fillets, and glassing them in. I am open to any advice someone has to share.
 

Attachments

  • Port Bunk-1.jpg
    Port Bunk-1.jpg
    1.3 MB · Views: 15
  • Starboard Bunk-1.jpg
    Starboard Bunk-1.jpg
    1.2 MB · Views: 16
  • Transom-1.jpg
    Transom-1.jpg
    1.1 MB · Views: 16
  • Transom-2.jpg
    Transom-2.jpg
    1.1 MB · Views: 16
  • Transom-3.jpg
    Transom-3.jpg
    1.1 MB · Views: 17
  • Transom-4.jpg
    Transom-4.jpg
    1.1 MB · Views: 16
  • Transom-5.jpg
    Transom-5.jpg
    1,011.4 KB · Views: 16
  • Transom-This was where the leak was coming from.jpg
    Transom-This was where the leak was coming from.jpg
    855.6 KB · Views: 15
  • Center motor mounts.jpeg
    Center motor mounts.jpeg
    3.4 MB · Views: 15
  • Center transom wall-drain plug.jpeg
    Center transom wall-drain plug.jpeg
    2.7 MB · Views: 14
  • Forward engine compartment.jpeg
    Forward engine compartment.jpeg
    3.5 MB · Views: 15

KJM

Lieutenant
Joined
Jul 31, 2016
Messages
1,265
Those bunks with the holes already in them have likely been wet a long time. I doubt the holes you found there chalked over were part of the original design. There is likely water soaked foam in there as well. They have to come out and be replaced IMO. I'll admit the transom don't look too bad so that's a bonus.
 

tpenfield

Moderator
Staff member
Joined
Jul 18, 2011
Messages
18,039
Is the transom wood wet? but not rotted? I can see it is dark in a few places, but you can probably kill it if the wood is still solid.

Letting it all dry (really dry out) out before you glass back over will be important.
 

kcassells

Fleet Admiral
Joined
Oct 16, 2012
Messages
8,715
The biggest joke in regard to boat compartments is that they are sealed and waterproof. Guys still rehab boats and think these non air non drain compartments won't fail. LOL
They always fail mostly from mfg's cheap ass jobs and prior owner band aiding the problem and passing it off at sale as dry.
Guud Luck.
 
  • Like
Reactions: KJM

Monterey276

Seaman Apprentice
Joined
Aug 11, 2023
Messages
35
Those bunks with the holes already in them have likely been wet a long time. I doubt the holes you found there chalked over were part of the original design. There is likely water soaked foam in there as well. They have to come out and be replaced IMO. I'll admit the transom don't look too bad so that's a bonus.
Yea, that’s what I’m thinking too. I think after I take some real accurate measurements of everything in there. I’m going to cut off the top glass layer above both bunks. That will be a start to see how they were constructed and how I’d need to rebuild. I’m scared to find out how far up it goes. How was the water getting in there???
 

Monterey276

Seaman Apprentice
Joined
Aug 11, 2023
Messages
35
Is the transom wood wet? but not rotted? I can see it is dark in a few places, but you can probably kill it if the wood is still solid.

Letting it all dry (really dry out) out before you glass back over will be important.
It is really solid. To give you an idea of the condition, I had originally planned to cut off the inner transom skin in 2-3 sections. I was going to epoxy back in place after I did the repair work. It was bonded so tightly to the wood that I had to cut into small sections and pry off with a hammer and 2’ prybar. The transom is the least of my concerns right now.
 

Scott Danforth

Grumpy Vintage Moderator still playing with boats
Staff member
Joined
Jul 23, 2011
Messages
49,538
Transom looks wet.

Would be months faster just replacing than trying to dry it and kill the mold spores
 

Monterey276

Seaman Apprentice
Joined
Aug 11, 2023
Messages
35
Transom looks wet.

Would be months faster just replacing than trying to dry it and kill the mold spores
I’m not getting into it until next year anyway. My goal for the fall is to just identify/expose what needs replacing. Then I’m going to put a bunch of damp rid buckets inside and wrap the boat for winter.
 

Monterey276

Seaman Apprentice
Joined
Aug 11, 2023
Messages
35
The biggest joke in regard to boat compartments is that they are sealed and waterproof. Guys still rehab boats and think these non air non drain compartments won't fail. LOL
They always fail mostly from mfg's cheap ass jobs and prior owner band aiding the problem and passing it off at sale as dry.
Guud Luck.
Lucky me ehh. I’m the guy stuck doing it the right way…
 

KJM

Lieutenant
Joined
Jul 31, 2016
Messages
1,265
Lucky me ehh. I’m the guy stuck doing it the right way…
When you rebuild them, I would leave a drain hole at the lowest point and coat the inside with resin to seal the wood, then fill the cavity with rigid subsurface foam insulation. That way any water that gets in there in the future can get out. Like was said, give it enough time and water always gets in!
 

Monterey276

Seaman Apprentice
Joined
Aug 11, 2023
Messages
35
When you rebuild them, I would leave a drain hole at the lowest point and coat the inside with resin to seal the wood, then fill the cavity with rigid subsurface foam insulation. That way any water that gets in there in the future can get out. Like was said, give it enough time and water always gets in!
Yea, that is in the plans for sure. Not exactly sure how I’ll design it but I’ll figure it out once I deconstruct what is currently there. I’m certain some of the water was allowed to pass through all the stainless screws holding down electrical/mechanical components. I have an idea that if I rebuild them with something 1” thick (maybe 2 sheets of 1/2” marine plywood bonded together) and then only use 3/4” stainless screws for reattachment points, there wouldn’t be any piercings into the new bunks. I’d also predrill any holes I need with a larger diameter, refill those holes with thickened epoxy, then finally, drill the 3/4” screw holes to attach my equipment. Lots of extra steps but I’m not cutting corners on this project.
 
  • Like
Reactions: KJM

KJM

Lieutenant
Joined
Jul 31, 2016
Messages
1,265
Yea, that is in the plans for sure. Not exactly sure how I’ll design it but I’ll figure it out once I deconstruct what is currently there. I’m certain some of the water was allowed to pass through all the stainless screws holding down electrical/mechanical components. I have an idea that if I rebuild them with something 1” thick (maybe 2 sheets of 1/2” marine plywood bonded together) and then only use 3/4” stainless screws for reattachment points, there wouldn’t be any piercings into the new bunks. I’d also predrill any holes I need with a larger diameter, refill those holes with thickened epoxy, then finally, drill the 3/4” screw holes to attach my equipment. Lots of extra steps but I’m not cutting corners on this project.
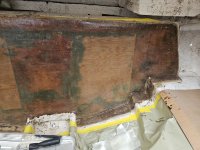
Another option would be to use coosa board or some other composite material that won't degrade if it gets wet.
 

drewm3i

Petty Officer 1st Class
Joined
Dec 31, 1969
Messages
288
My opinion is that the transom looks fine. I would allow it do dry out. A bilge heater and air circulation would help. I would also mist it with ethylene glycol a few times during the winter layup. I would then wipe with a solvent before glassing everything back together.

The stringers look like a cut and gut will be necessary.
 

Monterey276

Seaman Apprentice
Joined
Aug 11, 2023
Messages
35
Hey all, wanted to give an update on my Monterey restoration since I haven’t posted in this thread for a while. Although I did a ton of work on all my mechanical stuff over the winter, I’m going to keep this about the fiberglass, stringers, and transom repairs.

First off, when March came along, I still hadn’t completed all the mechanical repairs and preventive maintenance I wanted to have done. At that time, I hadn’t even touched my port side transom assembly and wanted to rebuild it as I had with my starboard. I decided to try and hire someone so I could be getting 2 things done at once. Also, I still didn’t really have a solid plan about how to tackle that problem. I met with a few different guys who all had differing opinions, ideas and of course, prices. This is mostly because the transom, while it did have some water intrusion and a few small areas at the beginning stages of rot, was really solid overall.

Anyway, one of them suggested a pretty solid plan I liked. The transom had sat delaminated all winter long so had plenty of time to dry out. I had brought a couple fans over there too and periodically allowed them to run.
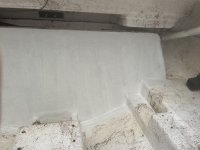
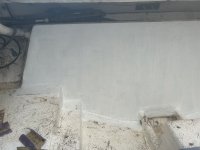
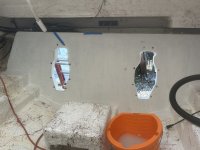
His idea was to cut the first 3/4” layer of plywood out about 4” beyond the keyhole in every direction. The old plywood was chiseled out in this area and a new piece of exterior grade plywood was epoxied in place. Areas that had signs of rot were also ground out and then filled with some type of resin. Not exactly sure what he used but it had a sort of dark green color to it. The entire transom was sanded and finally glassed back in. I think he said he used 5 layers of alternating fabric between CSM and woven. The last top layer was a 24 ounce woven. The entire layup was done using polyester resin.
On the day he did the layup, I met him over there and we applied gelcoat once it had started to become tacky. It was probably about 3-4 hours after layup.

Just want to say too that this guy was super professional and provided pics and updates every time he worked on my boat. Great craftsmanship in my opinion

So that was the transom repair. Pics are attached so curious to see what you all think. I thought it was a great plan considering the condition of my transom so hopefully this may be a useful fix to others.

Lastly, and unfortunately, this was not the end of my problems with rot and water intrusion. One consistent thing I was told was that the motor mounts and stringers were fine and not to mess with them. (Foreshadowing - they really weren’t). I’ll get to this update later cause, as usual, I have questions for you guys.
 

Attachments

  • imagejpeg_2.jpeg
    imagejpeg_2.jpeg
    312 KB · Views: 14
  • image000000.jpeg
    image000000.jpeg
    425.3 KB · Views: 12
  • image000000.jpeg
    image000000.jpeg
    447.9 KB · Views: 13
  • IMG_7266.jpeg
    IMG_7266.jpeg
    2.2 MB · Views: 12
  • IMG_7350.jpeg
    IMG_7350.jpeg
    3.1 MB · Views: 12
  • IMG_7349.jpeg
    IMG_7349.jpeg
    2.8 MB · Views: 11
  • IMG_7370.jpeg
    IMG_7370.jpeg
    2.8 MB · Views: 12
  • IMG_7271.jpeg
    IMG_7271.jpeg
    1.9 MB · Views: 11
  • IMG_7270.jpeg
    IMG_7270.jpeg
    2.1 MB · Views: 14
  • IMG_7264.jpeg
    IMG_7264.jpeg
    1.9 MB · Views: 14
  • IMG_7265.jpeg
    IMG_7265.jpeg
    2.1 MB · Views: 35

tpenfield

Moderator
Staff member
Joined
Jul 18, 2011
Messages
18,039
Thanks for the update . . . Looking forward to fixing the stringers. I cannot remember if you had done core samples of the stringers. :unsure:
 
Top