99 Monterey 276 Transom Replacement

Lou C

Supreme Mariner
Joined
Nov 10, 2002
Messages
12,320
First decide if you’re goin go to keep this boat a long time or not. Then evaluate rhe condition of the rest of the boat & the running gear before going forward with a project like that.
 
  • Like
Reactions: KJM

Monterey276

Seaman Apprentice
Joined
Aug 11, 2023
Messages
35
good luck, I would personally fix the transom this winter
I seriously considered it but I had a lengthy conversation with the guy in my area who specializes in restoration jobs. He said it’s actually a much easier job the further along the rot is. It’s much easier to do the demo work. Made sense to me anyway
 

Monterey276

Seaman Apprentice
Joined
Aug 11, 2023
Messages
35
First decide if you’re goin go to keep this boat a long time or not. Then evaluate rhe condition of the rest of the boat & the running gear before going forward with a project like that.
I didn’t have plans to sell until this came up. I initially thought it was a death sentence. It’s a great looking boat IMO. Everything works perfectly.
 

KJM

Lieutenant Junior Grade
Joined
Jul 31, 2016
Messages
1,246
Thanks for the advice everyone. Just wanted to share the rest of this story. After drilling a couple holes I’ve found that it is definitely wet and at the beginning stages of rot but it’s actually not terribly bad yet. I don’t have any stress cracks or the interior glass beginning to delaminate. I had a mechanic pull the engine and crank down the bolts but that only slowed the leak down temporarily. (Another indicator of it getting squishy in there). He says that there are spots he could see the plywood core between the inner and outer transom assembly and it didn’t look bad at all. My plan for the fall is to wire and plumb in a backup bilge pump totally independent from the primary pump. I’m going to pull the drive off and look for any spots water may be seeping through and put some 5200 around the outside transom assembly. It obviously is going to have to be fixed correctly within the next few seasons but I don’t think it’s as bad as I was initially told. I’ve watched a lot of YouTube videos recently about rotten transoms and mine isn’t even close to that. Also, it doesn’t look like too bad of a job, I’ll do some research and be ready to tackle it myself a few seasons from now.
Don't mean to be a downer, but you are putting off the inevitable. A wet transom in places means a rotten transom in places. If you have the engines pulled(?) why not just bite the bullet and dig in? It ain't fun but it is doable. I would be ready to face rotten stringers as well, at least where they meet the transom. I would also suggest using a composite material for the core of your rebuild, you don't want to do this twice!
 

KJM

Lieutenant Junior Grade
Joined
Jul 31, 2016
Messages
1,246
I seriously considered it but I had a lengthy conversation with the guy in my area who specializes in restoration jobs. He said it’s actually a much easier job the further along the rot is. It’s much easier to do the demo work. Made sense to me anyway
I would like to know what he said! Maybe I'm wrong but ripping apart an entire boat instead of the back end of a boat don't seem easier to me. Could it be he's just looking for a bigger job down the road?
 

tpenfield

Moderator
Staff member
Joined
Jul 18, 2011
Messages
17,957
Once wet, rot tends to go exponential and can go quicker than you think.
 

Monterey276

Seaman Apprentice
Joined
Aug 11, 2023
Messages
35
I would like to know what he said! Maybe I'm wrong but ripping apart an entire boat instead of the back end of a boat don't seem easier to me. Could it be he's just looking for a bigger job down the road?
Nah, I didn’t get that vibe from him at all. He said if I wanted to have him do it, it wouldn’t be until end of next season anyway. He has that many jobs in front of mine. Again, it needs to be addressed but has probably been leaking/rotting for years. I’ve only discovered it this season. One more years not going to hurt IMO. It still floats … mostly
 

drewm3i

Petty Officer 1st Class
Joined
Dec 31, 1969
Messages
288
My advice: take the TPenfield approach over winter.

Pull the engine and transom assembly. Cut the inner skin off the transom where it's wet.

Once removed, inspect the wet wood. Depending on severity, dig out what's rotted and repair with either new core or epoxy mixed with milled glass fibers.

Drill a bunch of holes in the existing wood and inject ethylene glycol a few times into the holes. Keep a heater in the bilge to dry out the wet wood. Once dry, fill all of the holes with epoxy. Then glue the skin back in place with epoxy and clamps. After that, tab over all of the joints and paint the bilge.

This will be a lot easier now rather than later
 

tpenfield

Moderator
Staff member
Joined
Jul 18, 2011
Messages
17,957
Having been there and done that. . . Nip it in the bud stages. It is not all about the transom, and a delay may enlarge the scope .
 

tpenfield

Moderator
Staff member
Joined
Jul 18, 2011
Messages
17,957
Keep in mind that all of the wood ‘bones’ of the structure are connected and moisture travels quickly among the component.
 

drewm3i

Petty Officer 1st Class
Joined
Dec 31, 1969
Messages
288
Keep in mind that all of the wood ‘bones’ of the structure are connected and moisture travels quickly among the component.
Share the link of your 330 SS project. I think it fits the bill here.
 

drewm3i

Petty Officer 1st Class
Joined
Dec 31, 1969
Messages
288
 

Monterey276

Seaman Apprentice
Joined
Aug 11, 2023
Messages
35
Hey all, wanted to send an update on my leaky transom assembly/rotten transom situation. I drilled quite a few more holes in various places along the stringers and motor mounts and seeing mostly brown/black wood shavings that come out. I made a decision that y’all are right and it shouldn’t wait any longer so I guess I’ll be attempting a boat restoration project. Last Wednesday I disconnected everything on both engines, and with the help of the marina, pulled them both out. They are now sitting in my garage until I get this resolved. Over the weekend I began removing hardware, electrical, plumbing etc. I have so many questions I don’t even know where to begin. I’ll post some photos soon along with the beginning idea stages of my plan for review. Hopefully a few of you more experienced members won’t mind lending me advice on the subject.
 

JASinIL2006

Vice Admiral
Joined
Feb 10, 2012
Messages
5,618
Sorry you found rot, but good on you for taking care of it properly!

You are in the right place for help.
 

tpenfield

Moderator
Staff member
Joined
Jul 18, 2011
Messages
17,957
We are going to need lots of pictures as you go, as it will help with responses.
 

KJM

Lieutenant Junior Grade
Joined
Jul 31, 2016
Messages
1,246
Take lots of pictures for your own use as well as you take everything apart, esp. wiring, so you will know how it all goes back together down the road.
 

Monterey276

Seaman Apprentice
Joined
Aug 11, 2023
Messages
35
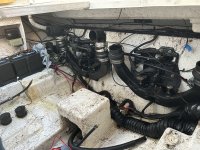
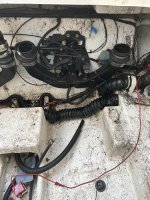
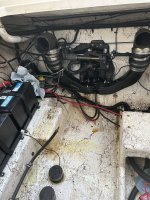
Here’s a few from right after I finished up removing the engines. We pulled these while it was still in the water so I could see where the leak was coming from. I have a video of that if I can upload videos here but it was sort of inconclusive anyway. It seems to be trickling down the back side of the Y-pipe somehow but I couldn’t see how without removing more stuff. Next step is to remove the drives. So here’s question number 1, how do I know for sure the drive is in forward gear for removal if the linkage is disconnected?? I can see the shift lever moving the drive cable (I left the linkage all connected, just removed the bracket from the manifold studs). I wanted confirm with someone first on this cause I didn’t want to try and remove and potentially damage something if it’s not actually in forward position. I have already disconnected speedometer tube.
 

Attachments

  • IMG_6256.jpeg
    IMG_6256.jpeg
    2.9 MB · Views: 14
  • IMG_6255.jpeg
    IMG_6255.jpeg
    3 MB · Views: 14
  • IMG_6254.jpeg
    IMG_6254.jpeg
    3 MB · Views: 14

Scott Danforth

Grumpy Vintage Moderator still playing with boats
Staff member
Joined
Jul 23, 2011
Messages
48,761
usually the easiest way is to remove the drive before removing the motor.
 
Top