'94 Crownline 182 Restore transom/stringers/deck

Rickmerrill

Senior Chief Petty Officer
Joined
Mar 13, 2014
Messages
686
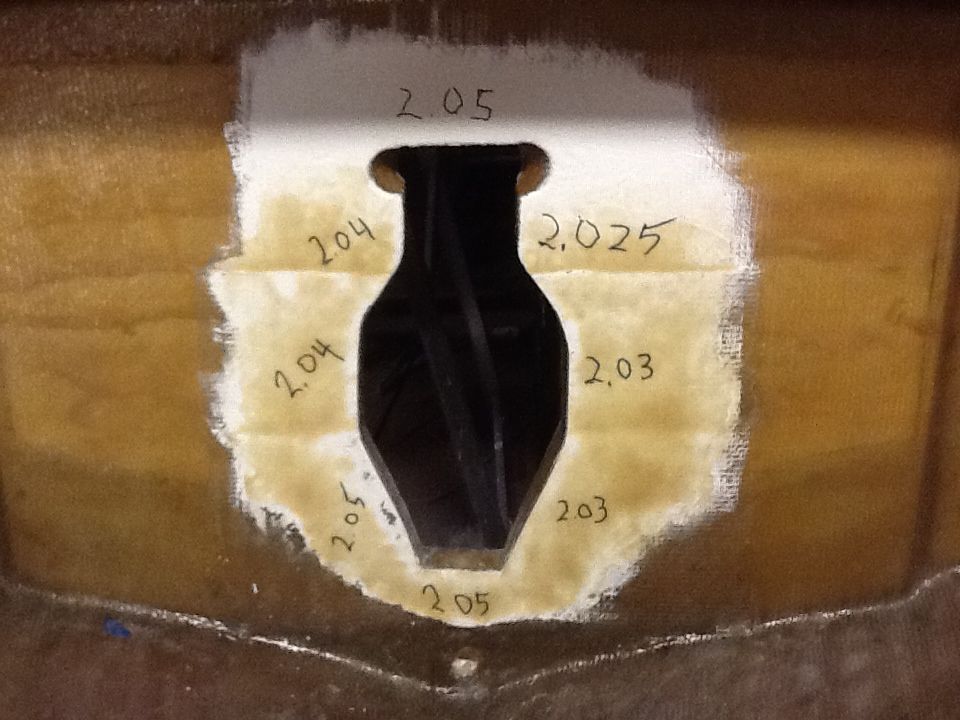
Thanks for the comments GT and Jim. It tells me some others entertain the idea of building it up and sanding it "level". When I went to bed last night I was thinking I'd just bevel the edges a little and be done with it. This morning I woke up thinking if I start sanding the areas that are right on 2" now are going to a little under spec. Yeah, like .020" would matter and the stitching on the biaxial sticks up so you wouldn't get 100% contact anyway. But that's the way I am; Jim I think you know what I mean. GT I thought about the ease of sanding PB. I have to go with what I got so I think I'll try adding some wax to some gelcoat, so I'm not gummy sanding, add a few layers, sand and see what I get. I think after a couple of hours in this heat my body will tell my mind "that's good enough".
 

Rickmerrill

Senior Chief Petty Officer
Joined
Mar 13, 2014
Messages
686
Bigdirty, I was a maintenance machinist for a few years - that helps a lot with knowing how to deal with broken studs and such. Then I worked in a prototype shop for a few more years where the tolerances were frequently +- .0002" - that ruined me for stuff like this and woodworking too! That gelcoat didn't build up nearly as fast as I thought. Switched to PB just to fill the low areas. Once that drys I'll do some sanding and call this experiment done.
 

GT1000000

Rear Admiral
Joined
Jul 13, 2011
Messages
4,916
Looks golden from this distance! Nice Job! I seriously doubt the factory took this much pride in executing a "spec" tolerance transom thickness...
 

atjohnson

Petty Officer 2nd Class
Joined
Feb 3, 2014
Messages
106
Sounds great Rick. I have all of the tools now, so if you are interested in borrowing any of them rather than purchasing them all, you are more than welcome. It wouldn't hurt to have your own alignment tool since it is more commonly used, but all of the others seem to be 3 year service intervals for use.
 

Rickmerrill

Senior Chief Petty Officer
Joined
Mar 13, 2014
Messages
686
Thanks GT. The best they could do was 1-7/8" thickness. A little 3m 4200 on the garboard drain and the transom is finished.
 
Last edited:

Rickmerrill

Senior Chief Petty Officer
Joined
Mar 13, 2014
Messages
686
Thanks Andrew, that is a very generous offer. Wow, three year interval; I'm a little bit behind on maintenance!
 

Rickmerrill

Senior Chief Petty Officer
Joined
Mar 13, 2014
Messages
686
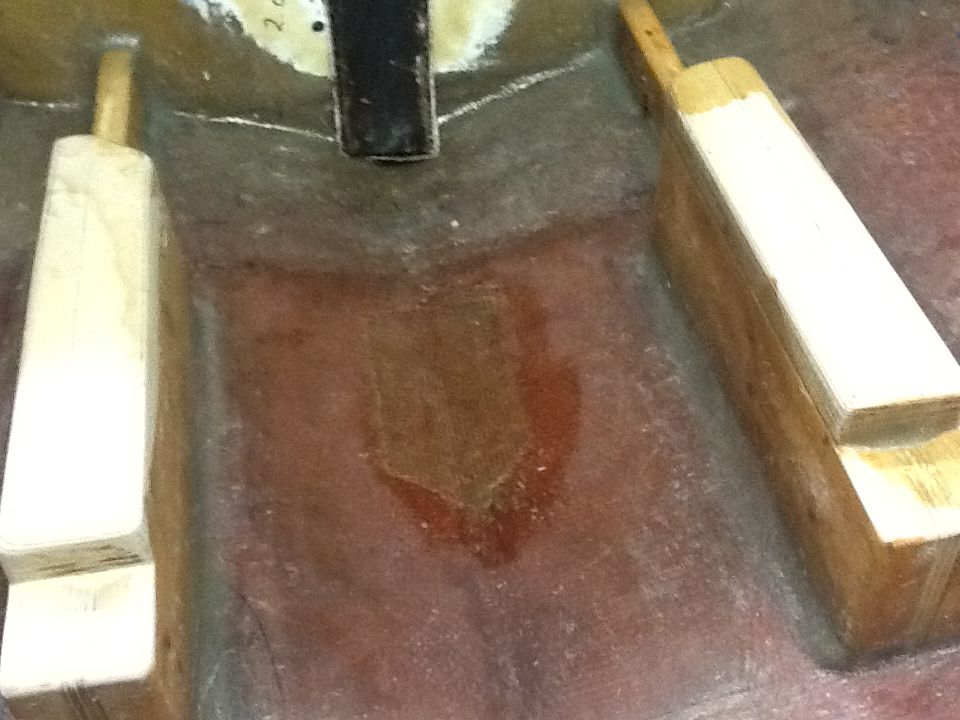
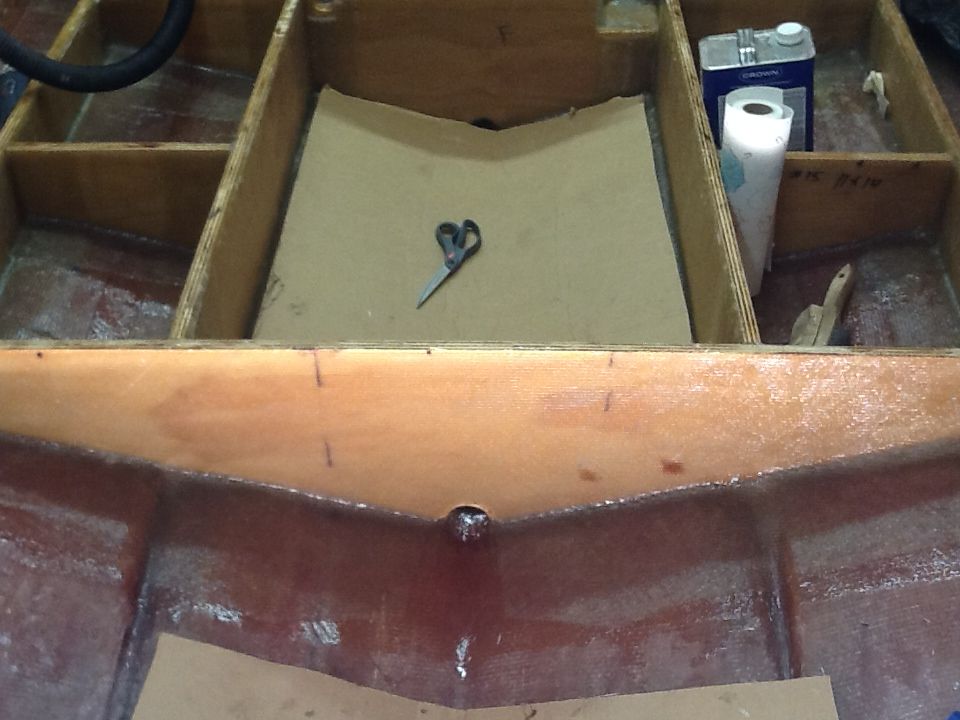
Engine supports are in, probably in the right place, and the pad for the bilge pump has been removed and the oily area cleaned/repaired. That pad was glassed over some woven on the hull that had almost no resin so the fibers soaked up water/oil. Took several sessions of clean and grind to get rid of. The old pad had nothing protecting the bottom side. You can see what's left of the pad leaning against the keyhole. Still wet or oily after two years of garage storage! I'll overlap the 1708 I used to seal the area when I tab/cover the engine supports to add strength.
 

Rickmerrill

Senior Chief Petty Officer
Joined
Mar 13, 2014
Messages
686
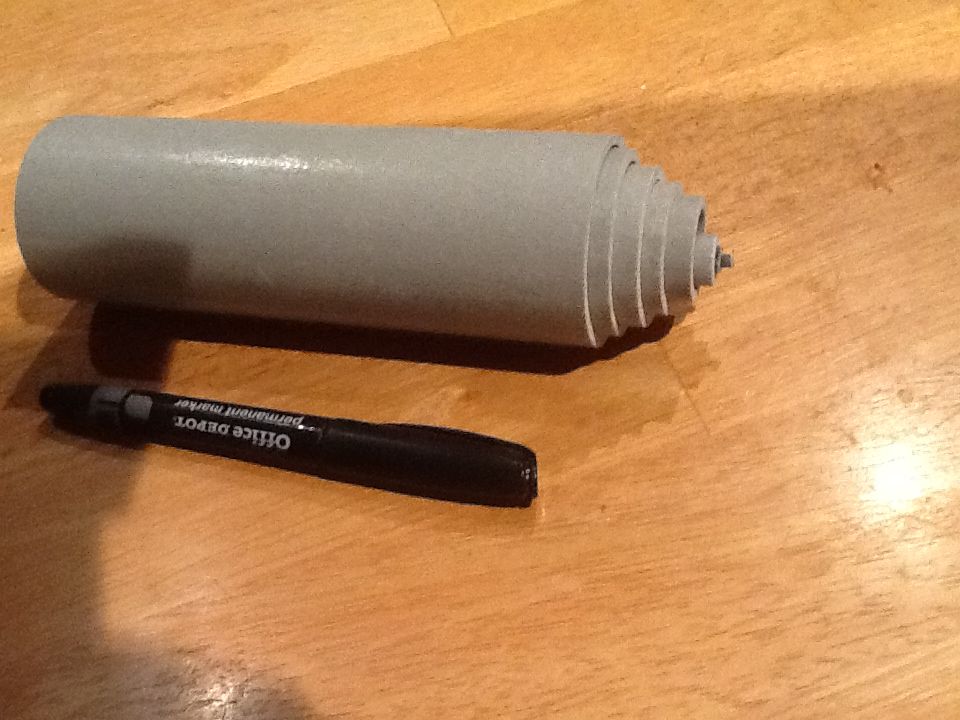
I recently noticed someone on the forum solved the transom flatness issue with a piece of ply, some PB (I think), plastic and clamps. Wish I'd thought of that or better yet wish he'd posted sooner! On a similar note (wish they'd posted sooner) someone made their own fiberglass tubes (to line drain holes, PVC is usually used). I used a sample pack of fiberglass tubes I got from an antenna mfg shown below (about $15). Since my boats main failure was at the bulkhead drain holes I wanted the best waterproof fix I could think of.


Haven't updated lately cause I been working my butt off on this! Here is where it stands now.
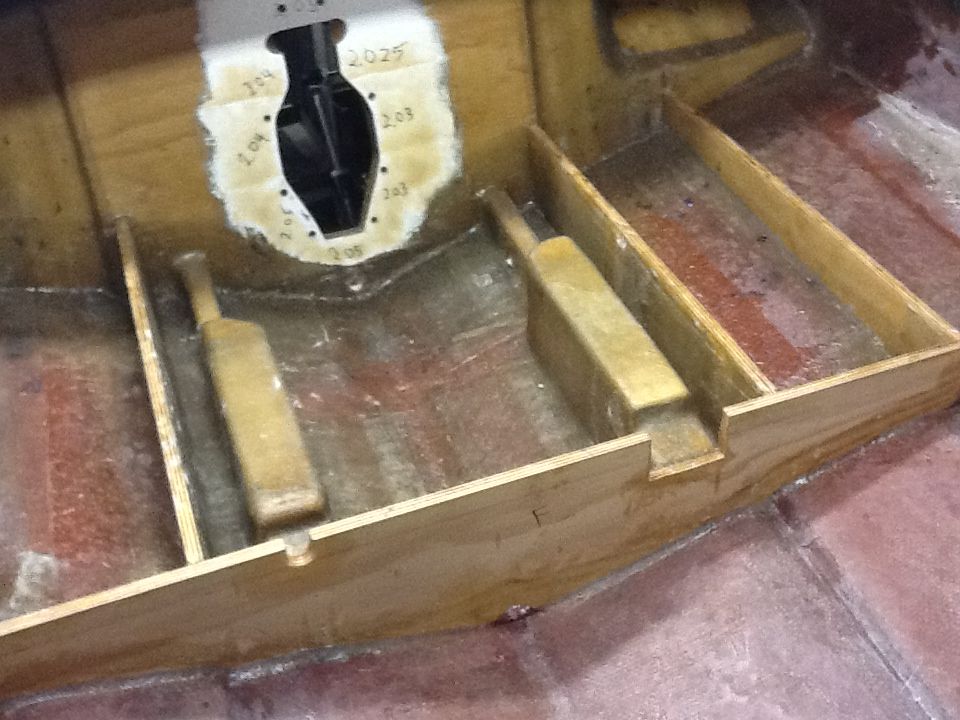


Well, it looks prettier in the picture than in real life! Biggest problem was getting 1708 around the corners on top of the engine supports without air pockets. Second problem was glassing over the motor mount, down to the hull then up the side of the stringer. The space between stringer and mount is less than 3 inches. Get one corner air free, start on the other corner and it starts pulling the first corner. I tried several ways of holding the first side down; the chip brush on one side and the roller on the other worked pretty good. Getting 4 layers of 1708 over everything was a glassing challenge I'm not sure I was up to. I think if I had to do it over again I'd glass in the mounts first and then add the inner stringers. All in all it seems solid back there, few air bubbles, plenty of tabbing in the corners so I'm calling it a win but casualties were worse than anticipated!

I've pretty much decided the way I'll get my stringer height, and the way I did this area, is to start with the bulkhead and PB in place, use a string line to mark height and use a straight edge to cut the bulkhead nice and flat with nothing in the way of the saw. For the stringers one end is marked where it meets at the top of the bulkhead and on the other end use the string line to figure height and mark that. Draw a line and cut the stringer just a little short. Use my shims to raise it to proper height and PB it in. A little unorthodox I know, probably inefficient but if I try to cut the stringers in place it won't be very pretty.
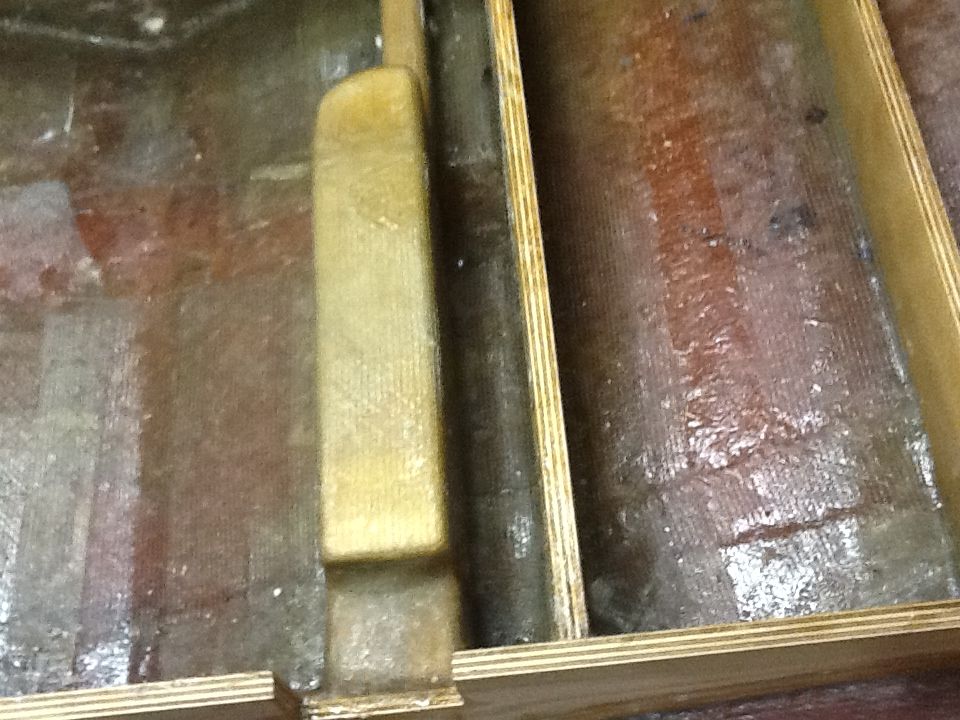


The distance between mount and stringer < 3".
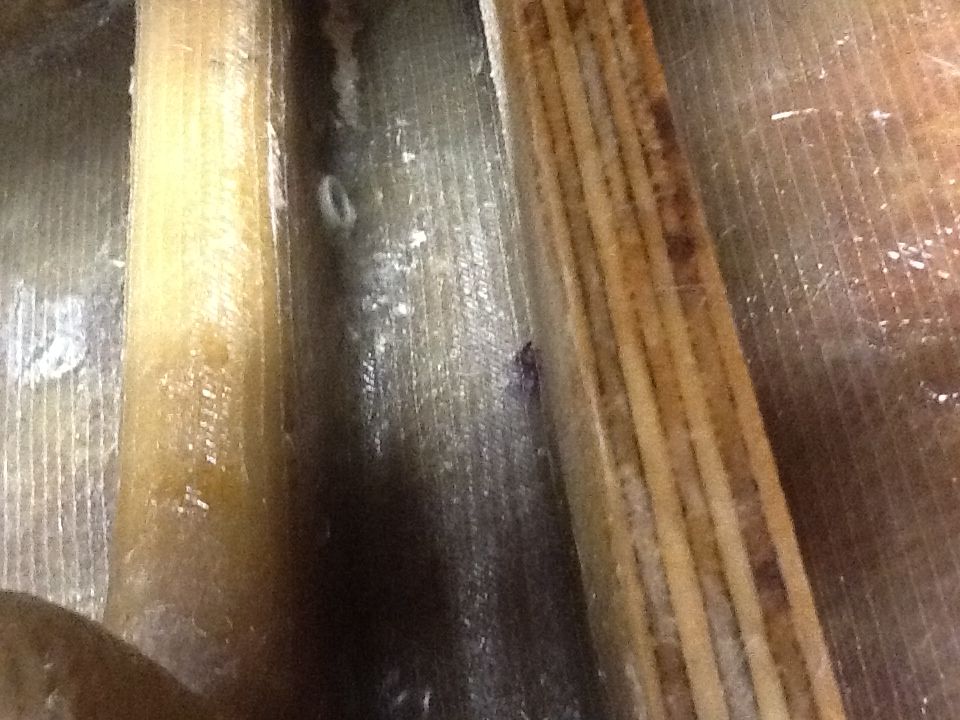


The drain tube in place.

Lots more I'd like to mention and a few questions but this is long enough so I quit for now.
 
Last edited:

Woodonglass

Supreme Mariner
Joined
Dec 29, 2009
Messages
25,928
Here's what I KNOW for certain...It's 10 times better than what it was when it came from the factory and look how long that lasted. I say..."Good On Ya!!!!" That's some pretty darn good glassin in a difficult situation.;)
 

atjohnson

Petty Officer 2nd Class
Joined
Feb 3, 2014
Messages
106
The glass on your mounts looks really good. I'm curious to know how you laid them (one piece, two?) I started with a one piece, but after layer two, I had to change it to two pieces. I feel your pain with the tight gap between the mount and the stringer. I could barely get a roller in there, then I would use the chip brush and mess up some other spot trying to pat out air bubbles. Seeing your drains also reminds me that I need to open mine up. I glass over them and was planning on coming back to open them up later.
Are you planning on glassing as you go? I couldn't tell from the pictures if that was the plan or if you were just knocking out the mounts.
 

Rickmerrill

Senior Chief Petty Officer
Joined
Mar 13, 2014
Messages
686
Andrew thanks for the kind words. I thought about asking how people would approach this but decided it would probably take an animation or video for me to understand it. Kinda like trying to describe how to tie a knot. But since you are painfully aware maybe I can describe it. I started with the starboard mount, I think I got two pieces over the top then the third piece was two sheets that stopped about an inch from the top. After that it was a blur. On the port side I decided to stay away from the ends and get three progressively larger/longer pieces all the way over figuring that would have a good grab on most of it. I managed to double tab to the bulkhead and inner stringer and put a half piece in between. I also put two layers on the angled piece on the back on both mounts. The rest was mostly guessing what would be the strongest and putting overlapping patches. On the tops I made "caps" for the ends, both mounts, but I added two layers of CSM on the ends just to make sure it was waterproof and to level it out a little. On the back part, with the holes, I got three layers up and over and figure the wood would give before that did. I did cut the holes in the cloth before glassing those in with each hole a little larger than the next. That made a nice taper into the hole for PB. Resin ran down in there so I had to use a rasp on a drill to waller it out. I think it would have been easier not to cut the holes in the wood first and just drilled them in place after glassing. I hope some of that made sense but in the end I probably have 2 layers in a few small spots, 3 on some and four on the middle.

We had a good discussion about how long before you should rough and scuff, turns out it is only 19 hours. Since then I've decided to glass as I go to try to get primary bonds and I hate gummy sanding! I've managed to go a quart at a time but really a pint gives me a lot more time to get the 1708 to fully wet out and to work on any air bubbles. By then I'm getting tired bones from the awkward positions and ready to jump out of the boat.
 
Last edited:

Rickmerrill

Senior Chief Petty Officer
Joined
Mar 13, 2014
Messages
686
I said I'd like to try to add a few helpful tips from time to time as I learn and here are a few more little things. 1- Don't wear old fake black rubber soled shoes. They make a mess inside especially after they get some resin on them and that will need to be cleaned up. White or tan or oil proof soles are much cleaner. 2- An oscillating tool is great at trimming nibs on new glass before the next layer, it even roughs up the area so no sanding required. 3-Rubbing lots of acetone around on a rag is just moving contaminants around the surface. What you want to use is lots of rags or paper towels to transfer the contaminants to a clean side of the rag or a paper towel. Change to a fresh side of the rag each wipe or throw the paper towel overboard each wipe or two if you use the other side. It's cheap insurance for a good bond. 4-You have 16 hours after new glass to lay your next layer over it to get a good primary (chemical) bond. If you don't make it in time you'll need to rough it up again and depend on a secondary (mechanical) bond. Try to plan layups accordingly as much as possible. I hope some of this is useful to somebody.
 
Last edited:

Rickmerrill

Senior Chief Petty Officer
Joined
Mar 13, 2014
Messages
686
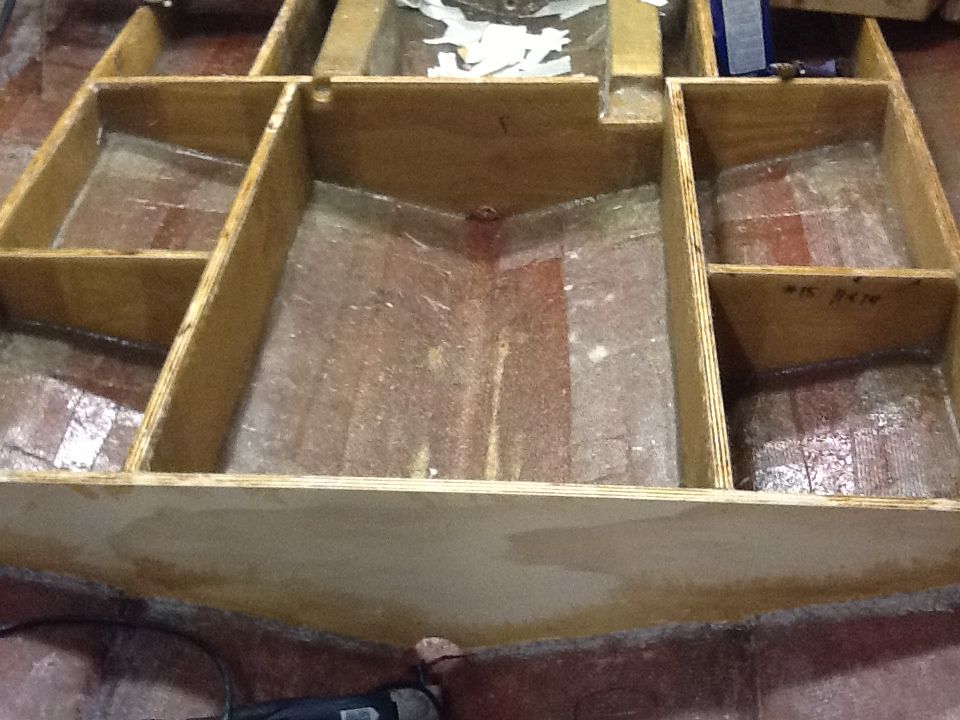
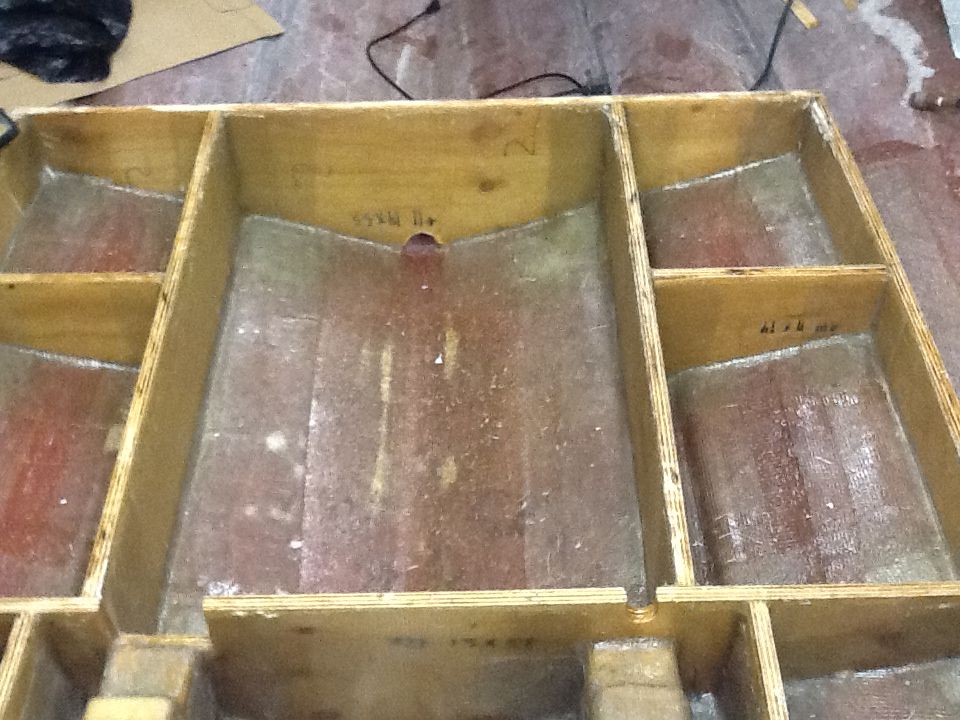
Finally finished the bulkhead in front of the fuel tank and the stringers that are around it. Don't know why it took so long, been working on them at least a couple or three hours almost every day and some days longer. Also cut out and fitted the two stringers around the ski locker today and will start to PB them in tomorrow. Have gone thru three of my four five gallon pails of resin and still have the forward stringers, capping all stringers/bulkheads, and the deck to do so it looks like I'll probably need another 5 gallons to finish up. Been using the freezer bag trick to squeeze out PB, that works nice. Also been wetting out the 1708 on a piece of cardboard, it wets them out well but it can get a little messy picking up and placing the biaxial and sometimes I manage to stretch it and need to do emergency surgery and do some wet cuts with an old pair of scissors. Here are a couple of somewhat boring pictures of the fuel tank area completed.


Looking from the bow. The white bright white spots are where sweat hit.

Looking from the stern.
 
Last edited:

Woodonglass

Supreme Mariner
Joined
Dec 29, 2009
Messages
25,928
Hey Rick,

Glassin looks good. Next time you go at try this... Use some blue painters tape and tape your glass to the top of the stringer then fold it back over the top. Use your roller and wet out the side of the stringer or bulkhead really well with resin and then bottom of the hull too. Then drape the glass over and onto the wetted out stringer and roll it in the resin. apply Plenty more resin from the top down to the fillet and from the hull to the fillet. Always work towards the fillet at first. Have a chip brush handy to dab at the fillet for air bubbles. When it starts to tack a bit you can roll horizontal too and use the bubble buster roller. Once it starts to tack up and get rubbery use a razor knife and cut off the top edge and the taped part.;) This is how I've done it and it always worked well for me. I only pre-wet glass when I was working Upside down and had to carry it to the boat and apply it laying on my back!!!:eek::D
 

Rickmerrill

Senior Chief Petty Officer
Joined
Mar 13, 2014
Messages
686
Well, it just so happens that my next step was to get two layers on the front of the forward fule tank bulkhead so I tried Wood's advice. I used the painters tape to hold the top of the 1708 even with the top of the bulkhead and then flipped it over the top out of the way. Then I did the same for the second layer of 1708. Not sure this was exactly right because you mentioned cutting the excess at the top but I was confused on exactly where the tape and cloth went. Anyway, I worked the top down with resin but didn't quite "get" the working the hull side towards the fillet part of your advice. So I guess you could say I started at the top and worked my way to the other end. I tend to like sliding a wet roller along the fillet to get most of the bubbles and then rolling the second half towards the fillet. I used the chip brush, mostly in the strake areas, to chase any remaining bubbles and ended up not needing the bubble buster. I thought that wetting it out beforehand seemed to leave a more translucent laminate but I like not having to deal with placing the wet cloth and sticky gloves and this one looked great. I went wet on wet on this one and it turned out really good. This is what it looked like a few hours after.
 

geneseo1911

Petty Officer 2nd Class
Joined
Jul 3, 2011
Messages
183
That looks really nice. If Crownline had taken half that much care you wouldn't be in this situation now. I'm a little surprised a well cared for premium brand like CL wouldn't have held up better, but I think the 90's was a low point for boat build quality across the board.
 

Woodonglass

Supreme Mariner
Joined
Dec 29, 2009
Messages
25,928
Hey man, that layup looks GREAT. I just meant that working towards the fillet helps keep it from pulling the glass away from the fillet and causing bubbles but hey what every works...works. It looks to me like you got it down!!!! Thats about as good as it gets!!!! I'm not using the bubble roller much nowadays either. After a while you just start to know how to work the stuff doncha know!!!!;)
 
Top