'90 Maxum 2100SR - restoration & conversion

Reserector_

Chief Petty Officer" & 2021 Splash of the Year Win
Joined
Oct 15, 2019
Messages
602
Nice work on the scarf joints. It's a shame they will be hidden. At least you have photos of them on the internet, eh?

I wish I had known that trick with the transom holes when I did mine. Not easy to seal them otherwise.

Thoughts on transom gluing: When I set my transom in, I wetted the ply with laminating (poly) resin until it was done drinking that in, and let it kick. Then I laid up about 4 layers of CSM dry, holding it in place with a handful of staples. With the transom wood flat, I soaked it thoroughly. Then I wetted the hull and clamped it in place, working bottom to top.
I mixed my resin on the slow side and had plenty of time.

The point I'm trying to make that might work for you is the layers of CSM instead of PB. Once the resin dissolved the styrene binder in the CSM, it was like having a very evenly applied layer of PB about 1/8" thick. It conformed nicely to the small irregularities of the hull. (Large irregularities were already filled and leveled.) Working by myself, this seemed to go more quickly and controllably than mixing large batches of PB and trying to spread it quickly and evenly. The CSM was stapled in place on the wood, and all I had to do was saturate it.

Just food for thought. I know that epoxy doesn't melt the styrene as well as Poly does, so that might be a consideration. Maybe some of the others have thoughts on this method.
 

Baylinerchuck

Commander
Joined
Jul 29, 2016
Messages
2,726
Nice work on the scarf joints. It's a shame they will be hidden. At least you have photos of them on the internet, eh?

I wish I had known that trick with the transom holes when I did mine. Not easy to seal them otherwise.

Thoughts on transom gluing: When I set my transom in, I wetted the ply with laminating (poly) resin until it was done drinking that in, and let it kick. Then I laid up about 4 layers of CSM dry, holding it in place with a handful of staples. With the transom wood flat, I soaked it thoroughly. Then I wetted the hull and clamped it in place, working bottom to top.
I mixed my resin on the slow side and had plenty of time.

The point I'm trying to make that might work for you is the layers of CSM instead of PB. Once the resin dissolved the styrene binder in the CSM, it was like having a very evenly applied layer of PB about 1/8" thick. It conformed nicely to the small irregularities of the hull. (Large irregularities were already filled and leveled.) Working by myself, this seemed to go more quickly and controllably than mixing large batches of PB and trying to spread it quickly and evenly. The CSM was stapled in place on the wood, and all I had to do was saturate it.

Just food for thought. I know that epoxy doesn't melt the styrene as well as Poly does, so that might be a consideration. Maybe some of the others have thoughts on this method.

I guess my concern would be squeezing the clamps too tightly and in essence wringing out the resin from the fiber causing starved fiber. Also make sure the overall thickness doesn’t exceed specifications.

If using the PB Glue method, you can also make it kick slow. You only tighten the clamps until uniform squeeze out is detected along all edges. That squeeze out can immediately be tooled into fillets.
 

Reserector_

Chief Petty Officer" & 2021 Splash of the Year Win
Joined
Oct 15, 2019
Messages
602
Squeezing the resin out is actuallywhat you want.
When it comes to fiberglass, ultimate strength-to-weight is achieved when the fibers are completely impregnated and the layers are compressed, with all excess resin removed.
Resin by itself is not very strong Polyester is quite brittle, in fact. It is merely the glue that binds the fibers.
That is why modern boats are resin impregnated in a vacuum bag. Air is drawn out to tighten the glass layers, and then the resin is piped in. No excess resin at all.
 
Last edited:

PC on the Bayou

Petty Officer 1st Class
Joined
Apr 27, 2020
Messages
234
After waiting around all day (and watching some football) for the temp to get closer to 70, I got the transom wood "glued" in place and clamped yesterday evening. Also put the stringers in place so that once I tab in the transom I can start bedding the stringers. Finally feels like I'm making progress; although slowly. Pics soon.
 

todhunter

Canoeist
Joined
Sep 15, 2020
Messages
1,302
And you used PB / thickened polyester resin to glue the transom in? How did you feel about the working time to spread it and get it clamped?
 

PC on the Bayou

Petty Officer 1st Class
Joined
Apr 27, 2020
Messages
234
And you used PB / thickened polyester resin to glue the transom in? How did you feel about the working time to spread it and get it clamped?

Yes, I glued it in with PB.

I have been mixing my resin on the slow side so I haven't had any issues with kicking off too quickly. Yesterday, it was a nice cool day (70 F) max; so, it went off really well to get it in place and clamped.
 

todhunter

Canoeist
Joined
Sep 15, 2020
Messages
1,302
Yes, I glued it in with PB.

I have been mixing my resin on the slow side so I haven't had any issues with kicking off too quickly. Yesterday, it was a nice cool day (70 F) max; so, it went off really well to get it in place and clamped.
That's what I want to hear! The transom being so large has me nervous about the PB kicking before I'm ready, but I'll almost certainly be installing it in the winter in my climate controlled garage, so I should be able to achieve whatever ambient temperature I want. Hopefully by the time I'm ready to glue my new transom in I'll have gotten a good feel for mixing the resin to get the speed of cure I want.
 

PC on the Bayou

Petty Officer 1st Class
Joined
Apr 27, 2020
Messages
234
Hopefully by the time I'm ready to glue my new transom in I'll have gotten a good feel for mixing the resin to get the speed of cure I want.

I started all of my resin work with a slow mix ratio because I didn't want to be too rushed with anything. I would rather have to wait longer between tasks than to get half way through and have my resin hardening up on me.

It, also, makes it good for clean-up of tools and equipment after working with the resin. So far, I've been able to clean up my mixing cups, rollers, etc. very well.
 

PC on the Bayou

Petty Officer 1st Class
Joined
Apr 27, 2020
Messages
234
Unclamped the transom this morning and sanded the keyhole to clean it up. Then waited for the temp to come up for a while and mixed up some PB to fillet around the transom and fill a few uneven spots.

Man, the PB took a while to kick off good in this cool weather. Ended up putting a tarp over the back of the hull and putting a space heater to warm it up a bit more.

Weather is supposed to be back I. the 70's tomorrow; so I hope to get the transom tabbed and then start bedding I.the stringers.

I plan to put in the spacers and then bed in between them. Once that kicks and firms up, I will go back in, remove the spacers, and bed the rest. Then I will do the fillets as well.

I will post pictures after I get as far as I can tomorrow.
 

PC on the Bayou

Petty Officer 1st Class
Joined
Apr 27, 2020
Messages
234
On a side note, the glass fibers that I made by shredding some CSM seems to work well. Thanks to whomever it was in another thread for idea of using a paper spreader to make the fibers from CSM scraps.
 

todhunter

Canoeist
Joined
Sep 15, 2020
Messages
1,302
I started all of my resin work with a slow mix ratio because I didn't want to be too rushed with anything. I would rather have to wait longer between tasks than to get half way through and have my resin hardening up on me.

It, also, makes it good for clean-up of tools and equipment after working with the resin. So far, I've been able to clean up my mixing cups, rollers, etc. very well.
How did you spread the PB on the transom? Did you use a notched trowel or some other method?
 

kcassells

Fleet Admiral
Joined
Oct 16, 2012
Messages
8,714
LOL....with whatever I had. Only kidding a disposable notched trowel is good. Get a couple of them for the layup.
Semen Kevin
 

PC on the Bayou

Petty Officer 1st Class
Joined
Apr 27, 2020
Messages
234
Ok. Better late than never on the pictures.

I finished bedding the stringers this morning and will probably start tabbing them in this afternoon. Have a tad bit of grinding to do once the fillets set up where I didn't stand back enough by the ski locker.

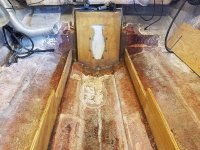
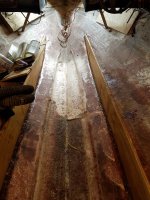
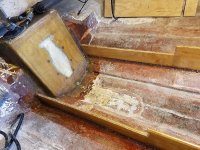
Here are the pictures of the transom and stringers as they are now.

20201107_102649_copy_800x600.jpg

20201107_102539_copy_800x600.jpg

20201107_102550_copy_800x1066.jpg

More to come when I get them tabbed. Planning first tab to go over hull about 4 inches then the second 6 inches on each side.
 

PC on the Bayou

Petty Officer 1st Class
Joined
Apr 27, 2020
Messages
234
Kicked the first 5 gallon resin bucket today and started the second. It took a heap of PB to bed the stringers and make the fillets.

I was able to get the first layer of tabbing on them today. I hope to do the second either tomorrow or Wednesday.

Then it will be time to make the bulkheads and bottom of the fuel tank compartment.

This is enjoyable work.
 

PC on the Bayou

Petty Officer 1st Class
Joined
Apr 27, 2020
Messages
234
Now that I am starting to go back together, I am thinking about the layout of the decks and other areas to make her a well outfitted fish and ski.

What are everyone's thoughts of putting my trolling motor batteries in the ski locker area? Since I don't keep skis there when fishing, it would make good use of the space. I usually take out the batteries and off the trolling motor if going pleasure boating, tuning, etc.

Do you see any drawbacks to this dual purposing the ski locker?
 

buxmj

Petty Officer 1st Class
Joined
Jun 9, 2018
Messages
294
Great progress PC! Looking forward to more pics and progress.
 

PC on the Bayou

Petty Officer 1st Class
Joined
Apr 27, 2020
Messages
234
Spent a big part of yesterday (Veterans' Day) finishing up the tabbing on my stringers. Man is that time consuming!!

Are there any better ways to wet out the glass than rolling it on with a roller? Obviously, can't pour it on and spread it on a vertical surface.

In any case, I'm done with tabbing them in. Next job will be laying out and cutting my bulkheads and the bottoms for the tank area and possibly ski locker.

I decided to wait on capping off the stringers until I have the bulkheads in.

No new pictures right now. I'll take some more when I get the bulkheads in place.
 
Top