'79 Starcraft SS 16 restoration

Status
Not open for further replies.

tomynoks

Petty Officer 1st Class
Joined
Jan 1, 2007
Messages
252
Re: '79 Starcraft SS 16 restoration

@ Jason- Reminds me of Seattle... It's just the opposite in AZ though... in the summer it will be your turn to rub it in!!!

@HA...I also used 3M 5200 to seal the entire transom edges to the aluminum. Leave no gaps!! lol... and 5200 on any screws (depthfinder transducer etc) into the transom.. My first attept had water dripping in through the O/B mounting bolts. I think they are sealed up well now. Just remember...you want the transom sealed from the OUTSIDE so no water touches wood... You probably know that..lol... I had to learn the HARD way!!!
 

sschefer

Rear Admiral
Joined
Nov 13, 2008
Messages
4,530
Re: '79 Starcraft SS 16 restoration

Don't bother with the Al on the inside, instead get a couple of Stainless or Aluminum Spreaders. I made mine out of 3/8x3x30 Aluminum. As for your Carbs, a rebuild is not beyond you if you take your time and follow the manual to the letter. The basic carb kit is just a set of gaskets but if you find worn parts, the full kit can run 80-90 bucks. It would be tought to buy new carbs from Merc and at 200-300 each who would anyway. Any carb you get for 70.00 is due for a rebuild so you might as well use yours.

Beware of those saying "These came off a running engine".. Why would anyone take perfectly good carbs off a running engine and sell them.. You wouldn't, you'd sell the whole motor as running. If the engine is blown there's a good chance the culprit was a leaned out carb.

Theres some food for thought... Have a nice weekend..
 

Huron Angler

Admiral
Joined
Apr 7, 2009
Messages
6,025
Re: '79 Starcraft SS 16 restoration

Just remember...you want the transom sealed from the OUTSIDE so no water touches wood... You probably know that..lol... I had to learn the HARD way!!!

I will use adequate amounts of 5200 and keep it dry hopefully. Not sure if I will do the pre-fill with epoxy in oversized holes and re-drill method or not.

Don't bother with the Al on the inside, instead get a couple of Stainless or Aluminum Spreaders. I made mine out of 3/8x3x30 Aluminum. As for your Carbs, a rebuild is not beyond you if you take your time and follow the manual to the letter.

I checked out your Monark thread again, you are referring to the diamond-plate aluminum backing the top motor bolts right? I could do something like that.

I only have the seloc manual now, assuming the compression test results are not appalling...I will buy the real thing IF I commit to spending cash on this Merc.

This is a tough call for me since I love how well this motor starts up, and she could be a great one for this rig if running 100% and propped correctly.

Thanks for the advice Steve, your Monark and the Frankenmerc thread are still very good motivators.:)
 

Huron Angler

Admiral
Joined
Apr 7, 2009
Messages
6,025
Re: '79 Starcraft SS 16 restoration

I got two sheets of 3/4" Aruco plywood from Menard's for the transom. I figured if I only need one and get two I might just be able to get it right the first time.

Considering building a box on the portside or stern for additional storage with the leftovers.

Found a random orbital sander for fifteen bucks while I was there, with a two year warranty.:D

It even has a little bag to collect particles so maybe I can get started on paint prep without making too much mess at my buddy's boat garage.:)

I also got a new Craftsmen rivet tool, with a rotating end for hard-to-reach areas. Hopefully it will last longer than the Ace hardware, they did both cost only $19.

Will now get started on my plans for battery and gas tank storage under the splashwell now as well. I will get some photos up, and I will be getting the old transom out to use as a template.

Strategy is to cut and then do a mock install to locate the holes before I drill. Otherwise I'm sure one or two won't line up right.:facepalm:
 

jcupo6

Chief Petty Officer
Joined
Jul 13, 2009
Messages
512
Re: '79 Starcraft SS 16 restoration

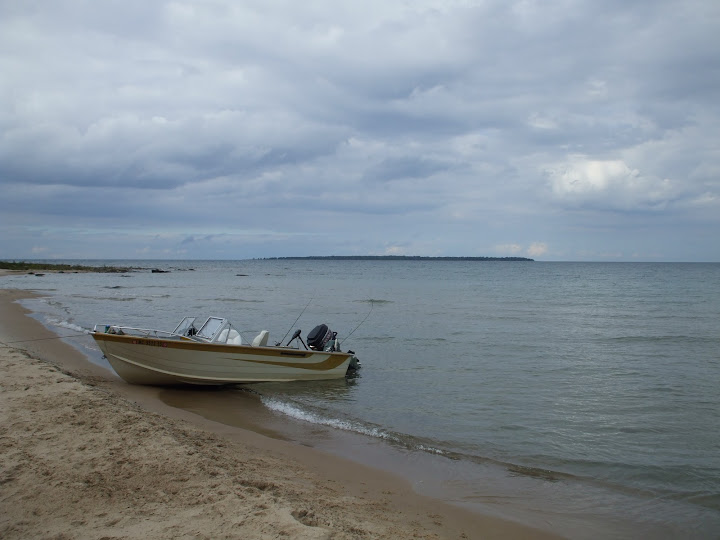
I really like this picture, but it's missing something... :rolleyes:

Summer%20Vacation%202010%20272.jpg


Ahhhh, that's better! :)

better.jpg
 

Huron Angler

Admiral
Joined
Apr 7, 2009
Messages
6,025
Re: '79 Starcraft SS 16 restoration

Jerry there's plenty of room for your Donzi in Lake Huron, and she would be great in the big waves I know:D

I love how Jason's Islander still has snow on it even out on the lake:)
 

ezmobee

Supreme Mariner
Joined
Mar 26, 2007
Messages
23,767
Re: '79 Starcraft SS 16 restoration

It even has a little bag to collect particles so maybe I can get started on paint prep without making too much mess at my buddy's boat garage.:)

You can typically stick a shop vac in those sanders if you really want to eliminate the dust.
 

jasoutside

Supreme Mariner
Joined
Dec 20, 2009
Messages
13,269
Re: '79 Starcraft SS 16 restoration

Oh wow! Thanks for letting me dream a little bit Jerry!:D
 

Huron Angler

Admiral
Joined
Apr 7, 2009
Messages
6,025
Re: '79 Starcraft SS 16 restoration

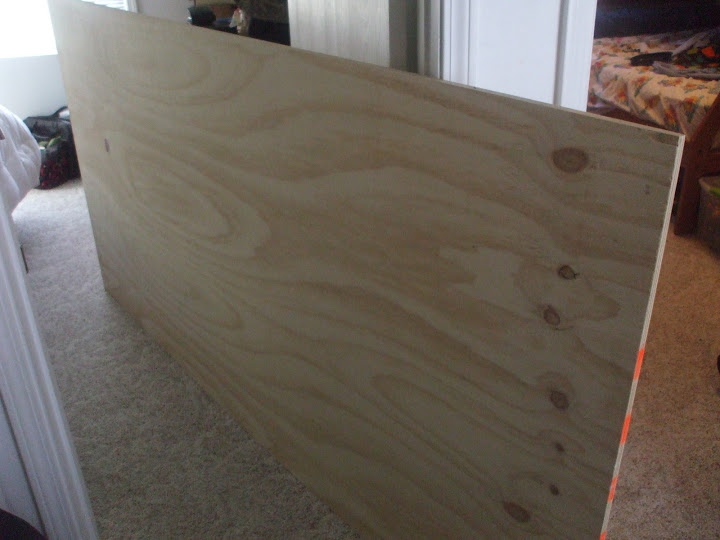
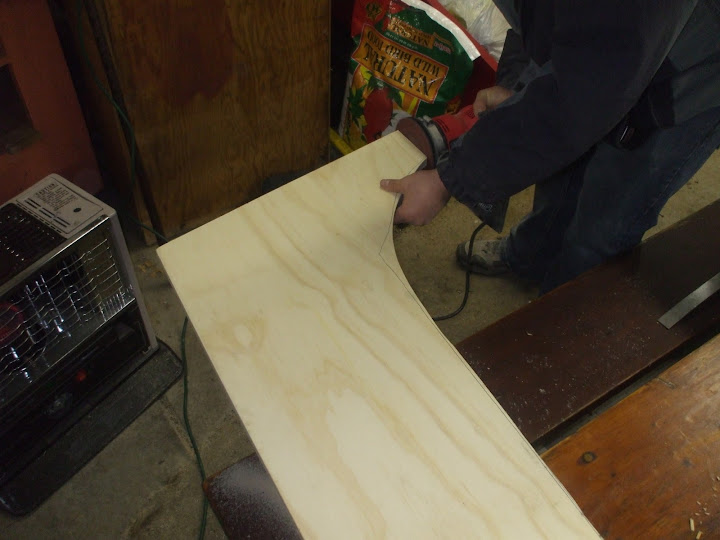
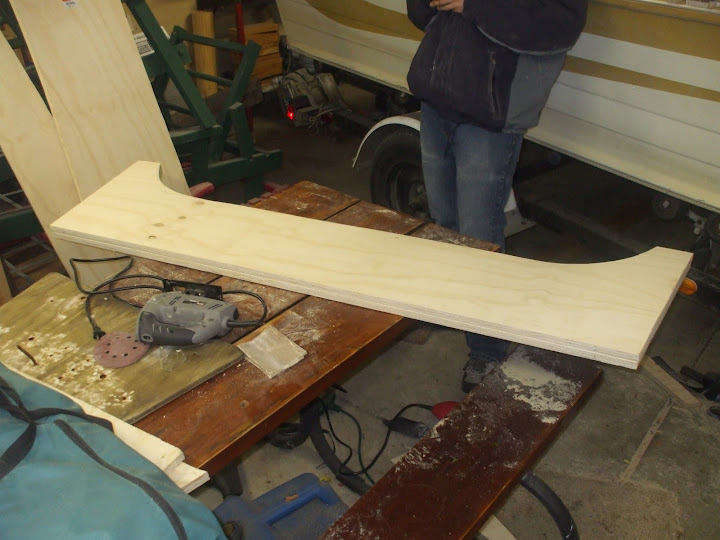
One sheet of Arauco 3/4" plywood.

Boat%20resto%20winter%202010%20059.jpg


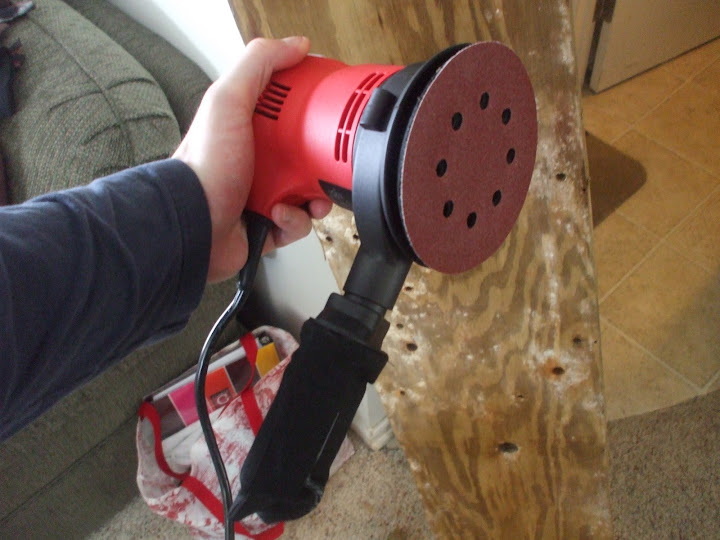
Here's the new random orbital sander, this thing got a good amount of use today.

Boat%20resto%20winter%202010%20060.jpg


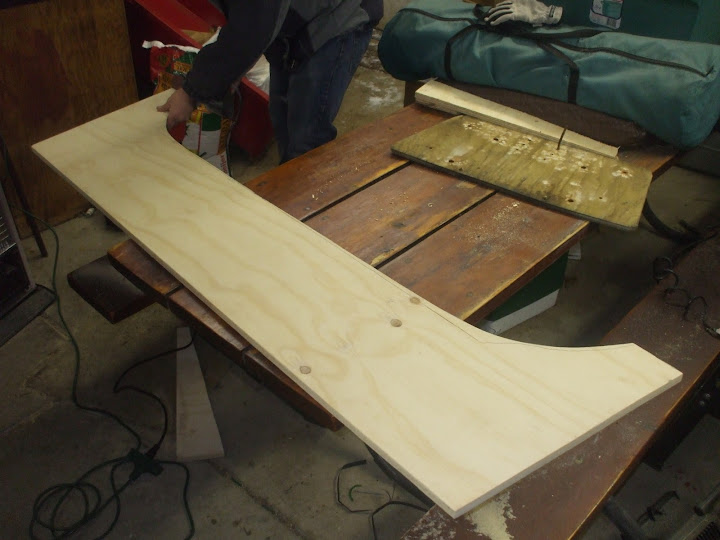
We used the old wood as a template, and realized what a worthless template it was after a little while. You can see the lines drawn on the wood, there were huge gaps underneath the aluminum trim pieces.

In some areas the screw were only going into the hull and not the transom wood at all, due to it being very shoddy and not the right shape.

Boat%20resto%20winter%202010%20061.jpg


Boat%20resto%20winter%202010%20062.jpg
 

Huron Angler

Admiral
Joined
Apr 7, 2009
Messages
6,025
Re: '79 Starcraft SS 16 restoration

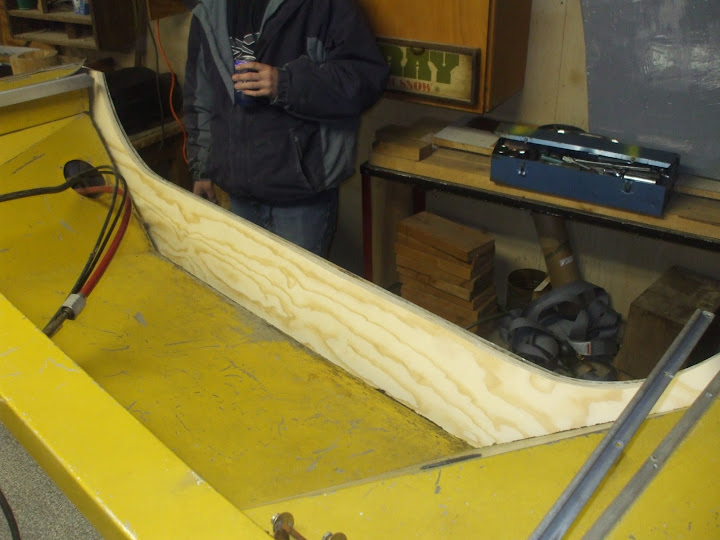
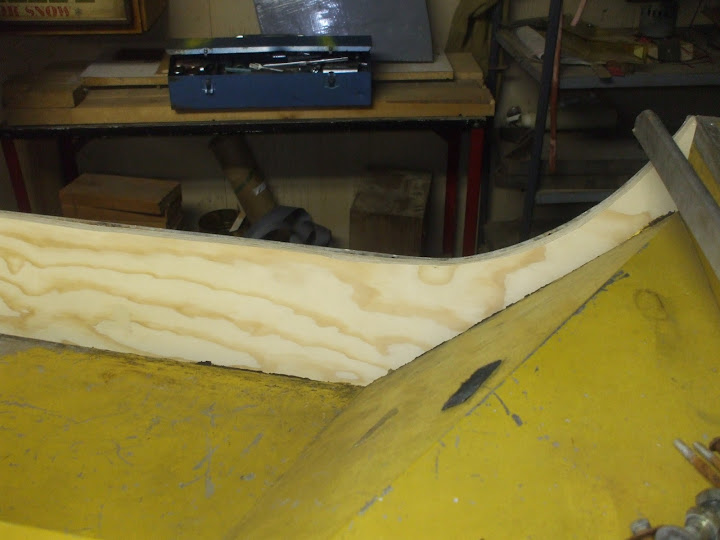
Some photos of one of the many test fittings.

Boat%20resto%20winter%202010%20063.jpg


Boat%20resto%20winter%202010%20064.jpg


Boat%20resto%20winter%202010%20065.jpg


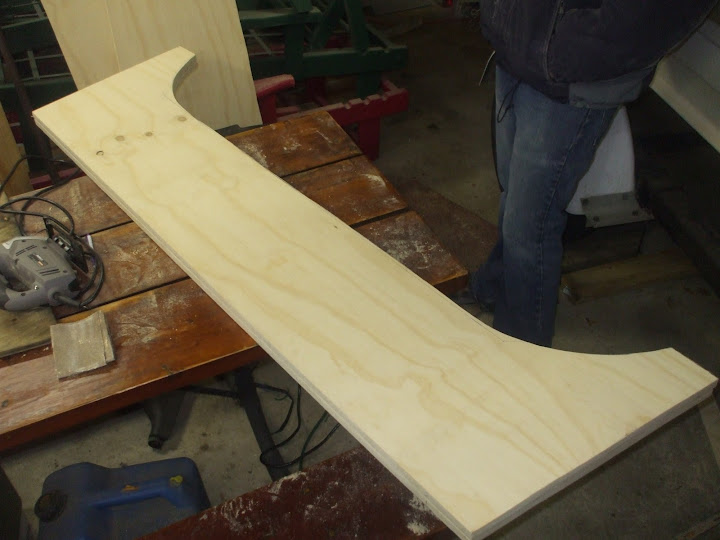
Once the first piece was the right shape we used it to cut the second piece. Then lots of sanding to make them exactly the same size on every edge.:)

Boat%20resto%20winter%202010%20066.jpg


Boat%20resto%20winter%202010%20067.jpg
 

Huron Angler

Admiral
Joined
Apr 7, 2009
Messages
6,025
Re: '79 Starcraft SS 16 restoration

I picked up a few new blades for the jigsaw and all the cuts went very well. The orbital sander worked well, but we also used a belt sander for a while especially on the curved areas.

I will need to get both pieces sanded a bit more, and then I can test fit them so I can get the holes drilled.

Not sure on whether or not I will be overdrilling to fill with epoxy, or just using 5200 on the fasteners and calling it good.
 

ezmobee

Supreme Mariner
Joined
Mar 26, 2007
Messages
23,767
Re: '79 Starcraft SS 16 restoration

I belt sanded mine a little bit also once it was in place to get to perfectly follow the aluminum skin.
 

tomynoks

Petty Officer 1st Class
Joined
Jan 1, 2007
Messages
252
Re: '79 Starcraft SS 16 restoration

Lookin'good HA!!! I got hung-up installing controls today... check out my thread if you have a little time and an opinion or two!

Thanks,

Tom
 

Triton II

Commander
Joined
Nov 23, 2004
Messages
2,479
Re: '79 Starcraft SS 16 restoration

Good looking transom HA. If you have the time/inclination, going the Jason route of overdrilling, filling with epoxy and re-drilling to the correct size is the better way of ensuring watertightness of the transom. I reckon the little bit of extra work is worth it for peace of mind and possibly better durability. If however, you're aiming to restore and then sell so you can buy the QEII, then, sure, take the easier way! :D

TII
 

Huron Angler

Admiral
Joined
Apr 7, 2009
Messages
6,025
Re: '79 Starcraft SS 16 restoration

I belt sanded mine a little bit also once it was in place to get to perfectly follow the aluminum skin.

That seems like a good idea, we are planning on it also.

Lookin'good HA!!! I got hung-up installing controls today... check out my thread if you have a little time and an opinion or two!

Thanks,

Tom

Thanks Tom, yeah I took a look at the controls. Not my expertise unfortunately.

Good looking transom HA. If you have the time/inclination, going the Jason route of overdrilling, filling with epoxy and re-drilling to the correct size is the better way of ensuring watertightness of the transom. I reckon the little bit of extra work is worth it for peace of mind and possibly better durability. If however, you're aiming to restore and then sell so you can buy the QEII, then, sure, take the easier way! :D

TII

Thanks TII, not sure what QEII is but I want one:D (I think you mean the Chief:cool:)

New transom wood = great day! Nice!

It was a good day, some progress and got to play with lots of power tools:D
 

FJ_Russo

Petty Officer 1st Class
Joined
Mar 14, 2010
Messages
350
Re: '79 Starcraft SS 16 restoration

HA Great work on the transom!! And thanks for the info on the wood! I'm really back and forth with rebuilding mine this year. From a guy that did his floor and his restore on year and then the transom the next whats your advice and thoughts as to waiting? Now that your a ways into it, did it seem to make the job substantially harder? I only really hesitate because I dont really have a place to hang my engine while I redo the transom.
Thanks for the info... and dont get lost in the "Blizzard" were supposed to get...LOL We will see I never believe snow from the weather man till I see it. Although it did get me some more boat money.. seems chief feels its going to be bad enough to warrant a second engine crew that equals EXTRA cash to me!
 

Huron Angler

Admiral
Joined
Apr 7, 2009
Messages
6,025
Re: '79 Starcraft SS 16 restoration

From a guy that did his floor and his restore on year and then the transom the next whats your advice and thoughts as to waiting? Now that your a ways into it, did it seem to make the job substantially harder?

FJ thanks, the transom rebuild is actually easier than it looks.

Not a problem at all to do these separately. Waiting to do the transom has not caused me any problems, it was pretty solid so I got an extra year out of it.

I'd have done it last winter if I had the space to pull the motor and store it.

It does makes sense to paint the boat while the hull is empty, so it's easier to flip. That's the one area that will make things tougher for me by starting with the deck rebuild.:facepalm:

I might just tilt the hull like Jason did with his Islander to prep for paint and spray. I hope it's not too much of a hassle. There is no way my deck is being removed for any reason for at least 10-15 years.

I have a 4x4 explorer so I can't wait for some snow, fun driving this week.:)

I get to go into work early as a result of this storm(our HQ is in St. Louis and nobody showed up for work)...so I am getting a bit of OT myself. Let it snow! :D
 

Huron Angler

Admiral
Joined
Apr 7, 2009
Messages
6,025
Re: '79 Starcraft SS 16 restoration

QEII = Queen Elizabeth the Second. A big mother of an ocean liner! :D

TII

Gotcha...she's a big girl all right. Drafts 32' and my fishing hole doesn't even get that deep in the middle:)

I do like the fact that her big diesels can get her going 39mph:D
 
Status
Not open for further replies.
Top