77 Starcraft Holiday 18 i/o - rebuild with pics galore

sprintst

Commander
Joined
Apr 18, 2009
Messages
2,066
Re: 77 Starcraft Holiday 18 i/o - rebuild with pics galore

Hey sprintst,
Just a couple notes, If some one says your speedo doesn't work just hook the bilge to a respirator that way you don't even have to get your hands wet. :D
I hope that you get everything done it the time frame you have planned.
If you can get it rewired for less then it would cost you for the wire that's the way to go. But if not it's really not that hard to do yourself.
Keep it rolling.
Bob

Just a knot on the head from a fish bonker works too :)

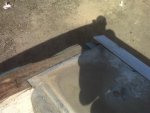
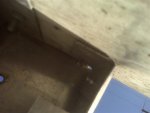
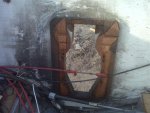
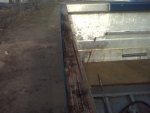
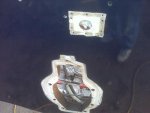
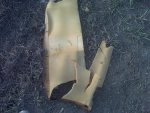
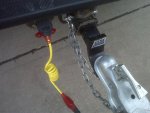
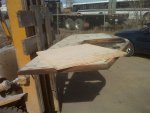
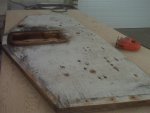
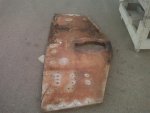
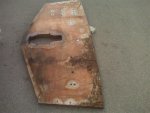
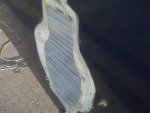
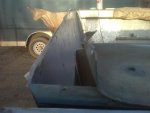
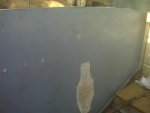
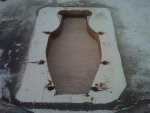
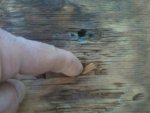
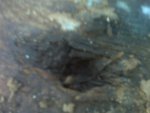
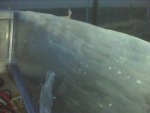
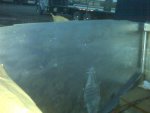
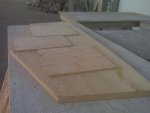
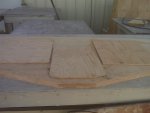
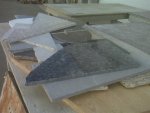
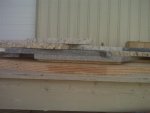
I'm hoping the time thing works as well. Today was a good start though as I'm at the point where I can pull the transom after undoing a couple more bolts. It took about 4 hours to get all the junk off the transom, transducer, battery isolator, rear top cap supports, etc.

I'll see if I can dig up the wiring thread I was following many months ago. The dude just sent off his wiring harness and got a custom made one that was perfect and exactly to length, heat shrink wrapped connectors, heavy guage, color coded corectly, etc. Otherwise I may go with what I have for now and do a do over later.
 

sprintst

Commander
Joined
Apr 18, 2009
Messages
2,066
Re: 77 Starcraft Holiday 18 i/o - rebuild with pics galore

Here's a closeup of the gunwale support I was talking about. There is a small section that overlaps the transom that I will bend up with pliers to get the transom out. Here is a shot of the under side as there is 2 screws on each side that are a b*tch to get out.

The right top section of the transom is quite rotten. Hopefully it will last long enough for me to trace it out.

Here is another shot of the rear cap removed. Also just wondering if this 1/2 piece of plywood around the outdrive hole has to be this shape or can it be a larger square.

There is also a shot of a gaping hole that was covered with silicone and rubber. Not sure what ran through this hole at one tine but I don't need it.
 

Attachments

  • IMG00651 (Medium).jpg
    IMG00651 (Medium).jpg
    59.6 KB · Views: 3
  • IMG00654 (Medium).jpg
    IMG00654 (Medium).jpg
    30.3 KB · Views: 3
  • IMG00655 (Medium).jpg
    IMG00655 (Medium).jpg
    73.8 KB · Views: 3
  • IMG00656 (Medium).jpg
    IMG00656 (Medium).jpg
    51.9 KB · Views: 3
  • IMG00657 (Medium).jpg
    IMG00657 (Medium).jpg
    49 KB · Views: 3

sprintst

Commander
Joined
Apr 18, 2009
Messages
2,066
Re: 77 Starcraft Holiday 18 i/o - rebuild with pics galore

Here are some pics of the rear cap supports that I'm recutting and/or epoxying. The large piece that run the width of the boat has been recut and I tacked it with some finishing nails to the old piece so I can sand it down to exactly match the contours. It also holds it in place long enough so I can drill the support holes for the braces. The smaller pieces here on the bbq will get epoxied in the next day or so as well.

I've got to find some of this foam that was on top of the rear top cap supports...between the wood and the cap. This stuff basically turned to dust in spots. I'll see if they carry it in a fabric store otherwide I've got to visit the upholsterer.

Here is a shot of my hitch and chains that I double checked since Kev's boat went Superman on him and tried to fly. :)
 

Attachments

  • IMG00660 (Medium).jpg
    IMG00660 (Medium).jpg
    49.8 KB · Views: 1
  • IMG00661 (Medium).jpg
    IMG00661 (Medium).jpg
    46.7 KB · Views: 1
  • IMG00662 (Medium).jpg
    IMG00662 (Medium).jpg
    53.3 KB · Views: 1
  • IMG00659 (Medium).jpg
    IMG00659 (Medium).jpg
    93.3 KB · Views: 1
  • IMG00640 (Medium).jpg
    IMG00640 (Medium).jpg
    58.5 KB · Views: 1

BobsGlasstream

Commander
Joined
Sep 11, 2009
Messages
2,128
Re: 77 Starcraft Holiday 18 i/o - rebuild with pics galore

Hey sprintst,
I can't think of any reason not to make the 1/2 " wood square larger. As long as the out drive hole is the same and the bolt pattern. It shouldn't cause any problems. I sure someone wiser then me will chime in.
Keep it moving.
Bob
 

sprintst

Commander
Joined
Apr 18, 2009
Messages
2,066
Re: 77 Starcraft Holiday 18 i/o - rebuild with pics galore

That's what I was hoping as well...on the larger square thing :) As long as it's not too small and the inner transom plate hangs over it... Bigger should be ok. I'll post on the engine side to see what everyone says...
 

sprintst

Commander
Joined
Apr 18, 2009
Messages
2,066
Re: 77 Starcraft Holiday 18 i/o - rebuild with pics galore

Transom has beed pulled and prepped. Notice the rusty bolts that will have to be replaced with stainless. There are also some shots of the transom on the forklift used to pull it.

Not too much corrrosion on the inside but there was some. I masked off the area and hit it with zinc chromate primer and some cheap alum paint I had in the garage.

The bolt holes were masked off with a type of sports equipment tape that doesn't leave a goopy residue anywhere. That's all I had on hand at the time.

You can also see where the water came in under the cap. It will get 4200'd into place after I epoxy coat the whole transom. It looked solid from the inside but once it's pulled it's a whole other story.
 

Attachments

  • IMG00663 (Medium).jpg
    IMG00663 (Medium).jpg
    47.3 KB · Views: 0
  • IMG00664 (Medium).jpg
    IMG00664 (Medium).jpg
    65.9 KB · Views: 0
  • IMG00665 (Medium).jpg
    IMG00665 (Medium).jpg
    48.8 KB · Views: 0
  • IMG00666 (Medium).jpg
    IMG00666 (Medium).jpg
    59.3 KB · Views: 0
  • IMG00669 (Medium).jpg
    IMG00669 (Medium).jpg
    64.2 KB · Views: 0

sprintst

Commander
Joined
Apr 18, 2009
Messages
2,066
Re: 77 Starcraft Holiday 18 i/o - rebuild with pics galore

Here's more shots of the prepped and primed area. I wire brushed it with a drill attachment and wiped it with acetone after.

You can also see the area of alum that overlaps the transom that I just bent up with pliers. I'll bend it down back over the transom when I'm done as it sopprt the top cap from being pushed too far down under weight.
 

Attachments

  • IMG00670 (Medium).jpg
    IMG00670 (Medium).jpg
    38.7 KB · Views: 0
  • IMG00671 (Medium).jpg
    IMG00671 (Medium).jpg
    56.9 KB · Views: 0
  • IMG00672 (Medium).jpg
    IMG00672 (Medium).jpg
    50.3 KB · Views: 0
  • IMG00675 (Medium).jpg
    IMG00675 (Medium).jpg
    44.3 KB · Views: 0
  • IMG00676 (Medium).jpg
    IMG00676 (Medium).jpg
    32.1 KB · Views: 0

sprintst

Commander
Joined
Apr 18, 2009
Messages
2,066
Re: 77 Starcraft Holiday 18 i/o - rebuild with pics galore

More misc painting shots and soft spots in transom.
 

Attachments

  • IMG00677 (Medium).jpg
    IMG00677 (Medium).jpg
    58.8 KB · Views: 0
  • IMG00680 (Medium).jpg
    IMG00680 (Medium).jpg
    43.8 KB · Views: 0
  • IMG00683 (Medium).jpg
    IMG00683 (Medium).jpg
    32.1 KB · Views: 0
  • IMG00685 (Medium).jpg
    IMG00685 (Medium).jpg
    41.9 KB · Views: 0
  • IMG00686 (Medium).jpg
    IMG00686 (Medium).jpg
    42.4 KB · Views: 0

BobsGlasstream

Commander
Joined
Sep 11, 2009
Messages
2,128
Re: 77 Starcraft Holiday 18 i/o - rebuild with pics galore

sprintst,
Looks like you have made some very good progress.
Keep it rolling.
Bob
 

sprintst

Commander
Joined
Apr 18, 2009
Messages
2,066
Re: 77 Starcraft Holiday 18 i/o - rebuild with pics galore

Picked up a bunch of stainless steel bolts, washers, nuts, etc for the transom area and am ready to go again.

Just checking to see what you guys think.

I'm going to build up the transom to 2 inches in the areas of the drive opening, kicker bracket and ladder areas.

Just wondering if I should then drop it into place, check the fit, mark the holes that need to be drilled and then pull the transom to drill the bolt holes on a flat surface so that they are bang on and level.

The transom will then get an epoxy coat and hopefully be bolted in on Monday or Tues.
 

BobsGlasstream

Commander
Joined
Sep 11, 2009
Messages
2,128
Re: 77 Starcraft Holiday 18 i/o - rebuild with pics galore

Hey sprintst,
I think you will find several folks on both sides of this question. The main thing is to make sure you are 90 degrees angle to your transom.
I could not get my transom into my drill press for perfect holes so I just mounted it in the boat and went to HF and bought a drill guide for $20 and it worked fine. I used one of those speed boring bits from Lowe's and was done in a few minutes.

Keep the pic's coming.
Bob
 

sprintst

Commander
Joined
Apr 18, 2009
Messages
2,066
Re: 77 Starcraft Holiday 18 i/o - rebuild with pics galore

It's a bit extra labor to pull it again and drill the holes but on a flat table I should be able to drill them perfectly vertical.

The bolt holes in my existing transom were about 80% square. The are some that were out of whack and am surprised that they didn't leak as the bolt heads were not flat on the transom.
 

jasoutside

Supreme Mariner
Joined
Dec 20, 2009
Messages
13,269
Re: 77 Starcraft Holiday 18 i/o - rebuild with pics galore

Hey buddy, I am following along as I need to complete this same task in the not too distant future.

In my mind I am thinking that once the transom is in it will stay in and I'll just need to figure out the 90 from there. Purely a thought for me at this stage of the game.

Good Luck!
 

BobsGlasstream

Commander
Joined
Sep 11, 2009
Messages
2,128
Re: 77 Starcraft Holiday 18 i/o - rebuild with pics galore

sprintst,
Again, I don't think you will go wrong either way. I think mine are 98+ straight. Looking forward to your updates.
Bob
 

sprintst

Commander
Joined
Apr 18, 2009
Messages
2,066
Re: 77 Starcraft Holiday 18 i/o - rebuild with pics galore

As Mayor Quimby on the Simpsons would say "I am ah flip flopping"

I know marking the holes through the skin will work as they will be exact but it's extra labor to pull it and get the holes to line up again.

If my drill had a flat base I would make a bracket with a 90 degree angle to hold the drill square to the transom.

Heading out to sand the epoxy drips off my gunwale supports as I have the neighbors belt sander.

I'll post picks later of the transom with extra 1/2 inch plywood in the outdrive opening, kicker bracket area and ladder areas.
 

sprintst

Commander
Joined
Apr 18, 2009
Messages
2,066
Re: 77 Starcraft Holiday 18 i/o - rebuild with pics galore

More pics. I built up a couple of areas so there would be a little more meat in the kicker bracket, ladder and outdrive areas. I needed the thickness around the outdrive to get to 2" so I thought what the he** since I had the wood.

I made some epoxy cabosil peanut butter and spread it with a notched trowel. The granite scraps should hold it down tight enough with any luck until it sets up.

The top of the transom got shaped with a belt sander to make the bevel. Hopefully it's the right angle. I'll find out in the next day or so when I drop it in place.

If the weather stays ok then it gets coated in epoxy and then done and done. I'll 4200 the bolts into the openings and with any luck she'll be water tight.
 

Attachments

  • IMG00690 (Medium).jpg
    IMG00690 (Medium).jpg
    44.4 KB · Views: 0
  • IMG00691 (Medium).jpg
    IMG00691 (Medium).jpg
    41.8 KB · Views: 0
  • IMG00692 (Medium).jpg
    IMG00692 (Medium).jpg
    56.7 KB · Views: 0
  • IMG00693 (Medium).jpg
    IMG00693 (Medium).jpg
    44.4 KB · Views: 0

sprintst

Commander
Joined
Apr 18, 2009
Messages
2,066
Re: 77 Starcraft Holiday 18 i/o - rebuild with pics galore

Hey sprintst,
I think you will find several folks on both sides of this question. The main thing is to make sure you are 90 degrees angle to your transom.
I could not get my transom into my drill press for perfect holes so I just mounted it in the boat and went to HF and bought a drill guide for $20 and it worked fine. I used one of those speed boring bits from Lowe's and was done in a few minutes.

Keep the pic's coming.
Bob

You wouldn't happen happen to have a pic of the guide would you. I took a look today at the local hardware store and couldn't find anything. I'll try home depot tomorrow or Princess Auto which is like a HF here.
 

BobsGlasstream

Commander
Joined
Sep 11, 2009
Messages
2,128
Re: 77 Starcraft Holiday 18 i/o - rebuild with pics galore

Hey sprintst,
I didn't have the tool with me but I did find the box.
IMG00295.jpg

IMG00296.jpg

I know that several stores carry similar items. I know that sears has one.
It did a good job for me, and you can clamp it to the transom.
Hope this helps.
Bob
 

sprintst

Commander
Joined
Apr 18, 2009
Messages
2,066
Re: 77 Starcraft Holiday 18 i/o - rebuild with pics galore

Perfect. Now I know what I'm looking for :)
 

sprintst

Commander
Joined
Apr 18, 2009
Messages
2,066
Re: 77 Starcraft Holiday 18 i/o - rebuild with pics galore

This weather sucks. It will be better in a couple of days so I'll work some ot tomorrow to pay for this money pit. All the temps are in Celcius

Tonight Increasing cloudiness. 40 percent chance of flurries overnight. Wind southeast 30 km/h becoming light overnight. Low minus 2. Tuesday Cloudy with 60 percent chance of wet flurries in the morning and early in the afternoon. Snow beginning in the afternoon. High plus 3. Tuesday night Snow. Amount 2 cm. Wind becoming northwest 20 km/h near midnight. Low plus 1. Wednesday A mix of sun and cloud. High 13. Thursday Sunny. Low minus 2. High 12. Friday Sunny. Low plus 2. High 14. Saturday Sunny. Low plus 1. High 13. Sunday Sunny. Low plus 2. High 15.
 
Top