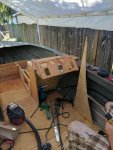
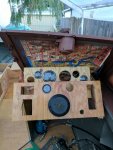
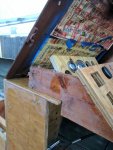
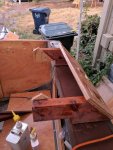
'76 Holiday i/o 18' Fishing Rebuild (pic heavy!)

strokendiesel002

Petty Officer 1st Class
Joined
May 15, 2012
Messages
283
I assume you're using 1/4-20 bolts. In my in-laws boat that I just finished using aluminum for the decking, I used stainless rivet nuts. They're quite strong. Not sure how long you need them to be(don't remember your deck thickness and what all of the options I found were, but i may be worth a look for you. I also showed how I installed them, as the proper installer is not cheap and I only had 30 to do.

Good luck!
 

Pusher

Lieutenant
Joined
Sep 2, 2014
Messages
1,273
I assume you're using 1/4-20 bolts. In my in-laws boat that I just finished using aluminum for the decking, I used stainless rivet nuts. They're quite strong. Not sure how long you need them to be(don't remember your deck thickness and what all of the options I found were, but i may be worth a look for you. I also showed how I installed them, as the proper installer is not cheap and I only had 30 to do.

Good luck!

I tried checking that process out but you have the dreaded speedo of death!
 

strokendiesel002

Petty Officer 1st Class
Joined
May 15, 2012
Messages
283
No Title

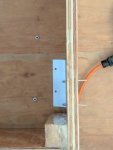
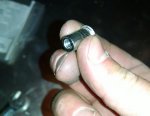
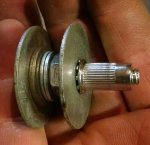
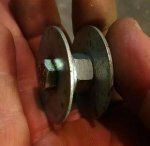
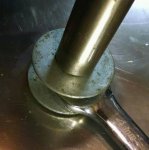
Hope this works, had to crop them down so there's not a lot of perspective I found hardened 1/4-20 bolts lasted longest and the nut is over sized. There is a star washer between the nut and washer, just like you see between the rivnuts and same washer.
 

Attachments

  • photo271533.jpg
    photo271533.jpg
    101.5 KB · Views: 1
  • photo271534.jpg
    photo271534.jpg
    183.7 KB · Views: 1
  • photo271535.jpg
    photo271535.jpg
    173 KB · Views: 1
  • photo271536.jpg
    photo271536.jpg
    171.5 KB · Views: 1

italianstal27

Chief Petty Officer
Joined
Feb 18, 2017
Messages
403
How big of a hole did you drill in your deck to get that washer through??

And is that setup to only expand the rivnut? Or did you leave it as a whole setup under the deck?
 

strokendiesel002

Petty Officer 1st Class
Joined
May 15, 2012
Messages
283
The hole was only for the rivnuts, the washer is part of apparatus to expand the rivnuts. I found that setup on YouTube I believe
 

Pusher

Lieutenant
Joined
Sep 2, 2014
Messages
1,273
That's a pretty slick tool. Now to clarify, does the oversized nut in the center your wrench is on, just give you something to push on while expanding the rivnut in the hole?

I only used these on aircraft with the actual rivnut squeezing tool.

I'll say this, if your hole is round and the rivnut expands into a round hole it is easier for it to aug the hole out and eventually strip out allowing the nut to free spin. If you make a slightly oval hole then the rivnut expands into that and doesn't strip out as easily..... Or so I assume
 

strokendiesel002

Petty Officer 1st Class
Joined
May 15, 2012
Messages
283
More or less, yes. There's a star washer between the nut the wrench goes on and the bottom fender washer. On the other side of that fender washer, between it and the rivnuts, is another star washer. Goal is to prevent the rivnuts from rotating like you mentioned. Thanks BTW, I went through a few bolts as I was in a rush and using a cordless impact to speed the process... Totally worth it :)
 

italianstal27

Chief Petty Officer
Joined
Feb 18, 2017
Messages
403
Console is in! And second deck sub structure will be finished by end of day.

We got the zinc chromate primer on the bow deck and interior of the boat after scrubbing it wish soap, water, then 120 grit sand paper.

Also pulled the rusted metal that was holding the winch hook on... ENORMOUS amounts of corrosion.

We've run into 2 problems which i'll post pictures of, the first is there is a 3" crack that runs smack dab in the middle of the keel, that one is no problem. We'll drill crack out, get some marine tex all over the crack, and get a back plate of spare aluminum we have laying around. No problems.

The major issue we have now discovered are 2 symetrical cracks where the keel is riveted to the sides of the hull. pics to come. But it looks too risky to drill 1/8" from the rivets. Sad.

However, we got the interior sanded and primed and consoles are in, windshield lines up within a 1/16" to the gunnels and we finally got the old wire out of the boat.

Life's good gents! 1 small brew and then back at it. Going to be 90 this weekend....

August 1st!
 

Watermann

Starmada Splash of the Year 2014
Joined
Jan 12, 2013
Messages
13,790
More cracks, your holly is yet another testament to the ignorance of people using these boats when they're structurally weakened by rotten wood and loose rivets. Alas you're in good company though. :happy:

Your can do attitude will be inspiring for others sure to come facing the same challenges. :encouragement:
 

italianstal27

Chief Petty Officer
Joined
Feb 18, 2017
Messages
403
Second deck sub structure is in. Second deck will to in once we cut out cubby holes and cut foam for the pockets that don't have much room.

We think our next challenge is understanding 1) steering wheel height, 2) angle, 3) making double sure our 14' steering cable will actually reach lol.

Tomorrow we'll finalize gauge height, get some window gasket for the windshield and hopefully have the steering wheel installed with the gauges behind it!

And yeah I'll get those pics in. Only forseable hiccups now are 1) need to order more wire from gregs marine and 2) those 3 cracks we found, 1 of which we know how to fix.
 

italianstal27

Chief Petty Officer
Joined
Feb 18, 2017
Messages
403
PICS!

IMG_20170720_170234.jpg

Finally said screw it and got the rats nest of wiring OUT OUT OUT. Brought in a bucket of warm lightly soaped water and went to down on the amine blush on the deck. Also scrubbed the bow hull walls that had previously been covered by vinyl.

Brought the consoles in (also amine removed), and made one last sanity check before we bolted them to the ground.

TOO HIGH. THEY WERE TOO HIGH. After an hour of panicking, realized we forgot to sand the bottom edge. Upon sanding that fixed 80% of the problem. Had to sand down the top of the starboard console to get the windshield to sit level but that's whatever.

IMG_20170720_170413.jpg

Pic from the front. GORGEOUS!

IMG_20170720_174717.jpg

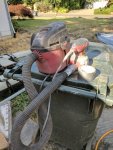
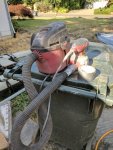
How there hasn't been an extensive thread about dust control is beyond me. Beware of the white dust friends! We set up this ghetto vacuum system and it actually helped a TON. Make sure you get a bag for the shop vac so it doesn't spray the dust out.

IMG_20170720_195703.jpg
Because NOTHING in the boat is square (anyone else have this problem?), cutting things to fit was incredibly difficult. Pic shows how bad it was on the port side. Sucks, but you'll see how we remedied the problem.

IMG_20170720_211858.jpg

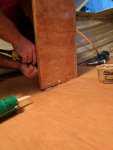
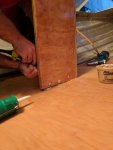
YAY! Build the gap with epoxy and colloidal silica and use rivets to hold the plywood to the bracket. We used 3/4" screws to drill into the deck with Loctite PL adhesive.

IMG_20170720_211920.jpg

Work in progress..... Get a pneumatic rivet gun peeps!

IMG_20170720_213633.jpg
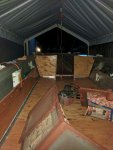
All installed! Took roughly 8 hours to get it all alligned and installed but it's done!
 

Attachments

  • IMG_20170720_170234.jpg
    IMG_20170720_170234.jpg
    132.8 KB · Views: 2
  • IMG_20170720_170413.jpg
    IMG_20170720_170413.jpg
    125.5 KB · Views: 2
  • IMG_20170720_174717.jpg
    IMG_20170720_174717.jpg
    180.9 KB · Views: 2
  • IMG_20170720_195703.jpg
    IMG_20170720_195703.jpg
    113.2 KB · Views: 2
  • IMG_20170720_211858.jpg
    IMG_20170720_211858.jpg
    93.5 KB · Views: 2
  • IMG_20170720_211920.jpg
    IMG_20170720_211920.jpg
    101.3 KB · Views: 1
  • IMG_20170720_213633.jpg
    IMG_20170720_213633.jpg
    131.4 KB · Views: 2

italianstal27

Chief Petty Officer
Joined
Feb 18, 2017
Messages
403
And now the crap news of the crap news:

IMG_20170721_210516.jpg
IMG_20170721_210522.jpg
IMG_20170721_210507.jpg

So keel crack, no problems, drill it out and build up marine tex. Put a piece of stock aluminum over it (there will be stock aluminum anyway because that's where the winch hook goes).

But where we're losing sleep is the cracks where we didn't spray zinc chromate paint. They're too close to rivets to drill out the ends of the cracks, and they're not on a flat surface, do we just build up a ton of marine tex, slap a piece of stock aluminum over it, and rivet with closed end rivets?
 

Watermann

Starmada Splash of the Year 2014
Joined
Jan 12, 2013
Messages
13,790
The closeup pic of the crack looks to be split off at the top end. I can't tell how far it goes down on the other end, it goes into the seam.

Can the cracks be seen on the outside to where you can take a pic of them. It would help too if you would trace over the crack with a sharpee so it can be seen better and then take another pic.

I'm thinking you'll have to remove some solids in order to properly patch it and I would use 5200 behind the patches rather than marine tex. 5200 is a powerful adhesive in addition to being a great sealant. The idea behind patching cracks is to isolate the crack from the force that caused it.
 

italianstal27

Chief Petty Officer
Joined
Feb 18, 2017
Messages
403
Tons of work completed over the weekend.

Prepping wood takes forever but here's the most efficient process we've found:
1) Cut the wood, sand the 2 flat sides with orbital sander 100 grit.
2) Use palm sander with 100 grit on edges to get them smoother from the cuts.
3) Blow off sawdust with air compressor.
4) Mix 2 pumps epoxy (West system 105 and 205 fast hardener) it's been 85F outside.
5) Lay the epoxy thick enough that your spreader isn't touching wood. You shouldn't hear anything. If you're touching wood you're laying it too thin.
6) Move on to the next piece. Generally, working 6 at a time is a good number.
7) Let all pieces cure for about an hour in the sun.
8) When the epoxy is no longer sticky, but your fingernail leaves a mark in it, apply second layer.
9) Let that sit for another hour.
10) Flip 'em over and repeat on other side. Have scrap pieces of wood to suspend them off the ground. Cover the scrap pieces of wood with saran wrap (epoxy doesn't stick to the saran wrap!)
11) Repeat, let dry.
12) Around now it's probably close to 5PM (assuming you started this at noon). you'll let these cure for another 2-3 hours. At 8PM bring the pieces into the garage where you mix up some thickened epoxy to do the edges.
13) Again, have scrap pieces of wood to get pieces off ground so they don't glue to each other.
14) Let that sit overnight. Mix the thickened epoxy to a little thinner than peanut butter (helps get into the cracks easier).

--2 days later (let that epoxy cure)--
15) Remove amine blush with scotchbrite pad & mostly water. get a garden hose out! Have a big surface about chest high that you can do this with. we used a piece of decking on saw horses.
16) Scrub it good and rinse with water.
17) grab some sand paper for wet sanding. go to town on thick globs. DEFINITELY wet sand. Dry sanding flings so much dust into the air it's impossible to cover your eyes. That bis-a is nasty stuff.
18) spray the panels clean, let them dry in the sun (get the edges off the ground so they dry.

And now you're ready to fasten them together in the manner you see fit!
 

italianstal27

Chief Petty Officer
Joined
Feb 18, 2017
Messages
403
More progress and pics:
IMG_20170721_140642.jpg

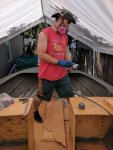
Getting the primer sprayed on the walls and bow deck. Probably going to scuff and then get ready for primer. We're going to roll the floor (and add sand for grip), and spray the sides (for a smoother surface).
IMG_20170721_163350.jpg

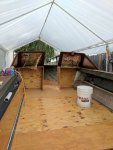
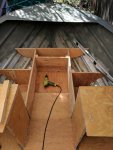
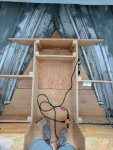
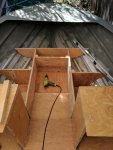
Halfway through construction of the sub structure for the raised deck. We connected the 3/4" plywood with 2"x2" pieces of wood that were 1/8" off the ground. 2 edges and both ends were epoxied, then, before installation, we applied peanut butter to help bond the plywood pieces. We used 2 screws per side. We then epoxied over the screws.
IMG_20170721_163357.jpg

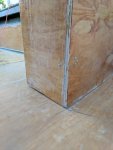
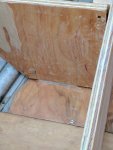
Some of the 3/4" pieces had a small gap between them and the floor (nothing is flat), so we got thickened epoxy under them and called it a day :)

IMG_20170721_193030.jpg

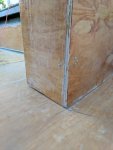
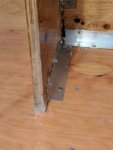
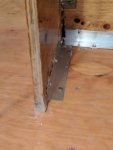
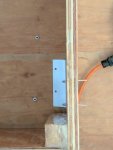
Here's how we attached the sub structure to the floor. 1" aluminum bracket. 2 rivets and loctite PL for the vertical connections. 2 stainless steel screws for to attach them to the deck with copious amounts of adhesive.
IMG_20170721_203358.jpg

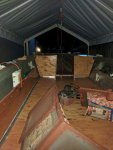
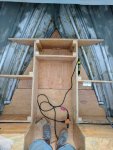
All done and installed! (minus the piece that goes straight to the bow). need to get that one installed but we momentarily lost it lol.
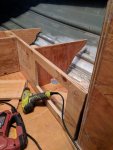
IMG_20170722_211227.jpg

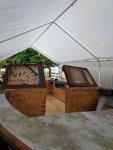
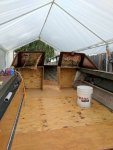
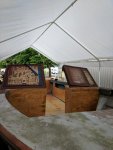
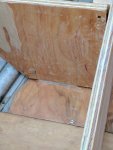
We really wanted storage space up front, but obviously having this cut out really weakens the plywood. (the bowmost compartments will be filled with foam).
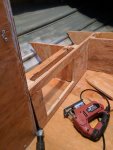
IMG_20170722_211223.jpg

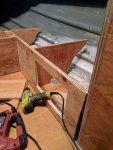
To alleviate the weight on the plywood, we added a cross member to transfer weight into the supporting pieces. Should be solid and good to go from here!

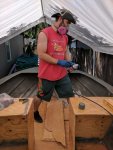
Also, the amount of dust created in here from the jigsaw was insane. Get those respirators!
 

Attachments

  • IMG_20170721_140642.jpg
    IMG_20170721_140642.jpg
    140.1 KB · Views: 2
  • IMG_20170721_163350.jpg
    IMG_20170721_163350.jpg
    136.2 KB · Views: 2
  • IMG_20170721_163357.jpg
    IMG_20170721_163357.jpg
    118.8 KB · Views: 1
  • IMG_20170721_193030.jpg
    IMG_20170721_193030.jpg
    92.4 KB · Views: 1
  • IMG_20170721_203358.jpg
    IMG_20170721_203358.jpg
    154.2 KB · Views: 1
  • IMG_20170722_211227.jpg
    IMG_20170722_211227.jpg
    129.4 KB · Views: 2

italianstal27

Chief Petty Officer
Joined
Feb 18, 2017
Messages
403
More progress.
IMG_20170724_190729.jpg
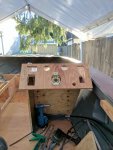
checking dash placement...

Everything is harder to allign because NOTHING IS STRAIGHT.

IMG_20170724_183627.jpg
checking side wall clearance

IMG_20170724_200140.jpg

checking windshield clearances (this one took the most time)

IMG_20170724_201138.jpg

realized we need to a support for the windshield, so we'll attach a small bracket to the 2x6 for it to mount to. Should really shore things up!
IMG_20170725_205524.jpg
The brackets on the interior for the panel.

After I epoxied the instrument panel to these brackets last night, let it sit for a couple hours.

Realized that I screwed it on at a different angle -.-

So today, taking a saw-zall to it and starting again.

Not sure how it got off by 5-ish degree, but it is what it is. If we let every mistake bog us down this project would never be finished.

-John
 

Watermann

Starmada Splash of the Year 2014
Joined
Jan 12, 2013
Messages
13,790
Yeah that guy Murphy visits each of us a few times during the process. Just kick him on down the road and move forward ;)
 

ezmobee

Supreme Mariner
Joined
Mar 26, 2007
Messages
23,767
I know from experience that windshield and console alignment on these boats is one of the worst parts to tackle.
 
Top