'76 Holiday i/o 18' Fishing Rebuild (pic heavy!)

italianstal27

Chief Petty Officer
Joined
Feb 18, 2017
Messages
403
Highly recommend getting the west system with the 406 thickener. It works amazingly well for the edges and isn't nearly as thick as the tube you can buy that comes in a caulking gun. I'd say we spent less time mixing our own than fighting the thick caulking tube system. Your mileage may vary ;)
 

italianstal27

Chief Petty Officer
Joined
Feb 18, 2017
Messages
403
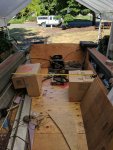
More progress last night! Aiming for August 1st completion.

IMG_20170708_185531.jpg
Fairly close.... hopefully it doesn't touch after epoxying!

IMG_20170709_130443.jpg

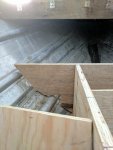
Got the bow piece finally riveted to the hull. Had to use 1.25" gap rivets in the front as we drilled it at an angle to hit the rib. Super tight tolerances up there... But that piece is finally in and it is SOLID. We epoxied the tip of the rivet and the manderil.Hopefully that'll help keep the deck from rotting.

IMG_20170709_173256.jpg

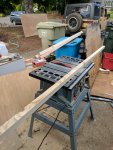
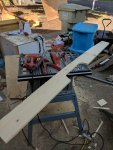
Cutting the 2x2 to attach the pieces of plywood at a 90 degree angle. We'll put an 11" piece in the corner, and screw into that. These also will need to be epoxied.

IMG_20170709_173308.jpg

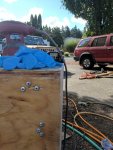
STILL epoxying. Using the west system filler to help thicken the epoxy for the edges. Edges take so longgggg.

IMG_20170710_194735.jpg

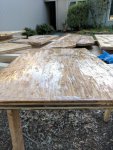
Question of the day! Here's a piece of ply we're using in the sub structure. You can see some areas soaked up the resin more than others. We're going to sand and paint of course, but do we need a second top coat? Is there enough resin in those areas that look more dry?

-John
 

Attachments

  • IMG_20170708_185531.jpg
    IMG_20170708_185531.jpg
    114.3 KB · Views: 2
  • IMG_20170709_130443.jpg
    IMG_20170709_130443.jpg
    152.1 KB · Views: 2
  • IMG_20170709_173256.jpg
    IMG_20170709_173256.jpg
    182.9 KB · Views: 2
  • IMG_20170709_173308.jpg
    IMG_20170709_173308.jpg
    240 KB · Views: 2

italianstal27

Chief Petty Officer
Joined
Feb 18, 2017
Messages
403
Taking the day off work to finish the dash and the raised gauges. Finish epoxying the consoles, get holes drilled for the steering column that came today (Hope it's just long enough!) And get the amine blush off everything. Sand then prime then install!
 

ezmobee

Supreme Mariner
Joined
Mar 26, 2007
Messages
23,767
Question of the day! Here's a piece of ply we're using in the sub structure. You can see some areas soaked up the resin more than others. We're going to sand and paint of course, but do we need a second top coat? Is there enough resin in those areas that look more dry?

I would 2nd coat it.
 

italianstal27

Chief Petty Officer
Joined
Feb 18, 2017
Messages
403
Thanks EZ! Will throw a second coat on the ones that are kinda dry. Epoxying the dash panel & instrument panel now :)
 

italianstal27

Chief Petty Officer
Joined
Feb 18, 2017
Messages
403
Got the stern support beam cut out of 1x6 sanded ready to epoxy. Dash is cut out and epoxied.

Literally all I did today was cut pieces of wood and epoxy. My dad us coming to help Sunday and we have a buddy coming Saturday. Our thought is we'll start cutting wood and doing the harder work while letting the help work on epoxy. It's no joke. Just time and time again doing epoxy lol
 

italianstal27

Chief Petty Officer
Joined
Feb 18, 2017
Messages
403
More epoxy!

We also got the majority of the pieces cut for 4 boxes that our seats will sit on. We purchased 2 25 qt bins from home cheapot as well. They fit right under the plywood boxes and should help with storage. We hope. Pics coming tonight maybe!

In total, cut 22 pieces of plywood and we have a TON of epoxy work to do. But the consoles are almost ready to be screwed into the deck! Glorious news!
 

italianstal27

Chief Petty Officer
Joined
Feb 18, 2017
Messages
403
Enormous progress today. Cut the doghouse and plywood necessary to make our seat boxes. Second deck is almost completely epoxied. So close. Tomorrow will certainly be remove amine blush day and finish epoxy on Deck and dog house panel.

Before spraying primer on the epoxy, do most of you scuff lightly be hand? Sand flat? Sand real hard and hope you don't get too far into the epoxy layer?

Pics coming! Of epoxy 😂... It's a skill. Best advice I can offer is use the fast cure, do 1 pump at a time, and surface tension will help keep the epoxy on whatever layer of plywood you're coating. Be bold. If you have 1 drip go over the side it's not the end of the world. Also sun helps or harden twice as fast. We were applying the second coat within 45 minutes of the first. Right before it was about to wax over. Striving for August 1.

-John
 

Watermann

Starmada Splash of the Year 2014
Joined
Jan 12, 2013
Messages
13,790
On painting, what parts are being painted? Sanding and how much to sand depends on how you want it to look in the end after painting. Of course it defeats the time, effort and money to sand off all your glorious epoxy resin. If it's a glass slick surface then for proper adhesion of primer and paint it has to be hit with some 220g then tacked clean.
 

italianstal27

Chief Petty Officer
Joined
Feb 18, 2017
Messages
403
the "smoothness" isn't important to us... The deck will have sand added to the primer to give the deck some grit.

The supporting panels just need the paint to protect the UV layer. The raised bow deck will also have sand added to primer for grit.

Really, the only thing that we might want to be "smooth" are the sidewalls... but again having some grit to it might be helpful for pulling crab pots correct?

After removing the amine blush, do you really only need to scuff by hand + vacuum dust to get proper paint adhesion?

Or did you guys really go at it with a power sander "carefully" to ensure you didn't go through the epoxy.

-John
 

italianstal27

Chief Petty Officer
Joined
Feb 18, 2017
Messages
403
IMG_20170712_170532.jpg

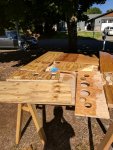
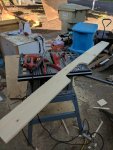
Stern deck support cut. Having an existing template to work with is SO NICE. Really makes for a quick job. This'll be epoxied.
IMG_20170712_170557.jpg

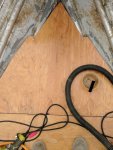
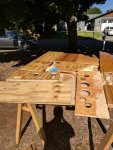
More epoxy. These are the bow deck support pieces, getting a second coat. Instrument panel has 6 holes in it for the gauges. We're not sure how high to make the panel (because the gauges are like 6" long. So we'll continue shaving off material until we can't go any further.
IMG_20170713_085842.jpg

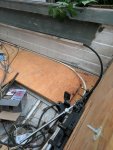
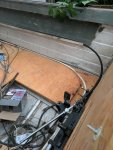
New steering cable arrived today (black). We're going to have (hopefully) just enough to make it to the steering wheel up front.
IMG_20170714_170948.jpg

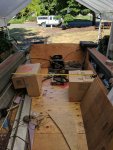
Mocking up seat box heights / width / length to fit in the boat. Home depot medium size boxes worked well. Decided on the seat boxes being 17 3/4" wide, 12 3/8" tall, 15" long. There'll be 4 of them, and we're still working on how to connect them to the deck.

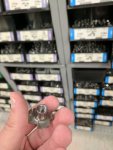
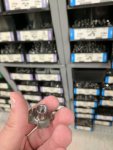
Thinking something like this:
IMG_20170717_114319.jpg
Hammered into the top of the countersunk deck (so it sits flush), and HEAVILY epoxied. Should be enough to keep it from pulling out, and would allow us to move the seat boxes for when we're hunting out of it.
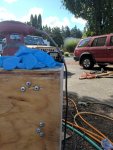
IMG_20170716_094525.jpg

Console finally cut flush and sanded down and gaps filled with epoxy.
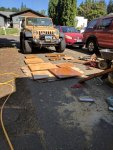
IMG_20170716_160313.jpg

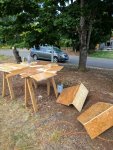
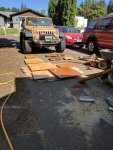
Dog house pieces and seat box pieces curing in the sun. Each coat of epoxy took about 1 hour to cure. We applied the second coat as soon as your finger print wasn't being left in the epoxy. Some sides of this exterior ply REALLY soak up the epoxy.

If you've applied two coats, and the wood still looks "woody" and not glossy from the amine blush, does that mean you still need more?


-John
 

Attachments

  • IMG_20170712_170532.jpg
    IMG_20170712_170532.jpg
    171.8 KB · Views: 2
  • IMG_20170712_170557.jpg
    IMG_20170712_170557.jpg
    186 KB · Views: 2
  • IMG_20170713_085842.jpg
    IMG_20170713_085842.jpg
    148.1 KB · Views: 2
  • IMG_20170714_170948.jpg
    IMG_20170714_170948.jpg
    173.7 KB · Views: 2
  • IMG_20170717_114319.jpg
    IMG_20170717_114319.jpg
    98.1 KB · Views: 2
  • IMG_20170716_094525.jpg
    IMG_20170716_094525.jpg
    147.6 KB · Views: 2
  • IMG_20170716_160313.jpg
    IMG_20170716_160313.jpg
    208.8 KB · Views: 2

Watermann

Starmada Splash of the Year 2014
Joined
Jan 12, 2013
Messages
13,790
I use those T nuts to secure my pedestals to the decking but they have to go on the underside, pounding them into a hole on the same side and adding adhesive won't work, way too much torque.
 

italianstal27

Chief Petty Officer
Joined
Feb 18, 2017
Messages
403
mmmm our deck is already riveted down.... so you're saying there probably *isn't* anyway to get a threaded insert into the deck without pulling the pieces?
 

Watermann

Starmada Splash of the Year 2014
Joined
Jan 12, 2013
Messages
13,790
Yeah I can see how you'd hit the throttle and someone would be watching seagulls on their back :lol:

A toggle bolt with washer and nut is about the only way I can see around it. I don't know if they make them in SS?
 

Pusher

Lieutenant
Joined
Sep 2, 2014
Messages
1,273
It woud add weight and leave you with a raised floor but you could sink the t nuts into a board then permanently epoxy it to the floor. The seat box would nut onto the base plate.

The perk is you wouldn't be putting a hole in your new deck.
 

italianstal27

Chief Petty Officer
Joined
Feb 18, 2017
Messages
403
That's exactly how we would do it if we weren't gonna be moving the seats.

We really screwed up by not having the seat plan done before we riveted the deck down. 😑
 

italianstal27

Chief Petty Officer
Joined
Feb 18, 2017
Messages
403
Perhaps we'll be the pioneers for solving how to make this happen for future generations. But I'd say we have to ourselves into a pickle.

Removable seats are super important for us...
 

Pusher

Lieutenant
Joined
Sep 2, 2014
Messages
1,273
Sorry, I don't think I was clear enough. The seat boxes themselves would be removable. You'd just have two 3/4" raised floor pieces where the base plates would be epoxied to the floor...... So the box would be temporarily secured to the base plate with t-nuts and then the base plate would be permanently secured to the floor with epoxy
 

Watermann

Starmada Splash of the Year 2014
Joined
Jan 12, 2013
Messages
13,790
Yeap what Pusher is describing is what I've seen guys with pedestals do, I've not seen seat boxes done that way before but it will work.
 
Top