76 16' Starcraft Kingfisher project.............I hope!

Woodonglass

Supreme Mariner
Joined
Dec 29, 2009
Messages
25,927
Re: 76 16' Starcraft Kingfisher project.............I hope!

I know...Wish that had'nt happened!!!! Next time I'm in PA, I'll bring my HVLP and paint her the right way fer ya!!!!:D
 

ezmobee

Supreme Mariner
Joined
Mar 26, 2007
Messages
23,767
Re: 76 16' Starcraft Kingfisher project.............I hope!

I know...Wish that had'nt happened!!!! Next time I'm in PA, I'll bring my HVLP and paint her the right way fer ya!!!!:D

If there's a next time, the bottom is going to be bare and the sides done in Valspar w/ hardener.
 

Woodonglass

Supreme Mariner
Joined
Dec 29, 2009
Messages
25,927
Re: 76 16' Starcraft Kingfisher project.............I hope!

Now That's ^^^^ a Winning Combination!!!!
 

Trevordog

Seaman Apprentice
Joined
Jul 12, 2011
Messages
40
Re: 76 16' Starcraft Kingfisher project.............I hope!

Thanks for the help with the 220 grit paper, but you opened up a new can of worms for me. THe Primer. I knew I had to hit all the bare aluminum spots with the ZC primer, but now I am concerned that I should prime the entire boat. EZ if I remember correctly you used
Easypoxy and it did not work well for you. So if I should prime the entire boat, which I don't mind doing, do I use the Zinc Chromate on all parts (bare aluminum and old paint), or is there a different primer I should be using. Rattle can, or is there a roll on? Thanks......
 

ezmobee

Supreme Mariner
Joined
Mar 26, 2007
Messages
23,767
Re: 76 16' Starcraft Kingfisher project.............I hope!

Yes definitely hit all the bare spots with a light coating of the ZC. Then, if you're using Easypoxy, prime the whole boat with their primer. That's the step I didn't do because I was specifically told that if the existing paint job was in good physical condition (no peeling or flaking) then I could just thoroughly scuff it and top coat. Well apparently NOT!!
 

Woodonglass

Supreme Mariner
Joined
Dec 29, 2009
Messages
25,927
Re: 76 16' Starcraft Kingfisher project.............I hope!

Thanks for the help with the 220 grit paper, but you opened up a new can of worms for me. THe Primer. I knew I had to hit all the bare aluminum spots with the ZC primer, but now I am concerned that I should prime the entire boat. EZ if I remember correctly you used
Easypoxy and it did not work well for you. So if I should prime the entire boat, which I don't mind doing, do I use the Zinc Chromate on all parts (bare aluminum and old paint), or is there a different primer I should be using. Rattle can, or is there a roll on? Thanks......
Refer to Post #19 It spells out what to do.
 

Trevordog

Seaman Apprentice
Joined
Jul 12, 2011
Messages
40
Re: 76 16' Starcraft Kingfisher project.............I hope!

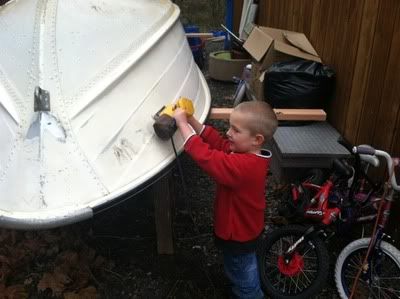
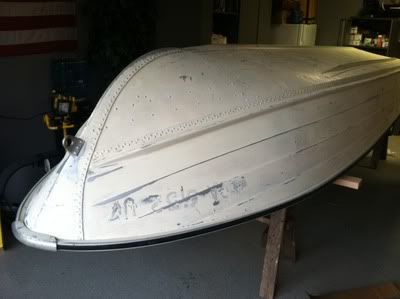
Thanks for the help everyone. I called Jamestown distributor where I purchased the easypoxy. They of course recommended I purchase the Pettit Protect (high build epoxy primer, 4700). They also recommended I sand with 150, not 220. I took their advice and prepped the boat. Even got my 4 year old involved.
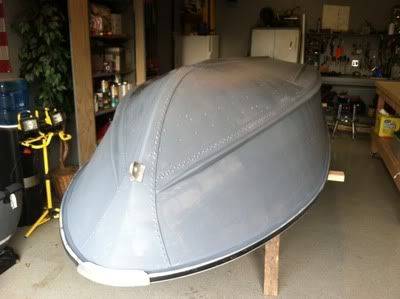
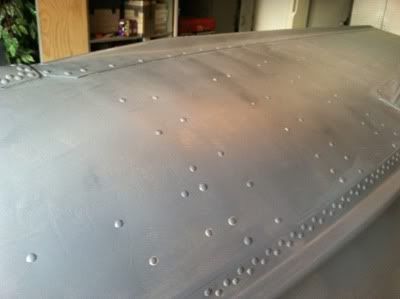
He had a blast helping with the sanding. All rusted screws from the many unknown items the PO had installed were removed and replaced with rivets and 5200. After 50/50 water vinegar wash, the boat was primed. I was happy with the primer. Seems to bond very well to the both the bare and painted aluminum.
I am ready to paint with the easypoxy now.

This brings me to my new question. Do you recommend two coats or can I get away with one due to the primer that was put on? Thanks again for all the help.

Jacksanding.jpg


sanded.jpg


primed.jpg


IMG_0513.jpg
 

ezmobee

Supreme Mariner
Joined
Mar 26, 2007
Messages
23,767
Re: 76 16' Starcraft Kingfisher project.............I hope!

Two coats for sure.
 

Trevordog

Seaman Apprentice
Joined
Jul 12, 2011
Messages
40
Re: 76 16' Starcraft Kingfisher project.............I hope!

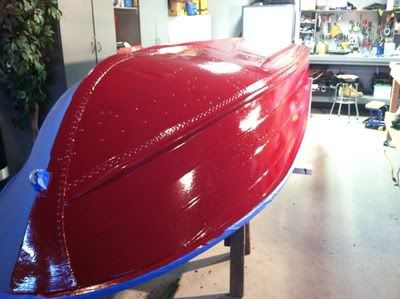
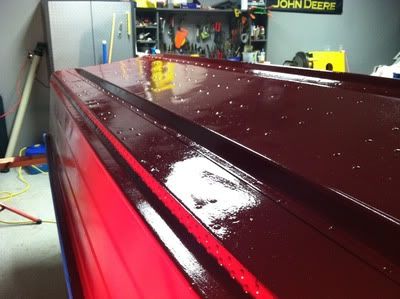
Well I made a little progress. I got the first coat of the easypoxy paint on, but made a big rookie mistake. When I put the primer on I had used a foam roller. Something in the paint made the foam roller expand and then fall apart. I went through about 5 rollers painting a 16' boat. I assume the epoxy did it. When I set out to use the easypoxy paint I did not want to go through the same issue, so I used a standard 4" roller after consulting with a guy at the paint store. He didn't think it would be a problem. Wrong! The fibers from the roller came off and are noticeable in the paint. Even with the roll and tip method I still got fibers. I am hoping that when I wet sand they will come out. Paint also was a bit more red then I thought. We were trying to find a maroon color that matches our truck and camper. Close, but still a little too red.

IMG_0603.jpg


IMG_0604.jpg


Wet sand and then at least one more coat, maybe two if I have enough paint. Any tips on wet sanding would be appreciated. I have been reading up on the forum. Not sure what grit to use, I saw a few different opinions on this.
 

ezmobee

Supreme Mariner
Joined
Mar 26, 2007
Messages
23,767
Re: 76 16' Starcraft Kingfisher project.............I hope!

Hmm, I wonder if it was something specific to the primer? Cuz I rolled my Easypoxy top coat with the standard 4" foam rollers from Lowes with no issues. Came out looking like it was sprayed by a pro. If you're unhappy with it at the moment, sand it good and put on a final coat with a foam roller.
 

jasoutside

Supreme Mariner
Joined
Dec 20, 2009
Messages
13,269
Re: 76 16' Starcraft Kingfisher project.............I hope!

Add to the conversation...

I attempted to roll and my rollers fell apart too. Rusto primer thinned with mineral spirits. I quickly gave up on that I'll not attempt to roll/brush a boat again, I stink.
 

Trevordog

Seaman Apprentice
Joined
Jul 12, 2011
Messages
40
Re: 76 16' Starcraft Kingfisher project.............I hope!

Thanks guys. That is exactly what I will do. I assume I should wet sand. Is that correct? and if so, what grit do you recommend?
 

Bwana Don

Lieutenant Commander
Joined
Oct 20, 2009
Messages
1,951
Re: 76 16' Starcraft Kingfisher project.............I hope!

If there's a next time, the bottom is going to be bare and the sides done in Valspar w/ hardener.

Hardeners have isocyanates in them. Nasty stuff that will obsorb through your membranes (eyes,nose..skin) and enter your lungs. Be very carefull with a hardener even if your rolling it on. Dangerous stuff. Google it, scary health risks.

Here you go. $350 but then you could spray or roll anything safely.
http://www.ebay.com/itm/380261092883?ssPageName=STRK:MEWAX:IT&_trksid=p3984.m1438.l2649
Turbine products
Hobby Air makes one too.
I've seen guys make their own with a shop vac and a mask ??????
 

Trevordog

Seaman Apprentice
Joined
Jul 12, 2011
Messages
40
Re: 76 16' Starcraft Kingfisher project.............I hope!

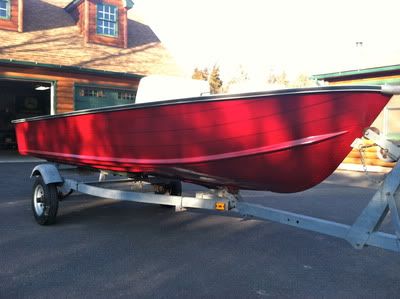
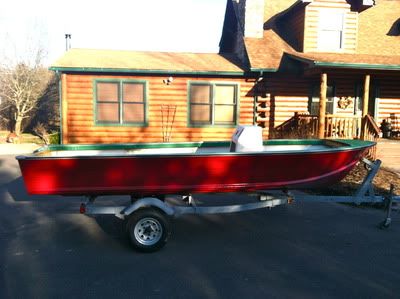
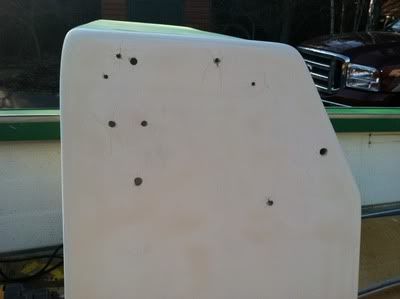
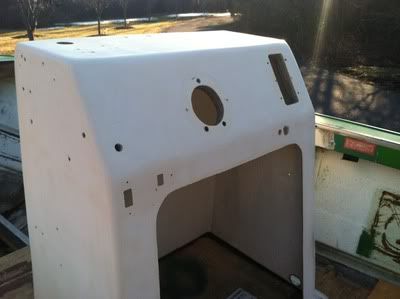
Well I'm making some more progress. I got the outside all painted with three coats. Looks ok to me. Next step is to paint top of the bow and the gunwales, apply gluvit, and start working on floor. I found an old console on CL for $30 and think it may work for what I am looking for (side console). Of course that brings me to my next question. The console has some (a lot) of holes from the previous owner. I plan on filling the holes and painting the console to match the gunwale color (tan). How do you recommend I do this. I was thinking of applying fiberglass cloth to the back side (inside the console) and filling the holes with epoxy. I know I can't do the big hole, but I can figure something to go there.

IMG_0686.jpg


IMG_0685.jpg


IMG_0683.jpg


IMG_0684.jpg
 

jasoutside

Supreme Mariner
Joined
Dec 20, 2009
Messages
13,269
Re: 76 16' Starcraft Kingfisher project.............I hope!

Great progress man!

Hmmmm, good question on your cool console find...

For the smaller holes I'd be going MarineTex. For the big ones, I'd be thinking about what I could install there. That's just me though.:)
 

64osby

Admiral
Joined
Jul 28, 2009
Messages
6,819
Re: 76 16' Starcraft Kingfisher project.............I hope!

How about making some panels, wood or Alum. and just cover it up. Then you have a blank slate to put on any and all switches/ gauges.
 

GA_Boater

Honorary Moderator Emeritus
Joined
May 24, 2011
Messages
49,038
Re: 76 16' Starcraft Kingfisher project.............I hope!

How about making some panels, wood or Alum. and just cover it up. Then you have a blank slate to put on any and all switches/ gauges.

Hey TD - Looking good! :D I second 64's idea. Those are some pretty big holes to patch and then you can do anything.
 

ricohman

Lieutenant Commander
Joined
Jul 30, 2011
Messages
1,631
Re: 76 16' Starcraft Kingfisher project.............I hope!

I think you are doing an awesome job on the Starcraft.
As far as wet sanding goes.....why? I've sprayed a lot of vehicles in my day and wet sanding enamel was part of the job for that showroom shine. Go as high as 2000 grit if you want but be careful around any of the rivets or you may go through the paint. Wet sanding was always followed by a 2 or 3 stage buffing.
But on the bottom of a boat I would wonder why. It looks sharp as it is.
+2 on the isocyanates. I can't even buy hardener in Canada as its been outlawed unless you are approved as a body shop with the proper safety equipment. Rolling it on is a safe way to do it and you don't need a forced air breathing apparatus. But you should still wear a proper 3M mask.
 

Trevordog

Seaman Apprentice
Joined
Jul 12, 2011
Messages
40
Re: 76 16' Starcraft Kingfisher project.............I hope!

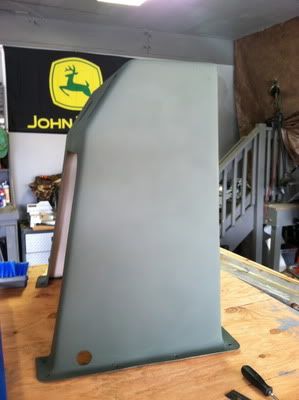
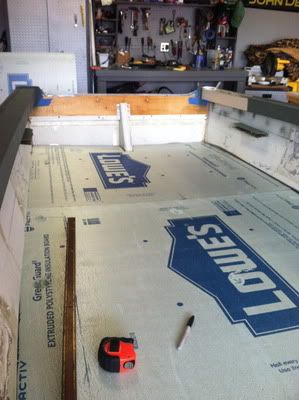
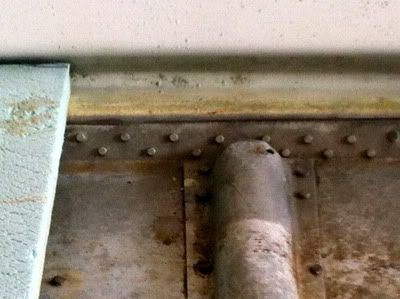
Console came out pretty good. I filled the holes with Flexpoxy, sanded and painted with primer and then top coat. All rivets were gone over with Gluvit, so now I am ready to do the floor. Which of course brings me to my next question. There is a groove that goes along the edge of the boat where the floor would go. My question is, does the plywood (3/4) go into that groove, or does it stop on the edge of the stringer before the groove. If it stop, which it appear to, do I have to seal that gap between the floor and the sidewall at all. The original floor was completely rotted, so I have no template. I was using the foam board from Lowes as a template, and then will cut up and use as floatation. I am open to any suggestions to make it easier. Obviously I have read a ton of posts that have helped so far. Thank you as always to all that help!!

Console with primer:

IMG_0784.jpg


My guess on how to make a template out of foam board:

IMG_0856.jpg


This is the groove I am referring to:

IMG_0858.jpg
 
Top