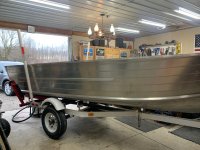
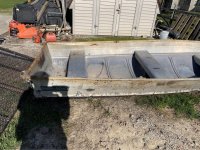
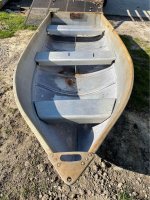
'74 Holiday 18 Restore Mod.... Convert to open bow.

Paulwise

Petty Officer 3rd Class
Joined
Jan 11, 2022
Messages
85
I rinsed the inside with a couple gallons of vinegar mixed with the same volume of warm water. That was followed up with pressure washing and rinsing with just warm water. I can't comment on the effectiveness of treating those hidden areas, but I feel better trying something!
Right, no way of seeing everything going on under there. Thats is a pretty strong mix, did it rinse out ok.... no further issues?
 

renns

Petty Officer 1st Class
Joined
Dec 20, 2017
Messages
316
Right, no way of seeing everything going on under there. Thats is a pretty strong mix, did it rinse out ok.... no further issues?
Strong mix? 50/50 is pretty standard from what I've read? That was this past fall/early winter when temperatures allowed proper flushing. The whole hull was pressure-washed out multiple times after the vinegar rinse, so I doubt there's any significant acid left anywhere. The hull was also leak-tested twice, so there's been lots of clean water cycled through.
 

Paulwise

Petty Officer 3rd Class
Joined
Jan 11, 2022
Messages
85
Strong mix? 50/50 is pretty standard from what I've read? That was this past fall/early winter when temperatures allowed proper flushing. The whole hull was pressure-washed out multiple times after the vinegar rinse, so I doubt there's any significant acid left anywhere. The hull was also leak-tested twice, so there's been lots of clean water cycled through.
Well, you were right. After some more looking it looks like the weaker solutions i was seeing (2 cups to a gallon) were for household items like pots and pans. All of the boat related articles are saying 50/50 so thats what ill do. I think ill be able to do the flush out with the preassure washer today since it will hit 50. Im glad you told me your mix sir, I was not quite on the right track.
 

Paulwise

Petty Officer 3rd Class
Joined
Jan 11, 2022
Messages
85
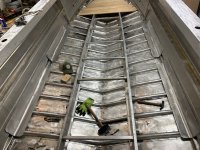
This is what the rib ends look like after flattening the bottom metal with a dead blow and six inch 2x4. They are all about 1/4" off of the deck. Im trying to figure out how to get them flat to the bottom to be able to reinstall rivets. I have CLecos so ill try that first. Not sure how far down they will pull them. Maybe pull down the ribs with a 2x4 and drywall screws with washers then heat them up to reform the bend. Not sure yet....
View attachment 356515
At the point where i have the bottom skin hammered flat and am considering ways to get the ribs bent back down flat against the bottom for for new rivets and patches. So far Clecos dont put enough down pressure to pull the ribs flat and a moderate heat from propane then hammering it didnt do it either (kind of paranoid of blowing through the hull.. I can get them to go flat by taking a large screw driver against an existing rivet and leverage them down but then they will always have pressure pulling the hull skin up again and ill be right back where i started in 5 years. hmmmm!? Probably do some floor reinforcements until i have a better plan.
 

Paulwise

Petty Officer 3rd Class
Joined
Jan 11, 2022
Messages
85
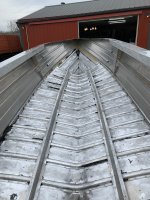
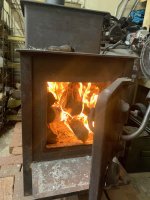
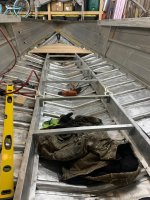
Got the de-corrosion vinegar bath and power wash and rinse done. Also took about a quart of acetone and cleaned the paint residue from the outside that didnt come off with stripper. Shined up nice enough and i didnt find any more structural problems or unseen holes. Back to cold weather today in Northern Ohio so had to fire up dads wood burner again.
 

Attachments

  • IMG_4802.jpeg
    IMG_4802.jpeg
    2.4 MB · Views: 15
  • IMG_4803.jpeg
    IMG_4803.jpeg
    2.7 MB · Views: 15
  • IMG_4730.jpeg
    IMG_4730.jpeg
    2.1 MB · Views: 15

Paulwise

Petty Officer 3rd Class
Joined
Jan 11, 2022
Messages
85
Had my blind rivet gun blow up on me last night. Took an oil bath in the process. Gonna have to return it to the CATS(cheap ass tool store) and get a replacement, maybe not at the CATS this time.
 

renns

Petty Officer 1st Class
Joined
Dec 20, 2017
Messages
316
Oh no! What a mess that must have made. Hopefully no injuries?
 

Paulwise

Petty Officer 3rd Class
Joined
Jan 11, 2022
Messages
85
Oh no! What a mess that must have made. Hopefully no injuries?
Everything in the shop got lubed haha. A seal in the gun broke. Blew oil everywhere. No injury, not even my ego unfortunately. My vulgar feelings about the Cheap Ass Tool Store are confirmed over and over and it makes me gloat every time. Got a replacement. Onward......
 

Paulwise

Petty Officer 3rd Class
Joined
Jan 11, 2022
Messages
85
Off the subject.... While working on the boat I have been drinking Black Coffee and eating no breakfast and will continue into the foreseeable future. I have a mentor that has lived in Russia and Ukraine for the past 20 years, he was forced to move back here a couple weeks ago, needless to say hes a mess. My chosen morning routine is a way of reminding myself to pray for him and the innocent people of Ukraine. слава Україні (Glory to Ukraine) May God give them victory.

Screen Shot 2022-02-28 at 12.20.12 AM.png
 

Paulwise

Petty Officer 3rd Class
Joined
Jan 11, 2022
Messages
85
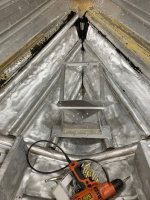
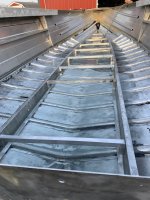
  1. Front subdeck support and structure.
  2. Stringer ties.
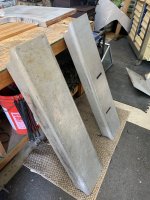
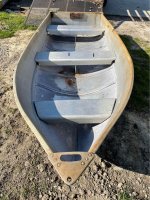
  3. Using bench seats from an old, not floating, Smoker Craft dingy to make vertical bracing for the sides and rib ends. Paid 50 bucks for the dingy. Saving me hundreds.
  4. Im waiting on my brother/someone to have some time to give me a hand and get the rib end patches installed.
  5. Ill also be using the dingy to make some of the structure for the conversion in the bow.
Using a lot of repurposed aluminum for this project. I will have to spend money on new trim throughout the boat and a transom cap but because of the open bow conversion and modifications im making there is no point in spending the money when i have all this other material sitting around.
 

Attachments

  • IMG_4808.jpeg
    IMG_4808.jpeg
    2.3 MB · Views: 21
  • IMG_4809.jpeg
    IMG_4809.jpeg
    2.1 MB · Views: 20
  • IMG_4810.jpeg
    IMG_4810.jpeg
    2.2 MB · Views: 20
  • IMG_4811.jpeg
    IMG_4811.jpeg
    2.2 MB · Views: 20
  • smoker craft 1.jpg
    smoker craft 1.jpg
    200.1 KB · Views: 18
  • smoker craft 2.jpg
    smoker craft 2.jpg
    192.5 KB · Views: 21
Last edited:

Paulwise

Petty Officer 3rd Class
Joined
Jan 11, 2022
Messages
85
Ill be using the gunwale cap trim on this to create the supports for the bows casting deck on my boat, will also use some of the hull sheet for the interior gunwale sides. The stern corner caps are really cool as well. Going to have to find a way to use them just for fun. smoker craft 1.jpg
 

Paulwise

Petty Officer 3rd Class
Joined
Jan 11, 2022
Messages
85
Update:

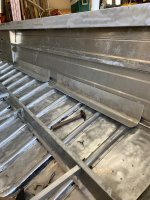
Wala! The former bench seats of the Smoker Craft are now my vertical rib end bracing. Took a few cutting wheels to make this happen then bending the slight angle they needed. I must say im happy with these. The length was just long enough to span 5 ribs each.

Boat is certainly stiffening up now. The bow deck support and the stringer supports really made the lower hull feel a lot more solid. Loving that.

Getting the hang of rivets, blind and solid. Thanks to CC for a source for good rivets. Using solid as much as i can for longevity purposes.

My brothers Ingersol Rand air gun is working out. Takes a little more air preasure than i thought i would need for 3/16 rivets based on other posts, I think 40-50 but its doing the job.

Im getting 2 feelings,
1. That im going too fast. LOL
2. That this is going to challenge my craftsmanship ability and creativity to the extreme. IE the open bow gunwale and casting deck structure is a challenge im having trouble conceptualizing. But i do enjoy the challenge and there is so much good information on this site about this build that I feel like im cheating and its saving me a ton of time. So i guess thank God for all of you that are willing to share your knowledge.

i dont really care about moving quickly. I always have been a very focused person on the thing im trying to do, sometimes to a fault but in this case its paying off i guess.IMG_4816.jpeg
 
Last edited:

Paulwise

Petty Officer 3rd Class
Joined
Jan 11, 2022
Messages
85
My late night companion in the shop. How he sits like this is a miracle of nature i suppose. He also likes to take naps outside at night in subzero temps. Good boy though. Guards our little property like a champ and loves to chase rabbits away from the garden. IMG_4815.jpeg
 

BOYS & TOYS

Petty Officer 2nd Class
Joined
Mar 1, 2008
Messages
144
"Wala! The former bench seats of the Smoker Craft are now my vertical rib end bracing"
Just curious about the thickness of your bracing material.
 

Paulwise

Petty Officer 3rd Class
Joined
Jan 11, 2022
Messages
85
Just curious about the thickness of your bracing material.
About 1/16. I would do heavier gauge but my reasoning is that since i only have one gap on each side my length of coverage will make up for what im losing in thickness of the material. I almost put them in the break and creased the bends but i dont think it will strengthen them much and might even weaken them as well.
 

Paulwise

Petty Officer 3rd Class
Joined
Jan 11, 2022
Messages
85
Leak test today. Only leaking im seeing is from the front bow nose plate and the seam at the bottom of the transom outer skin. Nothing from rivets or corrosion. Only the seams. Very slow seeping (a single drip takes 10-20 seconds. I am guessing that gluvit will take care of this. Not sure but i was pleasantly very suprised that nothing else leaked.. Any experience

I did the method where you dont fill the hull all the way to the rib ends but you tip the boat on the trailer forward and back to test bow and stern independently thus putting less weight in the empty hull. Worked perfect
IMG_4821.jpeg
 

Paulwise

Petty Officer 3rd Class
Joined
Jan 11, 2022
Messages
85
Leak Test Results:
  • No leaks from any rivets.
  • Very slow seeping from seems in the bow and the transom skin.
My thought is to gluvit the interior and that should stop the seeping. ANy opinions on this or am I on the right track?
 

ShoestringMariner

Lieutenant Commander
Joined
Apr 18, 2015
Messages
1,593
Gluvit yes. If you want to go further, do both Gluvit inside and west system’s g-flex on the outside. Now is the time to turn it upside down if you plan on it. G flex is Similar to Gluvit, but floods the seams nicely with syringes, especially with a heat gun. Stays flexible.

Can’t vouch for real time results yet as I’ve just done both treatments on my rebuild this winter. It’s all theory at this junction
 
Top