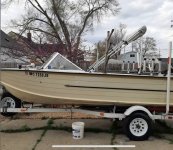
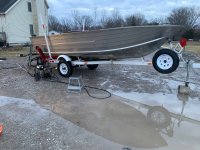
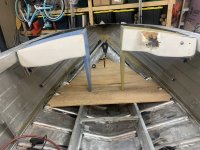
'74 Holiday 18 Restore Mod.... Convert to open bow.

Paulwise

Petty Officer 3rd Class
Joined
Jan 11, 2022
Messages
85
Couple people on Facebook have asked how i stripped the boat. There is broken info so i put the process in one response.. here it is. IMG_4803.jpeg
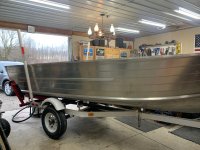
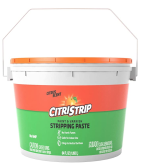
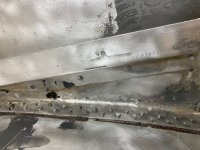
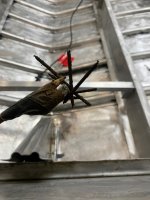
Here was my process, I used citristrip stripping paste, apply generously with a brush. Wait 2 hours or check with your fingernail to see if its lifting the paint, if necessary wait longer. Do sections, dont do the entire boat at once, do small sections. The paste will dry out if you let it sit too long. if necessary wait longer. Use a power washer(3500 psi minimum) to blast the paint off with the 10 degree tip starting from the bottom of each section and working toward the top. I had to blast the metal at point blank range on many parts of the boat because the paint was soft but still adheard to the boat(would have not come off with a scraper). When i finished stripping it I had to repeat the process again because like i said some parts of the paint were really on there(2 layers of paint on my boat). After 2 applications of stripper and power washing it 2 times to remove the lifted paint it. I had to do a touch up application of the stripper on several a few areas to get it to the point where there was only a cloudy film on the boat but it was down to bare metal. I did about 10 hrs of power washing on my boat to get it fully stripped. It was a lot of work. Lastly i took a quart of acetone and an old towel and cleaned the cloudy film off of the aluminum. Wet the towel with acetone and use the wet part of the towel to clean small sections working your way around the boat. Lots of elbow grease during this step as well but that is what gave it that really clean look. Obviously I have a different boat and who knows what paint you have on there but i think the power washer and the citristrip together were a good team.
 

Attachments

  • fullsizeoutput_1e00.jpeg
    fullsizeoutput_1e00.jpeg
    734.7 KB · Views: 7
  • Screen Shot 2022-03-11 at 9.55.44 AM.png
    Screen Shot 2022-03-11 at 9.55.44 AM.png
    528.8 KB · Views: 7
  • IMG_4788.jpeg
    IMG_4788.jpeg
    2.3 MB · Views: 7

Paulwise

Petty Officer 3rd Class
Joined
Jan 11, 2022
Messages
85
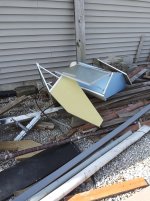
Update: Free CONSOLES!!!!! AND.......R..I..V..E..T..S.......
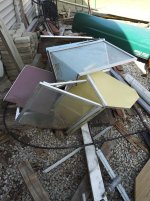
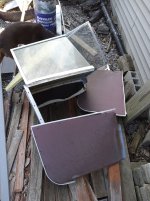
Just found some consoles from a '68 Starcraft "offshore" which is the predecessor to the Super Sport. Going to pick them up Saturday over by Lake Erie. Good Price at $0. Guy just wants them gone from behind the barn. Hopefully i wont have to modify them too much for installation with my '74 window configuration.
consoles 3.jpgconsoles2.jpgconsoles 1.jpg
 

Paulwise

Petty Officer 3rd Class
Joined
Jan 11, 2022
Messages
85
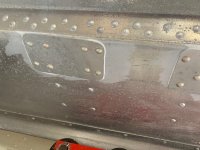
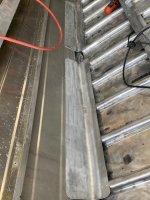
My Brother escaped his life as a new and soon to be Dad for a couple hours and came over and we did the patches to the hull bottom and the inside hull supports. That was a a bit messy, we were very generous with the 5200 on each plate. Each plate got 4 rivets for the original holes and 4 outside of those to pin down the corners. Worked very well. Some of the plates got slightly turned and are not perfectly paralell with the seem above it. This drove me crazy but will not effect the functionality. Rivets all held. I didnt know how to push the rib ends down tight to the floor. I ended up prying them down against the floor with a large screw driver while intalling the 1st rivet. This worked well, all of the ribs are flush to the floor now. My only concern was breaking an old rivet off or damaging it. I think its good however.
IMG_4836.jpegIMG_4837.jpegIMG_4838.jpeg
 

Paulwise

Petty Officer 3rd Class
Joined
Jan 11, 2022
Messages
85
To the admins, Im not sure why i have duplicate posts but i didnt do it on purpose. Forgive my tech dorkiness.
 

Moserkr

Chief Officer + Starmada Splash Of The Year 2021
Joined
Nov 23, 2020
Messages
869
Nice work paul! Shes going to be sitting pretty by the time youre done with her. Havent had much to say to help cause you’re doing a good job, but im tagging along!
 

Paulwise

Petty Officer 3rd Class
Joined
Jan 11, 2022
Messages
85
Nice work paul! Shes going to be sitting pretty by the time youre done with her. Havent had much to say to help cause you’re doing a good job, but im tagging along!
Thanks! Moral support is welcome as well, its a long road.
 

classiccat

"Captain" + Starmada Splash Of The Year 2020
Joined
Dec 20, 2010
Messages
3,412
Good progress and excellent work Paul!

The patches and chine supports turned out great.

Having a willing riveting partner is worth their weight in gold (or in this case, diapers! :ROFLMAO: )
 

ShoestringMariner

Lieutenant Commander
Joined
Apr 18, 2015
Messages
1,593
My Brother escaped his life as a new and soon to be Dad for a couple hours and came over and we did the patches to the hull bottom and the inside hull supports. That was a a bit messy, we were very generous with the 5200 on each plate. Each plate got 4 rivets for the original holes and 4 outside of those to pin down the corners. Worked very well. Some of the plates got slightly turned and are not perfectly paralell with the seem above it. This drove me crazy but will not effect the functionality. Rivets all held. I didnt know how to push the rib ends down tight to the floor. I ended up prying them down against the floor with a large screw driver while intalling the 1st rivet. This worked well, all of the ribs are flush to the floor now. My only concern was breaking an old rivet off or damaging it. I think its good however.
View attachment 357040View attachment 357041View attachment 357042
Looks great!
 

Paulwise

Petty Officer 3rd Class
Joined
Jan 11, 2022
Messages
85
Gluvit yes. If you want to go further, do both Gluvit inside and west system’s g-flex on the outside. Now is the time to turn it upside down if you plan on it. G flex is Similar to Gluvit, but floods the seams nicely with syringes, especially with a heat gun. Stays flexible.

Can’t vouch for real time results yet as I’ve just done both treatments on my rebuild this winter. It’s all theory at this junction
I just posted a question on your build page and now i go to mine and see this haha. thanks! This seems to be what is called for in my situation.
 

Paulwise

Petty Officer 3rd Class
Joined
Jan 11, 2022
Messages
85
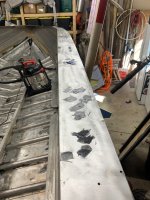
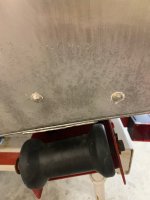
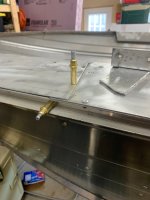
Found 2 loose rivets in the transom tray and so i replaced those. Also did a lot of filling of corrosion and holes in the gunwales. I have to say i really think JB weld Marine Epoxy is an amazing product. Does a great job.IMG_4852.jpegIMG_4848.jpegIMG_4847.jpeg
 

Paulwise

Petty Officer 3rd Class
Joined
Jan 11, 2022
Messages
85
This is about half of the rusted steel nails I found inside the knee brace with my magnet on a smores stick.. Im glad i decided to clean any sand that was in there out. Turned out to be a lot more than sand. NO HUNDRED DOLLAR BILLS THOUGH. Darn.
IMG_4854.jpeg
 

Paulwise

Petty Officer 3rd Class
Joined
Jan 11, 2022
Messages
85
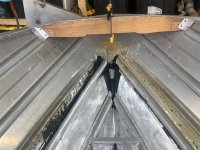
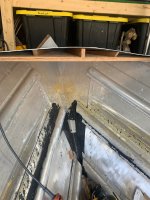
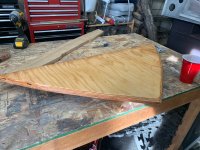
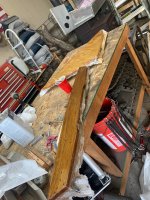
Here im building the new structure for gunwales and nose for the conversion to the open bow layout. I have the fiberglass on the front beam and nose plate. My least favorite part of this is the shim style nose supports but it will be solid and unseen. I really had to wing that to make it work. Will sand and install tommorow i hope, although the walleye in the maumee river are spawning now so i might be there in the morning instead. Love me some walleye.
 

Attachments

  • IMG_4855.jpeg
    IMG_4855.jpeg
    1.9 MB · Views: 16
  • IMG_4856.jpeg
    IMG_4856.jpeg
    2.2 MB · Views: 16
  • IMG_4857.jpeg
    IMG_4857.jpeg
    2.1 MB · Views: 17
  • IMG_4858.jpeg
    IMG_4858.jpeg
    1.9 MB · Views: 17
  • IMG_4859.jpeg
    IMG_4859.jpeg
    2.2 MB · Views: 17
  • IMG_4860.jpeg
    IMG_4860.jpeg
    2.5 MB · Views: 17
  • IMG_4861.jpeg
    IMG_4861.jpeg
    2.4 MB · Views: 16

Paulwise

Petty Officer 3rd Class
Joined
Jan 11, 2022
Messages
85
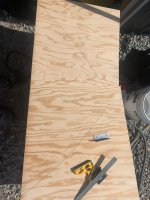
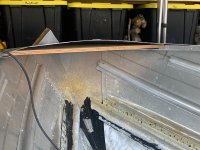
Console Test Fit. This was definitely gratifying. I got these consoles from a gent on facebook who randomly saw my shot in the dark shout out searching for them. Lived about an hour away. They are from a '68 Offshore. My thoughts are that i may have to trim them down. Im not sure yet however because i havent put my windows on them yet. But boy do i love the way they crown with the lines of this boat. The lines look so dang good. As a creative person this is a beautiful accident but I think they are like this because the Offshore has a deeper hull so the angel of each console is forced to a steeper angle. Here is hoping my windows just lay perfectly on top of them and i wont have to do any modifications (yeah right haha). Either way trimming them will be a lot less work than fabricating them from scratch.
IMG_4863.jpeg
 

ShoestringMariner

Lieutenant Commander
Joined
Apr 18, 2015
Messages
1,593
Console Test Fit. This was definitely gratifying. I got these consoles from a gent on facebook who randomly saw my shot in the dark shout out searching for them. Lived about an hour away. They are from a '68 Offshore. My thoughts are that i may have to trim them down. Im not sure yet however because i havent put my windows on them yet. But boy do i love the way they crown with the lines of this boat. The lines look so dang good. As a creative person this is a beautiful accident but I think they are like this because the Offshore has a deeper hull so the angel of each console is forced to a steeper angle. Here is hoping my windows just lay perfectly on top of them and i wont have to do any modifications (yeah right haha). Either way trimming them will be a lot less work than fabricating them from scratch.
View attachment 357273
Someone’s been busy! Nice find on your consoles. Definitely mock up the windshield. You might need to pull them back some though. The vertical legs should be near inline with the stringers more. Unless you are using your original glass (narrower pass thru?)

Looking great though
 

MNhunter1

Lieutenant Junior Grade
Joined
May 12, 2014
Messages
1,053
Nice work! Looking forward to the finished bow with the reinforcements. I keep wondering if mine will be sufficient to support a trolling motor and ponder the idea of the full plywood underlay. The curve also adds another complexity as you have noted. I believe Watermann did something similar, but trimmed down his bow cap to let it lay flat. I cut the new braces already for mine, just went a little wider than the originals, but still debating replacing with a full piece like you did. I also feel like the cap on the MR is a little smaller than the cap of my previous SS, but it could just be how it looks/feels in perspective with the extra 2ft of length.

I agree you’ll likely need to trim the consoles down for the windshield to line up correctly, as well as move them back a bit. You could always just eliminate the windshield too if you liked how it sits. Nice to have that extra dance space behind the consoles depending on how you fish, and still leaves enough space for one to fish from the bow.
 

Paulwise

Petty Officer 3rd Class
Joined
Jan 11, 2022
Messages
85
Nice work! Looking forward to the finished bow with the reinforcements. I keep wondering if mine will be sufficient to support a trolling motor and ponder the idea of the full plywood underlay. The curve also adds another complexity as you have noted. I believe Watermann did something similar, but trimmed down his bow cap to let it lay flat. I cut the new braces already for mine, just went a little wider than the originals, but still debating replacing with a full piece like you did. I also feel like the cap on the MR is a little smaller than the cap of my previous SS, but it could just be how it looks/feels in perspective with the extra 2ft of length.

I agree you’ll likely need to trim the consoles down for the windshield to line up correctly, as well as move them back a bit. You could always just eliminate the windshield too if you liked how it sits. Nice to have that extra dance space behind the consoles depending on how you fish, and still leaves enough space for one to fish from the bow.
Mine is a Holiday and came with plywood in the nose. I just incorporated it into my design. I didnt need to add any supports for the plywood. I just cut a new one and glassed it. I added the shims so if someone steps up there it will be firm and not cave. I could have removed all the rivets and made it flat but i like the lines of the nose so i did the extra work to keep it original. I may have problems if i want to add a trolling motor but ill deal with that later. Worth the headache to keep the beauty of the design to me.
 

Paulwise

Petty Officer 3rd Class
Joined
Jan 11, 2022
Messages
85
Nice work! Looking forward to the finished bow with the reinforcements. I keep wondering if mine will be sufficient to support a trolling motor and ponder the idea of the full plywood underlay. The curve also adds another complexity as you have noted. I believe Watermann did something similar, but trimmed down his bow cap to let it lay flat. I cut the new braces already for mine, just went a little wider than the originals, but still debating replacing with a full piece like you did. I also feel like the cap on the MR is a little smaller than the cap of my previous SS, but it could just be how it looks/feels in perspective with the extra 2ft of length.

I agree you’ll likely need to trim the consoles down for the windshield to line up correctly, as well as move them back a bit. You could always just eliminate the windshield too if you liked how it sits. Nice to have that extra dance space behind the consoles depending on how you fish, and still leaves enough space for one to fish from the bow.
I Will definitely have to trim the consoles. That is going to be interesting. As far as the positioning of the consoles i am not sure how i want to approach it. The original position would be some inches more forward than a Super Sport. This however would give me less room in the rear of the boat. As i am leaning toward not having much in the way of seating in the bow as well as using the boat primarily for fishing out of the back it would make sense to leave them forward and have a smaller bow deck. Not sold i either way but am leaning toward having them forward as they were originally in the Holiday configuration. I could easily be swayed to moving them if it made more sense. Another factor is that when I ran the boat last summer it was extremely stern heavy. Had trouble getting on plane. This probably had many reasons but that is just another factor.
 
Last edited:
Top