73 Sea Ray restoration

GSPLures

Chief Petty Officer
Joined
Sep 3, 2019
Messages
564
Fan is a good idea. I might make my kid sit in the bilge and make the noises for a more authentic experience
 

GSPLures

Chief Petty Officer
Joined
Sep 3, 2019
Messages
564
Well I got the transom glassed in. I ran 1708 across the whole thing going past the hull tabbing. Then put another layer of 1708 on the doubled wood around my keyhole extending a few inches past the double wood. To get to the recommended thickness for merc.
Click image for larger version  Name:	20200830_141415_compress77.jpg Views:	1 Size:	699.2 KB ID:	10924588 it looks like there is more bubbles than there are must be the camera (crappy phone) there is one at the bottom edge that I will grind back.
 

GSPLures

Chief Petty Officer
Joined
Sep 3, 2019
Messages
564
Well with that out of the way, I am going to rest up for the rest of the day and in the morning recut my keyhole and make sure that I am within spec of mercruiser and then cut out half the stringers and restart the grinder.
 

GSPLures

Chief Petty Officer
Joined
Sep 3, 2019
Messages
564
I cut out my keyhole and took measurements I am dead on with flatness but when measuring thickness with my mic I am at 1.95" around is that good enough?

if not I can put another layer of 1.5csm over the keyhole area when I glass the stringers. I'd prefer not to because I really want to call the transom done lol.
 

AShipShow

Lieutenant Commander
Joined
Jul 8, 2016
Messages
1,792
Nah, throw on another layer of 1708...
Its not necessarily a strength issue, its a transom assembly issue... The transom plate and gimbal housing are designed for the specified 2- 2 1/2" and if its less than that, the mating parts may bottom out before the hardware is tight...

It'll only take you 20 minutes to throw on another layer of 1708... Just cut out a piece (or even 2) that are a littler bigger than you're transom plate and glass em in and be done with it.

Again, its not for strength, its for the proper transom assembly... proof of that is, merc has the same exact dimensions specs for the transom for a 3.0L as it does for a big block 7.4L... and probably even their racing engines
 

GSPLures

Chief Petty Officer
Joined
Sep 3, 2019
Messages
564
Nah, throw on another layer of 1708...
Its not necessarily a strength issue, its a transom assembly issue... The transom plate and gimbal housing are designed for the specified 2- 2 1/2" and if its less than that, the mating parts may bottom out before the hardware is tight...

It'll only take you 20 minutes to throw on another layer of 1708... Just cut out a piece (or even 2) that are a littler bigger than you're transom plate and glass em in and be done with it.

Again, its not for strength, its for the proper transom assembly... proof of that is, merc has the same exact dimensions specs for the transom for a 3.0L as it does for a big block 7.4L... and probably even their racing engines

Ok. When I glass in my stringers I will throw a few more pieces over it. Thank you.
 

GSPLures

Chief Petty Officer
Joined
Sep 3, 2019
Messages
564
For my next question. I cut out the starboard stringer and cut the bulkheads in half to do one stringer at a time. Due to the horrible state of my port stringer I have to assume if the hull is going to shift it will anyway. I slid new 2x6s over my bunks because they are sagging to stop the hull from conforming to the bunks.

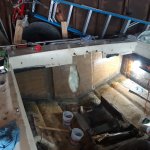
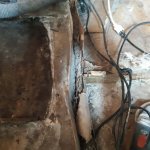
Click image for larger version  Name:	20200831_153512_compress82.jpg Views:	1 Size:	734.0 KB ID:	10925178Click image for larger version  Name:	20200831_153523_compress63.jpg Views:	1 Size:	776.8 KB ID:	10925179As you can see there is pretty much no port stringer left. Can I just remove this at the same time so I can grind it all at once and be done with it?

I have to assume in this state it has no structural integrity anyway. The cap is on the boat and the transom is glassed in
 

GSPLures

Chief Petty Officer
Joined
Sep 3, 2019
Messages
564
Awesome. I am absolutely sick of looking at rotted stringers lol. Also atleast now I can grind all at once and then be done with that part
 

kcassells

Fleet Admiral
Joined
Oct 16, 2012
Messages
8,720
make sure you have all the ppe you need. Save those lungs and eyes for the future.
Let the fun begin.
 

GSPLures

Chief Petty Officer
Joined
Sep 3, 2019
Messages
564
Yup, I have it from when i did my transom grinding. After my youngest goes to bed I'm going to kick the radio on in the garage and get at it.
 

GSPLures

Chief Petty Officer
Joined
Sep 3, 2019
Messages
564
All the stringers are cut out and just got the front motor mount out (what a nightmare that was) it is dimensional lumber with a 1/2"ply over it. Studs comming up from the bottom so it was done by the previous owner. The wood was only glassed at the end which I though was held in place by foam then glassed over.

but it ended up being this hard gray caulk type stuff which took 2 hours just to get most of it off by chiseling. I tried the grinder with some 24grit but that just gummed up. There was water trapped in it also
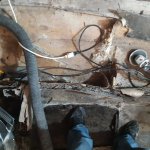
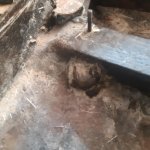
20200831_133155_compress35.jpg20200831_133200_compress56.jpg I didnt get a chance to clean up for pictures after cutting out the stringers and removing the mystery caulk that will be tomorrow.
 

Baylinerchuck

Commander
Joined
Jul 29, 2016
Messages
2,726
Cruising right along. As far as the hull, grind everything out at once. You don’t want to put one stringer in, then cut the other out. Do it all at once. I took my boat to the car wash when I was done grinding and gave her a good pressure washing. I did get a few odd looks, but it was nice washing all that dust outa the tub.
 

GSPLures

Chief Petty Officer
Joined
Sep 3, 2019
Messages
564
I will, not looking forward to it though lol. I was going to start grinding the lips down yesterday but curiosity got the best of me I had to know what was making the blobs holding my front mount in. Still dont know what it was but it certainly was not very friendly with my tools.
 

Baylinerchuck

Commander
Joined
Jul 29, 2016
Messages
2,726
I will, not looking forward to it though lol. I was going to start grinding the lips down yesterday but curiosity got the best of me I had to know what was making the blobs holding my front mount in. Still dont know what it was but it certainly was not very friendly with my tools.

Possibly a previous repair and a product called Sea Cast or similar to. This stuff can be mixed, poured into a void, and it hardens up like a rock. A buddy of mine used it when the wood core rotted out of his motor mounts. He cut the top of the boxes off, cleaned out the wood, the poured it in. Once hard, he capped it with 1708. It made a really nice repair.
 

GSPLures

Chief Petty Officer
Joined
Sep 3, 2019
Messages
564
Possibly a previous repair and a product called Sea Cast or similar to. This stuff can be mixed, poured into a void, and it hardens up like a rock. A buddy of mine used it when the wood core rotted out of his motor mounts. He cut the top of the boxes off, cleaned out the wood, the poured it in. Once hard, he capped it with 1708. It made a really nice repair.

Well that is some good stuff. It took about a total of 2 hours just to get that stuff out around the 2 sides of the motor mount. And it was bogging down my 4.5" angle grinder
 

GSPLures

Chief Petty Officer
Joined
Sep 3, 2019
Messages
564
I have up to the ski locker grinded. Unfortunately I am not hitting that sweet pink color as in other restos. Looks like the previous owner put a layer of CSM and cloth down on the hull at some point so I am grinding off that first layer of cloth and it is a whitish clear color. It definitely looks white in the picture due to the dust lol.
20200901_142114_compress87.jpg
you can see at the bottom of the pic where I stopped grinding it is a yellowish color. But underneath that layer is good and solid
 

Jrobbs3

Cadet
Joined
Aug 31, 2020
Messages
20
I have up to the ski locker grinded. Unfortunately I am not hitting that sweet pink color as in other restos. Looks like the previous owner put a layer of CSM and cloth down on the hull at some point so I am grinding off that first layer of cloth and it is a whitish clear color. It definitely looks white in the picture due to the dust lol.

you can see at the bottom of the pic where I stopped grinding it is a yellowish color. But underneath that layer is good and solid

Just curious (as I've yet to do this myself on my project), are you grinding down the entire surface of the hull? Or just where your transom, stringers, and bulkheads were tabbed in previously?
 

GSPLures

Chief Petty Officer
Joined
Sep 3, 2019
Messages
564
Just curious (as I've yet to do this myself on my project), are you grinding down the entire surface of the hull? Or just where your transom, stringers, and bulkheads were tabbed in previously?

I am doing the whole hull. Most of the bottom has to be grinded for tabbing and I will be adding to the stringer system to make it stronger.
 
Top