70's era 15' Yarcraft yankee project question

oba97

Petty Officer 1st Class
Joined
Jul 28, 2015
Messages
277
what about machine screws? I have tried to figure the size of replacement rivets but my larger diameter ones look to be almost 1/2" and most large ones I see for sale are 3/16 so Im thinking that Im measuring wrong?
 

Mark72233

Ensign
Joined
Jul 11, 2014
Messages
926
I think the screws I got for my rub rail are #10-32 x 1 1/2. I went to Home Depot and just bought a few machine screws of different lengths and sizes until I found the right ones for my rub rail than I went on line and purchased stainless steel nuts, washers and bolts in bulk of 100 count bags. They where only about $6-$10 a bag. Much cheaper than buying local
 

TruckDrivingFool

Lieutenant Commander
Joined
Jul 30, 2007
Messages
1,818
The problem with machine screws is you need the access to the back side. If you can get to the backside all around and would feel more comfortable using machine screws you certainly can use them (and would be better than wood type screws) but I still say you'll save time and effort using rivets.

Look at the rivet holes in the hull, that is the size of rivet they used as rivets are sized according to shank diameter. (part that goes in the hole) When I tore the AeroCraft apart the rub rail was held on with 3/16" rivets. The hull halves where only stapled together so I can't rule out a 1/4" rivet in your application but wouldn't be surprised if they used the same size on both just different shank lengths and head sizes.

That make any sense?
 

oba97

Petty Officer 1st Class
Joined
Jul 28, 2015
Messages
277
No Title

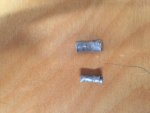
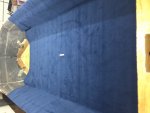
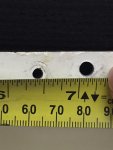
Thanks everyone for your insight. Here is a pic of the two different holes with a measuring tape for reference. I also have a pic of the two different sized riverside removed. The larger held the cap to the hull, the smaller diameter held the rub rail on. I still need to add my ply backing strip. I also added a pic of me test fitting my carpet. I need to figure out how to cut it where the hull starts to hump......I understand the potential issues with carpet but happy wife, happy life.
 

Attachments

  • photo241247.jpg
    photo241247.jpg
    81.2 KB · Views: 1
  • photo241248.jpg
    photo241248.jpg
    72.1 KB · Views: 1
  • photo241249.jpg
    photo241249.jpg
    174.2 KB · Views: 1

TruckDrivingFool

Lieutenant Commander
Joined
Jul 30, 2007
Messages
1,818
From the pic I'd say 3/16" to hold the halves together and 1/8" for the rub rail. They should be listed as large flange and dome head for the two different head sizes. For the length measure the thickness of all the materials you are riveting together then get a rivet with a grip range that that measurement falls into.
 

oba97

Petty Officer 1st Class
Joined
Jul 28, 2015
Messages
277
I feel like an idiot šŸ˜…. As I look again (after your response) you are spot on. I promise I can read a measuring tape, and consider myself quite handy. For some reason I was way off. Must be time for a burban!
 

oba97

Petty Officer 1st Class
Joined
Jul 28, 2015
Messages
277
No Title

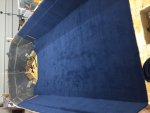
Quick update...I have my carpet installed and the plywood backing to the hull lip glued and curing. I should be ready to bring the cap back in the garage now. Once I get it back in I will have some work to do repairing a section I had to cut out of the splashwell to get the cap off at the beginning of the project. I think the carpet went well, I used indoor/outdoor adhesive for the deck and spray contact cement for the sides. The deck was easy, I loose laid it in place, pulled half of the carpet back, spread the glue with a 1/8" trowel then laid it back down. I took a rolling pin and rolled out the carpet. Once the first side was done I repeated the process for the other side. I chose to use contact cement for the side walls because I didnt want the carpet to droop while it dried. I just sprayed both surfaces, waited a couple of minutes then slowly worked my way from the deck to the top of the side wall. It was a little more challenging because you dont have much (if any) room for error once you mate the two surfaces. Here is a pic of the finished product minus clean-up. I decided to leave the area under the splashwell un-carpeted (will paint) so that if gas/oil spills Im not having to deal with cleaning the carpet.
 

Attachments

  • photo241444.JPG
    photo241444.JPG
    88.5 KB · Views: 1

saginawbayboater

Senior Chief Petty Officer
Joined
Mar 8, 2012
Messages
677
Quick update...I have my carpet installed and the plywood backing to the hull lip glued and curing. I should be ready to bring the cap back in the garage now. Once I get it back in I will have some work to do repairing a section I had to cut out of the splashwell to get the cap off at the beginning of the project. I think the carpet went well, I used indoor/outdoor adhesive for the deck and spray contact cement for the sides. The deck was easy, I loose laid it in place, pulled half of the carpet back, spread the glue with a 1/8" trowel then laid it back down. I took a rolling pin and rolled out the carpet. Once the first side was done I repeated the process for the other side. I chose to use contact cement for the side walls because I didnt want the carpet to droop while it dried. I just sprayed both surfaces, waited a couple of minutes then slowly worked my way from the deck to the top of the side wall. It was a little more challenging because you dont have much (if any) room for error once you mate the two surfaces. Here is a pic of the finished product minus clean-up. I decided to leave the area under the splashwell un-carpeted (will paint) so that if gas/oil spills Im not having to deal with cleaning the carpet.

Carpet looks sweet oba97! Nice work
 

oba97

Petty Officer 1st Class
Joined
Jul 28, 2015
Messages
277
My rivet gun came in and it included a few different size rivets. Here is what I found.... Both the 3/16 and 1/8 rivets were a little loose in their respective holes. So should I not worry about it because I still need to drill through my 1/4" backer and I plan on using washers or do I buy bigger rivets and re drill if necessary? I've never used rivets so it's all new to me.
 

TruckDrivingFool

Lieutenant Commander
Joined
Jul 30, 2007
Messages
1,818
You can oversize if you want but since you have fresh holes on the working end of the rivet you should be fine.
 

TruckDrivingFool

Lieutenant Commander
Joined
Jul 30, 2007
Messages
1,818
I'll throw this in too look at table 2

13/67 = 0.1940..... Close but still in spec for a new hole

Will just make your rivets pass through easier.
 

oba97

Petty Officer 1st Class
Joined
Jul 28, 2015
Messages
277
ok, thanks for the advise. I think I will try a few 3/16 and see how it feels.
 

oba97

Petty Officer 1st Class
Joined
Jul 28, 2015
Messages
277
No Title

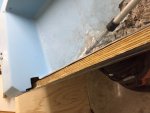
Big day!! I put the cap back on and ran into a half expected issue. My transom looks to be about 1/4" or less too thick. So I figure I can cut out part of the splash well then reattach. Or, I could route out the area of the transom that is too thick. I wanted to ask you all before I make a decision just I case there is one way better than the other. Here are a couple pics for reference. One is from under the splash well where it contacts the transom and a couple from the top. You'll notice there is a small gap at the top but there is not at the bottom.
 

Attachments

  • photo241649.jpg
    photo241649.jpg
    72.8 KB · Views: 1
  • photo241650.jpg
    photo241650.jpg
    76 KB · Views: 1
  • photo241651.jpg
    photo241651.jpg
    80.5 KB · Views: 1

TruckDrivingFool

Lieutenant Commander
Joined
Jul 30, 2007
Messages
1,818
Keep in mind I'm a tinner and don't have a clue, but this is the way I had planned to deal with the SW if I had made it that far on the AC,

Trim the original lip off where the SW met and went up the transom. Get the cap to fit back on. Reglass the transition from the SW to the trans. tying the two back together.

I had planned on painting anyway so I wasn't afraid of losing the gel coat match. The router idea will work too but my plan seemed to be the easiest way to deal with it without possibly losing the seal I had created by encapsulating the trans wood.
 

oba97

Petty Officer 1st Class
Joined
Jul 28, 2015
Messages
277
Man you are right! I wish the guys who helped me put the cap on understood just how satisfying it was to get it in! After all that work, man it was nice. I'm thinking the same as you are about cutting and re-attaching the part of the splash well that mates with the transom. I'll wait to see if anyone else chimes in, but right now that's the direction I'm leaning towards.
 

oba97

Petty Officer 1st Class
Joined
Jul 28, 2015
Messages
277
No Title

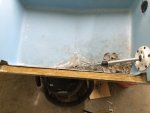
Right or wrong here is what I ended up doing...... I cut out the part of the splashwell that meets the transom. That allowed the cap to go back on nicely šŸ˜€ . Here's the right or wrong part. After grinding I put some duct tape around the opening from under the Splashwell to give some type of backing for the new glass. I put a layer of 6oz glass from the Splashwell up and over the transom. I plan on doing two layers of 17oz then fill any low spots with PB. Not sure if this is the correct or best way so I'm open to any advice. Here is a pic while I was prepping. I sure hope I have things right cause the cap is going to be a ***** to get off when I'm done.
 

Attachments

  • photo241817.jpg
    photo241817.jpg
    81.7 KB · Views: 1

TruckDrivingFool

Lieutenant Commander
Joined
Jul 30, 2007
Messages
1,818
There ya go :joyous:

Look up/search fairing compound, I believe it's easier to sand and is made from resin and microspheres or cabisol.
 
Top