'65 Lyn Craft Seabreeze 1500 Sport Runabout

buxmj

Petty Officer 1st Class
Joined
Jun 9, 2018
Messages
294
Thanks guys, yes I am very happy with how the yard looks now, especially looking out from the house, the whole area is so much easier to keep clean also. I told the admiral that the slab will make a great shuffleboard court someday, she's not amused.

Sam since I haven't ever had a working boat I don't know about the smaller lakes nearby. Lake Monroe is real close and on the St John's but can get pretty rough when the wind picks up. One goal I have is to travel the St John's up to your area, you ever travelled south on the St. John's?
 

sphelps

Supreme Mariner
Joined
Nov 16, 2011
Messages
11,462
. One goal I have is to travel the St John's up to your area, you ever travelled south on the St. John's?

No not yet . I haven't made it past downtown J-ville yet .. I would love to do the St Johns river cruise down to the Mount Dora show with the ACBS .. That's a long trip I dont think I have the boat for that .. A cuddy cabin would be nice for that trip ..
 

buxmj

Petty Officer 1st Class
Joined
Jun 9, 2018
Messages
294
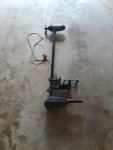
Last week when I was cutting away with the multitool to lessen the grinding still to come I heard my name being called when I turned the tool off, which I am surprised I heard it since I wear noise cancelling headphones. It was one of my neighbors. I thought it was going to be "hey can you give us a little break from the noise"?! But he was asking what era the boat was and wanted to see if I was interested in a trolling motor he had in his attic that he bought from Sears back in the 70's. I said the boat is a 65 but will be powered by a 70's motor so the trolling motor will fit in. He didn't want anything for it, just wanted to give it to me. One big reason I might not do the grinding all in one day, I do get along with all my neighbors and don't want to risk losing that. Neighbors on each side of me have pools also so a fiberglass dust bowl wouldn't be good. Click image for larger version  Name:	20200621_143825.jpg Views:	1 Size:	1.71 MB ID:	10886835
 

sphelps

Supreme Mariner
Joined
Nov 16, 2011
Messages
11,462
Cool ! My brother has an old phantom tm he is giving me . I think it’s early 60’s . Still runs like a champ !
 

buxmj

Petty Officer 1st Class
Joined
Jun 9, 2018
Messages
294
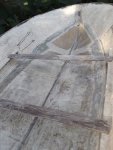
I did get the transom lower filler pieces glued on and the top edge trimmed to a better angle and the whole thing edge routed. I also cut the old splashwell out while the cap was off the boat. I am glad that I don't have to do any more trimming to the cap, fits right over the new transom and will be at the same height as that aluminum box that was on it. The new splash Click image for larger version  Name:	20200624_114738a.jpg Views:	1 Size:	208.7 KB ID:	10888302 well will be raised and I think I will cut out the bottom drain hole a little more so there is more PB and less chance of water to wood contact.

Buck
 

kcassells

Fleet Admiral
Joined
Oct 16, 2012
Messages
8,715
Looks good. Place something under the transom to get it off direct contact to the hull. PB will fill it in.
Plastic shims, anything plastic/rubber.
 

buxmj

Petty Officer 1st Class
Joined
Jun 9, 2018
Messages
294
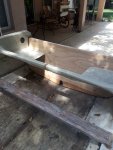
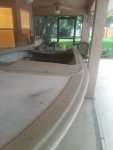
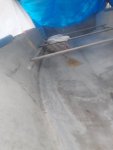
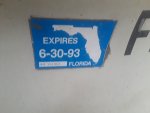
Thanks KC for the reminder, so many things to remember to do during a restoration! I have been working on the boat off and on since the last post which I can't believe it has been a month already. I learned that if I need to put the boat under cover (hurricane) and not lose a parking spot in the garage, the boat fits on the back patio, woohoo. While it was parked there I was able to get all the registration numbers off the bow during a rain storm.

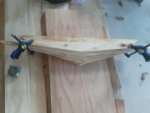
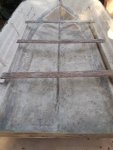
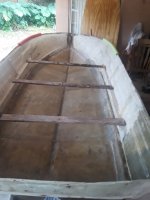
I finished making the 5 bulkheads (there are no front to back stringers, just side to side bulkheads), I am using the clamps to keep them from hooking like hockey sticks.

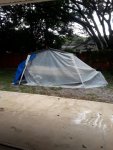
Saturday I started to grind a little and realized it was going to make too much dust for my neighbors so this morning I set a small canopy up and enclosed it with plastic sheeting and tarps. I went to Harbor Freight to get some more flap disks and also bought a carbide cup wheel. I am sorry I can't recall who just used one on here but I am glad they posted that it worked for them. They are $10 and it looks like it will get through the whole job.

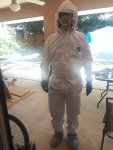
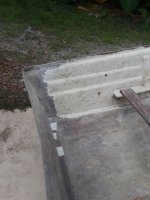
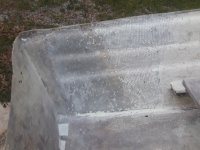
I live in Florida and I should have done this in January! It is as bad as every one says but I am getting through it. My garb is full Tyvek suit, rubber gloves and leather work gloves, respirator, full muff head phones, bucket hat and safety glasses. I went at it 3 times today for over an hour each time and only have a little bit of the itchies on my hands. I changed clothes after each session, soaked each time.

Hoping to finish the grinding tomorrow or Wed, then I finally can start the glassing!
 

Attachments

  • photo335815.jpg
    photo335815.jpg
    140.8 KB · Views: 7
  • photo335818.jpg
    photo335818.jpg
    132.4 KB · Views: 7
  • photo335819.jpg
    photo335819.jpg
    320.1 KB · Views: 7

sphelps

Supreme Mariner
Joined
Nov 16, 2011
Messages
11,462
Holy smokes that looks hot !!!! Drink lots of water and Gatorade Buck !
 

buxmj

Petty Officer 1st Class
Joined
Jun 9, 2018
Messages
294
Yes Sam it is miserable but I only do it for an hour and a half tops each go and take time to cool off in between. This last weekend I was trimming the trees and was more miserable so I guess that is good? I think I am on the downside, will get back at it tomorrow, probably could almost fill a 5 gallon bucket with all that I have scooped up. The original fiberglass job was so bad, the area of the floor that will be covered with plywood has a layer of CSM that was put down so inconsistently that it is driving me crazy.

On a side note from the misery of grinding I wanted to share the pic of the last time this boat was registered. The guy I bought it from said he had it out a few times, I am guessing he had access to a private lake.
 

Attachments

  • photo335910.jpg
    photo335910.jpg
    1.6 MB · Views: 5
  • photo335911.jpg
    photo335911.jpg
    115.8 KB · Views: 5

buxmj

Petty Officer 1st Class
Joined
Jun 9, 2018
Messages
294
Hello everyone, hope all of you are staying healthy and getting work done on your projects, home, boat and work projects for me.

So I don't think I finished the grinding but after about 10 hours I am done for now, I need a break. Because I was doing this outside, in Florida in an enclosed tent I could only do about an hour to an hour and a half before I needed to stop and take everything off and cool off and dry off. I got 3 sessions in on Mon, 1 on Tue and Wed and 3 yesterday. I was able to use the same Tyvek suit, it is hard to find them right now, but after using my only one that much I had to throw it away.

I went through the hull just a little bit but think it is an easy fix, 2 places and both are thin lines, no big spots to patch.

I was fortunate enough to not get the itchies, just a little on my hands at the end of the first day.

The method to my madness: 1. Use rubber gloves and leather gloves over them, I use 7mm rubber gloves from HF and they hold up well, so much they hold lots of sweat, yeah that grossed out the admiral. 2. Get the full Tyvek suit with the hood, which I think they all do have that. 3. I put full muff head phones after the respirator then put on a bucket hat and tight safety glasses and then pull the hood over to cover it all up. If you pull the hood down to above your safety glasses then fold the front lip of the bucket hat up that will keep dust off your face and head. 4. Be sure the rubber gloves are the first thing you put on and the last thing you take off.

On Monday we had at least 10 bottles of Gatorade and now nothing, I did drink a lot and now I need to DRINK a lot, at one point wanting to stop and take the sawzall to the whole thing. I am so frustrated with how bad the original glass was done, wondering if they ever worked on any day other than a Friday afternoon payday. I will have to do more but the majority is done.
 

Attachments

  • photo336116.jpg
    photo336116.jpg
    236.5 KB · Views: 8
  • photo336117.jpg
    photo336117.jpg
    283.2 KB · Views: 8
  • photo336118.jpg
    photo336118.jpg
    945.9 KB · Views: 8

kcassells

Fleet Admiral
Joined
Oct 16, 2012
Messages
8,715
Good for you, moving along despite the heat. Who's that alien in your garage? :D
 

buxmj

Petty Officer 1st Class
Joined
Jun 9, 2018
Messages
294
Thanks KC for the encouragement and yes Sam I would love to wear that to a gig, just wish I had a gig! Maybe sometime soon... I took last weekend off from the boat to get some stuff done around the house and on the truck. I am glad I did, sometimes good to step back smell the fiberglass dust, lol. Yesterday I bought a 5 gallon bucket of resin so there is no turning back now! After speaking to the guy who sold me the resin, he is a restorer also, he suggested I put in stringers, it was built with bulkheads only, I decided to put a center stringer in and split the bulkheads that are already cut which will give the hull more strength.

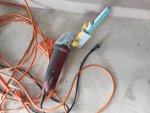
Also I needed to do some more grinding in some areas that needed some touch up but I had already disposed of my Tyvek suit and can't find any in stock anywhere. After seeing Andy on Boatworks use a 1 1/2" Makita belt sander and knowing it is expensive and hard to get I thought of the cheap 1/2" x 18" HF belt sander I have had laying around for a few years. The cheap belts you buy at HF for it were breaking at the seam so I bought some good belts from Amazon and it is working great! It doesn't kick up dust either, just lays it down and I can sweep it up. I do wear long sleeve shirt, gloves, respirator and glasses of course but no itchies and I won't pass out from being in an oven! It works great also because it gets in the tight spots the grinder couldn't reach. The belt in the pic looks ragged but that is after 30 minutes of use. I have gone through 3 belts and none have broken.

Hope to start laying glass this week!
 

Attachments

  • photo337359.jpg
    photo337359.jpg
    206.4 KB · Views: 6

kcassells

Fleet Admiral
Joined
Oct 16, 2012
Messages
8,715
I always tthougght about getting 1 of thos sanders. Great for tight spots I imagine.
 

buxmj

Petty Officer 1st Class
Joined
Jun 9, 2018
Messages
294
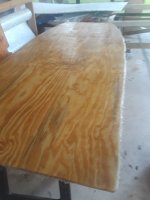
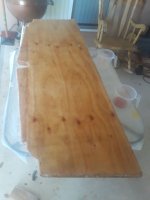
Hello all, hope everyone is doing well and staying out of trouble. I can't believe I haven't posted an update in so long. Life got crazy busy, which is good. I finally got started doing some glass work! Since the boat is small I have just 2 pieces of ply for the deck and the transom. There are bulkheads which I haven't coated yet but will hopefully get to that this weekend when I can start installing them also. The main deck piece is essentially an 8' sheet of ply and the other deck piece is a 2' triangle piece which goes in the bow. Both of those are coated on the top side and have one layer of CSM on the bottom side, the transom has CSM on both sides. Hoping to get more done this weekend.
 

Attachments

  • 20201018_102705a.jpg
    20201018_102705a.jpg
    155.1 KB · Views: 4
  • 20201019_092720a.jpg
    20201019_092720a.jpg
    135.1 KB · Views: 4

buxmj

Petty Officer 1st Class
Joined
Jun 9, 2018
Messages
294
I am still getting some small stuff done while I wait for the chopped glass to get here, the Cabosil arrived yesterday. There are a lot of divots and craters in the multi glass layers because of voids from the original construction. It will be easier to lay down some 1708 without having to worry about those divots and also don't want to just pour resin in to level it out. I need to make PB for the bulkheads anyway so might as well get good at mixing it up! I was given a small scrap of Coosa board to use at the bow for the bow eye, going to use a cutting wheel to get the old one off, too much rust to get the nuts off, then finish grinding the bow eye area so I can put that in when I have the PB.

I did some more grinding (mostly gelcoat) near the transom up the sides. There were some bigger 1/4" holes and 11 rivet holes for the Seabreeze plastic emblems. I figured since I will have someone make vinyl stickers for the emblems it would be better to put a layer of glass over all those holes rather than only filling them.
 

Attachments

  • 20201025_160001a.jpg
    20201025_160001a.jpg
    299.4 KB · Views: 7
  • 20201030_180944.jpg
    20201030_180944.jpg
    1.9 MB · Views: 7

Baylinerchuck

Commander
Joined
Jul 29, 2016
Messages
2,726
Great progress. Simply using thickened polyester resin has no strength and can crack. Make sure to add some 1/4” chopped strands to it for strength. Epoxy can be thickened without strands as it’s plenty strong on its own.
 

buxmj

Petty Officer 1st Class
Joined
Jun 9, 2018
Messages
294
Thanks BC for the reminder, I did cover all those holes with masking tape on the outside and mixed up some PB and put that in the holes before I laid a layer of 1708. On Friday I decided to do more grinding, thought I was just going to touch some things up but went at it for 2 hours and glad I did. Over the last three days I have laid down one layer of 1708 on the hull bottom and up the sides on the back to give it more strength and to cover the 10 or 11 holes on each side. I also made a PB sandwich, ha, cut the scrap piece of Coosa in half and used PB to glue the pieces together and then mixed up a bigger batch of PB and glued it to the hull for the bow eye. I put on the first layer of 1708 on that today. I have now finished a five gallon bucket of resin, will get another one later this week. I plan on putting one more layer of 1708 down, not as wide as the first and not as far forward, decided to not put the 1/4 inch plywood down on the hull like the original builders did. The deck boards are already coated on top side with resin and bottom side with resin and one layer of CSM so I am hoping to start on the bulkheads this week, they are already cut, just need to sand and coat them then I can install the transom and the deck!
 

Attachments

  • 20201109_143108a.jpg
    20201109_143108a.jpg
    204.7 KB · Views: 6
  • 20201109_142925a.jpg
    20201109_142925a.jpg
    289.2 KB · Views: 6

sphelps

Supreme Mariner
Joined
Nov 16, 2011
Messages
11,462
No stringers only lateral bulkheads .. Hmmm .. there was no foam under the deck originally right ? I’m thinking the manufacturer installed the plywood on the bottom of the hull for extra strength for pounding over waves ‘wakes .
I would think about either pouring new high density foam or adding some stiffeners to the hull . Like maybe cutting cardboard tubes in half and glassing them in parallel with the boat ..If that makes sense ...
 
Top