1993 Chaparral Gemini 190: Chronicles of a New Boat Owner (Deck Rebuild) [SPLASHED June 2018]

bpounds1991

Petty Officer 1st Class
Joined
Nov 3, 2017
Messages
321
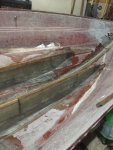
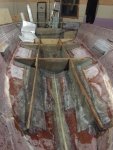
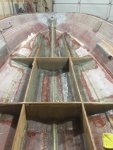
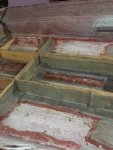
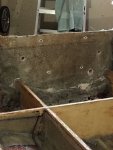
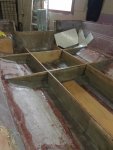
Thanks JASinIL2006, got about as much glassing as I could in after work today. I wanted to be done with it, but I'm just over measuring and cutting fiberglass for the day. The other part that stinks is the resin it's taking to glass this 2215. At this point I'm about 3 gallons into my 2nd bucket, and I haven't even finished the tabbing yet. Anyways, here's some progress pics.


IMG_2969.JPGIMG_2966.JPGIMG_2964.JPGIMG_2967.JPG
 

Woodonglass

Supreme Mariner
Joined
Dec 29, 2009
Messages
25,926
20 gallons of resin is pretty common for a boat of this size. Just remember though you only need to use enuf to make the glass go clear. Less is More when doing resin/glass work. A resin rich layup actually has less strength and is more apt to crack. Lots of people dont use the bubble buster roller but I find you'll use less resin if you do and still have a very strong and watersealed layupl You're making good progress and should be ready for a spring launch if you stay at it.:rockon:
 

bpounds1991

Petty Officer 1st Class
Joined
Nov 3, 2017
Messages
321
Thanks a ton WOG! This stuff is pretty darn hard to make clear that’s for sure. I’ll most likely tap into the next 5 gallon bucket by the end of tomorrow, and when my wife takes a weekend trip to Charleston in a few weeks, I may have her pick up another bucket ;) lol. My dad is coming over tomorrow to help drill all the transom holes, 3M 5200 and reinstall most of the pieces of equipment on the back of the boat, and fit the fuel tank.
 

bpounds1991

Petty Officer 1st Class
Joined
Nov 3, 2017
Messages
321
Sounds like a horror story LOL, planning on using some of the excess ply to support the tank over the PVC for sure. That’s in store as well for tomorrow, I’m also planning on constructing the 2 wood gas tank supports to place on top of it once it’s finally glued in. I told my dad tomorrow is a list of small things we’ll be crossing off the list, but will really help move things forward and expedite this whole process while I finish glassing.
 

kcassells

Fleet Admiral
Joined
Oct 16, 2012
Messages
8,707
IDK... looks like air bubbles in the flat and vertical layups. Also a couple areas of glass look resin starved? Might be the pics.
Can't really blow them up for detail. Lots of work going on there BP.
If it is bubbles/air those areas are the first to collect water and cause troubles down the line.
If that's is the case it's an easy fix. BTW...still better than factory says I!

Here's another good read on fuel tank install;
http://www.yachtsurvey.com/fueltank.htm
 
Last edited:

bpounds1991

Petty Officer 1st Class
Joined
Nov 3, 2017
Messages
321
I went over those areas over and over and OVER again with resin, they still just happen to look like that kcassells. I can't possibly think of any areas actually starved of resin at this point, considering I've used almost 5 gallons to get to where I'm at with the layups

The corners of the gas tank area need a little bit of grinding, as the gas tank itself is a VERY snug fit. We didn't get nearly as much done as we wanted today, but the transom holes are completely drilled and another 6 areas of fiberglass are done.
Click image for larger version  Name:	IMG_2972.JPG Views:	1 Size:	133.7 KB ID:	10545347Click image for larger version  Name:	IMG_2971.JPG Views:	1 Size:	112.9 KB ID:	10545348
 

Baylinerchuck

Commander
Joined
Jul 29, 2016
Messages
2,726
Wow, great progress sir!! Yeah I knew you were going to use a ton of resin with that thick material you’re using. She will be really strong when your done. Looking good.
 

bpounds1991

Petty Officer 1st Class
Joined
Nov 3, 2017
Messages
321
Thanks BC! Just finished the 2nd 5 gallon bucket and the tabbing is all finished up. Just need to go back through and add one layer on the corners and we're all good to go.
IMG_2974.JPGIMG_2973.JPG
 

mickyryan

Rear Admiral
Joined
Apr 18, 2016
Messages
4,214
I used 15 gallons on mine and not nearly the amount of stringers you have , all together my stringers were 12ft x 6 " x2 and bulkheads were 36"x 9" at deepest x 3 it is amazing how quick it goes but its always nice feeling when on the water that it is solid.
 

boedekerj

Seaman
Joined
Jul 24, 2017
Messages
71
Sweet progress! Still too cold here in Iowa so I'm a bit jealous that you're glassing! You mentioned that the tank is a "snug fit". Are you by chance using an aluminum tank? If so, there a TONS of precautionary tales about "too" snug a fit. I am living that tale now, as I have to back cut some of my stringers to remove my aluminum tank because it is TOO tight a fit, and will "corrode through, guaranteed" I'm told.
 

tpenfield

Moderator
Staff member
Joined
Jul 18, 2011
Messages
17,985
Yes, if the tank is snug up to a stringer or other structural member, it will trap moisture and corrode through.
 

mickyryan

Rear Admiral
Joined
Apr 18, 2016
Messages
4,214
if it is too snug against wood you will get expedited erosion because aluminum seals itself as it oxidizes and stops but if you keep scraping it off it keeps corroding, imho if i had a aluminum tank i would etch it with some good primer after getting it clean as i could with light sanding then i would either use line x type product "raptorliner" or any other poly urea coat tank then reinstall , it would add protection:)
 

bpounds1991

Petty Officer 1st Class
Joined
Nov 3, 2017
Messages
321
I’ve got a poly tank, and at the moment I’ve got what appears to be about 1/4” on each side. The main issue with the snug fit was that the corners just need a little bit of grinding to drop the tank in evenly. I’ll most likely pull the boat out tomorrow and take care of that, but overall I don’t see it as being a major issue (thank god). Once I get that taken care of I’ll make the cutouts for the fuel lines and then finish capping in order to move on to the gel coating. I’ll also take some pictures of the gas tank once we drop it in.
 

bpounds1991

Petty Officer 1st Class
Joined
Nov 3, 2017
Messages
321
I decided to revamp my week just a little bit. Temperatures Friday are hitting the 70s as well as Sunday, so my plan now is to tab the corners of each compartment Friday, grind once that sets, and then fit the fuel tank. Once that’s done I’ll install the under tank wood support, jig the hose exits from the compartment, and install the aluminum trays for the hoses. If all goes well I can finish up all capping Sunday with the admiral and start gel coating.
 

oldrem

Commander
Joined
Nov 7, 2013
Messages
2,002
Woohoo Sounds like you're rocketing it there. Splash date set? You may splash before I can even start working on the Sylvan again.
 

bpounds1991

Petty Officer 1st Class
Joined
Nov 3, 2017
Messages
321
I’m trying Rem, at this point we’d love to have it in the water within a month and a half. The biggest issue I think is just simplifying a few of the problems I have at the moment and not overthinking them... for instance this whole gas tank situation lol. A few other problems that need solutions currently are the amount of wiring that runs under the deck (cuts across the ski locker) but has the fuel sender in the middle that comes off like a T (as you can see with my masterfully crafted drawing at work lol).

Click image for larger version  Name:	D27EADD0-387C-46AA-8C00-8BBBFCAF7002.jpeg Views:	1 Size:	1.94 MB ID:	10546154
 
Top