1991 Searay 225 BR Transom and Stringer Evaluation

GCartwright

Petty Officer 2nd Class
Joined
Jul 1, 2012
Messages
149
The deck is down using pl and stainless screws, all sections are glassed with csm on the bottom, seams are all filled and tabbed, two layers of 1708 between the deck and hull, foaming is finished, about a litre left over from the 10 gallon kit, had one classic over pour episode,
Next is two layers of csm and one layer of 6 oz with wax on the top layer since I'm going with carpeting
 

Attachments

  • photo333340.jpg
    photo333340.jpg
    696.2 KB · Views: 3
  • photo333341.jpg
    photo333341.jpg
    392.9 KB · Views: 3
  • photo333342.jpg
    photo333342.jpg
    370.2 KB · Views: 3
  • photo333343.jpg
    photo333343.jpg
    333.6 KB · Views: 3

GCartwright

Petty Officer 2nd Class
Joined
Jul 1, 2012
Messages
149
Deck is now 95%done, one coat of resin, two layers of csm and one layer of 6 oz, 6 oz is nice to work with, didn't break a sweat putting that down

Question about how to deal with pedastal mounts, thinking of caulking the screw to deck hole, then building up the centre area into a small mound so that water doesn't sit there, then carpet, then pedastal, any thoughts?
 

Attachments

  • photo333921.jpg
    photo333921.jpg
    330.9 KB · Views: 2
  • photo333922.jpg
    photo333922.jpg
    324.8 KB · Views: 2
  • photo333923.jpg
    photo333923.jpg
    383.1 KB · Views: 2

JASinIL2006

Vice Admiral
Joined
Feb 10, 2012
Messages
5,548
I really didn't want any thru-floor bolts because I was concerned about water getting below deck. I built pedestal bases that the seats bolted into, and then used peanut butter to glue those to the deck, and then i covered the whole deal with fiberglass (several layers of 1708, I think). Even if water does get into the bolts from the pedestal into the wood base, it won't penetrate the deck.

Before glassing the bases to the floor, I drilled holes for the pedestal and installed stainless steel T-nuts for the pedestal bolts. They are super strong. My only problem was that I didn't protect the holes/T-nuts well enough from resin, and I had to chase the threads on a couple of T-nuts because resin dripped into them....

When I actually attached pedestals to the bases, I filled the holes with 3M 4200 to waterproof the holes.
 

GCartwright

Petty Officer 2nd Class
Joined
Jul 1, 2012
Messages
149
I though about doing it like Jas but decided against it, just a personal preference, wanted it so the seat never had a wobble
Now that I have holes in the floor with the screws coming up my question is how to best keep water out of these holes while using the existing mounts.
I've never laid carpet so if I was to caulk around screws coming thru the deck and pedestal base to deck then carpet gets cut around the pedastal
 

Attachments

  • photo333947.jpg
    photo333947.jpg
    919.6 KB · Views: 1
  • photo333948.jpg
    photo333948.jpg
    252.6 KB · Views: 1

JASinIL2006

Vice Admiral
Joined
Feb 10, 2012
Messages
5,548
I don't think you can be 100% sure you will never get water intrusion, because there will be some minor movement of the screws when they are under load and have the weight of passengers on the seats. Over time, gaps will open, which is why many folks don't want the holes in the deck.

I think the best you can do is pack the holes as much as possible around the screws with a urethane-based adhesive-sealant (e.g., 4200 or 5200) that has some flex to it. I would not use something really rigid and hard, like epoxy. Did you treat the edges of the bare wood where you drilled the holes with anything before putting in the screws? Since that is exposed end grain, it's particularly good at sucking up moisture.
 

kcassells

Fleet Admiral
Joined
Oct 16, 2012
Messages
8,600
Just do it the way you want and see what happens. Maybe someone else has better help.
 

GCartwright

Petty Officer 2nd Class
Joined
Jul 1, 2012
Messages
149
Yes, holes were coated in resin, I think I'll be fine with 4200 in the holes and around the base flange
 

GCartwright

Petty Officer 2nd Class
Joined
Jul 1, 2012
Messages
149
It's been a while since I updated, was making good progress until a recent health setback, hopefully back at it shortly.
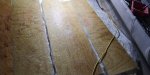
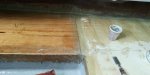
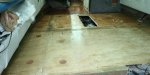
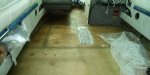
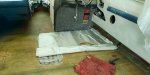
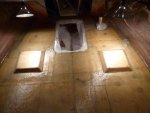
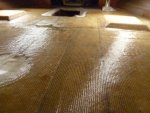
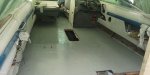
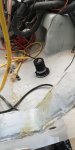
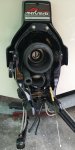
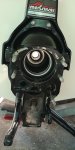
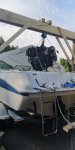
Put a few coats of deck cote down, seems to have adhered well,got the trim tabs on as well as the tow ring transom plate, mounted the new depth transducer with 4200, and rebuilt the outdrive with the new swivel shaft pin, bushings, gimbal bearing and all bellows etc
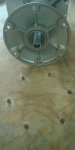
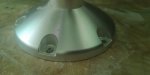
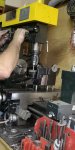
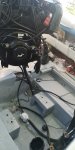
Bell housing bore for the shift cable had to be enlarged for new style cable so got a buddy to put it on his drill press and drill it out for me.
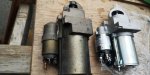
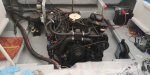
Transom assembly now ready for the outdrive once the motor is in. Changed the motor starter, reinstalled the motor coupler and have the engine ready for install.
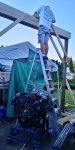
Built the gantry and did a test lift a few inches of the ground with two of us on the engine stand, no flexing or creaking so I feel good about doing the engine lift.

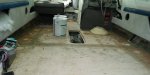
Now I'm waiting for my lower back to heal up enough for me to climb back into the boat and get the engine mounted, besides that I've got carpet to put in, seats to mount, electrics to hook up and a ton of cleaning to do
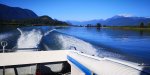
Hopefully we have a warm fall and I can get in the water this year
 

Attachments

  • photo338334.jpg
    photo338334.jpg
    95.4 KB · Views: 3
  • photo338337.jpg
    photo338337.jpg
    315.7 KB · Views: 3
  • photo338339.jpg
    photo338339.jpg
    343.3 KB · Views: 2
  • photo338340.jpg
    photo338340.jpg
    395.7 KB · Views: 2
  • photo338341.jpg
    photo338341.jpg
    320.8 KB · Views: 2
  • photo338342.jpg
    photo338342.jpg
    118.8 KB · Views: 2
  • photo338343.jpg
    photo338343.jpg
    397.8 KB · Views: 3

GCartwright

Petty Officer 2nd Class
Joined
Jul 1, 2012
Messages
149
With the help of a buddy doing the heavy lifting the motor is in, aligned, connected and running, outdrive is installed as well.

When I removed the hardware for the rear engine mounts a few years ago I didn't notice that extra washers were used to raise the back of the motor for alignment purposes, without these washers the motor would have to sit very low on the front mounts and there is not enough clearance between and above the motor mounts for this to happen, I built the new mounts based on the factory dimensions so these 1/8" washers will need to stay, I've read that adding spacers can stress the u-joints /coupler so we'll see, if these washers were installed at the factory they've been there for 30 years and all seems well.

Need a seat or two then I'm ready for a water test after I first get all the dust out
 

Attachments

  • photo338985.jpg
    photo338985.jpg
    1.1 MB · Views: 4
  • photo338986.jpg
    photo338986.jpg
    383.7 KB · Views: 4
  • photo338987.jpg
    photo338987.jpg
    374.5 KB · Views: 4

GCartwright

Petty Officer 2nd Class
Joined
Jul 1, 2012
Messages
149
Couldn't help myself, weather was perfect, no one at the launch and no one on the river, had to shake the rust off me and the boat, everything went well, bilge was dry.

Looks like I'm boating this year
 

Attachments

  • photo339185.jpg
    photo339185.jpg
    334 KB · Views: 4

GCartwright

Petty Officer 2nd Class
Joined
Jul 1, 2012
Messages
149
Well this was a 3 year rebuild as well, I though I could do it in a year, not even close, what I saved in fuel helped pay for the rebuild thou
Still need the rest of the seats and the sun pad etc
 
Top