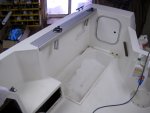
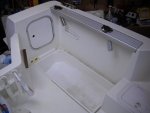
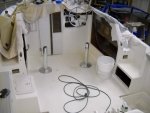
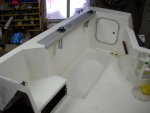
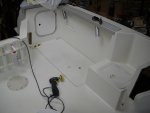
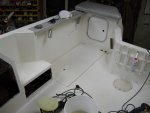
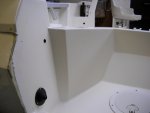
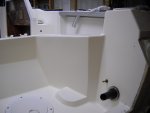
1991 Bayliner Trophy 2002 Transom Repair

Status
Not open for further replies.

j_k_bisson

Lieutenant Junior Grade
Joined
Oct 6, 2010
Messages
1,082
Re: 1991 Bayliner Trophy 2002 Transom Repair

Nice!

Great reflectivity...

Thanks.

I guess that is the out come of a monkey f*cking a football is. I'll be doing alot of that tomorrow night...... LOL:D Reflectivity that is.
 

j_k_bisson

Lieutenant Junior Grade
Joined
Oct 6, 2010
Messages
1,082
Update 12-21-2010

Update 12-21-2010

Well I'm home alone for the next 4 days and it's great!:D Wife left with all the kids to see her family on the weekend. Wont be back till X-mas eve. So I'm partying like never before! The house is already distroyed! Need to budget on night for clean up all ready!

Well last night did not work on the boat. Started in on the Honey due list she left me for when she was gone. Started wraping x-mas stuff last night. Need to finish that up tonight.

Today I'm planning on finishing the buffing of the cockpit walls. I'll wash down the floor and get everything ready for waxing/sealing. I'll have plenty of pics tomorrow for everyone. That is unless my buddies show up. They know I'm home alone.

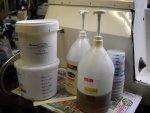
I did pick up yesterday after work 70 bucks worth of liquid get coat repair supplies. I'll be starting a new thread asking for very specific instructions on this proceedure from all the pro's around here. Then when I get into it next week I'll post the step by step with pics and instructions for everyone.

Wish me luck.
 

j_k_bisson

Lieutenant Junior Grade
Joined
Oct 6, 2010
Messages
1,082
Update 12-21-2010-2

Update 12-21-2010-2

Right now taking a break from scrubbing the cockpit. There are a ton of stains from fishing on that floor from this summer. Make me understand that waxing cycle that is required to maintain this typ of finish with out sun shade. Deffinately be washing and waxing two time the first month. Just to build up a layer of protection.

Well instead of waiting till tomorrow to post these pics, I'll post them while on break.

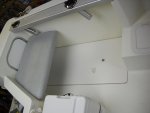
Here is the the cockpit after vaccuming.

DSCN1121-1.jpg

DSCN1122-1.jpg

DSCN1124-1.jpg

Here is the pics fish well I just finished scrubbing before this break. It is after scrubbing with Spray Nine, and then Starbrite Black Streak Remover on the heavy stains areas. I don't think it came out too bad. Buffing should take out most of the rest.

DSCN1125-1.jpg

On to the other fish well !!!!!!!!!!!!!!!!!!!!!!!!!!
 

proshadetree

Lieutenant Commander
Joined
Jul 19, 2008
Messages
1,887
Re: 1991 Bayliner Trophy 2002 Transom Repair

Lookin good man. I bet your arms are starting to look like Popeyes. Have a great holiday man.
 

j_k_bisson

Lieutenant Junior Grade
Joined
Oct 6, 2010
Messages
1,082
Update 12-22-2010

Update 12-22-2010

The arms are not turning into Popeye's, more like rubber bands. LOL

Recieved a call from buddies last night, so stopped working after I finish the other fish well on the boat and went out for a couple of holiday POPs. Here is the outcome after scrubbing. I also washed the hatches and seats. Sorry no pics without hatches and seats. Basically it came out just as clean as other side.

DSCN1127-1.jpg

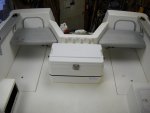
Here is the whole stern cleaned and assembled. I also put the cooler in I use for the fish during the summer. Now you can see why I needed to drill the holes in my rod rack. It was for the three bungee cords holding the cooler. two individual ones to the handles and one all the way around. I have found this set up to the best for me to keep the cooler centered and moveable.

DSCN1126-1.jpg

Today the front half of the cockpit. Plus buffing all of it. I'm too hung over to go anywhere but the garage. :rolleyes:
 

j_k_bisson

Lieutenant Junior Grade
Joined
Oct 6, 2010
Messages
1,082
Update 12-22-2010

Update 12-22-2010

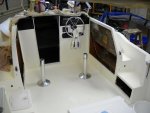
Just finished the washing the remainder of the cockpit. Did the dash wall half that I did not finish yesterday. Here is a pic on the outcome.

DSCN1132-1.jpg

On to buffing. Only going to do the vertical dash wall, the side walls, and into the fish well drains. The drains are just with heavy compound to remove the last of the stains. Hope to finish half of it tonight. Then the rest tomorrow.
 

Bustedknuckle84

Chief Petty Officer
Joined
Sep 29, 2010
Messages
421
Re: 1991 Bayliner Trophy 2002 Transom Repair

heres a pic of the clip for the antenna, sorry it was at night man.
 

Attachments

  • IMG_006834.jpg
    IMG_006834.jpg
    20.3 KB · Views: 4

j_k_bisson

Lieutenant Junior Grade
Joined
Oct 6, 2010
Messages
1,082
Re: 1991 Bayliner Trophy 2002 Transom Repair

heres a pic of the clip for the antenna, sorry it was at night man.

Thank you for the pic. It is appreciated.

Looking at it, it explains alot about what people have been talking about here. So basiclly it is a "J" hook that the antenna hooks to. By chance you know where I can get a replacement one? Possible factory supplier to match the same holes?
 

j_k_bisson

Lieutenant Junior Grade
Joined
Oct 6, 2010
Messages
1,082
Update 12-23-2010

Update 12-23-2010

Well a few buddies showed up yesterday around 5 and did not leave until late. So no work done on buffing. But alot of thinking on how to put cup holders in and where they would be most appreciated. LOL

When they left I was in no condition to operater any power tools, let alone hand powered tools lol. So no progress on the buffing. After the parents leave this morning, I'll start into it. Sorry not pics of the condition of the boat. I just finished cleaning up the emptys.........Might have to rewash the floors of Rye and Coke's spills before buffing.

Hopefully progress report this afternoon with pics.......
 

Bustedknuckle84

Chief Petty Officer
Joined
Sep 29, 2010
Messages
421
Re: 1991 Bayliner Trophy 2002 Transom Repair

Thank you for the pic. It is appreciated.

Looking at it, it explains alot about what people have been talking about here. So basiclly it is a "J" hook that the antenna hooks to. By chance you know where I can get a replacement one? Possible factory supplier to match the same holes?

I would say check out any hardware or marine store and correct its just a simple j hook and screw.

Hey for that cup holder right next to the steering wheel, do you plan to relocate it? seems to me all my drinks get in the way of the steering wheel because its so dang close to the wheel.
 

j_k_bisson

Lieutenant Junior Grade
Joined
Oct 6, 2010
Messages
1,082
Re: 1991 Bayliner Trophy 2002 Transom Repair

I would say check out any hardware or marine store and correct its just a simple j hook and screw.

Hey for that cup holder right next to the steering wheel, do you plan to relocate it? seems to me all my drinks get in the way of the steering wheel because its so dang close to the wheel.

I can honestly say there where no moments when we where making motor boat sounds while facing forward in the boat. But I can atest to the fact that we did plan out our trolling spread with full downriggers hanging out the sides while in the heated garage. Even deployed the downrigger weight to prove a couple points in heated debate.

All I can say about what the drunk guys (me included) came up with was this. "My wife is not going to like the cost the fishing equipment I'm buying at the fishing show on the 13th of next month!" Also "Go big or go home!" I think we should be able to cover 500-550 ft of lake surface in one trolling pass, that is with all depths covered (stagered) as well.

But I agree with the cup holder issue while driving. Even a pop can is in the way. I was thinking of replacing the holder part with a deeper one and a drain. Those things always a full of water. Basically melts a Tim's cup in about 10 minutes.
 

j_k_bisson

Lieutenant Junior Grade
Joined
Oct 6, 2010
Messages
1,082
Update 12-24-2010

Update 12-24-2010

Well last night ended with a bust. At around 11:30 my night looked like this

DSCN1133-1.jpg

The cheap Harbour freight buffer I gave a good rating to decided to burn the windings out. Of coarse it has to do it right before x-mas and the weekend ****'s me off more. Hell now I have to start on something else until I can get a new one. I will be purchasing the same one from harbour freight. The dewalt and porter cable ones are just way to expensive for right now. I was also just in the middle of compounding all the old wax and oxidation off. Here is where it broke. No shine just raw gel.

DSCN1135-1.jpg

By the way, Merry X-mass to all and have a good night:D. Kids and wife get home in a couple hours. Need to start in on the house work before they get home. Also rehide the gifts till tonight.
 

j_k_bisson

Lieutenant Junior Grade
Joined
Oct 6, 2010
Messages
1,082
Update 12-27-2010

Update 12-27-2010

Finally got back to working on the boat last night. X-mas is done completely at the Bisson compound. Even took down the tree yesterday with all the decorations around the house. With a three year old in the house, they are forever playing with things that are not quite safe for them. It alot easier this way.

Anyways, did not get a chance to go to Harbour Freight yesterday. Won't be able to get there until Thrusday. SO moved on to a few odd jobs that I have been putting off.

Last night sealed up the transom seeing I finally got the burnt silica thickening agent. Here is the before.

DSCN1150-1.jpg

DSCN1151-1.jpg

I just mixed up a batch of epoxy with the silica and fiberglass cut strands. Stuffed/scrapped it into the gap like factory on bothg sides (inside and out). Also filled the splash well drains between the well and the transom. Here are finished pics.

DSCN1152-1.jpg

DSCN1153-1.jpg

DSCN1154-1.jpg

Tonight if I can get out there so I can drill the splash well drains and then seal the wood. Also I figured that I will start my first liquid gel coat repair in the splash well. I need to fix the holes where the old bolts pulled throught the glass. I have already glassed the inside side. Just need to grind the well side and add my resin, glass and gel. I figure if I screw up this area I can always cover it with a transom saver bracket of some kind and liberal amount 3m sealant.
 

j_k_bisson

Lieutenant Junior Grade
Joined
Oct 6, 2010
Messages
1,082
Update 01-01-2011

Update 01-01-2011

Well finally the holidays are over. Everything will return back to normal. Have not worked on the boat, been spending a ton of familly time with the kids and the wife.

Also been shopping for supplies for the boat. Picked up a ton of stuff for the motor rebuild, a new buffer, and the Bennett pump and auto retractor circuit. So I'll be able to finished the hull mechanically and cosmetically.

Still have not figured out my liquid gel coat issue. Need to look into that more this week. DO not know how I am going to finish that issue. Might just return it all and not get into it this year. The issue is colour matching the gel to the boat. I'm colour blind and can do it properly. When the boat is mobile, and there is less salt on the roads, I can get the boat to someone who can do this for me this summer.

Tonight back at it. I'm going to finish buffing the cockpit. Than wash and wax this week.
 

proshadetree

Lieutenant Commander
Joined
Jul 19, 2008
Messages
1,887
Re: Update 01-01-2011

Re: Update 01-01-2011

Great to see you back at it. Yea Im still in lust with your boat. have a great new year man.
 

j_k_bisson

Lieutenant Junior Grade
Joined
Oct 6, 2010
Messages
1,082
Update 01-02-2011

Update 01-02-2011

Thanks man. Yes I got back at it last night. Worked from 6pm till 3am. Neighbours just love me. Thanks god it is winter and their windows are closed.

Well last night finish buffing 1 half of the **** pit. Made it up to the center line of the splash well. Its not a mirror but it will be good enough. Also started with the holes for the splash well drains. Drilled one out then the batteries died in the drill. So I'll have to get back at it at a later date.. Also cleaned the splash well. It came out great! No more stains. Sorry no pics today. Camera is broken again. Kids got to it. :mad:

I also bought the stator and some other parts for the motor from ebay. Starting to look forward to that project. Starting to get tired of buffing!!!!;)

Maybe pics tomorrow.
 

j_k_bisson

Lieutenant Junior Grade
Joined
Oct 6, 2010
Messages
1,082
Update 01-04-2010

Update 01-04-2010

Well finished buffing the vertical walls in the cockpit last night. I am deffinately getting tired of buffing. Can hardly wait to finish this portion of the project. Sorry not pics. Not till it is done. Very hard to show gloss on something that is not a mirror. Tonight I will finish the buffing. Have a quick going over the floor, and then the splash well.

Next is waxing. I plan on just going with Meguires cleaner wax, then two coats of Meguires Premium marine wax. I hope that will seal it and keep it looking good all summer. The floors I plan on using deck wax. I do not have the name but will get it for tomorrow. If someone sees any issue with this method of sealing lease let me know. I have not used any sealers ever, so I do not know if there is one for gel coat befre waxing.

I can see the end on the hull side. Only reassemby, and a bit of fiberglass work left in the splash well. I have one issue I do need help with. Having trouble finding a extra long white thru hull fitting. Needs to be 3" of thread on it and 3/4" size. Holes size is 1" approx for the hull. This is for the splash well drains. I can find bronze and stainless ons. But I want white plastic. If anyone knows who makes one please et me know.
 

j_k_bisson

Lieutenant Junior Grade
Joined
Oct 6, 2010
Messages
1,082
Update 01-07-2010

Update 01-07-2010

Well I was able to take a few pics of the cockpit last night. Here they are. The reflection is not that great but is it there is you get up and close. There was nothing there when I started. I think someone in the past used some kind of coating on it. It would just not come off. In the end it did but left like a haze on the surface.

DSCN1168-1.jpg

DSCN1167-1.jpg

Tonight I will be working on the splash well. I'm first going to buff it, then grind out the two washer crack spots. Then its on to some resin and mat. After that whole fiberglass'n thig is done I move on to waxing starting at the front. Hope to have the waxing and gel done this weekend. So I can start reassembling everything next week. Here are some pics of the work area.

DSCN1169-1.jpg

DSCN1170-1.jpg

Also after work today going to stop by Yacht Dr's work and get some custom tinted liquid gel coat. I also hope to see how the pros do this kind of work. Kind of excited. Like a kid going on a field trip!:D

Also for the Tabman I recieved my new Bennet trim pump and auto retractor kit. Next week I'll be finishing that installation. Probably a few questions on that wiring coming next week.

Lots of thinks to do this weekend. I hope nothing gets in the way of progress!
 

oops!

Supreme Mariner
Joined
Oct 18, 2007
Messages
12,932
Re: Update 01-07-2010

Re: Update 01-07-2010

geez........i hope you see this........take him a chip of gell off the boat !!!!!!.

tell YD i said hi and have a beer with him for me
 
Status
Not open for further replies.
Top