1990 Chris Craft 254 Seahawk ( Refurb and upgrades)

Status
Not open for further replies.

chriscraft254

Commander
Joined
Jun 4, 2011
Messages
2,445
Re: 1990 Chris Craft 254 Seahawk ( Refurb and upgrades)

Good tips on the TIPS and sealing of the lights.
Being that they are LEDS, if all goes well they should last something like 50-100,000 hours...
Have a great weekend...

Thanks Gt, yeah the leds should last a long time if they don't rust the little wires off the bulbs,lol They should be fine now. Got about two years befor they were rusted without the fixtures being sealed. I get alot of water down those steps when it rains etc. Its like a channel where all the water gets thrown to so these had to be sealed.

The lights, as always look great! The LED thread has been a huge help also and no you didn't forget to answer my ???? You answered it for me. Thanks!

Thanks man, I'm glad the led thread helped some, I'm still learning more about them every day, but atleast I can just add to that thread now and have it all be easily found. ;) Your boats really looking good man, good job on the wet sanding.

to further clarify,,,,
gallopolis used to have the neatest downbound towboat approach.
it was certainly blind. you couldnt see the lock chamber until you were right up on it.

we used to ease up and tie the stern barge to the wall,,, and the current would swing the tow around the corner at which point you could turn her loose and head into the chamber. if you didnt tie her off for the swing,,, you would definately go right into the dam side,,

coming upbound, once exiting the locks, you would have to do the same, ease out,,, get a stern line on her and power the tow around the corner, then you could proceed
the wind and current wouldn't allow any other option,,,, i loved that lock that way.

upon further inspection the changed it all up and ran a straight lock thru to avoid all the accidents,,,but it looks like they took all the fun outa it.
if i can find any more info before they changed it to the robert c byrd lock i'll be sure to post it.
i am certainly sad that the old one go( not sure when). that was the hands down coolest event on our trips from clairton pa to cairo il and the mighty mississippi:(

Gotcha, I have been through all the locks going up to lake champlain on the hudson before, but only been through one lock down here on the ohio. My m&d have been through almost all of them I suspect though, atleast going north. Think there next trip is going down south.
 

chriscraft254

Commander
Joined
Jun 4, 2011
Messages
2,445
Re: 1990 Chris Craft 254 Seahawk ( Refurb and upgrades)

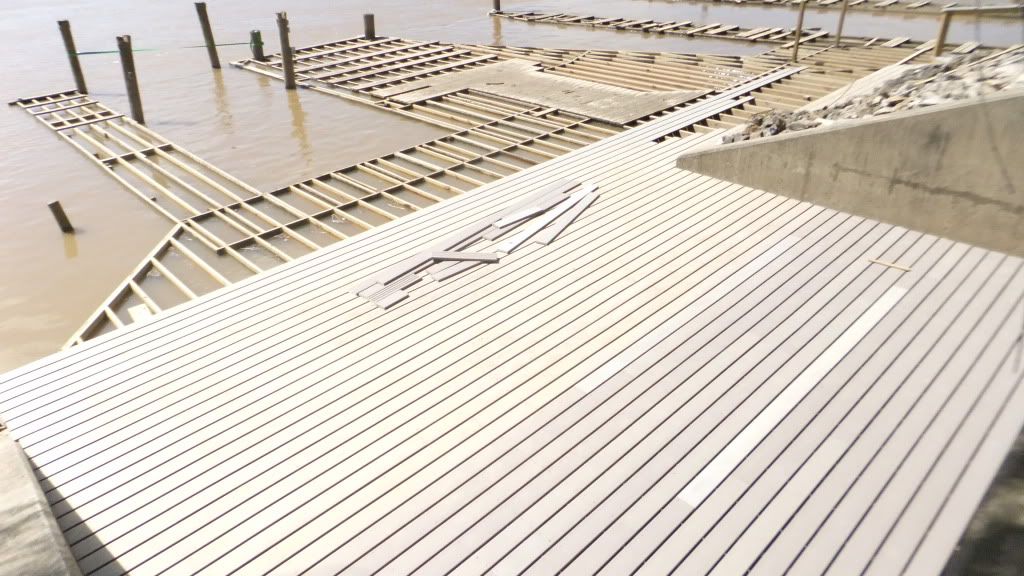
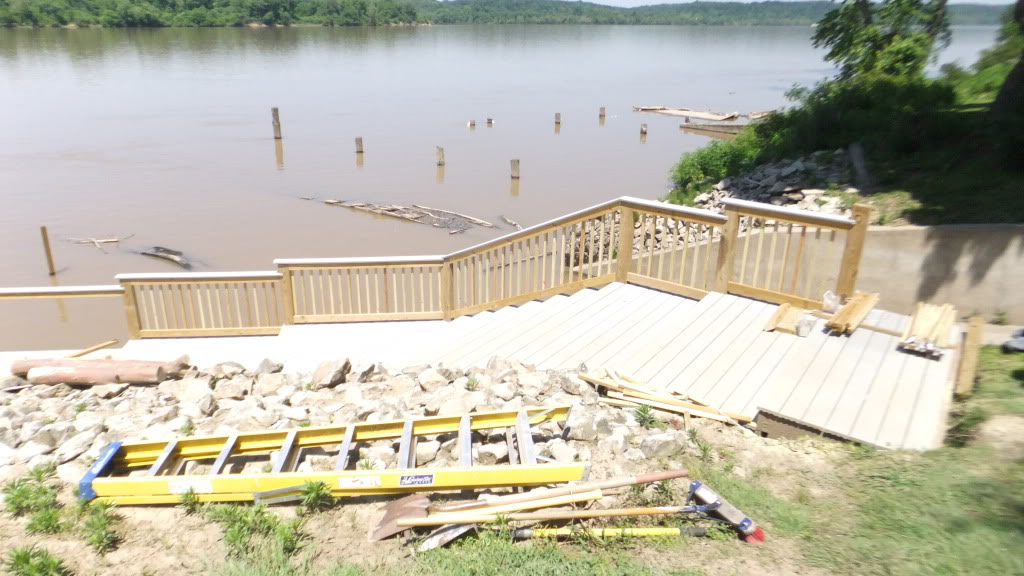
Here is a couple pics of the river project. Some decking and railings almost complete. I got pulled downtown to another large development we have going on down there to help with some docks being built, so this project got put on hold. The water was up anyway and the other project is floating docks. 186 sliips:eek:

waterintrusionmaitenance023.jpg


waterintrusionmaitenance026.jpg
 

lil buggy

Senior Chief Petty Officer
Joined
Sep 24, 2011
Messages
766
Re: 1990 Chris Craft 254 Seahawk ( Refurb and upgrades)

dock looks good! glad to hear the jobs are rolling in.:D. it will certainly help pay for the fun this summer.
hope your putting in for the weekend so you can be like your slacker friends:D and start enjoying it after all that hard work. the waters back to summer levels up here so we havent sent any debris down your way in the last 2 days,,, so it should be cleaning up for you as well.
 

fibersport

Petty Officer 2nd Class
Joined
Jul 18, 2010
Messages
103
Re: 1990 Chris Craft 254 Seahawk ( Refurb and upgrades)

Not sure if it would help you out but have you looked here www.superbrightleds.com for LED bulbs? Not sure if they have what you might want but they sure do carry a bunch.
 

chriscraft254

Commander
Joined
Jun 4, 2011
Messages
2,445
Re: 1990 Chris Craft 254 Seahawk ( Refurb and upgrades)

dock looks good! glad to hear the jobs are rolling in.:D. it will certainly help pay for the fun this summer.
hope your putting in for the weekend so you can be like your slacker friends:D and start enjoying it after all that hard work. the waters back to summer levels up here so we havent sent any debris down your way in the last 2 days,,, so it should be cleaning up for you as well.

No boating today, water was still up and I just had to finish up some projects on the boat. was a good day though i took care of a major water intrusion spot. By the way, it is raining alot here now and its heading your way,lol
 

chriscraft254

Commander
Joined
Jun 4, 2011
Messages
2,445
Re: 1990 Chris Craft 254 Seahawk ( Refurb and upgrades)

Ok, little bit of a long story but might be worth reading for some.:)

When I dropped the boat in over thunder weekend, I noticed two things of a little concern. First, when I dropped her in and docked her up, I immediately notice a slight list to starboard. This issue has come up before because of filled in deck fishwells, weight of all controls on starboard side, head inclosure on starboard side, water tank on starboard side, etc etc.

I have removed the head inclosure so that is less weight on that side and the bait well had been pumped dry via macerator pump to thruhull. So what was the deal???

The other issue was my bilge pump ran frequently. I was concerned about the bellows maybe because I put the outdrive on this year. Still a little concern but I think I may have found the culprit of the water intrusion/pumping of the bilge pump.

Last fall, I had picked up two new circulation pumps because the housing that the pumps snap into were cracked that were mounted in each livewell. Instead of just replacing the mount, I figured I didn't know how old the pumps were, so I would just replace the whole thing.

So in the process of removing the starboard side pump, I guess I got side tracked on other projects. But I had removed the four screws that had held down the pump in the livewell, but it was still sitting above the holes just becaue the hose and stuff was still connected to the airator.

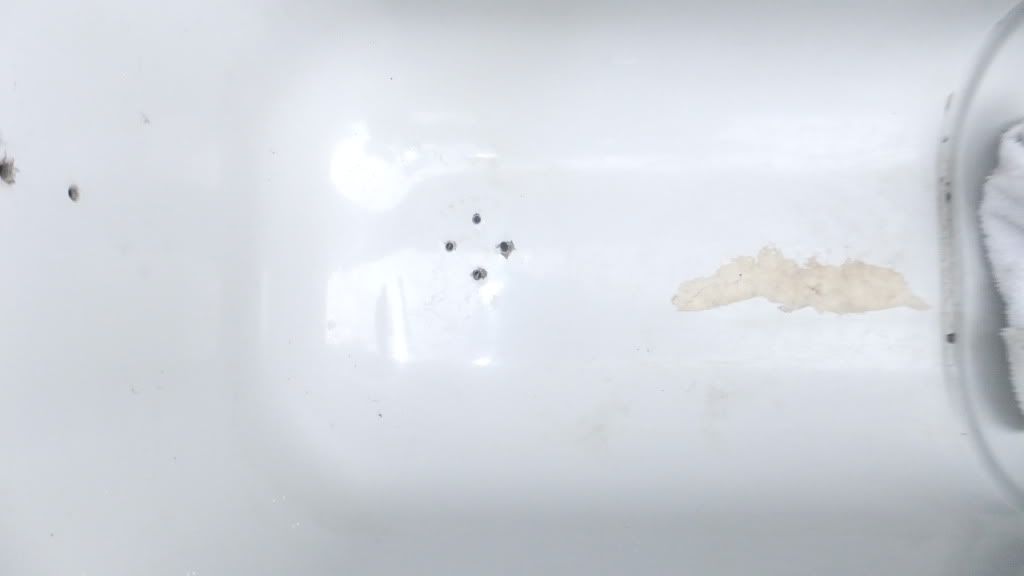
Anyway, today, I decided to silicone a small hole probably from a sinker or something, that I had seen in the livewell. I also was going to go ahead and remove the old pump and install the new pump not remembering I had removed the screws already. So I lift up the pump and bingo, there are four 3/16 inch holes that all winter and spring had been letting water into the hull . My fishboxes fill everytime it rains, they have no seals on them to keep rain water out, so I would imagine these holes were filling the boat the whole winter everytime it rained.

After I had removed the pump, I tried to dry the area so I could put a bed of silicone down before installing the new pump. This is when I noticed the hull was filled to the bottom of the in deck livewell bottom. Water kept seeping up through the holes when I wiped it with a towel. :eek::facepalm:

So off to investigate I went! I pulled the starboard gunwale rod holder and looked down in there, sure enough I had sitting water down there. Out comes the wet dry vac. After emptying the cavity the water had seeped into, I ran the vac in reverse for about 2 hours just to dry everything out, worked like a charm.

The good news is, the cavity it drained into is basically outside the outside stringer and it is all glassed in there. There are a few cut throughs for hoses etc. Because I keep my boat tilted way up most the time, the water only made it high enough until it drained through a hole that has two drain hoses going through it to the bilge.

I think when I got on plane it would release more water to the bilge and run the bilge pump. Time will tell I guess.

Lesson learned though, be more focused on the project at hand and don't miss a step.

I did get it dried out and the pump is now nicely sealed and everything is good in Chris Craft land again. The list was undoubtedly from this. I drained 35 gallons of water, thats about 280 pounds of water sitting outboard on the starboard side. Like a ballast.:facepalm:

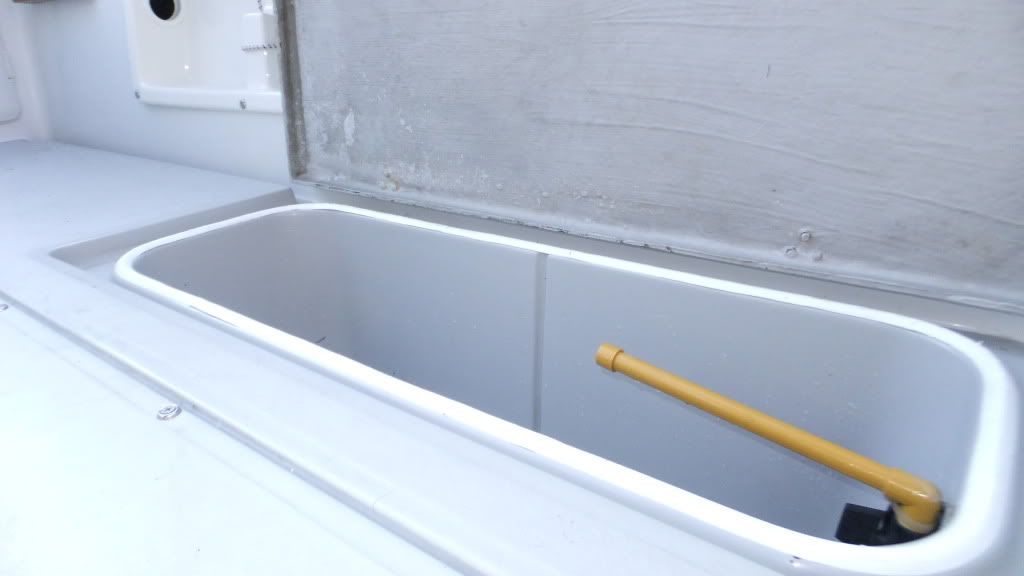
Here is the pic of the very small 4 holes that let in 35 gallons of water into the hull. A simple misstep and your hull can be soaked.

waterintrusionmaitenance103.jpg


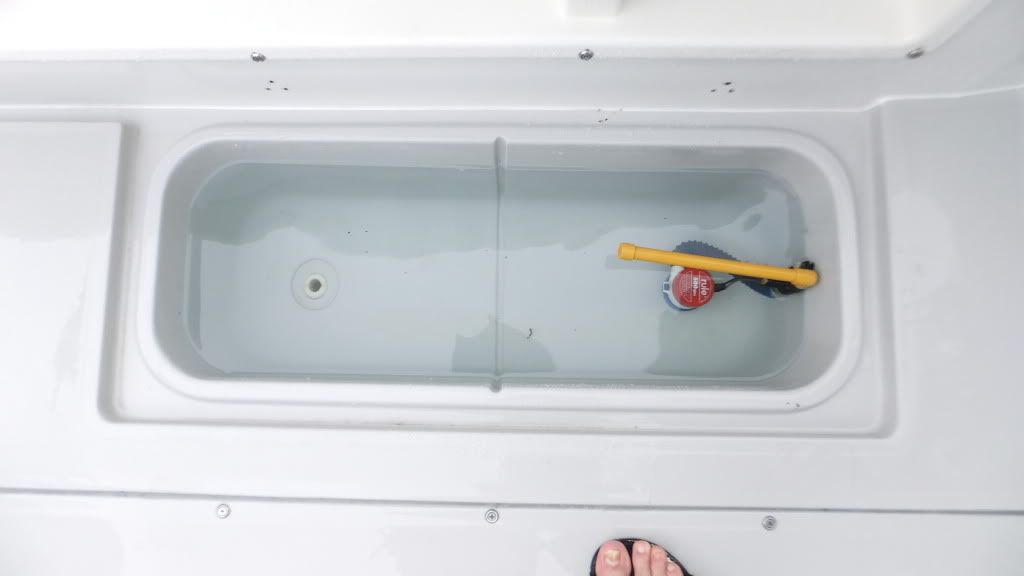
This is the port side, it wasn't leaking but did get the same treatment, removed and sealed.
woodywax2012275-1.jpg
 

GT1000000

Rear Admiral
Joined
Jul 13, 2011
Messages
4,916
Re: 1990 Chris Craft 254 Seahawk ( Refurb and upgrades)

Glad to hear you caught it sooner than later...hopefully no more list...Thumbs Up!
 

lil buggy

Senior Chief Petty Officer
Joined
Sep 24, 2011
Messages
766
Re: 1990 Chris Craft 254 Seahawk ( Refurb and upgrades)

Glad you found the leak:D.

just thinken here but the baitwells should have an overflow in case you leave the "fill pump" on and/or so you can leave it on to get freah water to push the old out, exchange it ya know. secondly the channel around the lids should carry the deck/rain water overboard. not sure why they run into the tanks. a rubber seal around them lids could help.

noooooo more rain,,,,,lol,,,,, get it headed away,,,lol

hope you can join us slackers and start enjoying your sweet rig,,, wet:D
the fishings been sweet around the docks.

happy mothers day:D
 

chriscraft254

Commander
Joined
Jun 4, 2011
Messages
2,445
Re: 1990 Chris Craft 254 Seahawk ( Refurb and upgrades)

Glad you found the leak:D.

just thinken here but the baitwells should have an overflow in case you leave the "fill pump" on and/or so you can leave it on to get freah water to push the old out, exchange it ya know. secondly the channel around the lids should carry the deck/rain water overboard. not sure why they run into the tanks. a rubber seal around them lids could help.

noooooo more rain,,,,,lol,,,,, get it headed away,,,lol

hope you can join us slackers and start enjoying your sweet rig,,, wet:D
the fishings been sweet around the docks.

happy mothers day:D

My bait wells are not set-up that way. Some fishing boats have intakes valves/ fill pumps, that fill the baitwells, mine do not. A bucket fills them and that is just fine with me because a many boats have sunk because of faulty valves on intakes.

The channels around the baitwells do divert water until you get a somewhat clogged drain in the stern or just a heavy downpour that overflows the channels.

I have already bought some seals for them but trying to figure a way to install and have it be easy to clean as well. Kind of a pita either way. I literally have had the seals for 2 years, just haven't decided how or if I even want to install them.

With seals the lids will collect debris. without they are easy to clean and water getting in there is really not an issue usually because the water can be pumped out with the flip of a switch. Not to mention the lids really need to have a thinker core added to them next winter. When stepped on, they are flexing so adding a seal is like adding it to a bowed peice of fiberglass.

It is very slight but over time these are going to get worse. I will rework the lids next winter. Also plan on pulling the fuel tank this coming winter, hoping the boat isn't completely rotted when I do.;)
 

chriscraft254

Commander
Joined
Jun 4, 2011
Messages
2,445
Re: 1990 Chris Craft 254 Seahawk ( Refurb and upgrades)

Ok guys , I had about a cup of water total in the fishwells after about 40 hrs of rain. I have a plan put together to solidify the lids and to seal them off so water can't get in the fishwells at all unless I put it there. Will post up pics when I'm done. :)

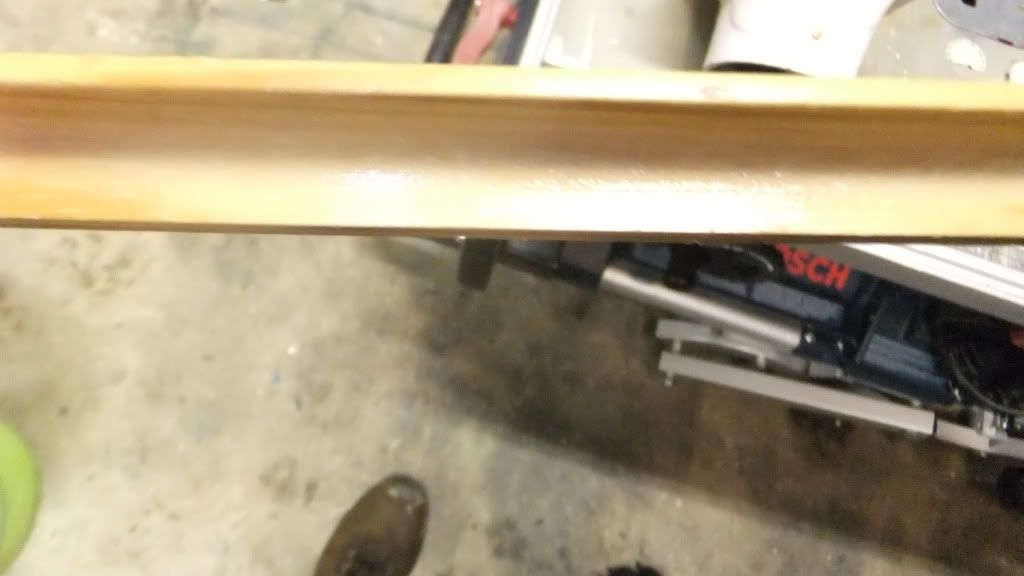
Ok, last night I got started on making, yes I said making new gasket seals for the baitwells. I took a piece of "L trim" or corner trim and then coated it with vasiline. I ran my finger down the channel so the inside of the corner trim would have a curve because that will be the finished side when intstalled.

waterintrusionmaitenance109.jpg


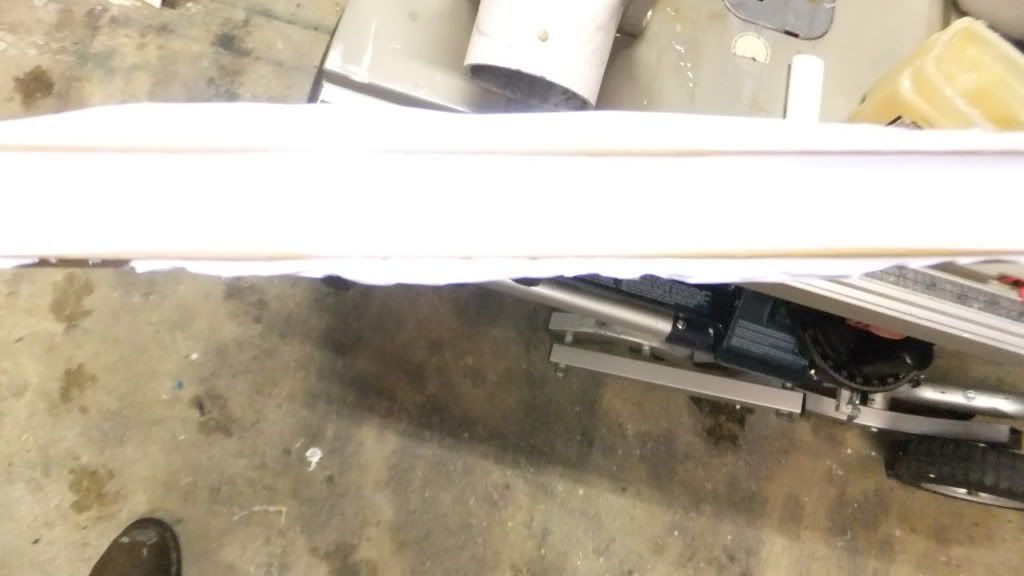
I then filled the cavity with 1 hour white silicone. I used white so I can see the imperfections if any after it has cured. After filling the cavity I scraped of the silicone to be even with the edges of the wood. This should give me a half circle type shape. If I need a taller seal I will use a piece of pvc pipe ripped in half and go through the same process.

waterintrusionmaitenance111.jpg


I let it sit over night inside so it would dry quiker because it was cool last night. Today when I got home I removed it from the L trim, it came out great and peeled right off the wood/vaseline.

Will take some pics, but right now I am making some clear ones, think they will look better. Should be able to simply fasten it to the top of the raised rib around the fishwell with some silicone. :)
 

chriscraft254

Commander
Joined
Jun 4, 2011
Messages
2,445
Re: 1990 Chris Craft 254 Seahawk ( Refurb and upgrades)

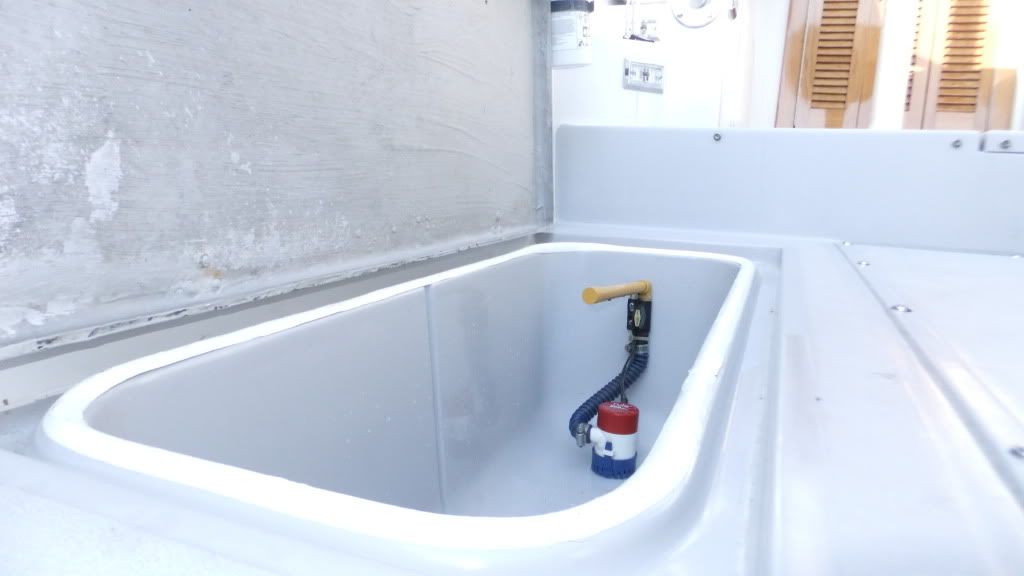
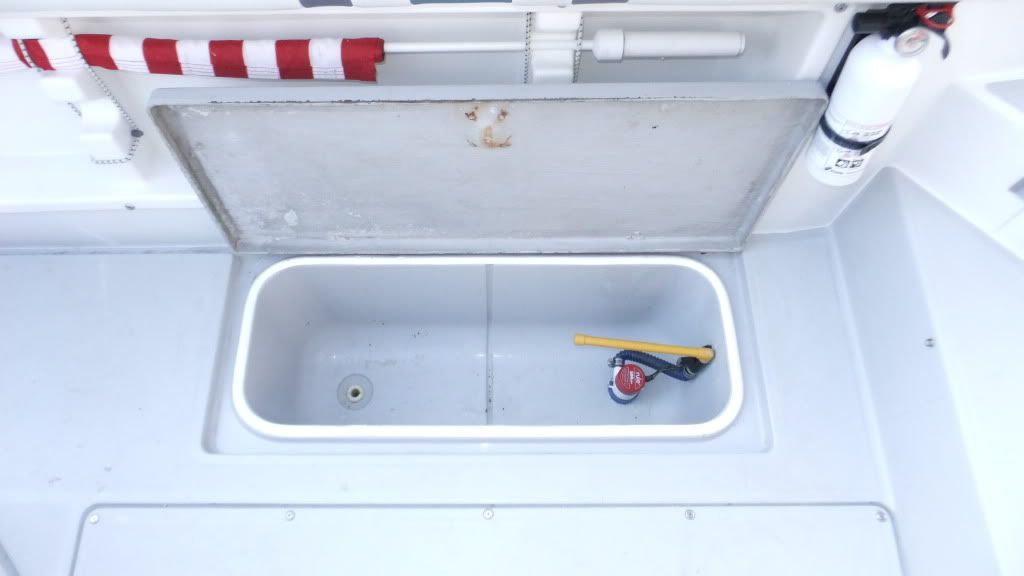
Here is the finished white seal just laying in place on the fishwell raised rib. It is about a half inch tall and is a perfect fit. The height allows the lid to sit on the seal which solidifies the lid some also when walked on. :) I'm pretty happy with the results of this, this definately goes in the top ten of favorites.lol

Once siliconed down, should be tight to the glass and water proof. Still making the clear ones though, have one sitting on the roof right now to excell the cure time.:eek:

waterintrusionmaitenance119.jpg


waterintrusionmaitenance125.jpg


waterintrusionmaitenance124.jpg
 

fibersport

Petty Officer 2nd Class
Joined
Jul 18, 2010
Messages
103
Re: 1990 Chris Craft 254 Seahawk ( Refurb and upgrades)

Wow, I've been impressed with all your work so far but making your own gaskets? I bow to your ingenuity and workmanship oh great one!
 

chriscraft254

Commander
Joined
Jun 4, 2011
Messages
2,445
Re: 1990 Chris Craft 254 Seahawk ( Refurb and upgrades)

Wow, I've been impressed with all your work so far but making your own gaskets? I bow to your ingenuity and workmanship oh great one!

Thankyou sir, I even impressed myself with this one,lol:) Called my dad and everything to brag.:redface: I heard of people doing this with fiberglass molds so I thought it might work with silicone. Now that I know it works, Might be a few more areas that get custom gaskets. I just couldn't find anything online or at the stores that I was happy with so I built it. :)

Can you see me patting myself on the back,lol:facepalm:
 

lil buggy

Senior Chief Petty Officer
Joined
Sep 24, 2011
Messages
766
Re: 1990 Chris Craft 254 Seahawk ( Refurb and upgrades)

keep patting,,, that is a great idea:D, and it looks shaweet. tooo cool that ya didn't have issue with the bends in the gasket. i like the idea of the silicone to bond the gasket with the lower baitwell again great idea! and no interference with the drain system,,,,, kudos my friend, now all thats left to do is a lil slackin;). get r wet and catch some of them fishies:D:D.
 

GT1000000

Rear Admiral
Joined
Jul 13, 2011
Messages
4,916
Re: 1990 Chris Craft 254 Seahawk ( Refurb and upgrades)

DANG! Now that right there is the cat's meow, the lizard's tongue, the toad's belly, and the kangaroo's pouch all rolled into one...

You may have just solved my future hatch gasket dilemna...

AWESOME, just Freeeekin Awesome!

You may continue the well deserved back patting at your discretion...

What is the brand of silicone you are using? If I may be so bold as to ask...:D
 

25thmustang

Lieutenant Commander
Joined
Mar 20, 2008
Messages
1,849
Re: 1990 Chris Craft 254 Seahawk ( Refurb and upgrades)

That's kind of a unique idea. On the Silverton the hatches move around under the carpet and that can be a bit annoying. This idea could stop that and even help with the water tightness of the bilge!
 

Pmccraney

Lieutenant Commander
Joined
Jul 26, 2011
Messages
1,734
Re: 1990 Chris Craft 254 Seahawk ( Refurb and upgrades)

Wow - custom made gaskets... outstanding!

You are hereby bestowed with membership in the sacred order of MacGyver - the patron saint of pulling stuff out of your *** in a pinch>

Here is your certificate:

MacGyver_DVD_Season_1.jpg
 

chriscraft254

Commander
Joined
Jun 4, 2011
Messages
2,445
Re: 1990 Chris Craft 254 Seahawk ( Refurb and upgrades)

keep patting,,, that is a great idea:D, and it looks shaweet. tooo cool that ya didn't have issue with the bends in the gasket. i like the idea of the silicone to bond the gasket with the lower baitwell again great idea! and no interference with the drain system,,,,, kudos my friend, now all thats left to do is a lil slackin;). get r wet and catch some of them fishies

Lol, soon man, soon. Just have like 12 other things to get done before i splash it. :0 The gasket worked great around the corners, if it were any more of a radious I would have had a little work to do, but it bends right in there. I hope to be slackin this weekend coming up. mid to high 80s and sunny, hopefully that won't change. Lots of debris in the river today, looked like a mine feild out there.

DANG! Now that right there is the cat's meow, the lizard's tongue, the toad's belly, and the kangaroo's pouch all rolled into one...

You may have just solved my future hatch gasket dilemna...

AWESOME, just Freeeekin Awesome!

You may continue the well deserved back patting at your discretion...

What is the brand of silicone you are using? If I may be so bold as to ask.
Lol, thaanks Gt, I have used a couple different brands for the caulking around the boat, I kinda like working with the GE brand caulk. Seems to flow good and get less air bubbles in the caulk. . My back hurts from all the back patting.:D

Wow - custom made gaskets... outstanding!

You are hereby bestowed with membership in the sacred order of MacGyver - the patron saint of pulling stuff out of your *** in a pinch>

Here is your certificate:

MacGyver_DVD_Season_1.jpg
Alrite!!! :) But it seems to be limited, I just tried to pull out another 400 gallons of fuel out my *** and nothing, what gives,lol :)
 

chriscraft254

Commander
Joined
Jun 4, 2011
Messages
2,445
Re: 1990 Chris Craft 254 Seahawk ( Refurb and upgrades)

That's kind of a unique idea. On the Silverton the hatches move around under the carpet and that can be a bit annoying. This idea could stop that and even help with the water tightness of the bilge!

Damn, forgot one, sorry. Yeah, I think you could probably make up any type of seal you wanted this way. Even in place if you taped off what you wanted to silicone and had something to make the proper form that your looking for. But the wood mold worked great with the vaseline as a release for the caulk.

I did have a little trouble with the second one I made, it was clear caulk and I tried to remove it to soon from the mold.

If anyone tries to make there own, let the caulk completely cure before removing the mold. 48 hours should do the trick, I tried to pull it off at about 20 hours and this is 1 hour dry time caulk but it is obviously a much thicker application in my case for the seals.
 
Status
Not open for further replies.
Top