1990 Chris Craft 254 Seahawk ( Refurb and upgrades)

Status
Not open for further replies.

chriscraft254

Commander
Joined
Jun 4, 2011
Messages
2,445
Re: 1990 Chris Craft 254 Seahawk ( Refurb and upgrades)

Still not sure where I am going to end it going forward, but it looks like the natural place will be at the very front where it deadends into the anchor locker area. I thought about tapering it in just forward of the cuddy but I am afraid getting it to thin will cause issues and I would have to taper back atleast 2 feet or more.

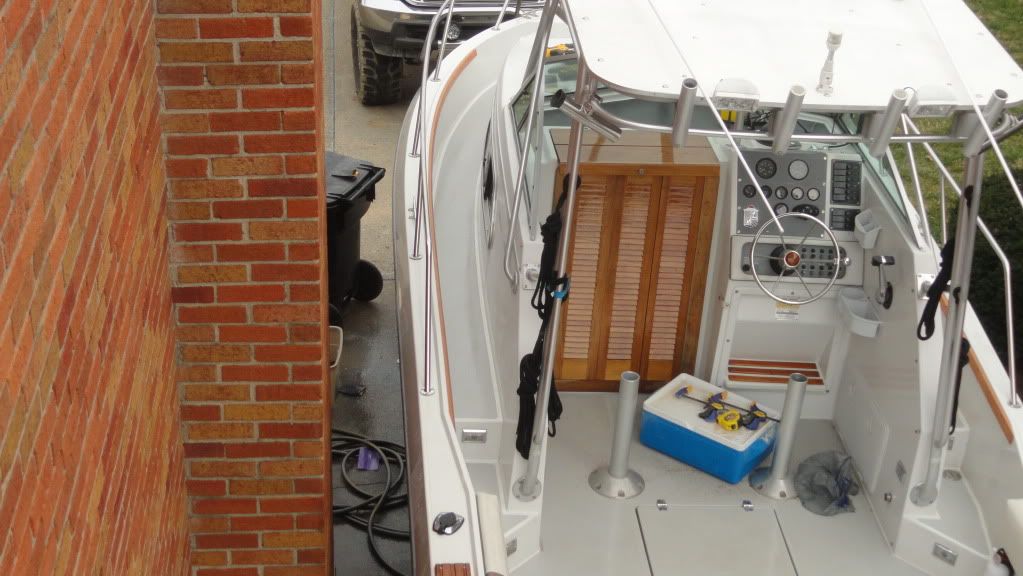
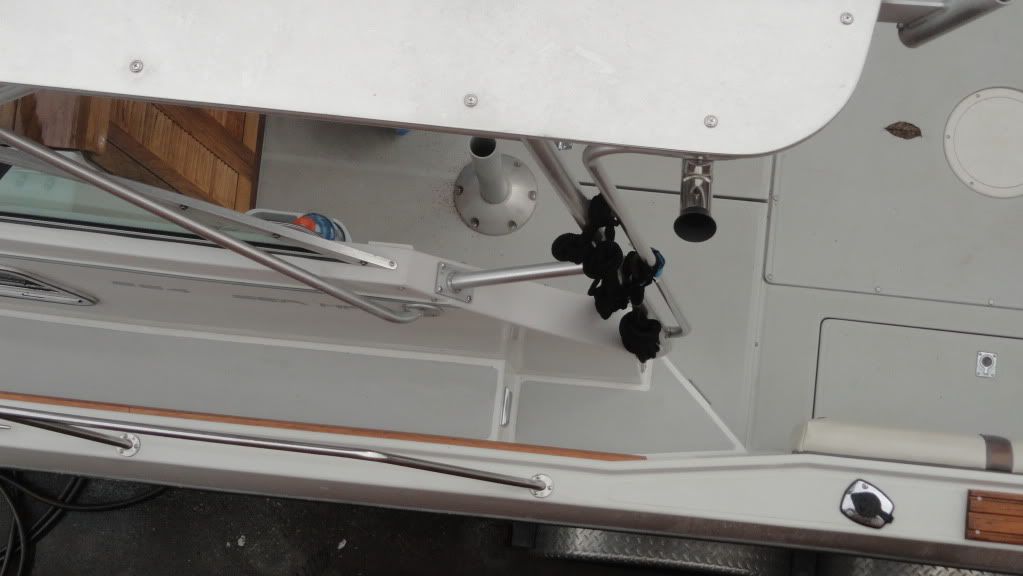
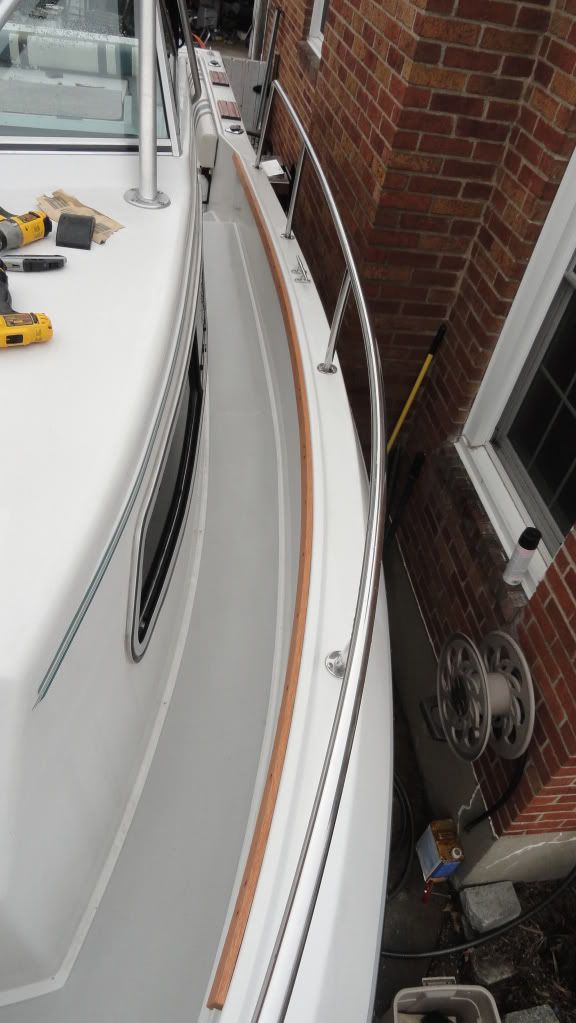
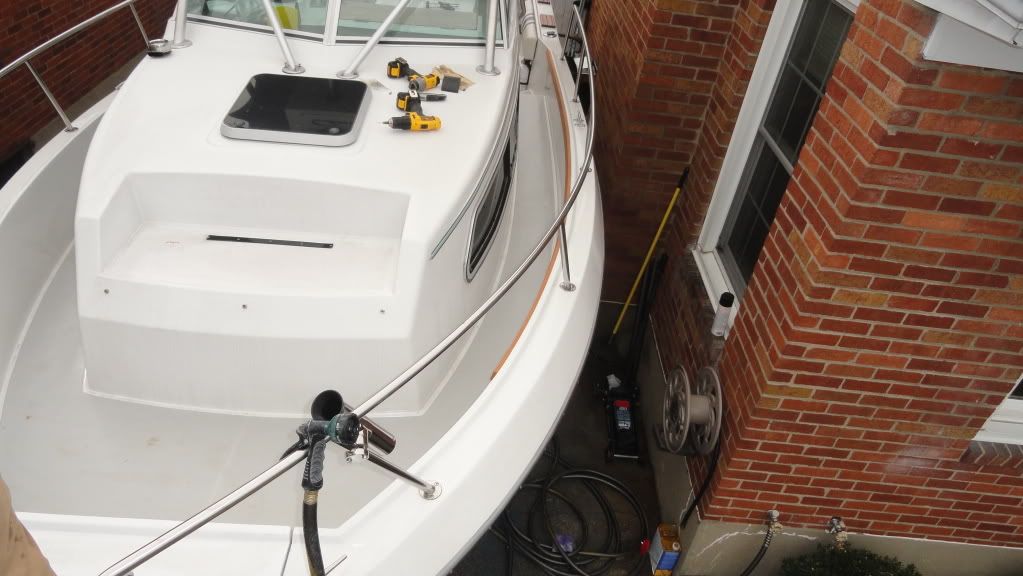
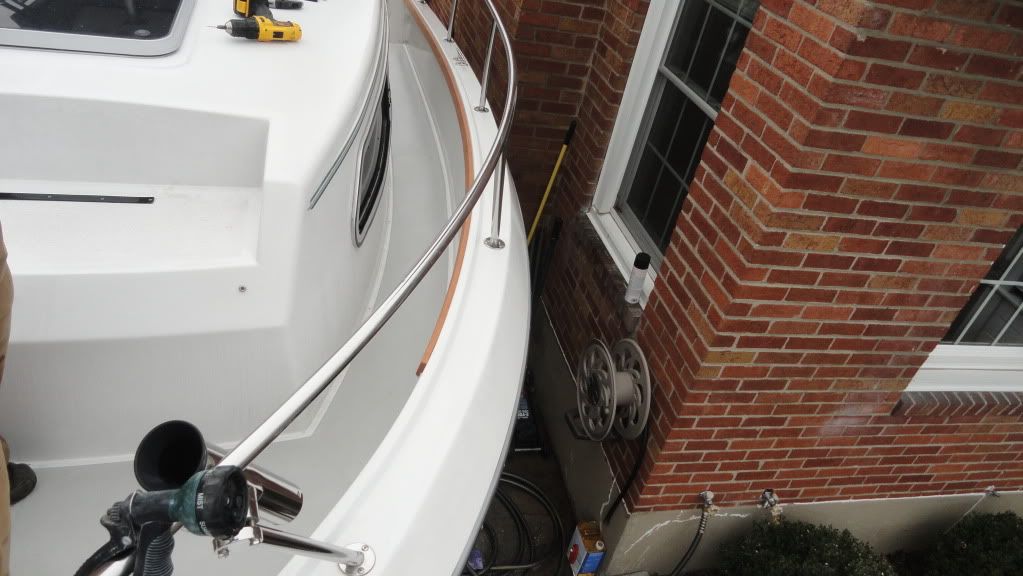
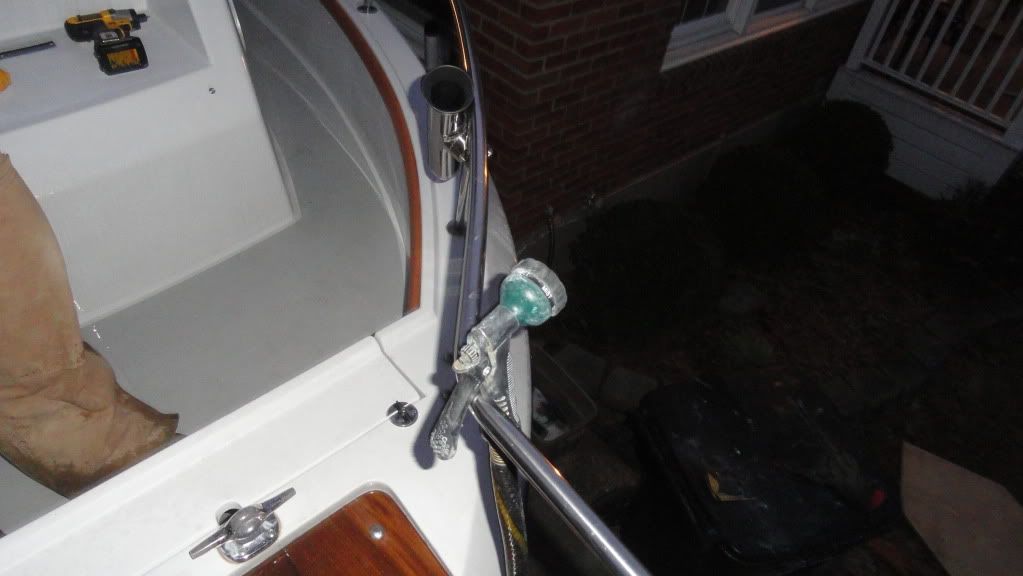
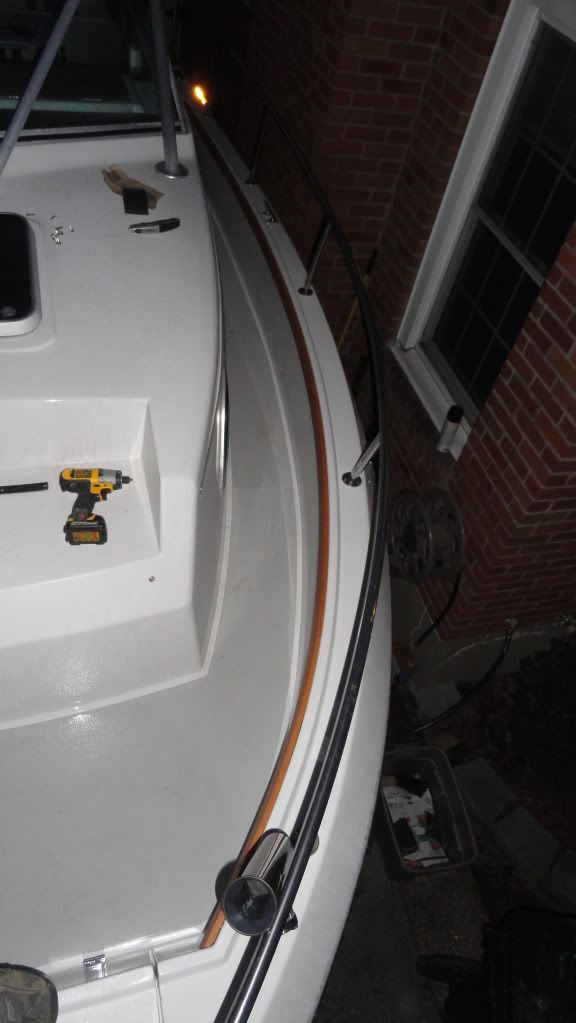
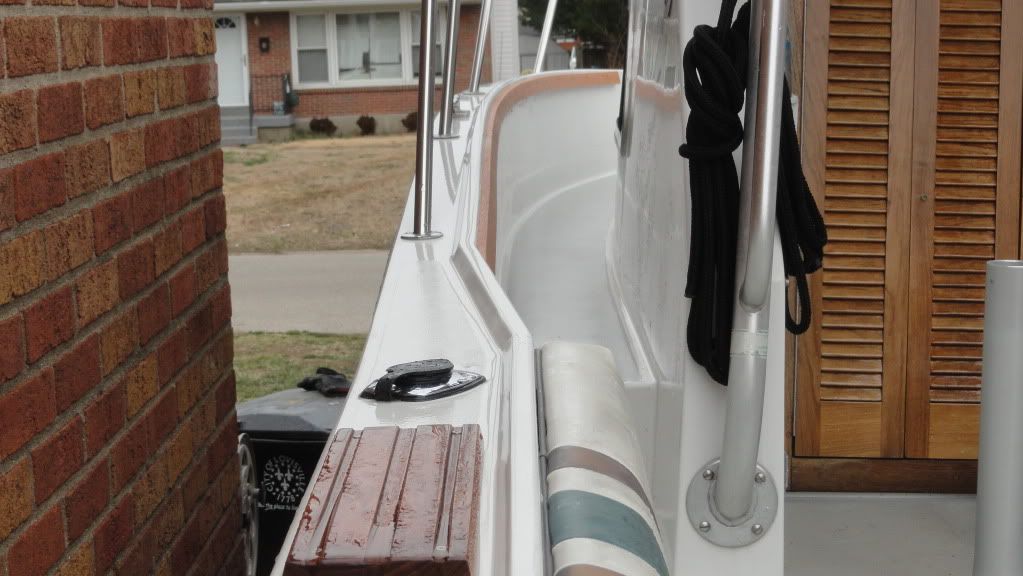
Here are more pics of the port side. Not varnished yet. Will be taking it all back off to prefinish and once back on, will install wood dowels over screws. I will be finishing the outside of it when dowels are installed. The only thing getting varnished, atleast finish varnish before the final install will be the backside and underneath of the trim molding.

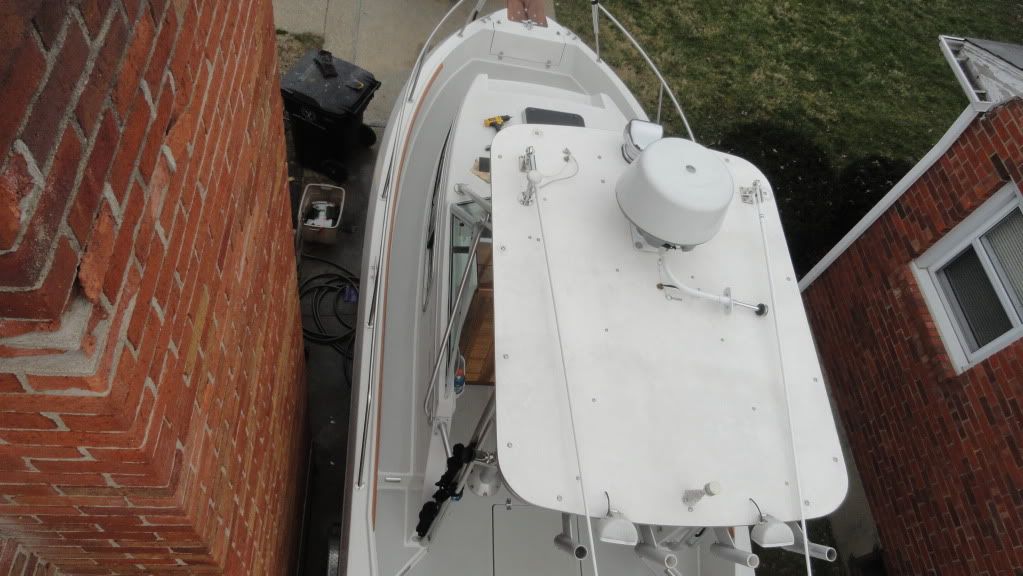
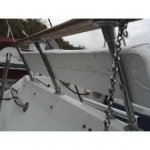
Here are better pics of an overview.
becky362.jpg


becky348.jpg


becky344.jpg


becky345.jpg
 

chriscraft254

Commander
Joined
Jun 4, 2011
Messages
2,445
Re: 1990 Chris Craft 254 Seahawk ( Refurb and upgrades)

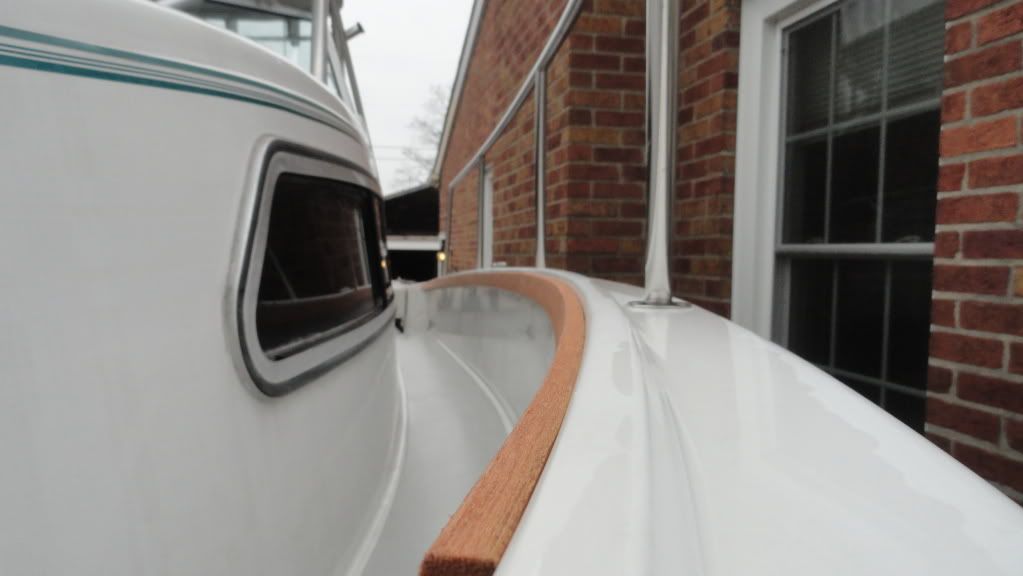
And pics of looking back from the bow.:) I am REALLY liking the looks of this. :)

becky381.jpg


becky373.jpg


becky372.jpg


You can see in this pic how much I would have to taper to get it to look right being tapered into the front. Think it will have to go all the way forward.

becky382.jpg
 

chriscraft254

Commander
Joined
Jun 4, 2011
Messages
2,445
Re: 1990 Chris Craft 254 Seahawk ( Refurb and upgrades)

I got tired just looking at all the scraping you have done. Nice work
Thanks man. Lol, Trust me, I feel your pain. Thats why I had to move onto something different for a while. Hopefully this will keep you more intertained,lol:D

Hey CC254,

Great work getting that bottom paint off! She's gonna be super beautiful in and out of the water!

Love all the teak trim! Fantastic boat!

Thankyou, not done with the bottom YET, but will be soon hopefully. :)
 

GT1000000

Rear Admiral
Joined
Jul 13, 2011
Messages
4,916
Re: 1990 Chris Craft 254 Seahawk ( Refurb and upgrades)

Yep, that trim is definitely going to look Fantastic, especially with the rgb LEDS...

You hit the nail on the head with the design... just the right amount...

Now that I see it taking shape, I agree that a good place to end is at the front, that way you don't have to worry about the taper...

Can't wait to see a new aerial view picture in your signature of it all lit up at night...gonna look SWWEEEET!
 

chriscraft254

Commander
Joined
Jun 4, 2011
Messages
2,445
Re: 1990 Chris Craft 254 Seahawk ( Refurb and upgrades)

Yep, that trim is definitely going to look Fantastic, especially with the rgb LEDS...

You hit the nail on the head with the design... just the right amount...

Now that I see it taking shape, I agree that a good place to end is at the front, that way you don't have to worry about the taper...

Can't wait to see a new aerial view picture in your signature of it all lit up at night...gonna look SWWEEEET!

Thanks GT! :) I will definately probably have a new sign. pic once the lights are installed. I think this will be one of a kind. Atleast I have never seen the leds run around the walkaround. It will be dimable so I can adjust the light since it will probably look alot brighter up there than in the stern with more space to diffuse the light.
 

chriscraft254

Commander
Joined
Jun 4, 2011
Messages
2,445
Re: 1990 Chris Craft 254 Seahawk ( Refurb and upgrades)

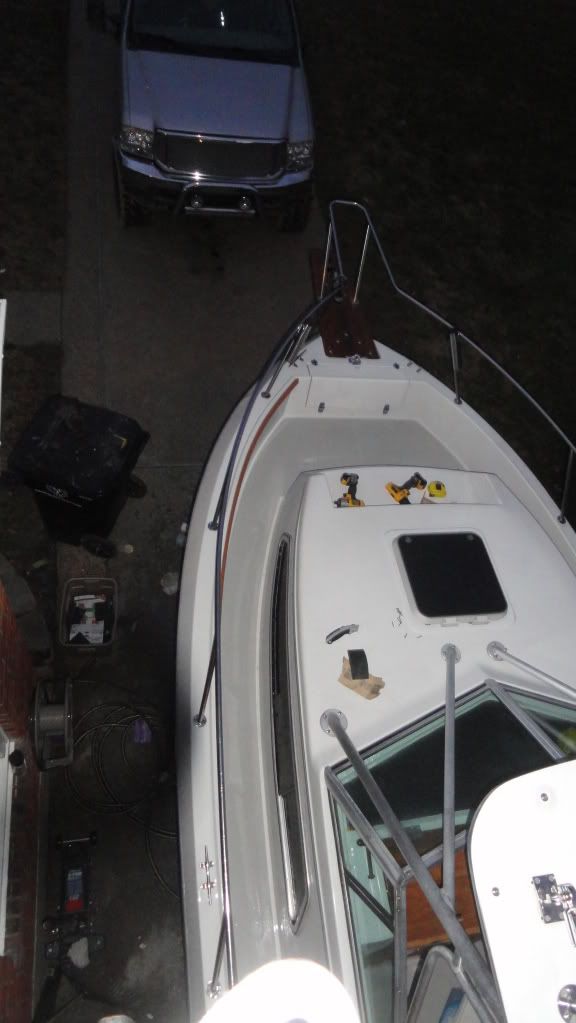
Got the last piece in up to the bow on the port side. Just before sun down. It needs some tweeking, it was a b^%ch to get in there. Will be leaving these installed for a while before removing to varnish. I am hoping they will stay curved when removed.

becky406.jpg


becky411.jpg


becky419.jpg
 

lil buggy

Senior Chief Petty Officer
Joined
Sep 24, 2011
Messages
766
Re: 1990 Chris Craft 254 Seahawk ( Refurb and upgrades)

Great work:D,
it looks "finished" ending all the way upfront
doesn't seem to offset the balance at all.

i get what you mean about the hotspot upfront where the gunnels get close together
but it opens up there as well. I bet it looks balanced "lit up" even without a dimmer.

did the teak fight you on the bends?

sweet and once again great work
 

evolution1985

Petty Officer 1st Class
Joined
Jan 29, 2012
Messages
213
Re: 1990 Chris Craft 254 Seahawk ( Refurb and upgrades)

I think you made the right choice on the teak rail. It looks great now, so should look awsome when both sides are done and varnished.
plus you think they look cool and as its your boat as long as your happy then thats all that matters. and again at least no one will ever mistake your boat for theirs, Its almost like having a giant flashing neon sign that says "hey its mine, not yours" except they are led and Im not sure if they flash or not but they sure look sweet :D
 

southkogs

Moderator
Staff member
Joined
Jul 7, 2010
Messages
14,933
Re: 1990 Chris Craft 254 Seahawk ( Refurb and upgrades)

Looks killer CC. Smoke's right ... you're an artist. That photo down the gunwale showing the line up ... your placement is TIGHT on that edge. VERY nice work.
 

jbcurt00

Moderator
Staff member
Joined
Oct 25, 2011
Messages
25,057
Re: 1990 Chris Craft 254 Seahawk ( Refurb and upgrades)

Mad skills w/ the teak once again. Looks good! Well done, sir.
 

chriscraft254

Commander
Joined
Jun 4, 2011
Messages
2,445
Re: 1990 Chris Craft 254 Seahawk ( Refurb and upgrades)

Great work:D,
it looks "finished" ending all the way upfront
doesn't seem to offset the balance at all.

i get what you mean about the hotspot upfront where the gunnels get close together
but it opens up there as well. I bet it looks balanced "lit up" even without a dimmer.

did the teak fight you on the bends?

sweet and once again great work

Thankyou, the teak wasn't to bad until getting into the tight curve. It had to be twisted as well as bent. Amagine that one side is sticking above the top raised cap and the other is lined up with the last piece. Yeah, wasn't easy, but didn't take very long either. I think if it was any more of a curve, the teak may have broken before getting it in there. :) Thank god the light install should be relatively easy. can't wait to get it lit up and take some nite pics.

I think you made the right choice on the teak rail. It looks great now, so should look awsome when both sides are done and varnished.
plus you think they look cool and as its your boat as long as your happy then thats all that matters. and again at least no one will ever mistake your boat for theirs, Its almost like having a giant flashing neon sign that says "hey its mine, not yours" except they are led and Im not sure if they flash or not but they sure look sweet :D

Everyone knows by now I love my leds,lol Thanks man.

Looks killer CC. Smoke's right ... you're an artist. That photo down the gunwale showing the line up ... your placement is TIGHT on that edge. VERY nice work.

Thankyou Sir, I basically used my thumb as a gauge, when my fingernail was in the middle of the rouunded edge of the raised rib while sitting on top of the trim, I pre drilled a hole. Then screwed it. Now if I can just learn how to spell "gunwale". I do it all the time with that word,lol

Mad skills w/ the teak once again. Looks good! Well done, sir.
Thankyou thankyou. :D
 

lil buggy

Senior Chief Petty Officer
Joined
Sep 24, 2011
Messages
766
Re: 1990 Chris Craft 254 Seahawk ( Refurb and upgrades)

did you have to use biscuts to get the joints right on?
and i saw the hose hangin round,
did you have to soak that teak to get it to bend like that?
if i remember correctly plan is
you'll finish 2 sides before install
then other 2 after. right?

hows that scraping goin?

wish i was workin on mine
 

chriscraft254

Commander
Joined
Jun 4, 2011
Messages
2,445
Re: 1990 Chris Craft 254 Seahawk ( Refurb and upgrades)

did you have to use biscuts to get the joints right on?
and i saw the hose hangin round,
did you have to soak that teak to get it to bend like that?
if i remember correctly plan is
you'll finish 2 sides before install
then other 2 after. right?

hows that scraping goin?

wish i was workin on mine


No biscuits, butt joints. Located and predrilled everything as I went. Decided to not try anything fancy there like lap joint or 45 degree ect because of the limited material thickness. I have used splines and biscuits a million times on trim, this was not the place for it. Once its all varnished in place you will not see a seam unless really looking for it. The hose was just there to wash the debris off after drilling. The boat needs a bath and polish badly.:redface:

I'm going to let the teak sit for a couple weeks or atleast a week and wet it down occasionally to try and make it stay bent when removed for varnish. If it does stay bent, I will finish varnish on all sides, but if it flexes or bounces back at all, I will just coat the backside and bottom.
I do not want to try and bend it in and have the face crack at all while installing to a finish. I will just have to see how it goes when removed. With the dowel plugs having to be installed over the screw placements, I will have to varnish the finish side after it is installed anyway, but I may put a couple coats on before install.

Wwill also be running a tight bead of lifecaulk or 1 hour silocone at the back edge where it transitions to fiberglass. This should shed any water, instead of letting it get behind the wood. I just bent the teak by pressing it into the hull by hand and walking it in with screws. I think the thickness was right for the application, any thinner and it would have cracked/broke.

The scraping has been put on hold, but will be back at it soon. Just needed a break from it for a while.

Why are you not working on yours? To cold?

I'm really itchen to see what its going to look like with the lights installed. I have some white led strip lights here. Think I may stick them up in there temped to a battery and get a preview.;)
 

southkogs

Moderator
Staff member
Joined
Jul 7, 2010
Messages
14,933
Re: 1990 Chris Craft 254 Seahawk ( Refurb and upgrades)

...I basically used my thumb as a gauge, when my fingernail was in the middle of the rouunded edge of the raised rib while sitting on top of the trim, I pre drilled a hole. Then screwed it...

T.L.A.R. sights ... That Looks About Right!

Makes it more impressive actually ... I couldn't do it with a slide rule and all the elves from the cobbler shop :D
 

evolution1985

Petty Officer 1st Class
Joined
Jan 29, 2012
Messages
213
Re: 1990 Chris Craft 254 Seahawk ( Refurb and upgrades)

yeah mate, you def have to test fit some led's, its going to look really awesome once its all done. I've already snatched some ideas for when I rebuild my bowrider in regards to the accent lighting. cheers mate
 

lil buggy

Senior Chief Petty Officer
Joined
Sep 24, 2011
Messages
766
Re: 1990 Chris Craft 254 Seahawk ( Refurb and upgrades)

Budd,
shops still got mine,hostage,:eek:lol
outdrive is next on the agenda then rewireing
lots of slop splices:mad:
gonna head there tomorrow to finalize the underwater led placement

and also to look for a line to hide the rgb's.
i'm havin some trouble deciding on which line to hold
drivers side, or passenger side under L seat
rinker fiesta vee250 2.jpg
but prolly both
i'm gonna have to put some kinda trim in to hide dem led's, thats where you come in(thanx)

i was also kicken round the idea of puttin them on the inside of the windshield upper frame
L shaped :eek:aluminuminum:eek: trim pointed down at my uh! knees
gotta make sure its outta my eyes tho.

also thinken of addin under the 2 rails in the back
side rail.jpg
and also under the stern rail(won't shine in the boat tho just on the stern)
stern rail 3.jpg
these last 3 mountings will shine down on the outside as well
so i will have to bury them deeply enough in the underside of the rail that i dont blind anybody passin by
your trim pieces look deep enough(again thanx)

i gots 32 ft to burn lol
any ideas

whadyathink
 
Last edited:

ezmobee

Supreme Mariner
Joined
Mar 26, 2007
Messages
23,767
Re: 1990 Chris Craft 254 Seahawk ( Refurb and upgrades)

The teak rail looks awesome. Another great personalization.
 

chriscraft254

Commander
Joined
Jun 4, 2011
Messages
2,445
Re: 1990 Chris Craft 254 Seahawk ( Refurb and upgrades)

yeah mate, you def have to test fit some led's, its going to look really awesome once its all done. I've already snatched some ideas for when I rebuild my bowrider in regards to the accent lighting. cheers mate

Happy to give others ideas, I get ideas from others as well as opinions. It helps alot and I appreciate to community of boaters around the country, great site here. Cheers to you as well.:)

Budd,
shops still got mine,hostage,:eek:lol
outdrive is next on the agenda then rewireing
lots of slop splices:mad:
gonna head there tomorrow to finalize the underwater led placement

and also to look for a line to hide the rgb's.
i'm havin some trouble deciding on which line to hold
drivers side, or passenger side under L seat
View attachment 133111
but prolly both
i'm gonna have to put some kinda trim in to hide dem led's, thats where you come in(thanx)

i was also kicken round the idea of puttin them on the inside of the windshield upper frame
L shaped :eek:aluminuminum:eek: trim pointed down at my uh! knees
gotta make sure its outta my eyes tho.

also thinken of addin under the 2 rails in the back
View attachment 133112
and also under the stern rail(won't shine in the boat tho just on the stern)
View attachment 133113
these last 3 mountings will shine down on the outside as well
so i will have to bury them deeply enough in the underside of the rail that i dont blind anybody passin by
your trim pieces look deep enough(again thanx)

i gots 32 ft to burn lol
any ideas

whadyathink

Do you have a rebuild thread going? I can probably give you a lot of ideas for placement if you post up some interior pics or send me some pics. Be happy to give you my opinions on placement.

The leds are very bright and I would be reluctant to put them anywhere close to the windshield aea because of glare. But if its just for when your anchored ,no problem. You also have to think about access to those areas for fishing your wires etc.

The teak rail looks awesome. Another great personalization.
Thanks man, Hopefully get it wrapped up this coming weekend on the port side, then on to lighting.
 

chriscraft254

Commander
Joined
Jun 4, 2011
Messages
2,445
Re: 1990 Chris Craft 254 Seahawk ( Refurb and upgrades)

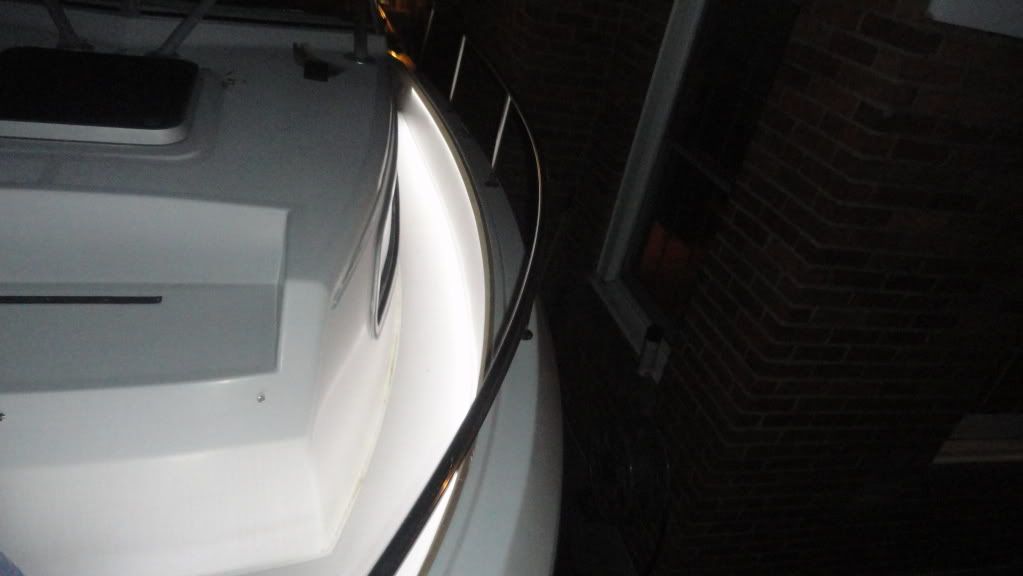
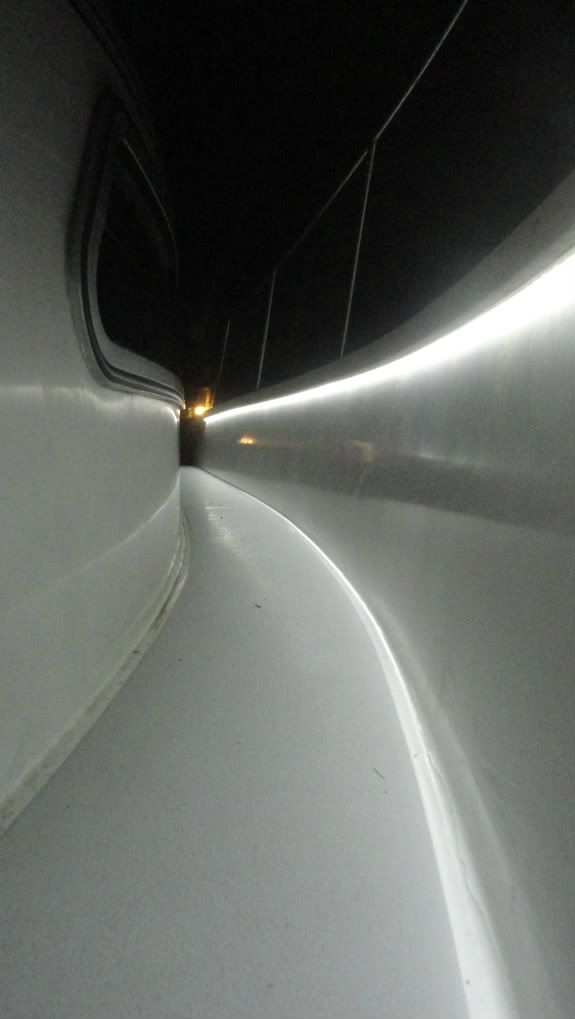
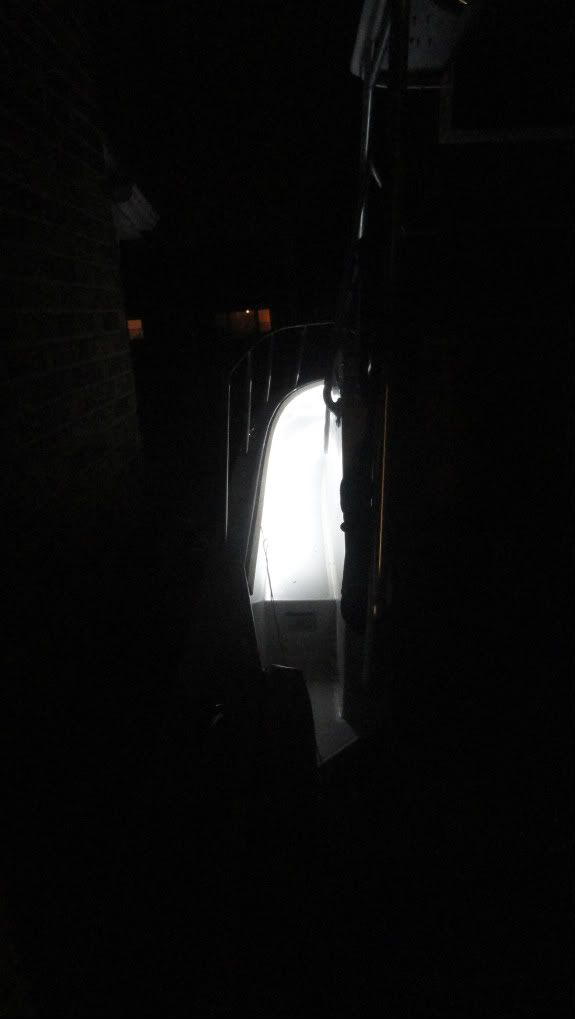
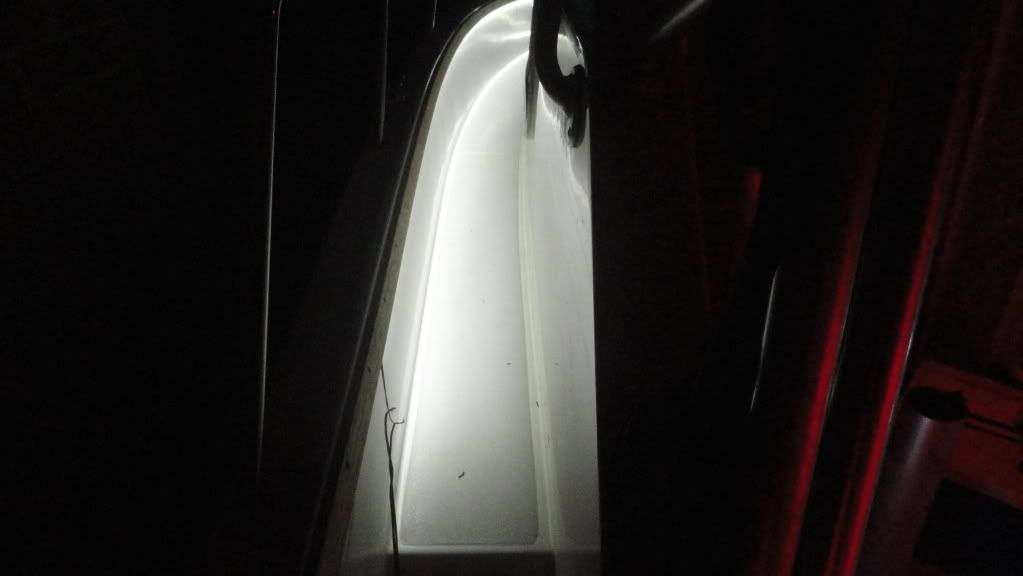
Had to hook some temperary leds up to see what it will look like. Trim worked perfect. can't see the lights and it really looks SSSSSweeet. Its hard to get good pics but here you go. I only had white lights and no dimmer yet. Most the pics I took were blown out because there so bright. :p

becky441.jpg


becky444.jpg


becky449.jpg


becky482.jpg
 

jbcurt00

Moderator
Staff member
Joined
Oct 25, 2011
Messages
25,057
Re: 1990 Chris Craft 254 Seahawk ( Refurb and upgrades)

Carp, your gonna set off the UFO detectors for miles around every time you tie up or float & turn those on.:facepalm: Esp w changing colors....

Again, most excellent layout & execution w/ the teak.

Is there still any teak at the secret teak storehouse? I might be in the market for a pc for a new acquisition.
 
Status
Not open for further replies.
Top