1990 Bayliner 2651 resto

Drivewayboater2

Petty Officer 1st Class
Joined
Aug 21, 2019
Messages
336
Transom done?
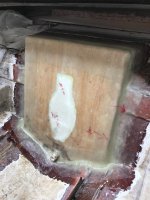
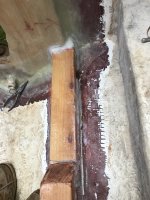
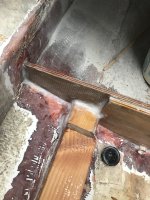
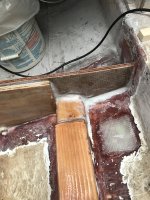
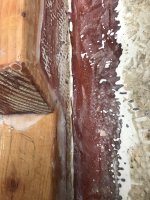
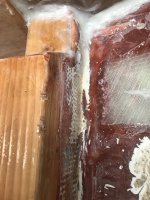
Put the final layer of 1700 over the transom last night. Looking for advise here. There are 3 layers of cloth ( one layer of tabbing all the way around) and two full layers over transom. Each layer got increased by 2ā€. Is this enough?
4108A852-5BC8-4572-88DF-EE76880569F6.jpeg

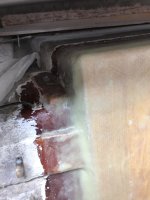
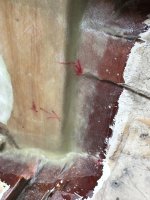
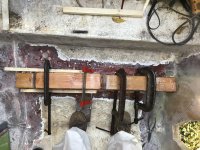
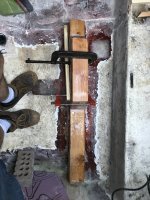
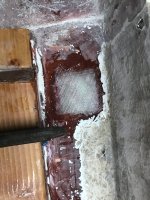
Also I added a layer where the u bolts come through the hull. Looked like they were put in when the original glass was wet. The backing plates were imbedded and bent.
4791BC89-B694-400F-B50E-A825635CFFF0.jpeg
4536C9CF-919A-4F89-9C8D-E84467A8073C.jpeg
 

Drivewayboater2

Petty Officer 1st Class
Joined
Aug 21, 2019
Messages
336
Looking for advice here. Are the 3 layers good enough on the transom? Iā€™m a bit nervous to move forward. Any help/guidance would be appreciated.
 

kcassells

Fleet Admiral
Joined
Oct 16, 2012
Messages
8,732
Looking for advice here. Are the 3 layers good enough on the transom? Iā€™m a bit nervous to move forward. Any help/guidance would be appreciated.
Yup! Each layer is usually 2 -3 " past the former. That would be all that is needed.
Looking for advice here. Are the 3 layers good enough on the transom? Iā€™m a bit nervous to move forward. Any help/guidance would be appreciated.
 

Drivewayboater2

Petty Officer 1st Class
Joined
Aug 21, 2019
Messages
336
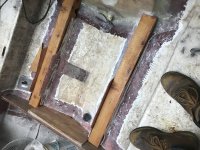
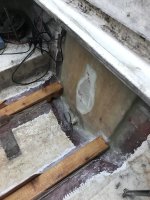
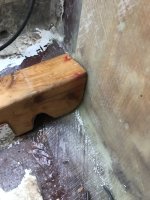
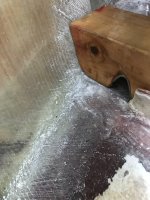
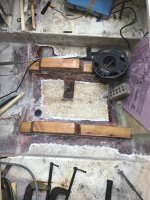
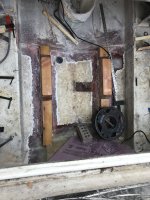
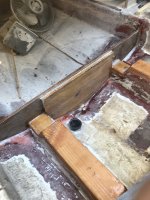
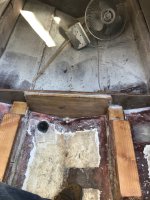
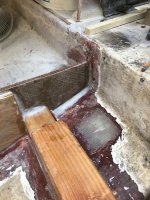
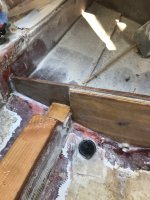
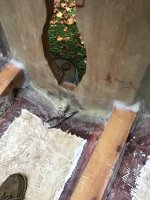
Got the chance to dry fit motor mounts and the new bulkhead behind the fuel tank. Was very pleased with how the radius came out up against the transom. Careful measuring was key.
Iā€™ll mix thickened epoxy and use a notched trowel and set new wood in the original pockets. Relief holes have been drilled every 4/5 inches at the base to with hydro locking while setting in the new wood.

5E9A8DC6-28F2-4C41-8A0F-63B339B1D1CB.jpeg

1362D377-4137-49D7-8531-58B17E4C3627.jpeg

A78B18CC-8E34-4B59-AF57-7411A53C9591.jpeg


4D21DFF7-A5CC-4EF3-AE6A-C4A6E3DE1D55.jpeg
 

mickyryan

Rear Admiral
Joined
Apr 18, 2016
Messages
4,214
loooks great when i did the trophy i did same thing just remember 2 put 2 holes in the motormounts for drainage and seal them up gooood cause that little area outside the motormounts seemed to coollect alot of rain water from engine cover
 

Drivewayboater2

Petty Officer 1st Class
Joined
Aug 21, 2019
Messages
336
Update 10-2
finally had a weekend where the weather cooperated.
had a chance to epoxy the starboard motor mount in place. CF8A866F-209B-40B8-A4C8-AFC971E210B1.jpeg
843701CC-D96D-4E15-A773-96760B26DC82.jpeg
653D876E-7EDA-4F16-AAE5-14718880175E.jpeg

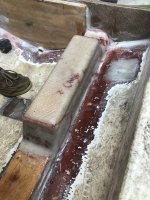
in addition removed and patched the raw water intake. The holding tank for the waste water will not be used. Iā€™ll be installing a Porta potty with pump out ability instead.
36ECF7B5-610F-489C-BA46-68B27D1E0AA2.jpeg
old port removed and fiberglassed

hope to do the port side motor mount and glass over both mounts plus the fuel tank bulkhead this coming weekend.
 

kcassells

Fleet Admiral
Joined
Oct 16, 2012
Messages
8,732
Very nice. Which porta pooper are you going to use.
Still kicking that around myself.
 

Drivewayboater2

Petty Officer 1st Class
Joined
Aug 21, 2019
Messages
336
Havenā€™t decided on what potty. Thereā€™s so much out there and thatā€™s my winter project list of things to research.
was brave after dark last evening and set the port side mount in.

6364E387-B02D-4F00-8F93-7E6286E1E381.jpeg

9AF92E1C-035A-4EB0-B0CB-D336E4629A17.jpeg

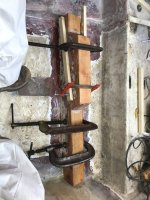
once again thickened epoxy was used. Tried to get even contact throughout existing fiberglass. Light clamping was used. Didnā€™t want to squeeze out too much Epoxy. Relief holes were cut at the bottom of of each side every 3 or 4 inches. Very solid!. Still have some filets to do before laying the fiberglass over the top. Iā€™m figuring 3 layers of progressive lengths should get me close to the thickness needed.
next up will be precutting the layers of 1700 that will be needed. hoping I can do each side all in one session.
 

Drivewayboater2

Petty Officer 1st Class
Joined
Aug 21, 2019
Messages
336
update 10-21
weekend weather has been horrible the last 3 weekends. Either too rainy or two cold for glassing.

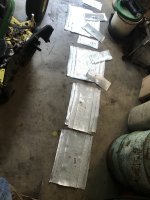
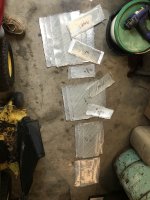
did some prep getting the 1700 layers ready if and when the weather cooperates.

234260BE-37ED-4604-BF4D-F62B75634051.jpeg

im thinking 3 layers of fiberglass should get me close. Progressive lengths for each area of the mount. And smaller pieces for tying in to the transom and forward bulkhead(not yet installed but itā€™s fabricated)

4F266BBB-162B-42C1-A3F5-5D75DAA83CED.jpeg

Up next gotta drill the transom holesā€¦ Iā€™ll be drilling from the outside and using the old holes that were filled with epoxy. Also have to cutout the steering arm area using a 1 3/4ā€ hole saw.

any tips our trick for either of these procedures? Without spending money on tools that are used once.

Like how to maintain square to transom when drill the transom plate holes AND how to maintain 60 degree angle on he steering arm cutout. Any tips would be appreciated.
 

todhunter

Canoeist
Joined
Sep 15, 2020
Messages
1,316
I used a drill press to drill a guide hole in a piece of 3/4" plywood, then clamped that to the transom and used that to help drill straight. It wasn't perfect, I still had to waller out a couple holes just a little.

For the steering relief, I just used a 1" drum sander on a 90-degree angle grinder. It made a lot of dust, but worked out fine. Make sure you give enough room to add a layer or 2 of glass.
 

Drivewayboater2

Petty Officer 1st Class
Joined
Aug 21, 2019
Messages
336
Great idea with the 3/4 ply as a guide. Thanks!
Hmmm drum sander. Interesting idea.
Add room for two layers of glass? Iā€™m using epoxy. Do I really need two layers of glass?
 

Drivewayboater2

Petty Officer 1st Class
Joined
Aug 21, 2019
Messages
336
Update 10-22
Took advantage of mild temps today and tabbed in the bulkhead behind fuel tank. Mixed cabosil and glass fibers and made a thickened epoxy. Tabbed in the entire area. Smoothed out with my finger. Ran short a bit on the port side. Iā€™ll get back to that next session.
overall Went well. Iā€™m happy with how it turned out.
16040B89-E3A1-4D8C-BCEC-F039724336E7.jpeg

DCD50F0F-0CF5-48C1-AA72-215B31A65495.jpeg

7227F15A-8274-4421-94CA-05D933C44700.jpeg

22D67ADD-ADE9-43B0-A64B-DE403B571FE3.jpeg


Looks like the end of this week we may hit the 70 degree mark and hope to start glassing in the mounts and connecting all the pieces together. Slow but sure progress.
 

froggy1150

Master Chief Petty Officer
Joined
Nov 3, 2017
Messages
846
I was able to glass thru almost freezing Temps during mine. I made a cover big enough to walk in, covered with a heavy duty tarp( old billboard sign banner) I ran 240v 40 amp so cord for a electric heater and for the COLD nights I also had a propane turbo heater. I would crank both to get everything hot then turn off the propane one while glassing
 

Drivewayboater2

Petty Officer 1st Class
Joined
Aug 21, 2019
Messages
336
Update 11-1
probably the last 70 degree days this past weekend. Plus we mess with the clocks on the east coast this weekend. grrrrr

had a chance to fillet the new mounts to the transom. Still gotta do some grinding and smoothing out. Made thickened epoxy with some chopped up fiberglass fibers. Pushed it into he nooks and crannyā€™s.
F948A3A2-BA41-4243-911C-4F41D2CEAD2B.jpeg

12CFCE0F-7189-41BB-A1DA-40FD58150D85.jpeg

also filleted the forward bulkhead and tried to even out the transitions from the old mounts and new wood.

9D4C62B0-20B2-4EA3-A7C3-158CB80A7B44.jpeg

7AAEBE18-45AB-4645-9E7E-6D1AB4F71339.jpeg

EADC12A2-2F1B-4DCE-954B-848CB1E94519.jpeg


FBCDFAAD-BE7C-4C16-B5B3-FEF0A12535DA.jpeg

lots of grinding to be done to smooth everything out and get ready for glassing over everything. Donā€™t mind grinding in 50/60 degree weather tho!

cmon that warm day in November!
 

Drivewayboater2

Petty Officer 1st Class
Joined
Aug 21, 2019
Messages
336
Update 11-9

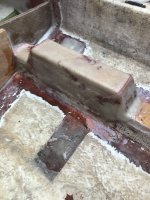
this past weekends mild temps in the north east gave me an opportunity to start fiberglassing the starboard side motor mount. Not yet complete but gave me an idea of what it is going to take.
all fiberglass was pre cut. Semi shaped prior to wetting. Gotta say being prepared is key.
I started with the front section. Two progressive layers of 1700 over the 4ā€œ section in front of main motor mount section. Two progressive layers on the angled section. Then 3 layers of progressive sizes over he main mount section. Followed up with two more angled pieces on the back side.

I still have the back end to finish. Iā€™ll use progressive pieces to tab in the back end of the mount to connect to the transom before using the same 3 layer progressive layup on the back.
963122FD-C94E-4830-8CCB-0F4FE10EA730.jpeg

0F31F6B3-AFE4-4600-84EE-37DB0D5AFC7D.jpeg

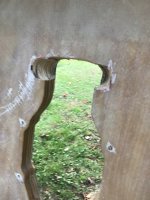
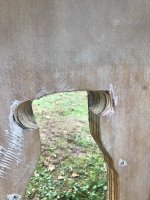
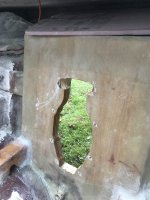
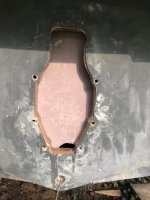
While I was at it I was able to cut out the relief for the steering arm. 1 3/4 hole saw on a 60ā€ angle. The hole was got wild on the starboard cut. šŸ˜‚Pardon the saw travel marks.

AA62B720-1758-431F-AC71-3259430563B7.jpeg

5D58E303-2BA5-4945-B090-22C197FFB9CE.jpeg

4A7584A4-3B9D-4FBC-A283-1853BA6AF65A.jpeg

And finally. I had guts to drill out transom holes. Used a small piece of 2x4 with a guide hole drilled on drill press. Clamped the 2x4 to the outside of transom( devious holes lined up) and carefully drilled through. Did a test fit with the transom assembly and with a little tweaking it turned out very nice.
F480B3F8-7D60-4AF4-A634-1C015710950E.jpeg

Iā€™ll be sure to epoxy and seal the holes before reassembly.
 
Top