198x SS-150 rebuild

Watermann

Starmada Splash of the Year 2014
Joined
Jan 12, 2013
Messages
13,787
Definitely direct wire the bilge pump with a separate float switch. I have mine wired up to a helm switch but nothing should be wired to your starting other than the motor and it's trim.
 

Lectro88

Petty Officer 1st Class
Joined
Oct 24, 2020
Messages
303
I’m late to the party too.
Sorry for the goofy spacing. I copied to notes and added later as it was a work in progress.
And it’s long winded.

My advice as an electrician and contractor.

Don’t ever skimp on wire size.

Smoking cables and over amp draw is not something you want and especially on the water.

IFFFF… all powers that BE forbid…,

Should you actually have a fire,. On the water you have nowhere to go but in the water should the need ever arise and you can’t get control of things.

Bear in mind you could have cold water or if you are in the ocean other problems to deal with. …

So far as those big cables matching?

Yes they need to match, just like on a car and in the house.

And speaking of houses, the smallest wire we pull is #14. It doesn’t matter if the entire circuit is feeding a single LED. OR no load at all.

My point is, don’t try and size things for a small 5 or 10amp load,

If it were me, I would follow the #14 thing, and fuse accordingly.

But I know there are 16 and 18 gauge ran for small loads ran for DC.

AND yes It’s easier to bend and flow the contours of small wires and just easier to work with. I get all that too.

But pinching pennies on smaller wire when you could just run 1 smallest size and not buy 1/2 dozen 25-50 foot rolls.

You could buy 250’ roll of black, red, blue, white or green or any other colors you choose.

Then use the money you saved not buying the little $chit and throw that money on the few bigger sizes that you will need.

Wire in bulk or big rolls is way cheaper in the long run than hand fulls of little packages is the point I was trying to make.

And running 10’ feet and 2 wires at a time can eat wire quickly is another thought.

Back to the big wire question,

You at some point carry a return or sometimes we call it an unbalanced load.

Whatever current or amperage that travels on the Hot wire has to return somewhere…

It doesn’t just disappear or dissipate into thin air like the magic smoke you try and get back into a burned up motor or capacitor.

Wire is way cheaper than a fire or an afterthought or underthought or underthunked.., an install that turns into a repair.

I’m not trying to tell you how to do your project, I’m just pointing out the ins and outs you could be overlooking at saving a dime and the better “maybe” safer way to do something.

1 other thing.

If you run bigger wire and you later add something that requires a bigger cable you are already good to go and no additional circuitry to add or upgrade.

Hopefully I was able to help.

Good luck
 

Rasdiir

Petty Officer 2nd Class
Joined
Jul 18, 2011
Messages
167
Definitely direct wire the bilge pump with a separate float switch. I have mine wired up to a helm switch but nothing should be wired to your starting other than the motor and it's trim.
I will change my plan for the bilge, everyone is offering the same advice so I know it was a bad idea :) I don't have a lot of accessories that will take much power, and tons of boats only have one battery, so I wasn't too worried about having everything but the trolling motor hooked to the start battery. Time will tell I guess!

I’m late to the party too.
Sorry for the goofy spacing. I copied to notes and added later as it was a work in progress.
And it’s long winded.

My advice as an electrician and contractor.

Don’t ever skimp on wire size.

Smoking cables and over amp draw is not something you want and especially on the water.

IFFFF… all powers that BE forbid…,

Should you actually have a fire,. On the water you have nowhere to go but in the water should the need ever arise and you can’t get control of things.

Bear in mind you could have cold water or if you are in the ocean other problems to deal with. …

So far as those big cables matching?

Yes they need to match, just like on a car and in the house.

And speaking of houses, the smallest wire we pull is #14. It doesn’t matter if the entire circuit is feeding a single LED. OR no load at all.

My point is, don’t try and size things for a small 5 or 10amp load,

If it were me, I would follow the #14 thing, and fuse accordingly.

But I know there are 16 and 18 gauge ran for small loads ran for DC.

AND yes It’s easier to bend and flow the contours of small wires and just easier to work with. I get all that too.

But pinching pennies on smaller wire when you could just run 1 smallest size and not buy 1/2 dozen 25-50 foot rolls.

You could buy 250’ roll of black, red, blue, white or green or any other colors you choose.

Then use the money you saved not buying the little $chit and throw that money on the few bigger sizes that you will need.

Wire in bulk or big rolls is way cheaper in the long run than hand fulls of little packages is the point I was trying to make.

And running 10’ feet and 2 wires at a time can eat wire quickly is another thought.

Back to the big wire question,

You at some point carry a return or sometimes we call it an unbalanced load.

Whatever current or amperage that travels on the Hot wire has to return somewhere…

It doesn’t just disappear or dissipate into thin air like the magic smoke you try and get back into a burned up motor or capacitor.

Wire is way cheaper than a fire or an afterthought or underthought or underthunked.., an install that turns into a repair.

I’m not trying to tell you how to do your project, I’m just pointing out the ins and outs you could be overlooking at saving a dime and the better “maybe” safer way to do something.

1 other thing.

If you run bigger wire and you later add something that requires a bigger cable you are already good to go and no additional circuitry to add or upgrade.

Hopefully I was able to help.

Good luck
That's a ton of good info, thank you!

I would definitely rather overwire than underwire, some of the sizes that came out of the calculator were just very surprising. The main reason I wanted to confirm all this was that the calculator was spitting out a lot of 10 and 12AWG (bilge and nav lights due to length of run), and I was really hoping to do as you have suggested and use 14 for most of the accessories.

So since the ground has to be the same size as the largest load, does that mean all the main bonding cables between the grounding bus bars should be able to support the starting load, since they are all connected? Or is it just the cables between the battery and engine that have to support starting load, and the rest just have to support the loads on the other circuits (lights, trolling, etc)? As an example: If I have a 100A fuse panel in the driver console (fed by the starting battery), and the trolling motor takes 60A (fed by the trolling battery), do the bonds between the front bus bars have to support 160A? That doesn't quite seem right to me. Or would it be better to have the trolling motor ground go direct to the trolling battery on cable supporting 60A and everything else go to the bus bars which get grounded to the starting battery on cable to support 100A?
 

Watermann

Starmada Splash of the Year 2014
Joined
Jan 12, 2013
Messages
13,787
I will change my plan for the bilge, everyone is offering the same advice so I know it was a bad idea :) I don't have a lot of accessories that will take much power, and tons of boats only have one battery, so I wasn't too worried about having everything but the trolling motor hooked to the start battery. Time will tell I guess!

That's a ton of good info, thank you!
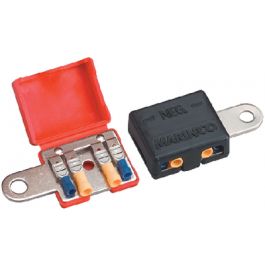
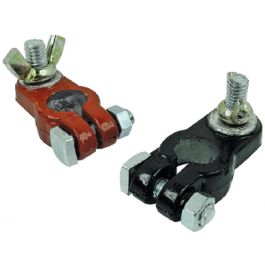
To keep solid connections make sure you use terminal blocks with a separate connector for each wire lead so you don't end up stacking connections. I like these.
and
 

Rasdiir

Petty Officer 2nd Class
Joined
Jul 18, 2011
Messages
167
The weather is nice and the project is back underway!

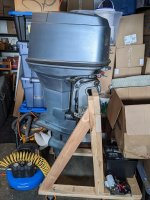
Back before the sub-zero temperatures hit last November I winterized the motor by running fuel with Sta-bil through and fogging the carbs and spark plugs, then pulled the motor and put it on a stand I built. Motor was stored in our unheated garage, but I think it only got to -2C one time all winter in the garage. Boat was stored in a car shelter tent that held up incredibly well to our snow load (I did keep it fairly clear after large snowfalls) and wind.

PXL_20220415_200919655.jpg

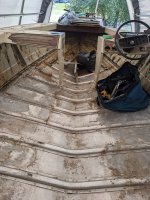
Our Canadian winter has receded here in Southern Ontario, and that means I can work on this boat in relative comfort. My daughter and I continued the tear down, and I am happy to report that everything removable is now off the boat except for the transom, rub rails, and that little board in the bow! Next steps to complete, hopefully by end-Apr, are:
  • Pull transom. All the bolts are out, I just need to make an attachment point to give some leverage to pry it out.
  • Clean out the remaining pour-in foam from the rib ends.
  • Knock out the remaining rivet shanks from the stringers, then try and get the loose ends and all the other garbage out from under the ribs.
  • Clean off the carpet glue and remaining carpet padding from the insides.
  • Wire wheel all the gunk (brown stains, small bits of foam, dirt, etc) off the inside sides and bottom. I gave this a quick test with 80grit nylon wheels, but it still took a lot of work, is there a better method?
  • Pull boat off the trailer.
  • Strip all paint, planning on using the Citri-Strip from Lowes.
I will be leaving the consoles in I think, they seem like a real bear to pull off and I don't think they will be in the way too much. Once all the paint is off I will be checking all the rivets and hopefully installing chine braces, so I guess I need to start shopping for some riveting tools.

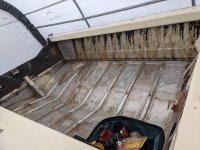
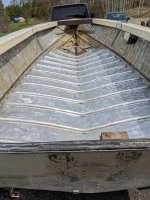
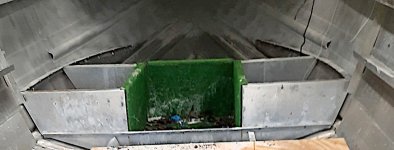
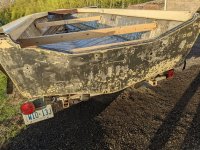
Current state (except the steering is off):
PXL_20220415_191801121.jpg
PXL_20220415_175706936.MP.jpg
PXL_20220415_191812788.jpg
 

renns

Petty Officer 1st Class
Joined
Dec 20, 2017
Messages
316
Looks familiar! One thought...I left my consoles in for most of the restoration project. In the end, I needed to pull them out anyways, and wish I had done it at the start. I spent time sliding deck boards in and out underneath the suspended consoles, when really just drilling out a few more rivets would have given much better access.
 

classiccat

"Captain" + Starmada Splash Of The Year 2020
Joined
Dec 20, 2010
Messages
3,412
Welcome Back!

I also store my SS in a portable garage. you'll get a few seasons out of the original cover...when mine started wearing through, i sprung for the heaviest ShelterLogic offered. Another recommendation, add a vapor barrier to the ground. I used a cheap blue tarp and will soon add crusher run; the difference with condensation is night & day.
 

Rasdiir

Petty Officer 2nd Class
Joined
Jul 18, 2011
Messages
167
So I didn't even come close to completing my intended task list above by end of April, but I am slowly plugging away still while I wait for it to finally warm up enough for paint stripping.

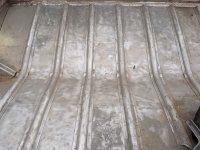
I got the consoles out as recommended, removed the bow cap, rub rails, and bow deck, and have been slowly cleaning the grime off the bottom with a nylon cup brush on a drill. I'm probably about 30% complete, but that will speed up once I pick up a corded drill tomorrow, my cordless batteries are old and I've only been able to hit it for around 20min a night. The nylon brush (80 grit) is quite slow, probably because I'm applying almost no pressure and keeping it moving. I did a quick test with a brass cup brush that was much quicker, any concerns with that? I'm also wondering just how clean these things need to be, because there is a dark grey layer that is a beast to remove (see the bottom center of the below pic) and I don't want to damage the hull trying
PXL_20220428_220425132.jpg


I have attempted to remove the glue and remaining carpet padding from the sides with both cup brushes, a scraper, and even some Goo Gone adhesive remover, nothing even dents it and I'm afraid to go to hard with the brushes.

For paint stripper, any recommendations for someone in Ontario? I did find a previous thread (can't remember who) from a fellow Canuck that recommended Heirloom Heavy Duty which seems to be available at Home Hardware, so I'll try and find some this weekend. If that is not available it seems like the EZ-Strip found at Canadian Tire might be the only option.
 

Rasdiir

Petty Officer 2nd Class
Joined
Jul 18, 2011
Messages
167
Where did you pick up the Resolve stripper?
 
Last edited by a moderator:

renns

Petty Officer 1st Class
Joined
Dec 20, 2017
Messages
316
Sorry, bad memory... Solvable brand. I bought a couple jugs at the ReStore where they clear out Home Depot returns. There is regular and 'heavy duty'. The heavy duty was what I ended up using and had good luck with. Cdn Tire sells it as well, and it doesn't get very good reviews, so YMMV. Get the smallest container and give it a try first. If you have a ReStore, check there also, as they had lots of the Solvable brand thinners, MEK, acetone, strippers etc last time I wandered through. Maybe it's the same in your area?
 

Rasdiir

Petty Officer 2nd Class
Joined
Jul 18, 2011
Messages
167
Sorry, bad memory... Solvable brand. I bought a couple jugs at the ReStore where they clear out Home Depot returns. There is regular and 'heavy duty'. The heavy duty was what I ended up using and had good luck with. Cdn Tire sells it as well, and it doesn't get very good reviews, so YMMV. Get the smallest container and give it a try first. If you have a ReStore, check there also, as they had lots of the Solvable brand thinners, MEK, acetone, strippers etc last time I wandered through. Maybe it's the same in your area?
Thanks, I picked up a litre of the heavy duty Resolve to try out before I commit to a gallon for $76 :oops:

I did manage to put in a few hours with the wire wheel this weekend, the bottom is now quite clean and the carpet backing is ground off the sides. I also picked up some Goof Off adhesive remover that I will be trying this week on the carpet glue on the sides.


PXL_20220501_164219761.jpg

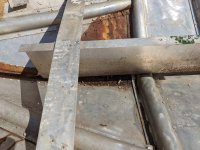
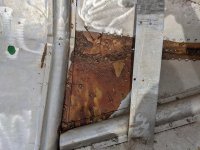
I also pulled the little stringer in the bow and got a good look at the mess, it looks like the factory sealant but I really can't be sure, especially since it's really only down the keel seam and then on the starboard side, almost nothing to port. There were 3 or 4 rusted nails or something stuck into the brown goop (I pried them out), and the goop is fairly impervious to the nylon cup brush. Should I be cleaning this out or is gluvit over the top good enough?
PXL_20220430_201336489.jpg

PXL_20220501_164243158.jpg
 

Watermann

Starmada Splash of the Year 2014
Joined
Jan 12, 2013
Messages
13,787
Don't mess with the red SC smeg other than to remove any loose bits around the edges if there are any. Yeah apply the Gluvit over it if need be.

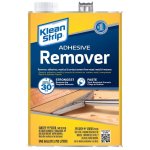
The only thing that took the carpet glue off my SS was Klean Strip adhesive remover and a pressure washer.
adremov.jpg

Port cleaned, starboard you can see what I started with.
y4mPBjI4Exjjvf5uN7KAxuKrtLA5aT9U4VYbLqqm3pdK8X4U6p7FrB1nq1NrFXv1opRtoI_a83zVWE66i0_UJqyMkntFi1K0CzFHgvRUatrGgdnJI0etbJtBdyCAUL0-GNPQbXwhpvtE5ffr4jnC_IL65DW4bqeWuSPA2m9sTmH3YL1LSuc5fuB16S6gHk0oulF
 

18trapper

Cadet
Joined
Mar 24, 2013
Messages
15
Klean Strip brush cleaner worked great for me to remove the carpet adhesive. Brush it on and scrape off a few minutes later. Goof off did nothing for me
 

Rasdiir

Petty Officer 2nd Class
Joined
Jul 18, 2011
Messages
167
Don't mess with the red SC smeg other than to remove any loose bits around the edges if there are any. Yeah apply the Gluvit over it if need be.

The only thing that took the carpet glue off my SS was Klean Strip adhesive remover and a pressure washer.
View attachment 359783

Port cleaned, starboard you can see what I started with.
y4mPBjI4Exjjvf5uN7KAxuKrtLA5aT9U4VYbLqqm3pdK8X4U6p7FrB1nq1NrFXv1opRtoI_a83zVWE66i0_UJqyMkntFi1K0CzFHgvRUatrGgdnJI0etbJtBdyCAUL0-GNPQbXwhpvtE5ffr4jnC_IL65DW4bqeWuSPA2m9sTmH3YL1LSuc5fuB16S6gHk0oulF
Thanks, but I don't think that is available anywhere in Canada, I couldn't find a good source.

It looks like the red smeg is blocking the bow-most limber hole in the rib. I did grind down a small patch directly in front of the rib to clear it, but the red stuff is inside the rib as well, any tips to get that out? It's completely blocking drainage from the bow.

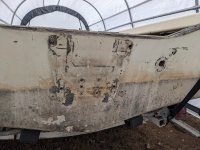
I ended up trying the Resolve stripper on the glue and it worked great, but I think I will wait until I am done the paint stripping to get onto the glue. I started stripping the transom, and after 2 days, 2 applications of the resolve, lots of scraping with a putty knife, and a bit with the nylon wheel I have managed to clear 90% of the transom paint. I think this boat has been repainted once, as there seems to be a thin, lighter top layer then a thick, tougher, more orange bottom layer.
PXL_20220510_232731650.jpg
The PO apparently applied jbweld or something similar to fill in some huge gouges. He didn't do a bad job, but I will be touching it up.
PXL_20220510_232645199.jpg
I also found about 6 spots where someone drilled the floor screws right through the rib ends and then the bottom hull, then covered it up with a very well adhered rubbery substance on the outside. Those spots will all get sold rivets once once the paint is stripped.

Paint stripping will continue for the next while I think, it's not coming off easy!
 

SHSU

Lieutenant Junior+Starmada Splash Of The Year 2019
Joined
Mar 8, 2017
Messages
1,725
I also found about 6 spots where someone drilled the floor screws right through the rib ends and then the bottom hull, then covered it up with a very well adhered rubbery substance on the outside. Those spots will all get sold rivets once once the paint is stripped.

PO make restorations such an adventure. lol

SHSU
 
Top