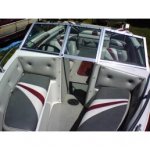
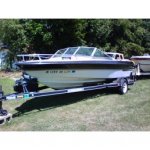
1989 Baretta Success 185 restoration

Status
Not open for further replies.

captmello

Captain
Joined
Jun 30, 2008
Messages
3,845
Re: 1989 Baretta Success 185 restoration

Chris,

thanks for the pics. Your bow area looks just like mine, right down to the little light in the bow seats. Your helm is different with a different guage layout.

Anyway, thanks for posting them. I like the idea of having the tank up front, if I pull my cap, i may consider putting my tank up front like yours. With my 350 V8 and 25 gallon fuel tank all in the rear, my boat seems a bit "Stearn heavy". My ski locker extends up under the bow area so I can see all the way to the front of the hull.

Even though the swim platform gets in the way of the lifting eye and can be a bit of a head knocker when working on the outdrive, it is great for swimming and water sports and I wouldn't buy another boat without one.

The transom is the same as mine as well. Should be an easy replacement.:D

Good luck with the restore, I'll be watching.
 

coostv

Petty Officer 1st Class
Joined
Mar 21, 2010
Messages
230
Re: 1989 Baretta Success 185 restoration

Does your light work in the bow area? I have not checked the bulb yet, what turns it on?
 

captmello

Captain
Joined
Jun 30, 2008
Messages
3,845
Re: 1989 Baretta Success 185 restoration

Does your light work in the bow area? I have not checked the bulb yet, what turns it on?

I believe it comes on with my anchor lights. I have a double light switch, Anchor or Navigation.
 

coostv

Petty Officer 1st Class
Joined
Mar 21, 2010
Messages
230
Re: 1989 Baretta Success 185 restoration

I have the same switch in my boat but the lights do not work. I will have to look into that later.

Today was a big day for me. I only had to work until noon and my brother in law had some extra time to donate to my cause. Here is what we wound up with today.

i4em9i.jpg


The good news is that the transom is DRY! Would have been a fairly easy job, but I will accept that I do not have to touch it :D

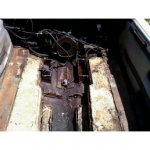
The mounts for the engine in the boat are toast, I did not realize just how bad the port side one was until the engine was out of the way.

294j6l4.jpg


kb6dk5.jpg


And the hack job done to clear the starter.

307nbe8.jpg


More to come.
 

coostv

Petty Officer 1st Class
Joined
Mar 21, 2010
Messages
230
Re: 1989 Baretta Success 185 restoration

Here is the inside of the engine mount box on the starboard side. I have already dug the rotten wood out. That is my flashlight shining through.

nwgd45.jpg


And the port side.

2jcezrk.jpg


Here is the gimbal bellow complete with one of my fingers in the way. Is water supposed to be in there?

10far7r.jpg


Now that the engine is out of the way I can get going on it. I will be pulling the rest of the foam out tomorrow and then get to work on cutting away the old glass.
 

coostv

Petty Officer 1st Class
Joined
Mar 21, 2010
Messages
230
Re: 1989 Baretta Success 185 restoration

I almost forgot, here are a couple more pictures for Captmello.

This one is looking under the dash on the port side. Fuel fill and vent etc.

2n24nxi.jpg


This is the starboard side looking into the bow.

dztdlz.jpg
 

captmello

Captain
Joined
Jun 30, 2008
Messages
3,845
Re: 1989 Baretta Success 185 restoration

Wow, those motor mounts are toast! I must say I'm skeptical about your transom being solid considering the rest of the boat...Just would hate to see you go to all that work just to have to redo the transom later on.

Thanks for the additional photos, looks just like mine under the front seats. This manufacturer sure didn't want water to collect in the front storage areas. Mine has those drains as well.

Keep up the good work!!
 

captmello

Captain
Joined
Jun 30, 2008
Messages
3,845
Re: 1989 Baretta Success 185 restoration

BTW, regarding the water in the bellows, no, shouldn't be any. You most likely will need a new gimble bearing and ujoints, and new bellows as well. I don't know much about OMC however, post your questions in the I/O forum for much better advise and help with the work.
 

coostv

Petty Officer 1st Class
Joined
Mar 21, 2010
Messages
230
Re: 1989 Baretta Success 185 restoration

We have a bit of forward motion to report. I ordered my supplies from US Composites today so I should be able to start putting this thing back together next week. I should have ordered the stuff I needed last week, but I dragged my heels and well.... I am getting the itch to get the kids out in it. This summer should be pretty fun for them (and me).

The big question is this. At the prodding of captmello I got curious about the transom and dug deeper. I now see that it is damp below the gimbal. Damp, not rotted away and it is dry to the sides of the gimbal. I was thinking I would really like to paint this thing next winter and seeing as the transom is divorced from the stringers I can get away with skipping it until winter comes. The other thought I have is to either refresh the motor and maybe add some performance (I have a buddy with a bunch of goodies left from the boat he sold last fall) or re-power it with a vortec 350 I have sitting waiting for its next home. The 8 would probably necessitate a different outdrive setup and therefore a new hole in the transom. It is not that I am trying to get out of doing it, I just do not want to take it down to nothing twice if I do not have to. Anyone have any thoughts?

Lastly, engine mounts can (or should) be solid to the hull, correct?
 

captmello

Captain
Joined
Jun 30, 2008
Messages
3,845
Re: 1989 Baretta Success 185 restoration

The thing about the transom being wet is that it will never dry and will certainly rot in time. I realize you want to get out on the water but if it was me, I'd pull it and redo it. Doing it later means pulling the motor again, etc., doesn't make sense. You do realize that you don't have to cut out the outer shell of the boat , you just peal, scrape, grind, do whatever it takes, to remove the wood from the inside of the hull.

Repowering to a V8 would mean regearing your outdrive or swapping to an outdrive already geared for a V8. The cutout in the transom would be the same. I wouldn't bother, most people seem to love their 4.3's. If you have a two barrel carb, you could consider a new intake and four barrel carb, that could net you 25-30 HP.

Regarding the motor mounts. It looks like the old ones were not solid through, with a large void in the center. I'd carve some new solid ones out of some dry treated lumber and glue 'em in good. You can see the old ones were giving way.

Are you going with epoxy or Poly resin?
 

JaSla74

Chief Petty Officer
Joined
Oct 14, 2008
Messages
506
Re: 1989 Baretta Success 185 restoration

My Baretta's transom appeared strong until I had the outdrive removed. I agree with captmello on this one.
 

coostv

Petty Officer 1st Class
Joined
Mar 21, 2010
Messages
230
Re: 1989 Baretta Success 185 restoration

I will be using poly resin.

I will try to post some pictures tomorrow after some more progress is made. I have done one engine mount and plan to complete the other tomorrow. I kind of took a bassackwards approach to the mount rebuild, but it will come out stronger than the original. This will be self explanatory once I get some pictures of it.

I took a break from the engine mounts today and started removing the left over fiberglass from the stringers. I was then interrupted by a friend needing me to get the blades off of his ExMark mower. I never went back to it...
 

coostv

Petty Officer 1st Class
Joined
Mar 21, 2010
Messages
230
Re: 1989 Baretta Success 185 restoration

After slowly poking at this thing for the last couple months I have some forward motion to report. As stated in my first post I am bad at taking progress pictures. So, we skip from tear down to pretty much done, lol.

2cy3zhv.jpg


Here it is with the motor set in it and the deck with its new coat of tintable spray in bedliner.

riemfl.jpg


Now here we have the transom work beginning. It literally took less than an hour to get it to this point. All I need to do is a little clean up, cut the wood, glue it all together and fiberglass it in. I am planning on having it done this week. I would love to get out next weekend if possible...
6qhb7k.jpg


2mpkac0.jpg
 

coostv

Petty Officer 1st Class
Joined
Mar 21, 2010
Messages
230
Re: 1989 Baretta Success 185 restoration BACK ON THE WATER!!

Re: 1989 Baretta Success 185 restoration BACK ON THE WATER!!

I worked at this thing like a madman this week. Unfortunately I never stopped to take any more pictures in the flurry of activity. I will at least try to snap some more completed pics of it and post them up.

I spent the day in the shop with a friend of mine getting it all put back together. At 8 PM we were headed for the lake to try it out. All is well, no leaks, runs great, and best of all I wore a smile :)

Transom on this boat? EASY!
 

tsegdoh

Recruit
Joined
Jul 25, 2010
Messages
3
Re: 1989 Baretta Success 185 restoration

Hello sir,
I have been reading about your restoration with great interest. I have the same boat as u and am replacing the floor also. I have attached a couple photos of my boat. Did u use pressure treated wood for stringers and floor? I see u did not put the ski locker in. Did u replace the stringers that support the ski locker area? I see u used bed liner material for the floor. Is it slippery or did you put carpet over? I am sure that i will have many more questions for u. Hope u dont mind.
Thanks,
Tom H.
 

Attachments

  • baretta1.jpg
    baretta1.jpg
    21.1 KB · Views: 2
  • baretta3.jpg
    baretta3.jpg
    24.7 KB · Views: 2
  • baretta2.jpg
    baretta2.jpg
    21.6 KB · Views: 2

coostv

Petty Officer 1st Class
Joined
Mar 21, 2010
Messages
230
Re: 1989 Baretta Success 185 restoration

Hello! I replaced all of the stringers underneath. The wood I used was standard exterior rated AC ply. Pressure treated is a waste of money, the wood is encapsulated in resin and glass cloth/mat anyway. 3/4" for stringers and 1/2" for the deck. It is very solid feeling, but there is not much more than a 10-11" span between stringers. I decided against the ski locker because I simply did not want to deal with it. I will not miss it one bit, the next owner might though.

I basically just copied what the factory had down there took measurements and drew pictures then ripped it all out. It was a pain, but knowing that it is solid and watertight is comforting.

The bed liner seems to be pretty slip resistant. I did not want carpet, but I may do a snap in runner down the middle if it proves to be too slippery.
 

Westport

Seaman Apprentice
Joined
Jul 16, 2010
Messages
37
Re: 1989 Baretta Success 185 restoration

My tank is under the bow deck. Fortunately for me, I will not be seeing the tank :) as the deck up there is solid. That is if I do not have to split the cap from the hull.


Well I got a few months late into this thread, but I'd say that if you do have access to the tank it would be a good time to inspect it for rust (if it's a steel tank), change out the 10 yr. old fuel line and anti-siphon valve. It beats trying to do that in the future after you have yuor new deck in place.
 

captmello

Captain
Joined
Jun 30, 2008
Messages
3,845
Re: 1989 Baretta Success 185 restoration

Looking good! Glad to see you got it done with plenty of summer left.:)
 

coostv

Petty Officer 1st Class
Joined
Mar 21, 2010
Messages
230
Re: 1989 Baretta Success 185 restoration

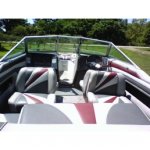
Thanks Captmello. Here is a cruddy pic I took today. I can now start focusing on little stuff that irritates me when I look at it. I also want to make a few things to make it fishing friendly.

15wkj7p.jpg
 

tsegdoh

Recruit
Joined
Jul 25, 2010
Messages
3
Re: 1989 Baretta Success 185 restoration

Thanks for the info. I did already gut the floor out of mine. I included a picture. i am hoping to start putting the wood in it next week. i was planning on coating the floor with fiberglass resin and then carpet. I am planning on putting the ski locker back in. We will see though. I bought this boat with a bad motor and have never had it on the water. I cant wait! it sounds like u really have enjoyed yours. Thanks again!
Tom
 

Attachments

  • baretta floor.jpg
    baretta floor.jpg
    28.3 KB · Views: 3
Status
Not open for further replies.
Top