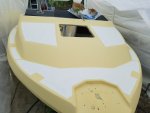
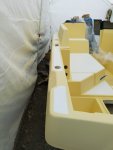
1989-90 bayliner 2159 hardtop.

mickyryan

Rear Admiral
Joined
Apr 18, 2016
Messages
4,214
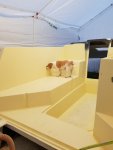
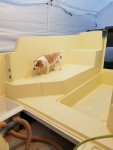
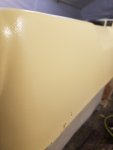
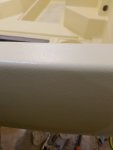
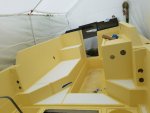
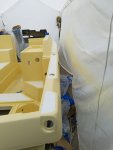
i got bugs to work out but overall im seeing im pleased with i guess sanding will tell, i feel as though i should put a couple more coats on but then i fear going too thick, not sure how to measure 12-15 mils but atm i believe its as thick as a penny
 

mickyryan

Rear Admiral
Joined
Apr 18, 2016
Messages
4,214
Nice! But what's that growing through the upper corner there on the left in less than a day? Looks like something out of a horror movie. You'll go in there tomorrow and find the whole thing choked with vines! :)

I really have to find something like that for when I get our boat home. Planning to build a carport next to the new storage shed to house it but I just don't see how it's gonna happen fast enough.

Cheers........................Todd

its coral bells :) hoping it takes over and shields everything:)
 

sphelps

Supreme Mariner
Joined
Nov 16, 2011
Messages
11,468
I wouldn’t worry about it going on to thick using the hvlp . You will be sanding a good bit off if your planning on making it shine .. really easy to sand through if not careful . I know from experience.. :facepalm:
 

mickyryan

Rear Admiral
Joined
Apr 18, 2016
Messages
4,214
yeah im going to have to do multi coats ... still wondering if paint isnt the better idea but i had to try the gelcoat and so far im liking it just not sure i will want to continue polishing as much as just using 2 part paint and just washing and waxing :)-
figured out how to take a depth reading i took and made a few sacrificial passes on a piece of plastic like my normal passes are and then when that fried i removed the tame and used a dial caliper , looks like im spraying about 10 mils with my normal pattern of overlap.and sweep so def will need a few more coats . ill wash whole boat down with some tsp and dishwashing soap acetone it and then spray another coat , just need to figure out if unwaxed or waxed with this weather.
 

mickyryan

Rear Admiral
Joined
Apr 18, 2016
Messages
4,214
still on fence about the paint but this gelcoat allows me to see defects and fix before applying the paint and its close to color so if i do go with paint it wont be hard covering color :)
 

mickyryan

Rear Admiral
Joined
Apr 18, 2016
Messages
4,214
got the outside sprayed today put it on a lil thicker then interior because i figured id be sanding a ton of it off trying to make it shine , we got one more day of good weather so hoping to get a second coat on inside and then let it all cure before i start sanding, my fear when sanding since i have not done this is a lot of folks say just use a da but wouldnt i be better served to use my air longboard with say like 600 to make sure i dont get waves or is that not usually a issue?
 

chevymaher

Commander
Joined
Mar 29, 2017
Messages
2,924
Since it is mainly a curved surface. A foam block is the best tool for the job. It conforms to the natural curve and rids the surface of smaller imperfections. Waves should have been dealt with before paint/gel coat. But your work looks good i am sure you don't have any. What your working on now is the orange peel effect.
 

mickyryan

Rear Admiral
Joined
Apr 18, 2016
Messages
4,214
i long boarded and blocked and made 12" curved boards concave boards and round boards for all my fiaring so i felt i had a pretty smooth surface, that's why i was asking , didn't want to regret or screw up on last phase lol I am no body guy im more of a mechanical, electronics guy my cousin is a body guy he told me to go by feel then i figured out my eyes decieve me so i checked it in the dark to force feeling around and that did work then i wet it down with slightly soapy water to imitate a gloss and checked it with a side light beaming down side for high and low and it looked really good , used a guide coat as well so if its wavy gravy i has failed!:)
 

mickyryan

Rear Admiral
Joined
Apr 18, 2016
Messages
4,214
welp i shot boat with 2 coats of cream gelcoat with intent on sanding and polishing .... decided to just use it as a primer coat for my original intent of raptor after realizing too much work to sand around all those cracks and crevices without sanding through over and over , hats off to guys that do it and it works out .
Raptor lined entire top yesterday :) Must say my texture turned out better then i had hoped its superfine almost like the texture on a Kitchen fridge :) thinned and shot through a 1.8 tip started with a 1.4 but i didn't want to thin more then 10 % so jumped to a 1.8 and it flowed nice.
 

Attachments

  • photo291393.jpg
    photo291393.jpg
    570.7 KB · Views: 6
  • photo291394.jpg
    photo291394.jpg
    769.5 KB · Views: 6

oldrem

Commander
Joined
Nov 7, 2013
Messages
2,002
When I get that far I may be asking a lot of questions on the Rapter, thinking of going that root on my decks.
 

mickyryan

Rear Admiral
Joined
Apr 18, 2016
Messages
4,214
Love the different Patterns i can do with the stuff biggest deal is let it cure before stomping all over it :)
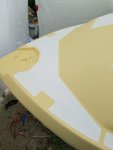
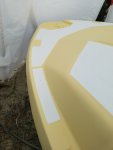
today I did the Non skid Areas in a white agressive pattern, they were worn off in areas so i had to do something .not perfect but not terrible either I will clean up a couple areas after they have cured. also did the dash in black like it was before to keep glare down , funny thing is when i took pics of it the camera zoinked out on it and made it all splotchy looking .. not sure whats up with that , only seemed to have that problem with camera and black.
 

Attachments

  • photo291421.jpg
    photo291421.jpg
    178.3 KB · Views: 5
  • photo291422.jpg
    photo291422.jpg
    181 KB · Views: 5
  • photo291423.jpg
    photo291423.jpg
    171.4 KB · Views: 5
  • photo291424.jpg
    photo291424.jpg
    160.3 KB · Views: 5
  • photo291425.jpg
    photo291425.jpg
    179.4 KB · Views: 5
  • photo291426.jpg
    photo291426.jpg
    181 KB · Views: 5
Top