1987 Power Play XLT-185 - floors, stringers, and upholstery

todhunter

Canoeist
Joined
Sep 15, 2020
Messages
1,316
Thats coming along good Tod. Looks like you need just a little black mixed in the white to get it "grayer". I had the reverse problem, too gray of a mix on a whiter hull, adding white back got me close. Just a dab will do, its easier to go from white to gray, than back whiter from gray. Get your color close ist, then add the Cat.
Zool, do you just hold the cup up next to the hull to see how close the color is? Thanks for the tip...I think you're right about what color it needs.
 

zool

Captain
Joined
Aug 19, 2012
Messages
3,432
Zool, do you just hold the cup up next to the hull to see how close the color is? Thanks for the tip...I think you're right about what color it needs.
I take a piece of cardboard or whatever, take a fixed amount of white and add one pin drop of black, mix it, swab it on the edge, then add another drop, swab it on the edge again and so on, then hold the swatch against you hull, then you can tell the ratio that is closest. Mix the ratio that matches the best, and catalyze it.
 

AShipShow

Lieutenant Commander
Joined
Jul 8, 2016
Messages
1,802
Zool, do you just hold the cup up next to the hull to see how close the color is? Thanks for the tip...I think you're right about what color it needs.
When I matched up my gelcoat, I put an area of clear packaging tape on the hull and then put my dab of gel on the packaging tape, that way I could get a very clear visual on the color match... It wasn't perfect but you gotta be closer than a couple feed to see it.
 

todhunter

Canoeist
Joined
Sep 15, 2020
Messages
1,316
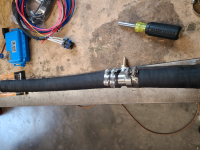
Pulled my fuel fill hose to install the Hardin Marine fuel return fitting.
20220603_185516.png


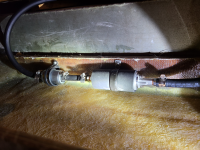
Got my pre-pump fuel filter and fuel pump installed behind the kick panel.
20220603_193022.png
 

todhunter

Canoeist
Joined
Sep 15, 2020
Messages
1,316
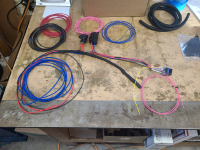
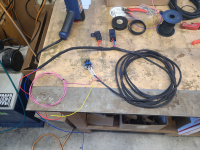
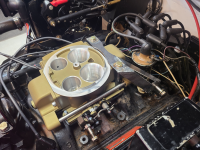
More Sniper work today. The harness that comes with the unit is nice and well thought out, but too short for my application so I extended it to the length needed for my boat. After extending the wires, I got the harness installed in the boat and tucked out of the way with the other wiring that was already in the boat. Here's a before and after:
20220604_074615.png

20220604_091036.png


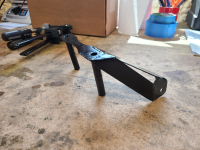
Next, I spent most of the day working on a throttle cable bracket. My OEM Mercruiser bracket will not work with the Holley Sniper, as there are components at the back of the Sniper that prevent it from bolting down where the carb bolts down. My throttle cable bracket was cast aluminum...not sure if the superseding stamped steel bracket will work. Anyhow, I ended up making my own. It works the same as the OEM bracket and positions the pivot in the same place...it's just got 3" standoffs under it to clear the Sniper. Please don't bust my chops on the welds...I don't sit at the welding table with any kind of regularity.
20220604_160329.png

20220604_141133.png

Hoping to do a first start around mid-week next week. I've still got a punch list to work through.
 

zool

Captain
Joined
Aug 19, 2012
Messages
3,432
That is one sexy carb....probably cheaper these days to pour martinis down a chic than pour gas down a 4 barrel ;)

nice work as usual Tod!
 

todhunter

Canoeist
Joined
Sep 15, 2020
Messages
1,316
Thanks Zool and Buck! I feel like after today I'm over the hump. I think I'll be doing a first start around mid-week. I couldn't finish the install today because I ran out of 14 AWG wire, but should have more tomorrow.

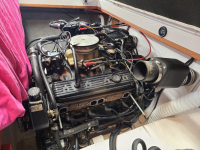
First thing I did was pull the port exhaust elbow, riser, and manifold. The reason I had to pull the manifold was to grind down one of the sealing plugs to clear the wideband sensor. The Hardin Marine riser is only 1" thick, and my stock risers were 1.25" thick, so the wideband sensor would have been touching this sealing plug. A few minutes with a grinder and a shot of black high temp paint and the manifold was ready to go back on. I do wish Hardin made the riser 1.25" thick. With it being only 1" thick, I don't think I can unscrew the wideband sensor with everything bolted up, as the points on the hex portion are taller than 1". It may come off, but it would be tight.

Port exhaust removed:
20220605_093928.png

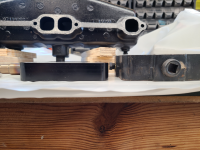
Difference in riser thickness - Hardin (1") on left, OEM (1.25") on right:
20220605_094357.png

Sealing plug after grinding, before paint:
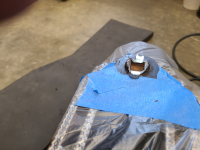
20220605_095223.png

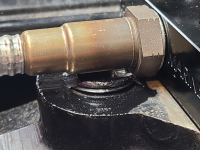
Wideband sensor clearance after grinding:
20220605_100804.png

Reassembled port exhaust with wideband sensor:
20220605_103433.png


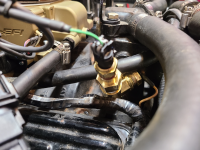
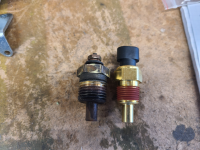
Next I moved on to addressing the coolant temp sensor that the Holley Sniper needs. I pulled the OEM sensor (for the coolant temp gauge on the dash) out of the intake manifold - it's a 1/2" NPT thread. The Holley sensor is 3/8" NPT. I wanted to still be able to use the gauge on the dash, so a trip to the hardware store for some fittings yielded the following - both sensors in the OEM location. It's a 1/2" NPT tee with two 1/2" NPT nipples and a female-to-female reducer (1/2" to 3/8" NPT).
20220605_113449.png


My boat is raw water cooled and has a 140F thermostat. Since I'm going to EFI, I wanted to change to a 160F thermostat. I went with a Quicksilver unit and all new gaskets.
20220605_143015.png


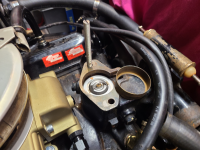
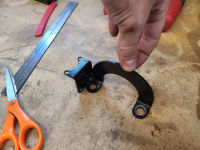
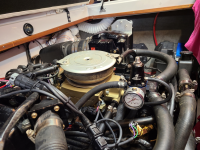
Next, I finished plumbing the fuel return line. With fuel injection I needed a return system and a regulator. After some head scratching, I decided to weld the fuel pressure regulator bracket to the "lift loop" that bolts to the top of the thermostat housing. I did not buy the Holley Sniper "master kit" so that I could buy my own FPR - I'm a fan of Aeromotive and use their regulators on all my car builds.

Here is the bracket for mounting the FPR:
20220605_133226.png

Here is the FPR and gauge all mounted up and plumbed:
20220605_144847.png


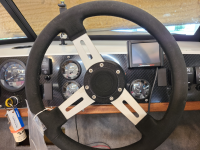
Lastly, I decided where I'm going to mount the display screen for the Sniper. I used one of the screws that hold the dash panel to the boat to mount the display. I'm planning to drill a hole through the blank switch block-off plate below it and run the wire into the dash there.
20220605_150109.png
 

Attachments

  • 20220605_104634.png
    20220605_104634.png
    2.1 MB · Views: 2

MagKarl

Seaman Apprentice
Joined
Jan 18, 2021
Messages
47
Not saying it will be a problem but I'd be a little bit concerned the new temp sender is on a dead end leg a ways out from the coolant flow. Be aware of the possibility of offset and/or lag.
 

todhunter

Canoeist
Joined
Sep 15, 2020
Messages
1,316
Not saying it will be a problem but I'd be a little bit concerned the new temp sender is on a dead end leg a ways out from the coolant flow. Be aware of the possibility of offset and/or lag.
Good call. If it gives me issues I may be able to compensate in the tune for it, or I may change the setup if needed. It'd be nice if both sensors scaled the same and I could run just one sensor and split the signal to go to both the dash gauge and the Holley. I may research that some.

Rain this week has hampered my ability to work on the boat, though I have made some progress. I'm hoping to finish the wiring tonight and maybe start it on the muffs.

One other thing - the Holley Sniper unit communicates with the touch screen (and the laptop) via a 4-wire CAN cable. The cable that comes with the touch screen isn't long enough to mount the screen on my boat's dash and connect to the unit. Holley sells an extension cable in various lengths up to 12 ft, but I need about 16 ft. I called Holley and they wouldn't make me a longer one so I ordered the materials make my own. The Holley CAN connector uses a Molex Mizu-P25 4-pin 250V connector - in case anyone needs to make their own cable in the future.

Lastly, huge thanks to @Nfowler for being willing to share info on his experience with putting a Holley Sniper on a Mercruiser 5.7.
 

todhunter

Canoeist
Joined
Sep 15, 2020
Messages
1,316
I got it running in the driveway on the Sniper tonight. I've got some clean-up / button-up to do in the morning, and then I hope to go do some testing with load on the engine at the river tomorrow afternoon.
 

Scott Danforth

Grumpy Vintage Moderator still playing with boats
Staff member
Joined
Jul 23, 2011
Messages
49,765
I got it running in the driveway on the Sniper tonight. I've got some clean-up / button-up to do in the morning, and then I hope to go do some testing with load on the engine at the river tomorrow afternoon.
Pics and vids or it didn't happen
 

todhunter

Canoeist
Joined
Sep 15, 2020
Messages
1,316
Alright all you carb die-hards, get your "I told you so's" ready. I blew the engine in my boat yesterday. 100% was my arrogance / indifference to multiple small warning signs that I ignored, and about that I'm pretty bummed. But...I've slept on it and I'm going to try like hell to have it back up and running for the July 4th weekend at my brother's lake house. Here's what happened:

Yesterday morning on muffs it was running OK on the initial tune. It warmed up to 160F and held and AFR seemed to be staying in the 11's, so pretty rich, but I figured once learning kicked in, it would start adjusting the tables. Then, all of a sudden the touch-screen was showing "No Data!" for all sensors (red flag #1). The Holley can run fine without the touch-screen connected, but I can't monitor the AFR without it. I switched from the touch screen to my computer and could not connect. Then after a while, the touch-screen started working again. Ultimately I think there is something going on with the wiring harness on the Sniper, and plan to call Holley tomorrow.

Anyhow, we loaded up and went to the river. At the ramp the touch-screen connected when I keyed on, but while cranking it went back to "No Data!" (red flag #2). It also didn't start right up on the first hit like it had in the past on the Holley (red flag #3) - it acted flooded, but I got it started, off the trailer, and tied to the dock. After getting the family loaded, it started right up on the first hit like I expected, then we were off. This time the touch-screen never came back from "No Data!", but I figured we would take a short ride up-river anyhow (completely ignoring red flags). It was running OK, so I decided to open it up. I could tell at WOT it was slightly down on power (red flag #4), so I decided to throttle back some. Shortly after that a loud bang and I could hear that we were losing compression from a cylinder. Oil pressure and water temp never faltered, so we limped it back to the dock, put it on the trailer, and went home.

The loud bang was the guts of #2 spark plug departing the engine and hitting the side of the hull. It was hot enough to leave a mark on the carpet on the side-wall, and to leave a burn spot in the bottom of my bilge. This is where the chuffing / loss-of-compression sound was coming from. I pulled the remaining plugs and #7 was also broken and about to come out as well. No broken/beaten ground straps, and the other 6 plugs looked on the rich side of things but OK. Compression test showed #7 is a dead hole (0 psi) but the remaining cylinders are still good. Based on what happened, I'm assuming that under load the engine went lean. With no touch-screen, I could not monitor AFR and get out of it in time (what an idiot).

That's as far as I made it yesterday. I'm taking tomorrow off work to pull the drive and engine out of the boat and then pull the heads off. Even though all 4 cylinders on the even side had good compression, I'm still going to pull both heads to make sure all is well...especially since the #2 plug failed catastrophically. Best case would be a burnt valve or something that the bottom end can stay together for. Worst case would be a fire slotted block, hole in the piston, or something along those lines.


The broken plugs:
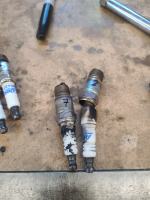
20220612_132957.png


The mark on the inside of the hull where the #2 plug hit:
20220612_132950.png


The burn mark in the bilge where the #2 plug came to rest:

20220612_132939.png
 

Scott Danforth

Grumpy Vintage Moderator still playing with boats
Staff member
Joined
Jul 23, 2011
Messages
49,765
that sucks... Feel for you (BTW, would never say ITYS)

hopefully its just a bit of the spark plug got stuck in a valve and bent the valve. Pull the heads and get eyeballs in there.

the spark plugs look like they ran super hot.
 

Scott Danforth

Grumpy Vintage Moderator still playing with boats
Staff member
Joined
Jul 23, 2011
Messages
49,765
if you have to rebuild the lower end, suggest going with a stroker.....
 

todhunter

Canoeist
Joined
Sep 15, 2020
Messages
1,316
if you have to rebuild the lower end, suggest going with a stroker.....
Thanks Scott. I do want to eventually build a stroker for the boat, but I just want it back on the water ASAP right now. I may pull a junkyard Vortec engine and do a 383 build in the winter. I haven't dove in too much on what's available. What brand do you recommend - Scat? Eagle? Any particular part number / compression?
 
Top