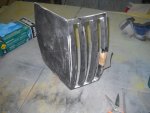
1987 Evinrude 200hp outboard resto/rebuild

nymack66

Petty Officer 1st Class
Joined
Aug 5, 2009
Messages
356
Re: Update 02-26-2011

Re: Update 02-26-2011

10-4 No excuses to slack off now :) The time you spend on the Computer you know she going to read your post sooner or later ....
 

j_k_bisson

Lieutenant Junior Grade
Joined
Oct 6, 2010
Messages
1,082
Re: Update 02-26-2011

Re: Update 02-26-2011

She read it over my shoulder while I was waiting for it to post last night. My figers will never recover from the message I had to perform last night. Lots of fun....

Again thanks for the offer of the tools and parts but I will deciline The new tool was set out yesterday. Should be in my end of week hopefully. I'll just spend the weekend on the side panels and hood. Needs to be done anyways. Sooner rather than later.

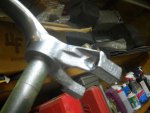
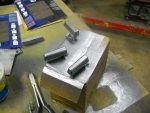
Here is some pics of my main pivot shaft. It's a bit rusted. But the sand blasting cleaned it up pretty good.

DSCN1527-1.jpg

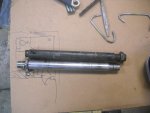
Here is the pic of the transom pivot shaft that was the wrong part. The old one is the black one. The stainless one is the ew wrong one. I think it is for a 140hp or something. its 1/2" shorter.

DSCN1524-1.jpg

I need to ship the guy I bought it from back to him and then he'll send me the right one I need. One of the things I need to do today.
 

nymack66

Petty Officer 1st Class
Joined
Aug 5, 2009
Messages
356
Re: Update 02-26-2011

Re: Update 02-26-2011

I see you folded the end on the steering tube, I did damage mine during the removal also it was rusted and seized up. Sorry I thought you meant the Steering pivot arm was what the culprit was ...My adult ADHD sorry for the confusion. Your Steering arm looks awesome. I am now in a habit to hose off this area thoroughly after Boating, its a spot that can be easily be missed.
I just finished ordering parts off Boats.net awesome service and website. Delivery is cheap I am not sure you you are using ...I am replacing the Cowling seals and bumpers etc. This weekend is painting time.
 

j_k_bisson

Lieutenant Junior Grade
Joined
Oct 6, 2010
Messages
1,082
Re: Update 02-26-2011

Re: Update 02-26-2011

When I was talking to the dealer yesterday they stated that the seals for the cowling, the o-ring like material on the split line, is only needed for salt water enviroments. Seeing I am in Fresh water I do not need them and will not be replacing them at this time. Maye later date if alot of chipping and squeeking. The bumpers is needed for proper alignment of the cowl pieces.

What do you think about this?
 

nymack66

Petty Officer 1st Class
Joined
Aug 5, 2009
Messages
356
Re: Update 02-26-2011

Re: Update 02-26-2011

Its totally your call, I do Boat in saltwater and my engine sits really low, I have been looking at a hydraulic jack plate simply because of necessity at the moment one of my engine is 20" the spare is 25". My objective is to keep her really sealed up ..I can't have water in there to corrode anything period. You really should change those spaghetti seals.
 

j_k_bisson

Lieutenant Junior Grade
Joined
Oct 6, 2010
Messages
1,082
Re: Update 02-26-2011

Re: Update 02-26-2011

Seeing I need to stop the bleeding right now on this motor. I'll put them in at a later time if they are needed. Right now I'm still trying to figure out what I'm going to do with this tilt tube issue. The one I got off ebay is 3/8" shorter than the one I need on the "flat" non threaded face. If I use this one with lock nuts will it make a difference?

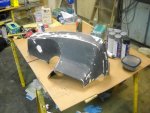
Last night started in on the one side panel. It was fun sanding. Here is a pic of the out come. Need to pic up some paint primer today. Then is prime sand, prime, sand, etc. Until it is perfect.

DSCN1530-1.jpg

The fun stuff is on tap for tonight. I love body work.....
 

j_k_bisson

Lieutenant Junior Grade
Joined
Oct 6, 2010
Messages
1,082
Update 03-03-2011

Update 03-03-2011

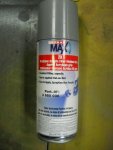
Well it was full force body shop last night. It was a very productive night. It all started afterwork when I stopped at my local painter supply shop. I picked up some high build fiberglass/plastic primer that they recommend. I was a bit leary after being told the price of $17 per can. But the stuff work amazingly. Only took one can for both cowls. Here is a pic of the can primer.

DSCN1551-1.jpg

Now please don't tell me this stuff is not for the purpose that I used it. I'll be pissed with them down at the store! I ever worked with this stuff before so I took their word for it.

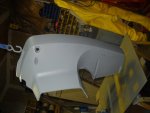
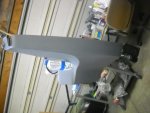
Anyways here are a couple of pics of the cowls after sanding and priming. The dings and dents where sanded out fairly flat/out with 320 grit sand paper. The primer filled them in and will need only minor sanding with 400 before paint tonight. The primer filled in the pits and very minor scratchs and scuffs very nicely. I am very happy with outcome. Almost perfect!

DSCN1549-1.JPG.jpg

DSCN1550-1.jpg

Tonight I will block sand and paint them. Then I need switch gears and vehicle maintence. I need to change the oil in the car and truck. Oh what fun that will be! But progress is being made on the boat motor! It should be done in a coupe of weeks. Just in time for fishing season. I also hope the tool for the trim system I have been waiting for comes in today or tomorrow. But it probably will not untill next week. So the hood is next on my list of things to do this weekend. Get all this body work stuff out of the way. Then its is only the lower unit paint and maintence items on the list of things to do to finish the motor.

Hey anyone know if the two colours on the hoods are painted or stickers to get the blue color on these 1986-87-88 hoods? I know the lettering are applied with appliques.
 

nymack66

Petty Officer 1st Class
Joined
Aug 5, 2009
Messages
356
Re: Update 03-03-2011

Re: Update 03-03-2011

Check this out you did good with your Urethane Primer period. As for the tilt tube no you cannot use it because its short in the wrong area, it will not fit into the end brackets correctly ...Your surface prep on the parts looks awesome.
Here is a write up on Urethane primers ..

Question: What is the difference between Lacquer Primer and Urethane Primer?
Urethane primer is about 50 times better. Many shops have not realized that lacquer primer is the most expensive primer to use in the market. All though the price tag is an attractively inexpensive cost initially, the side affect causes a transparent high cost and many shop owners never even notice. The number one cause of unsatisfied customers after experiencing an automotive finish repair was due to the use of poor quality undercoats. Lacquer primer is made of talc and resin and is categorizes as a thermoplastic type of paint resin. What is thermoplastic? The simplified answer is thermoplastic products can usually become a liquid state again.

For this example, let's say we apply some lacquer primer on a surface and let it dry (notice I did not say cure) outside for one week, a month, or even 2 years. We pull the car inside and take a razor blade and scrape off the primer and put it in your mixing cup. We pour some good grade lacquer thinner into the cup and wait a couple of days. Stir it and it will be become a liquid state where again, and depending on the resin that was used, you may be able to apply it back on the car.

This will not happen to urethane primers. Urethane and Epoxy primers are activated and go through a thermosetting stage. Again, to simplify the answer, Thermosetting in this circumstance is an activated resin that is used in urethane primer becomes a plastic type finish. The new coating structure cannot go back to it's original state. It is designed to become a strong, durable, chemical resistant coating.

The benefits of using urethane or epoxy primers are endless. The body shop and consumer are rewarded by having no lose of gloss, no shrinkage or swelling, delaminating or cracking. The solvents that are used in the basecoat systems are very strong. You must have an activated and cured undercoat in order for it to resist and repel the solvent from penetrating into it.

Since lacquer primer never cures and is made up of talc and thermoplastic resins, it absorbs the solvent instead, therefore causing lose of gloss to the topcoats followed by paint swelling. And if your lucky that's all. In more severe cases the topcoat will delaminate off the lacquer primer.

Urethane Primer contains more solids than lacquer primer and you will use about half the amount to do the same job.
 

j_k_bisson

Lieutenant Junior Grade
Joined
Oct 6, 2010
Messages
1,082
Re: Update 03-03-2011

Re: Update 03-03-2011

Thanks for that reply. It helps put some of my fears to bed. I hate using new products. Never know if they are right. Don't like hearing about that tilt tube though. Another $75 bucks for parts and a one week delay. Damn will the bleeding ever stop on this motor? LOL
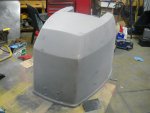
Well at least I won't be rushing to finish the trim system rebuild. Seeing the titlt tube is also required to put the motor mid section back together.

Just need to call my local dealer to see if they have a used one, I'll also try Faztullet shop. Hope he has one also.
 

nymack66

Petty Officer 1st Class
Joined
Aug 5, 2009
Messages
356
Re: Update 03-03-2011

Re: Update 03-03-2011

Jeff in a pinch bring your old tilt tube to a machine shop they can grind the treads off build up with arc welding and re-tap easily, Its the inside that really must be smooth and clean the end treads are just for hold the puppy in place ..Just a thought ...I will not bit surprise if you tell me you can do this your self !
 

nymack66

Petty Officer 1st Class
Joined
Aug 5, 2009
Messages
356
Re: Update 03-03-2011

Re: Update 03-03-2011

Hey Jeff whilst you have the heads off and you are goofing off ...:) Determined exactly what type of heads are on your engine using the method below. This information will come in handy later on for tuning this bad boy...Also use a caliper measure the thickness of each head verify they were never shaved or at lease same thickness. This information will explain compression numbers after assembly and break in.
I am not sure if you have a build sheet, Its a good idea to keep one and record all prudent information..My re-builder give me the Deer in the headlights look when I asked for one...
I am posting from experience here. My "Old" power head ran like chit for a number of reasons, however when I purchase it the selling point was and I quote "great compression" 140 lbs across all cylinders. Wanna know why? The Bozo shave the heads down! How I know you ask? I compare measurements with my second engine. Ray Charles can see where I was mislead!
Measure the volume in each cylinder head. To do this, use a piece of plexiglass cut to fit in the cylinder head to cylinder mating area. Drill a 1/4" hole in the center of the plexiglass. Lightly grease the edge of the plexiglass and install in the head. (Spark plug have to be installed) with a syringe graduated in cc's fill the cylinder head chamber up with a light weight oil. Record the measurements. Repeat for other chambers. Record this information, average CC volume for your heads to should be very close to the numbers in your manual if not right on.

Am I too late with this? Its no big deal if you have the heads on you can do this later if needed. I sorry I just remember to post this ...
 

j_k_bisson

Lieutenant Junior Grade
Joined
Oct 6, 2010
Messages
1,082
Re: Update 03-03-2011

Re: Update 03-03-2011

Yep on both. I have installed my heads so doing that is out. I also have the ability to weld the old one if it was needed. I'll actually relook at it tonight. You gave me something to think about.

I talked with Faztbullet yesterday afternoon about the tilt tube. He does have one. I'm just waiting for him to send me an invoice then it's just waiting for delivery! Rather have a good one than the welded one.

These days I am just not having any luck with things from ebay. My lower mounts where delivered to the wrong address and sent back to the seller. So another week waiting for them to be resent to the right address. USPS is not my favorite establishment these days. Two screw ups in one week.

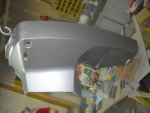
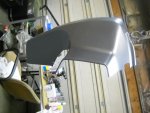
Last night I sanded and painted the lower cowls. They came out ok but I could have done another prime and sand to be perfect. I can still see very faint dimple lines where a few of the chips where. But hell this is a 24 year old motor. Its not going to be absolutely cosmetically perfect. Its a fishing boat. There will be more sheep head (fresh water drum) bouncing off that hood and side panels that I care to count in the coming years! Heres some pics of them after paint.

DSCN1553-1.jpg

DSCN1554-1.jpg

Also painted up the handles. They came out really nice. Tonight some thing to assemble back together. Here is a pic of how they came out.

DSCN1555-1.jpg

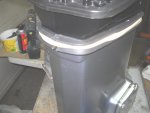
Also started gluing the new seal around the mid housing. The new one I got from the dealer had a retaining pin on it to make the loop. I glue only the pin hole. Where does the pin go? At the front or rear? I want to glue the whole seal to the mid section so it does not fall off again. I found a huge elastic to hold it in place when I glue it. So this should help with the gluing process. Here is a pic of the seal on the housing.

DSCN1556-1.jpg

This weekend is the hood and oil changes. Did not get to the oil changes last night. First thing for tonight though. The hood should have the primer done and the silver painted by Monday. Still need to pick up the blue paint for the hood from the dealer. Maybe on the way home from work tonight.
 

j_k_bisson

Lieutenant Junior Grade
Joined
Oct 6, 2010
Messages
1,082
Update 03-05-2011

Update 03-05-2011

Well finished assembling the side panels and quickly installed them on the mid section. My wife wants to use it now as a bird bath. JUst joking, but it does look like one. Maybe in a man's yard. lol Not a woman's. Here take a look.

DSCN1559-1.jpg

DSCN1560-1.jpg

It does look like the perfect bird bath! :eek:

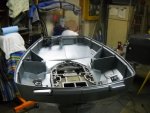
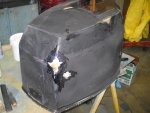
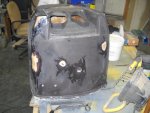
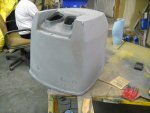
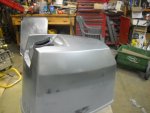
I started sanding and fixing the hood after all my other work was done last night. (oil changes) I was able to get the major areas sanded.This hood has like five layers of paint on it. Its helping with sanding out all the nicks. WIll reduce the amount of primer I will need. Then I put the fist coat of fiberglass repairs on the damaged/cracked areas. Here are a couple of pics where the night ended. This afternoon some more sanding and grinding and another coat of fiberglass.

Great! Banana man suits coming out all day!!!!!

DSCN1557-1.jpg

DSCN1558-1.jpg

The hood/cover was in pretty rough shape. Will need to replace the rubber seal around the bottom and the three rubber bushings at the locks. Also need to clean up the inside fiberglass. This hood was reworked before. It had the appliuques on the sides, front, and back Someone used the fiberglass bond to seal up the old holes. Need to seal up the old holes from the inside now. Water was getting and causing some cracking in the old reapirs. This things will be good as new when I am done with it. Might take 3-4 coats of mole hair fiberglass to get it right though. Seeing I am waiting on parts and money I might as well do it right. I'll post the progress as it goes.
 

j_k_bisson

Lieutenant Junior Grade
Joined
Oct 6, 2010
Messages
1,082
Update 03-05-2011 Afternoon

Update 03-05-2011 Afternoon

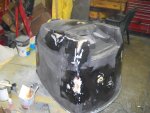
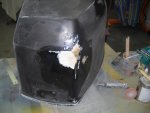
Just finished grinding the fiberglass and reapplying another coat of filler/mole hair resin to fill the bubble holes. Also found another area that needed fixing. That got a coat of resin then 1.5oz choped mat. Coming along nicely though. I hope for tonight to get the first coat of primer on it. It's unsure right now if it will happen. Might have to run into town and buy some spot putty to get there. Might wait till after the first coat of primer and then go the spot putty route. Here are th pics.

DSCN1561-1.jpg

DSCN1562-1.jpg

Just waiting for the resin to kick. Might be able to give it another round of sanding and filling this afternoon before the kids get up from their nap. We'll see.
 

j_k_bisson

Lieutenant Junior Grade
Joined
Oct 6, 2010
Messages
1,082
Update 03-06-2011

Update 03-06-2011

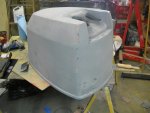
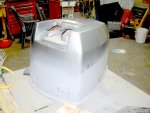
Was able to get that coat of primer on it after all. Also a coat of spot putty. Just need to finish sanding with the 120 grit nocking everything flat around the rivets to get rid of the "layered paint" look in the primer. Then sand the whole hood with 400grit. Here is how far I got last night. The pics are for the people that are addicted to them.

DSCN1563-1.jpg

DSCN1565-1.jpg

DSCN1566-1.jpg

I hope to finish the sanding this afternoon. Maybe a coat of the silver blue on top by the end of the day today. Maybe not. Depends on weather I need another coat of spot putty.

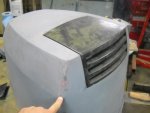
Have on question about paint colors of the hood. The vent cover piece that is in the silver colour on top. What colour is it. Silver, dark blue, or black? In the picture that I have posted, my finger is pointing to the colour switch line where the silver changes to dark blue. So on the original paint scheme what was the dark grey pieces color? Here is the pic.

DSCN1567-1.jpg
 

j_k_bisson

Lieutenant Junior Grade
Joined
Oct 6, 2010
Messages
1,082
Update 03-07-2011

Update 03-07-2011

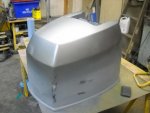
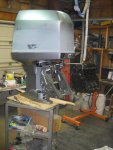
Was able to get out to the garage last night. Also was able to get a coat of silver-blue on the top. Did not come out too bad. Could have used a bit more sanding with 600 grit. A few sanding scratchs showed through. But again this is only a fishing motor as they say, so it's good enough. Here are some pics.

DSCN1569-1.jpg

DSCN1568-1.jpg

DSCN1570-1.jpg

Tonight I'll give it another light sanding for where the dark blue goes. Try to get some of the scratches out with 600 like I said. Then spray the dark blue.

Need to stop by the local dealer after work again and order the seal for around the bottom and a few other odd little parts. I love these Johnson/Rudes. You can order pretty much any part you need! Most are in stock at my dealer.

Also need to get over to my buddies house to make up some graphics for the hood. Instead of buying and using the factory appliques/decals. Don't have any, none came with the motor. I'm going to get them made out of vinyl from my buddy. He has a sign buisness and does this sort of thing everyday. It's just the colour thing we have a problem with. Do not know what the graphic colours are for the stripes around the base of the hood. There is silver and very dark blue. Anyone know actual color names for these two colors?

Also order the tilt tube from Faztbullet yesterday. My hope is for that to come in later this week. Also recheck the tracking number for those lower motor mounts. They should be in today/tomorrow. So things are deffinately coming together. Just need the wrench to come in to rebuild the trim pumps then I'm set.

Looking to the next big thing I need to plan for. I need to buy a 5" extension kit for this motor. Right now its 20" and I need 25". Anyone every buy a Bay Mfg kit? What are their thoughts with them. Is there any other extention kits on the market? Which are the best?
 

j_k_bisson

Lieutenant Junior Grade
Joined
Oct 6, 2010
Messages
1,082
Re: Update 03-07-2011

Re: Update 03-07-2011

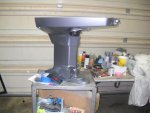
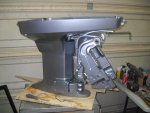
Seeing the parts are are on back order from the dealer, I had to forgo the painting of the dark blue last night. But I did recieve my lower motor mounts. So I was able to semi assemble the mid section. Still waiting on the Gland nut wrench and tilt tube. Also still need to get into the trim system rebuild. Hopefully this weekend. Here is a pic.

DSCN1572-1.jpg

DSCN1575-1.jpg

So I started in on the rear vent piece for the hood. After sanding ti down with 220 grit, I had a fiberglass repair to do on it. The bottom vent was broken. So tonight I will have to grind and spot putty the area. Here is how this came out.

DSCN1573-1.jpg

I guess no buddy knows the names of the silver color in the graghics.

Also I'll ask again. Anyone know of any other aftermarket extension kit maker for these engines? I'm looking for a 5" extension kit like bay mfg.

Anyone ever use a bay mfg extention kit. Any problems with it?
 

nymack66

Petty Officer 1st Class
Joined
Aug 5, 2009
Messages
356
Re: Update 03-07-2011

Re: Update 03-07-2011

I not sure if you saw this web site for an extension kits ...This is a costly route IMHO you may want to keep an eye for a cheap mid and swap on later on ... http://www.marineparts.com/partspages/Accessories/acc8.htm

Cowling is coming along nicely..I did absolutely nothing on my project this weekend ...I blame Netflex...
 

mark1961

Ensign
Joined
Apr 30, 2007
Messages
940
Re: Update 03-06-2011

Re: Update 03-06-2011

Have on question about paint colors of the hood. The vent cover piece that is in the silver colour on top. What colour is it. Silver, dark blue, or black? In the picture that I have posted, my finger is pointing to the colour switch line where the silver changes to dark blue. So on the original paint scheme what was the dark grey pieces color? Here is the pic.

View attachment 84724

Not much out there for the 87 but this one of an 86 might answer your question......

http://rides.webshots.com/photo/2187998850101354590IJaoGn

Also, the 88 appeared very similar to the 86 so i'd imagine the 87 was much the same.
 

j_k_bisson

Lieutenant Junior Grade
Joined
Oct 6, 2010
Messages
1,082
Re: Update 03-07-2011

Re: Update 03-07-2011

I not sure if you saw this web site for an extension kits ...This is a costly route IMHO you may want to keep an eye for a cheap mid and swap on later on ... http://www.marineparts.com/partspages/Accessories/acc8.htm

Cowling is coming along nicely..I did absolutely nothing on my project this weekend ...I blame Netflex...

I occasionally get sucked into TV as well. That is why I put an old tube TV in the garage. That way I can still get some stuff done. The TV is one my parent where getting rid of when the converted to Digital. So I really don't care how much over spray is on it.

Those units on that site are the Bay Mfg that I was talking about. I have been looking in to a long shaft mid. The problem is I have this one done now with a investment in parts. So I'm trying to save it. Hoping there is some other source for the extension kits.
 
Top