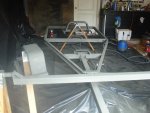
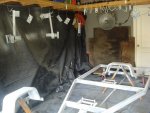
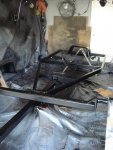
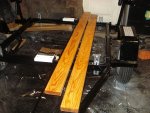
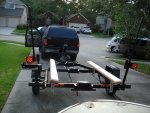
1984 Starcraft 16ft Glutton for Punishment [Splashed July 2019]

Status
Not open for further replies.

Woodonglass

Supreme Mariner
Joined
Dec 29, 2009
Messages
25,928
Nope, No Hardener needed with primer. It needs to be the way it is to enhance adhesion of the paint.
 

SHSU

Lieutenant Junior+Starmada Splash Of The Year 2019
Joined
Mar 8, 2017
Messages
1,744
Nope, No Hardener needed with primer. It needs to be the way it is to enhance adhesion of the paint.

Much appreciated!!!! Will start tomorrow morning and hopefully be done by tomorrow night!!!!
 

Watermann

Starmada Splash of the Year 2014
Joined
Jan 12, 2013
Messages
13,798
Oh boy something to look forward to, I know somebody that will have a restless night sleep thinking of the day to come. :heh:
 

SHSU

Lieutenant Junior+Starmada Splash Of The Year 2019
Joined
Mar 8, 2017
Messages
1,744
Spent all day Saturday spraying. Following Wood's and WM advise I went and got SE primer and the Rustoleum Clean Metal Primer. Took me 4 cans of SE and a Quart of Clean Metal Primer. Then I finished it off with the Tractor Paint and Hardener. Will start reassembly today.

SE Primer
DSC03410.JPG


First coat of Clean Metal Primer
DSC03412.JPG

Paint on
DSC03413.JPG

Still need to clean the tires and rims. Remove the oil from them and paint them up as well. Will follow same schedule as with the trailer.

Question on Tires, does it really matter between R and D rated tires?
 

Watermann

Starmada Splash of the Year 2014
Joined
Jan 12, 2013
Messages
13,798
I've used both P and ST tires on my tin boat trailers. The ST trailer tires are cheaper than passenger rated. Not sure I've heard of R and D ratings.
 

Watermann

Starmada Splash of the Year 2014
Joined
Jan 12, 2013
Messages
13,798
Oh yeah looks good to me, trailers are a good way to practice skills and set the gun up right too.
 

SHSU

Lieutenant Junior+Starmada Splash Of The Year 2019
Joined
Mar 8, 2017
Messages
1,744
Oh yeah looks good to me, trailers are a good way to practice skills and set the gun up right too.


Thanks WM. Not the first time I have sprayed, but sure as hell a lot quicker and better finish then with a brush.

As for the tires, google says the difference between D and R is with how the cord runs within the tire. D apparently runs hotter then R because of the design. D's don't last as long because of the heat. Will have to decide if its worth the effort to clean all the old grease (A lot of old grease) from the hubs and paint or just order some new ones. Leaning towards buying some new ones and cleaning up the least messed up one to use as a spare.
 

Watermann

Starmada Splash of the Year 2014
Joined
Jan 12, 2013
Messages
13,798
Yeah and there's always a reason for them to be greasy too, they need new seals and maybe bearing because of the leaking.
 

SHSU

Lieutenant Junior+Starmada Splash Of The Year 2019
Joined
Mar 8, 2017
Messages
1,744
Yeah and there's always a reason for them to be greasy too, they need new seals and maybe bearing because of the leaking.


Yep, I figured I would replace them while I was replacing/rebuilding everything.
 

SHSU

Lieutenant Junior+Starmada Splash Of The Year 2019
Joined
Mar 8, 2017
Messages
1,744
So starting to think ahead and want to have a permanent fuel tank. Not a whole lot of space on this boat so want to maximize my space best I can. I have spent hours upon hours looking at different fuel tanks and for the space I have under the deck looks like I will have to go custom. Question is, does anyone have any experience/suggestions with getting a custom tank made? Also, has anyone had experience with this Flea Bay seller: http://www.ebay.com/itm/CUSTOM-ALUM...ash=item41b6852edd:g:mvIAAOSwPCVX7EaA&vxp=mtr ? I would have preferred a polymer, but can't seem to find any that would fit under my deck.

Thanks in advance
 

Watermann

Starmada Splash of the Year 2014
Joined
Jan 12, 2013
Messages
13,798

SHSU

Lieutenant Junior+Starmada Splash Of The Year 2019
Joined
Mar 8, 2017
Messages
1,744
No idea about that seller but I will offer my advice on having a new tank built. Spare no expense to have it done right by people who make fuel tanks. Moeller Marine is who built my new tank. It's not cheap but the process is pretty easy, just make sure you check everything over 100% before committing to the build.

http://moellermarine.com/builders-technical-resources/custom-tank-design-2/quote-form/


Thanks WM, I will have to ask the Admiral to do some math to figure out what measurements we will need to fit into the area we want. Figuring a 12-16 gallon tank.

Couple Questions:

Was it your build or someone else's that had the the tank made by Moeller, but the fill neck was to tall even though drawings show it was supposed to be shorter?

Did you get a sender through them as well?

If you don't mind sharing rough price per gallon (I understand it will be very rough, but will give me a better idea at ball park)
 

Watermann

Starmada Splash of the Year 2014
Joined
Jan 12, 2013
Messages
13,798
Yeah that was my tank and the neck issue was my fault not Moellers. 700 with shipping for 25 gal tank and it's all set up with sender also coated with coal tar epoxy for durability.
 

SHSU

Lieutenant Junior+Starmada Splash Of The Year 2019
Joined
Mar 8, 2017
Messages
1,744
Yeah that was my tank and the neck issue was my fault not Moellers. 700 with shipping for 25 gal tank and it's all set up with sender also coated with coal tar epoxy for durability.


Thanks, that gives me a fare idea on what it will cost me to have one built. When you say it was your fault do you mind clarifying? Also, what type of sender was it? They offer mechanical and then some vertical options.
 

Watermann

Starmada Splash of the Year 2014
Joined
Jan 12, 2013
Messages
13,798
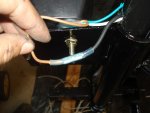
The filler was spec'd out on the diagram I signed off on with it's total height and I approved it rather than tell them to lower it. I missed it.
 

SHSU

Lieutenant Junior+Starmada Splash Of The Year 2019
Joined
Mar 8, 2017
Messages
1,744
The filler was spec'd out on the diagram I signed off on with it's total height and I approved it rather than tell them to lower it. I missed it.

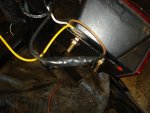
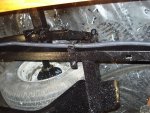
Ah, thanks for that. Saw you found a good work around. Will have to keep that in mind when/if I decide to go that route. Will need to revisit your thread again to see your plans

Thanks again
 

SHSU

Lieutenant Junior+Starmada Splash Of The Year 2019
Joined
Mar 8, 2017
Messages
1,744
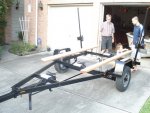
So it has been a long couple a weeks since I was able to post. Got the trailer put together again and wiring done. Enough to go and get the boat. Puts lots of pics since I neglected to post them earlier. So see below pics:

Butt connectors where possible and all wiring done with marine grade wiring for corrosion protection

DSC03419.JPG

Connection with butt connector, a layer of liquid electrical tape, a layer of standard electrical tape, and I topped it off with an additional layer of liquid tape on top of that.

DSC03422.JPG

All wiring covered to protect it.

DSC03433.JPG


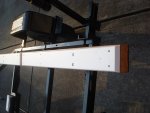
Bunks being measured for installment. I used Fir with starboard. The fir I protected with Tung oil. It will allow the wood to naturally expand and contract without cracking the protective layer and is easy to apply. You can also see the vinyl that i used to replace the 2x4 keel supports. Will see how well it lasts or if i will have to replace in time.

DSC03423.JPG

Close up of vinyl keel support. Rounded all the corners with my router
DSC03425.JPG

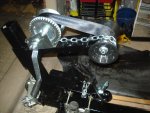
New winch and safety chain. Will have to shorten the safety chain a little, but better then what was there before
DSC03426.JPG

Fulton Hinge installed. Painted edges black to help prevent corrosion and wiring ran through to box
DSC03427.JPG

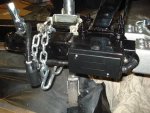
Other side of tongue with wiring box to new 7 pin connection and safety chains

DSC03428.JPG

Added some steps to each wheel well
DSC03431.JPGDSC03432.JPG


Before When Dropping Boat Off
DSC03363.JPG

After

DSC03435.JPG

New lights
DSC03437.JPG

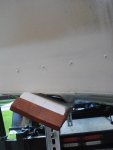
Close up of bunks installed. Edges routed and end cut at 45 degrees for retrieval

DSC03442.JPG


So got all this done, and was going well until...... (See next post)
 

SHSU

Lieutenant Junior+Starmada Splash Of The Year 2019
Joined
Mar 8, 2017
Messages
1,744
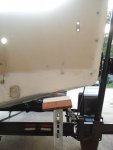
Measured everything out and put boat on trailer to find......
DSC03445.JPG
DSC03446.JPG


I forgot to account for the new width of the 2x6 vs the 2x4 on edge that was previously used.

:grumpy::censored::frusty:

So any easy fix, but will probably mess with all my wiring and lights....

Also see original owners placement for side brackets. DSC03447.JPG


With that, after talking with my dad, we have a couple questions for the experts:

Which direction should I move the bunks? On the keel side of these chines or outside of them?
Do I need to tighten up the side brackets or are they fine where they are?

As always, thanks in advance
 

redneck joe

Supreme Mariner
Joined
Mar 18, 2009
Messages
11,067
side brackets leave alone. bunks I would go outside - thats what I did on mine. I feel the wider support gives it more stability, especially on a bigger, top heavy boat like mine. You can prob go either way
 

SHSU

Lieutenant Junior+Starmada Splash Of The Year 2019
Joined
Mar 8, 2017
Messages
1,744
side brackets leave alone. bunks I would go outside - thats what I did on mine. I feel the wider support gives it more stability, especially on a bigger, top heavy boat like mine. You can prob go either way


Thanks RJ. Wasn't sure if the bunks also provided some weight support for the boat. That will make it easier to adjust
 
Status
Not open for further replies.
Top