1984 Starcraft 16ft Glutton for Punishment [Splashed July 2019]

Status
Not open for further replies.

Watermann

Starmada Splash of the Year 2014
Joined
Jan 12, 2013
Messages
13,798
Ah ok, I think if you need a spacer to get that mount away from the hull then something like that or a composite material would work for a kicker mount, not near as much force applied. I should read all of the post before I reply. :lol:
 

oldrem

Commander
Joined
Nov 7, 2013
Messages
2,002
Going to tag along on this one. Not too different from what I'll be doing with my Sylvan when winter breaks.
 

jbcurt00

Moderator
Staff member
Joined
Oct 25, 2011
Messages
25,056
.....I ask, because the Kicker Bracket comes with Carriage bolt that extend past the bracket and would tear into the skin of the hull when tightened down.

The bracket maker expected buyers to either pad out the transom or damage their boat?

not owning any kicker brackets, I'm having a hard time visualizing the problem... pix?

No chance shorter carraige bolts would prevent that?
 

SHSU

Lieutenant Junior+Starmada Splash Of The Year 2019
Joined
Mar 8, 2017
Messages
1,744
Going to tag along on this one. Not too different from what I'll be doing with my Sylvan when winter breaks.

Welcome aboard! Hope you learn from my mistakes LOL :watermelon:

The bracket maker expected buyers to either pad out the transom or damage their boat?

not owning any kicker brackets, I'm having a hard time visualizing the problem... pix?

No chance shorter carraige bolts would prevent that?

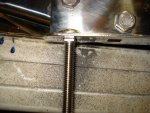
I agree I thought it was weird too. I will take pictures when I get home, but for quick reference the square shank extends about an 1/8[SUP]th[/SUP] past the bracket and is slightly larger than the 3/8[SUP]th[/SUP] hole needed. I didn’t force the issue when temporarily installing, don’t know if its normal for the square shank to slightly enlarge/deform the hole. That’s why I mentioned using a piece of rubber or UHMW as a backer to prevent damage/be a sacrificial piece
 

Attachments

  • photo284028.jpg
    photo284028.jpg
    7 KB · Views: 1

jbcurt00

Moderator
Staff member
Joined
Oct 25, 2011
Messages
25,056
If the square shoulder is TOO big to fit the bracket hole AND sticks out past the bracket, I'd guess the carraige bolt is the wrong size.... Or it doesnt need to be a domed 'flush' carraige bolt.

It might be too late now to downsize the bolt if you already drilled the hull, but swapping a 3/8ths carraige for a typical 3/8ths thru bolt shouldnt be a problem..... or whatever size bolt you used....
 

SHSU

Lieutenant Junior+Starmada Splash Of The Year 2019
Joined
Mar 8, 2017
Messages
1,744
Sorry, didn't explain well. The carriage bolt fits the bracket fine, but the square shank extends out the back about an 1/8th of an inch. That is what would dig into the skin of the boat. I know pictures are worth a 1000 words so will make sure to post them up once I have them.

I hadn't thought about changing the bolts. That may be a better option then the UHMW sheet spacer.
 

jbcurt00

Moderator
Staff member
Joined
Oct 25, 2011
Messages
25,056
The square shoulder of the bolts you have now fit the square holes in the bracket really well, IE perfect square peg~square hole?
 

SHSU

Lieutenant Junior+Starmada Splash Of The Year 2019
Joined
Mar 8, 2017
Messages
1,744
Here are the pictures as promised.

Photo 1: shows the carriage bolt fitting through the bracket and then the square shank/shoulder extending past the bracket.
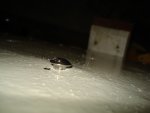
Photo 2: carriage bolt in the 3/8th hole. You can see the square shank/shoulders are pushing into the edges. Don't know if I should accept this or use the backer plate.

Hope this clarifies the questions. Appreciate ya'lls responses
 

Attachments

  • photo284060.jpg
    photo284060.jpg
    1 MB · Views: 6
  • photo284061.jpg
    photo284061.jpg
    600.5 KB · Views: 6

66Holiday924

Chief Petty Officer
Joined
Aug 21, 2017
Messages
584
I don't think it is the right bolt. If you know the maker of the bracket you can call them, send them pictures, and figure out what the right bolt is. Or you can find a washer to put between the head of the bolt and the bracket to make the square shoulder flush. If you want it to be super fancy have a fabricator make you a spacer piece. That engine puts a lot of stress on the bracket which transfers the stress to the transom. I would again be concerned about cracking/harming the paint. I think I would want some kind of non metal barrier between the bracket and the skin of the boat (thin piece of starboard maybe), but I don't like metal on metal like that and we've already had that conversation. lol.
 
Last edited:

Watermann

Starmada Splash of the Year 2014
Joined
Jan 12, 2013
Messages
13,798
Some options you have and one of them isn't to crank that square shank into the transom AL round hole.

In order of easiest to pita..

Washer(s) under bolt head to shim.
New SS carriage bolts with shorter square shank (if there is such a thing)
Plate spacer.
Mark shoulder of bolts and grind them all down to size.
 

66Holiday924

Chief Petty Officer
Joined
Aug 21, 2017
Messages
584
"Photo 2: carriage bolt in the 3/8th hole. You can see the square shank/shoulders are pushing into the edges. Don't know if I should accept this or use the backer plate."

You should not accept it with the carriage bolts putting a space between the bracket and the skin of your boat, it will damage the aluminum skin, and any damage to your boat for a kicker motor bracket is unacceptable. It cannot be designed that way. Something is missing. There might be another part to the bracket that you don't have. If you have the model and everything, look up the specific installation instructions, or get them from the maker.
 

SHSU

Lieutenant Junior+Starmada Splash Of The Year 2019
Joined
Mar 8, 2017
Messages
1,744
Thanks Guys,

I agree that it is designed wrong, but for how cheap I got it for, I can work with it. I attached the instructions provided by the manufacture. In instruction paragraph Labeled 3, they mention a backing plate for transoms under 2 inches, but I am guessing they are referring to the inside. Looking at other bolts, I don't see any option for a short square shank/shoulder. So I will go back with the original idea of purchasing a sheet of 1/4 UHMW. Use that as a sacrificial piece and use lots of 5200 around the holes to seal it.
 

Attachments

  • 55-0010_Install_pub_hansen.pdf
    572.9 KB · Views: 1

SHSU

Lieutenant Junior+Starmada Splash Of The Year 2019
Joined
Mar 8, 2017
Messages
1,744
Got some work done this weekend.

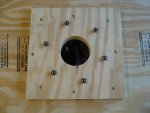
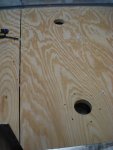
Photo 1: Cut out additional backing to be installed under floor for the chairs. You can see the Taper Lock base on top for size. I cut these to be 12 1/2 x 12 1/2.

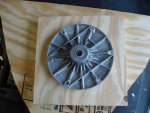
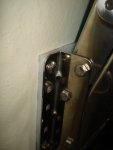
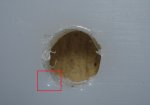
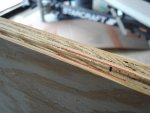
Photo 2/3/4: UHMW cut to size and installed behind kicker bracket. You can see it does the job. Included a photo of the bolt hole after the carriage bolt was pulled tight. Hard to see the damage, but it is there. Also included photo of Transom damage from where the washer from the bolt dug into it. Going to have to have a backing plate for the inside made up as well....

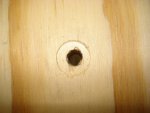
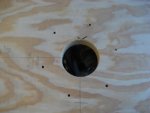
Photo 5/6/7: Installed the backing plate to the floor with Titebond 3 and some screws. Let that dry over night, then cut the 4 inch hole for the Taper Lock Base to fit thru. Drilled all of the holes at 1/4 and then from the bottom upped it to 3/8 for the t nut to slide into the hole. Will install them with some Titebond 3 after a couple coats of epoxy. Last picture is of the floor in the boat.

Photo 8/9: I cut down the floor to allow space between sheets for the fold over of Nautolex and then cut a groove for a piece of Transition strip to latch onto.

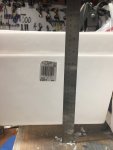
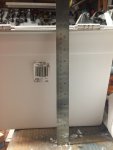
Photo 10/11: Got in my Tempress hatch liners for my 13 x 17 hatches. The website says they should be 12 inches deep; however, when I measured them, I noticed it was only 10 1/2 without the hatch and 11 with the hatch. I sent an e-mail off to Tempress asking them if I got defective liners or the website needs to be updated... Will let ya'll know what they say.

Next steps: Found a company that makes a 3 inch fuel sender. It should be in sometime this week and I can have my welder start fabricating a tank. Need the admiral to finish up the CAD for it. Will post once I get that completed.
 

Attachments

  • photo284202.jpg
    photo284202.jpg
    1.2 MB · Views: 7
  • photo284203.jpg
    photo284203.jpg
    788.1 KB · Views: 6
  • photo284204.jpg
    photo284204.jpg
    180.2 KB · Views: 6
  • photo284205.jpg
    photo284205.jpg
    1 MB · Views: 6
  • photo284206.jpg
    photo284206.jpg
    667.9 KB · Views: 6
  • photo284207.jpg
    photo284207.jpg
    953.8 KB · Views: 6
  • photo284208.jpg
    photo284208.jpg
    903.9 KB · Views: 7
  • photo284209.jpg
    photo284209.jpg
    1.3 MB · Views: 7
  • photo284210.jpg
    photo284210.jpg
    955.3 KB · Views: 6
  • photo284211.jpg
    photo284211.jpg
    1.1 MB · Views: 7

Watermann

Starmada Splash of the Year 2014
Joined
Jan 12, 2013
Messages
13,798
Looking good, with those backers on your seating should be plenty stout.
 

nrf414

Chief Petty Officer
Joined
Feb 16, 2008
Messages
573
This documentation is paramount for my build. Thanks for being thorough and posting solid pictures of your work. While I am a bit behind you it saves me a lot of head scratching 👍
 

SHSU

Lieutenant Junior+Starmada Splash Of The Year 2019
Joined
Mar 8, 2017
Messages
1,744
Thanks guys for the vote of confidence


This documentation is paramount for my build. Thanks for being thorough and posting solid pictures of your work. While I am a bit behind you it saves me a lot of head scratching 👍

Glad I can be some help to someone else. Will see how long I stay in front of you, with how quickly you have stripped and started on your boat, you will have her flipped and passed me in no time!! LOL
 

nrf414

Chief Petty Officer
Joined
Feb 16, 2008
Messages
573
Thanks guys for the vote of confidence


Glad I can be some help to someone else. Will see how long I stay in front of you, with how quickly you have stripped and started on your boat, you will have her flipped and passed me in no time!! LOL

Well I let it sit for about 2 months. Mostly during hunting season and holidays and I wasn't sure how I wanted to heat my garage. Once hunting season ended and January came now Im on a warpath to get finished and start ripping some smallies. Garage is about 65 right now and outside is 27° this makes working A LOT easier.
 

SHSU

Lieutenant Junior+Starmada Splash Of The Year 2019
Joined
Mar 8, 2017
Messages
1,744
Admiral was kind enough to CAD up some drawings for the splashwell and fuel tank. Off to go see my welder to give him final design.
 

Attachments

  • fuel tank.pdf
    153.9 KB · Views: 3
  • splash well.pdf
    80 KB · Views: 3

Decker83

Commander
Joined
Apr 5, 2011
Messages
2,593
The Cad drawings look good.. You should add some type of lip around the openings for the top of the storage area..
 

66Holiday924

Chief Petty Officer
Joined
Aug 21, 2017
Messages
584
The CAD drawings are great. It's awesome to have the admiral joining the fun!

I saw a build somewhere (can't remember where), the guy custom built his tank and he added dampers inside the tank. I thought it was a really good idea. They serve to stop the fuel from sloshing around throwing weight everywhere. All that fuel sloshing front to back or side to side could impact handling a lot.
 
Status
Not open for further replies.
Top