1982 Starcraft Center Console 18' Rebuild

Mikesta

Petty Officer 3rd Class
Joined
Mar 15, 2018
Messages
86
I think for as many rivets as Mikesta has to buck on this, he should "treat himself" to a rivet gun :lol:

They actually come in really handy for alot of projects; I'm always reaching for that thing from body work, punching out seized roll pins, chiseling, descaling rust, etc. Keep it oiled and it will last forever.

I agree...I deserve a nice rivet gun. I'm also into all kinds of projects so it would probably be more than worth it.....i'll be looking them up the rest of the night
 

Mikesta

Petty Officer 3rd Class
Joined
Mar 15, 2018
Messages
86
For the keel resting on the cross member, are you going to raise the bunk height to get it off there or just plan on using the roller to push it off?

I know you said the the 4x4 made it sit to high, but the extra 3 1/2 inches would make it so you didn't need a roller.

As for the Rivets, I when through 2 (Harbor Freight and Amazon special) before I finally spent the money for a true rivet gun (Used Airplane rivet gun). Lets just say it made a world of difference. I had to turn down the PSI to under 40 so as not to damage the hull/rivets. When we got it dialed in, Admiral and I could do a single rivet with a single 1/2 second to second burst depending on thickness. Bucking bar also makes a difference, started with a small 2 lb and went to a 10 lb. Did we do it right, probably not, but it worked for us.

SHSU

What kind of gun do you have? After doing some research I’m not sure what kind of gun or what kind of power. I’m thinking a 3x or 4x should be enough for what I need but not sure
 

classiccat

"Captain" + Starmada Splash Of The Year 2020
Joined
Dec 20, 2010
Messages
3,410
What kind of gun do you have? After doing some research I’m not sure what kind of gun or what kind of power. I’m thinking a 3x or 4x should be enough for what I need but not sure

I have an old central pneumatic 3x. More than enough cowbell! :lol:
 

SHSU

Lieutenant Junior+Starmada Splash Of The Year 2019
Joined
Mar 8, 2017
Messages
1,679
Central pneumatic 4x. 3x should be more then enough. I got the 4x because I knew I was going to be doing a few 1/4 rivets.

Pretty sure I got it from yardstore, but can't find my order to confirm...

SHSU
 

Mikesta

Petty Officer 3rd Class
Joined
Mar 15, 2018
Messages
86
I broke down and bought a real rivet gun. I figured for the amount of rivets I have to do it will probably pay for it self in no time. Besides this probably won’t be the last project boat so it will probably see use again after this boat.

I have a question about paint for you guys, have any of you ever used the paint from tractor supply? I think the name brand of it is majic. I’m pretty sure it’s the exact same as rustoleum pro and significantly cheaper. I’m no where near painting the hull but I’ve been plucking along on the interior side panels, console and splash well. I’ve got them sanded and primed, just deciding on what brand and color paint I want to use.
 

BWR1953

Admiral
Joined
Jan 23, 2009
Messages
6,052
...I have a question about paint for you guys, have any of you ever used the paint from tractor supply? I think the name brand of it is majic. I’m pretty sure it’s the exact same as rustoleum pro and significantly cheaper. I’m no where near painting the hull but I’ve been plucking along on the interior side panels, console and splash well. I’ve got them sanded and primed, just deciding on what brand and color paint I want to use.

If you use this paint, it likely won't perform well unless you use the hardener. And the hardener requires serious Personal Protection Equipment. Namely Positive Pressure face mask, etc. That kind of equipment is pricey. A normal respirator isn't enough. I wasn't willing to shell out $1500 for proper safety gear. :eek:

Some guys use the paint without proper protection. Not me. I used it without adding the hardener. Other guys have done the same thing. And it's pretty soft compared to other solutions. I won't use it again. :cool:

Check this link for the dangers. Do some serious reading and make your choice.

https://www.grainger.com/know-how/h...s/respiratory-protection/kh-233-isocyanate-qt


Correct PPE:
Isocyanate PPE.jpg
 

Mikesta

Petty Officer 3rd Class
Joined
Mar 15, 2018
Messages
86

Mikesta

Petty Officer 3rd Class
Joined
Mar 15, 2018
Messages
86
If you use this paint, it likely won't perform well unless you use the hardener. And the hardener requires serious Personal Protection Equipment. Namely Positive Pressure face mask, etc. That kind of equipment is pricey. A normal respirator isn't enough. I wasn't willing to shell out $1500 for proper safety gear. :eek:

Some guys use the paint without proper protection. Not me. I used it without adding the hardener. Other guys have done the same thing. And it's pretty soft compared to other solutions. I won't use it again. :cool:

Check this link for the dangers. Do some serious reading and make your choice.

https://www.grainger.com/know-how/h...s/respiratory-protection/kh-233-isocyanate-qt


Correct PPE:

I'll be rolling the paint so I don't think I will need that kind of protection. I appreciate the info though!
 

Mikesta

Petty Officer 3rd Class
Joined
Mar 15, 2018
Messages
86
So I got a few of the interior panels sanded down, self etch primed, regular primed and dried. I just stuck them in my basement for now and figured I'd wait until I have more ready to go before I buy the actual paint I'll be using.

My rivet gun came in today....she's mighty pretty, one problem though, the rivet sets I bought from Jaycee don't fit. the shank goes into the gun but the retainer spring doesn't fit around the business end of the sets. Kinda bummed because I was really looking forward to coming home from work and playing with it. I went to the website that I ordered the gun from and bought their rivets in the two sizes I need and also they sell a retainer spring with a bigger opening so I got that too. I couldn't believe how much cheaper the rivet sets and other rivet tools are compared to Jaycee. I'm pretty mad I bought the 2 rivet sets and a bucking bar from jaycee because I could have saved about half the price. Live and Learn I guess
 

SHSU

Lieutenant Junior+Starmada Splash Of The Year 2019
Joined
Mar 8, 2017
Messages
1,679
Glad you found the link as well for the paint. I used the paint mix for the trailer/outboard and it worked well. The only down side is you have to prep the paint, and then wait 30 minutes before applying. So sometimes it was a guess and prep to only find out I didn't have enough. In the end, my touch ups have been with rustoleum professional paint and the colors match. Not worth the hassle to do the mixing for small projects.

SHSU
 

Mikesta

Petty Officer 3rd Class
Joined
Mar 15, 2018
Messages
86
I'm curious how you guys would tackle this... The corrosion around the big hole is pretty deep...a lot deeper than I'd like to see. The smaller hole above it a little is where it corroded all the way through. The other side of the knee brace is perfectly fine with barely any pitting at all. For what ever reason just this one side and the tabs on the brace where it gets riveted to the bottom of the hull are the only spots affected by this. I'm not sure if I should just skim it with marinetex and call it a day or make a patch to put over the entire area.
knee brace.jpgI already plan on adding some angle to the tabs to beef them up even though there are no cracks on it, Structurally I think that its still plenty strong, I'm just not sure its 4 stroke power strong
 

Attachments

  • knee brace.jpg
    knee brace.jpg
    158.5 KB · Views: 2

SHSU

Lieutenant Junior+Starmada Splash Of The Year 2019
Joined
Mar 8, 2017
Messages
1,679
I might do a 4 x 4 (or appropriately sized) patch riveted over it and sealed with JB Weld or equivalent. Otherwise, I don't think I would do much more. Adding the additional angle iron you mentioned will help.

SHSU
 

Mikesta

Petty Officer 3rd Class
Joined
Mar 15, 2018
Messages
86
I might do a 4 x 4 (or appropriately sized) patch riveted over it and sealed with JB Weld or equivalent. Otherwise, I don't think I would do much more. Adding the additional angle iron you mentioned will help.

SHSU
How thick of aluminum would you use for patches? I might just skim over this with marine Tex but I’m trying to put together a game plan for fixing the gouge in the keel that I previously posted pics of. Thinking of just a patch with some closed end blind rivets buttered up with 5200. Then again I might just leave it because it won’t be visible
 

SHSU

Lieutenant Junior+Starmada Splash Of The Year 2019
Joined
Mar 8, 2017
Messages
1,679
Probably something between 16-11 gauge. If you got anything lying around from the tear down I would use the scrap.

SHSU
 

Mikesta

Petty Officer 3rd Class
Joined
Mar 15, 2018
Messages
86
Overtime at work has finally come to an end so I have my Saturdays back to work on the boat...for now. I haven't gotten much done to the boat itself because its outside and the weather hasn't been the greatest but I'm making good progress on the interior panels, the z bracket and the knee brace. I'll thanks myself when I start putting everything back together that all the interior panels have been painted and just need to be riveted in

I did finally finish getting the boat stripped down to the bare hull.....I removed the rub rail, the top of the gunnels and bracket that held it all together. I was skeptical about the removing the rub rail because it would be so expensive to replace but I just ran my heat gun ahead of where I was prying the rubber out of the channel and it came out very easily with no issues. HEAT is definitely the key, getting it back in the heat will be essential. I got the whole bow area and all the wood out too. It's crazy how flimsy these hulls are without anything in them tying everything together.

I've also ran into a bit of a snag, I went to start pounding new rivets in (been waiting on parts for the rivet gun to come in) and I decided to start at the transom where the two gunnels rivet into the transom skin and I found out that the heads of the brazier head rivets are to big and they touch a little bit causing them to not sit flat. I looked into modified brazier head rivets and the heads are just a smidge smaller which should fix this problem as they're just barely touching. All of the other seems appear to be spaced out enough to not need the modified brazier heads which is nice because I have about 2000 regular brazier heads that would be a shame to not need.

I have pics of the bare hull that I'm hoping will post without issue, Hopefully this new forum format didn't mess up how to post pics. The foam on top of the wood in the first picture was as hard as a rock and not soft at all which I thought was funny, When all of this goes back together I will put plywood here to make mounting a trolling motor easier
33.jpg

Here you can see the top of the gunnels and rub rail channel removed. I still have to finish cleaning up the inside with a wire wheel. I just bought an angle grinder today and a cup brush for it which should make it go way faster than using a battery powered drill that I had been using.
29.jpg

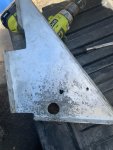
And Hear you can see some of the paint that didn't come off with the stripper and power washer. The other side has a bit more paint on it than this side. I'm still not sure if I want to take the time to remove it or just sand it flush and paint over it. I'm not really looking for perfect here
28.jpg
 

BWR1953

Admiral
Joined
Jan 23, 2009
Messages
6,052
When you get the hull to look like this, you'll be ready to paint. :cool:

Just sayin'. 😜
11.jpg
 

Watermann

Starmada Splash of the Year 2014
Joined
Jan 12, 2013
Messages
13,754
What I did for the remaining tough paint was to apply stripper and scrub with a 3M medium pad that with a handle and rinse. After that and the hull was bare, I ran a palm sander over the entire boat to get anything left over and to break the surface tension of the AL.

For the bow deck, on my SS I used 3/4" ply and added a piece of angle AL halfway between the bow point and where the header attaches. Once you have the ply in place you'll have to put the AL covering on and mark where it needs trimmed down since it was curved and when flat there will be some extra material.

y4mzqVsd3hKQkkidrPxEQnZ7nWTjW8f4unyO4lM8c8E7yqfFLk0Ev2sLeoBnRWdhKe4j5tBLEeg35QzCcDmJUNjcumywSXJ6x5QzBvLwiCbhqAKDnbe8rxYQ97VOAUaZ5MMBJE3S-mQAYnyz5le4R5RKu_5dA6VHk0umArQwcEDIXdSyoC3oYalCDnQUzIkcDVAMOLPeb_dT_YK-yKxOzWMsQ
 

Mikesta

Petty Officer 3rd Class
Joined
Mar 15, 2018
Messages
86
I got out this morning between rain showers and knocked some rivets out that I had drilled the heads out of yesterday.... Some one has definitely replaced some rivets before because I'm finding holes that were carelessly drilled and oblong and I'm also finding that some of the rivets on the seems have different sized heads than others which I can only assume didn't come from starcraft like that.

I'm curious what you guys would do to fix the oblonged holes because there are a bunch of them all next to each other and I'm not to sure that a new rivet would grab very well. Some of them I cant get the clecos to grab.
34.jpg

I'm thinking about getting some angle and just cutting a straight side off and putting it over the inside of the holes so that the rivets will have a new clean hole to grab onto. I'll just use a longer rivet obviously

It looks like big gouges in the picture around some of the holes but they're not gouges, they're just surface scratches
 

Watermann

Starmada Splash of the Year 2014
Joined
Jan 12, 2013
Messages
13,754
Yeah that's not right, looks like someone was using an old dull drill bit rather than a new pilot point bit that has never seen steel. The scratch looks to me like a drill bit walked across the AL.

I'd cut a strip of .080 as a backer with plenty of 5200 to seal up that mess and give the new solids something to hang onto. I made up a couple of angle pieces into brackets that I riveted to the side of the hull and bolted it to the transom as the V5 didn't have them so you could do something like that too while your at it, couldn't see any on your boat. The only other option are AL washers on each of the solids going in the oblong holes but holding them tight against the AL would be tough when setting.

y4mMIn-xZHIWXtpQM7Xg13Ls38f3OLAHGmg8q_ibCr9G3gHpxQbY5qk4gErFJ-GxZFoa0K0V-o1XfmW_neS-NpFrYtjaDgFeohhBt7kU_zv8oEdD5v3I-xFZ5cI6wo1Jyx2mXAMAktweS4h20OVgmrtBYQe6KLx5vH-xtA5FX02abwEo_4N5T9vDZybUBeg1uwZuRAUXYIOL7bwrFREWKeFbQ
 
Top