1981 Starcraft Super Sport 180 - Gonna try a Restore

Brackett221

Petty Officer 3rd Class
Joined
May 27, 2015
Messages
75
Thanks for posting the pic. of the plywood with spar. I've always been a epoxy resin fan, but the Spar keeps drawing me to the "Dark Side"!! That wood looks like it never left the shop corner!!
 

Candutch

Chief Petty Officer
Joined
May 8, 2015
Messages
637
Hey no problem. That's just 1 of 3 that I used to block dog access to certain parts of the yard and they all look the same, not a sign of weather, fading or rot. For full disclosure though there are 4 to 6 coats per side. Cant quite remember how many but I know it was a lot. The first 2 were very thinned out so the wood could soak it up easily, like 50/50.
 

Candutch

Chief Petty Officer
Joined
May 8, 2015
Messages
637
50% spar and 50% mineral spirits?

It was either mineral spirits or paint thinner, I can't remember which. One of the hazards of getting older I guess. I'll see if I have the can in the garage tomorrow, I'm sure I read on there what to thin it with.
 

budski

Lieutenant Commander
Joined
Sep 12, 2012
Messages
1,845
Don't know if it makes any difference but I used 1 part spar varnish, 1 part boiled linseed oil, and 2 parts mineral spirits on the first coat seems to work good second coat straight spar, got that formula off a thread here on I boats can't remember whose thread it was, hope this helps.
 

jbcurt00

Moderator
Staff member
Joined
Oct 25, 2011
Messages
25,034
1part spar
1part BLO
1part thinner/mineral spirits

^^^is the Old Timers Formula WOG has posted and several have used as an initial sealer coat (s) followed by several full strength, unthinned, spar.
 

Watermann

Starmada Splash of the Year 2014
Joined
Jan 12, 2013
Messages
13,787
The issue I have with anything really "soaking" into plywood it that first ply glue barrier so it's a minuscule soak in on the face, only the edges will actually benefit from the soaking and gravity doesn't help that much the way we paint the stuff on the flat and just hit the edges.

Now using the OTF on your dimensional lumber for trailer bunks, oh yeah that's some soak in there.
 

Candutch

Chief Petty Officer
Joined
May 8, 2015
Messages
637
I agree with Rob that it wont penetrate past the glue layer but thats still the whole first layer of wood now acting as a barrier instead of just a couple layer on top od the wood.
Now that you guys all mention it I remember reading the OTF method on these forums, that's probably why I decided to go with a 50/50 thinned mix since I didn't have linseed oil and didn't want to go out and find it. Im not sure what the linseed oil brings to the table to improve the sealing process but seeing how the ply i sealed stood up to the elements I will just stick with that method in the future. One less product to buy anyway.
 

Candutch

Chief Petty Officer
Joined
May 8, 2015
Messages
637
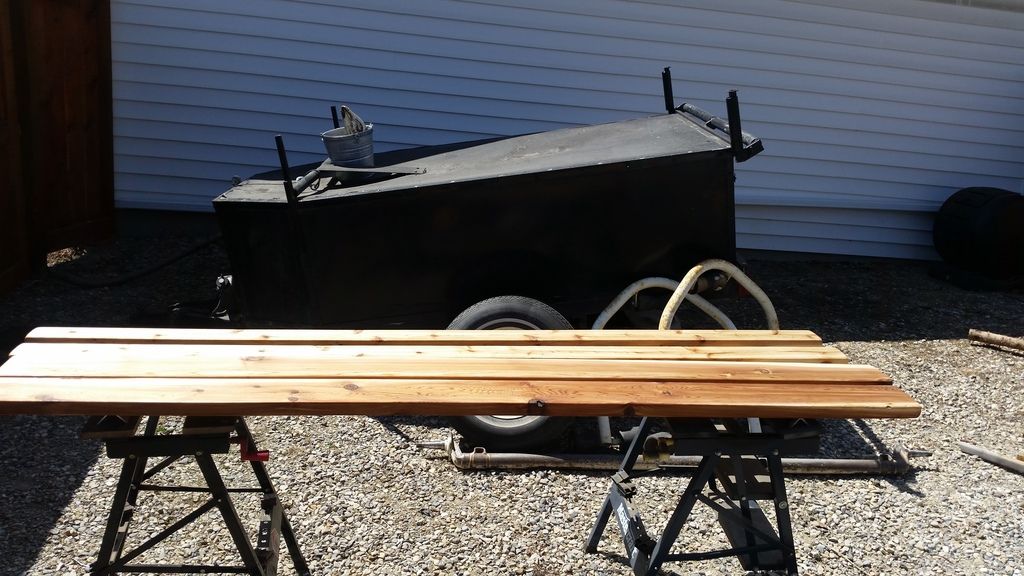
It's our last hot day before the weather turns so I'm taking full advantage of it to get some warm weather stuff done. Got the bunk boards out and hit them with my 50/50 spar thinner mix. As you can probably tell I used cedar, I hope that will be fine. I was limited to that, spruce or pressure treated for lumber. I know the bad about pressure treated so that was out. I went with the cedar because it is more rot resistent than spruce but I would have preferred fir.
I bought my axle yesterday, got a great deal at princess auto, 100 bucks off so I was pretty happy about that. It came with the easy lube hubs for 200 and that's what it was going to cost to have one built without hubs. So needless to say I was super happy about that, until I got home and mocked them up and realized that the sprint center were an inch longer ARGH!
At least it's not too far off, the springs can still mount completely under the frame they will just be towards the outside. I'm going to have to weld another plate to the moveable brackets and re drill the holes so I can move them outwards a half inch on each side but at least I can still use the new axle.
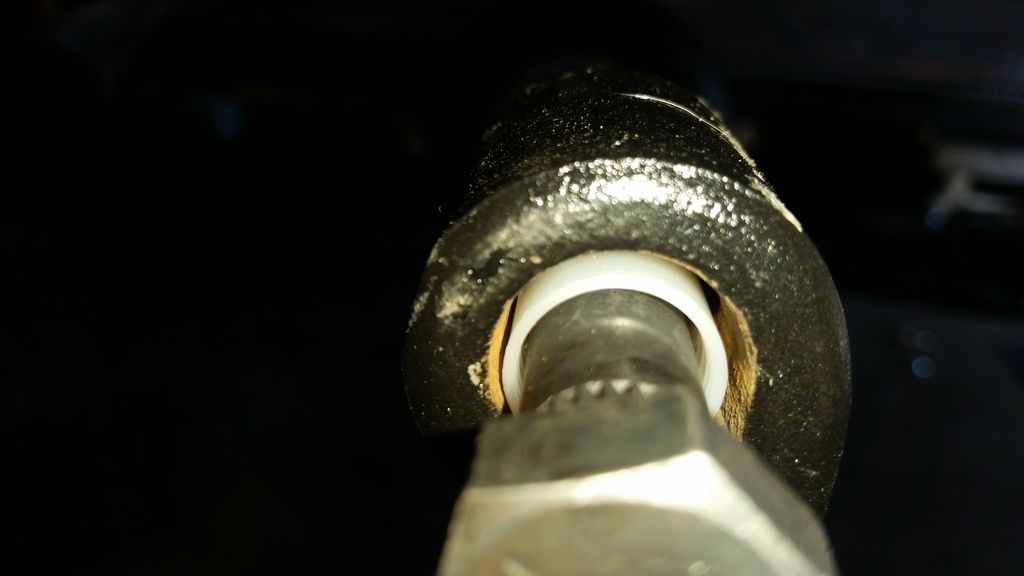
Question about the bolts that go through the axle eye. Do they come in different sizes? I picked up the only size they had in the axle/spring department and they seem to be a bit roomy. I attached a picture to show how much room there is.
Last thing to do today will be to get the rest of the vinyl glued.
View attachment y4mtfcCDnvE5gVx-Ty_ih_EOG6ZBmdi3fBe6hsZTLSMHxB8uYBI1r2aVYvSMxvNC5jDS0EVaquIoWZdR6FbeLjv1PhO2Ri_nBJbu
20170506_122529.jpg

20170506_122655.jpg

I also lucked out and found some locking nuts for the wheels on clearence today, $4.
 
Last edited:

Watermann

Starmada Splash of the Year 2014
Joined
Jan 12, 2013
Messages
13,787
Those sleeves for the inside of the spring eye are too small, they should be a tighter fit. I ran into the same problem and had to get new ones when I did my trailer and they were much thicker.
 

Candutch

Chief Petty Officer
Joined
May 8, 2015
Messages
637
Thanks Rob, so do I need a thicker bolt as well or just sleeve?
 

Watermann

Starmada Splash of the Year 2014
Joined
Jan 12, 2013
Messages
13,787
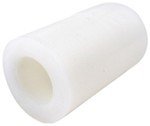
I used my 9/16" dia bolts and the bushing looked like this. bushing.jpg


The size I used is.... Nylon Bushing - 9/16" Inner Diameter, 1.024" Outer Diameter - 1-3/4" Long

A google search with those distentions if right for yours should give you an idea where to get them. I too have 4 of those skinny things somewhere laying around.
 

Candutch

Chief Petty Officer
Joined
May 8, 2015
Messages
637
Thanks again Rob, it looks like mine will be the same size. I found them online but i think im going to see if I can find these locally, shipping was ridiculous whether it was from Canada or the US. Not really interested in paying $15 a piece if I don't have to.
 

Candutch

Chief Petty Officer
Joined
May 8, 2015
Messages
637
Oh man, can't believe 2 weeks have passed by since my last update.

I managed to get some boat and trailer work done over the last 14 days. On the boat I got the last 2 doors wrapped in vinyl and the hatches painted in bedliner and everything attached. Only thing left to do for that is find a latch for the bow door but I may just leave that door off for now.
I also got the stern panels covered in vinyl and will mount them permanently when my wiring is done.
View attachment y4mjQhIKWiG0Kjv7VEWJq-n-XKXC1D_Msuq2QicVvAYbOTx13Ov28HqjPYPQ9u7CDkrXhCna-ePIXsmD83oYLwkm0cE3tMJHvenC
View attachment y4mrw12YYMfKSUuo4tgHSSMVrKU7wSLezvcRlGl3RvalEITir8L61lo_ZVRIbgVLZ6J6BkupeDviU2OcT5vAguUDVAWWGrPZjoqm

I'm also almost finished with the trailer. Just have the bunks to carpet and wiring to run. I was hoping for some opinions on where to mount the second set of bunks, the 2 x 4s. I messed up when I welded the brackets on for the retractible transom tie downs, turns out they are right where the 2 x 6 bunks needed to be so they would be on the outside of the strakes so now they will have to run on the inside. My question is should I mount the 2x4 bunks to the far outside or should I mount them at the front for guide bunks to align the boat?
View attachment y4mQfwmbzyzSjCvHqyQyq3xHfT7PmVRGMoJb0NmkeB9WfWNb87KyvtW3Kyy2mEpfMWS5v27L569VQgvYkutPZLvY62hMDxRN5JnM
View attachment y4mUFznoKSsqQ-xNPPJ0h_mWtt5q04A2_ottq12EUpH2dLV3WcZMtp2chmRY0s22B0Mp4mRoAQeprf5g1vd_D2SQDuESmXVNL6qj
 
Last edited:

Watermann

Starmada Splash of the Year 2014
Joined
Jan 12, 2013
Messages
13,787
Yeah looks super Rob :thumb:

I wouldn't think putting the bunks forward would do much of anything in the way of support.
 

Candutch

Chief Petty Officer
Joined
May 8, 2015
Messages
637
Thanks Chris and Rob. With the forward bunks I was thinking that they would just guide the bow straight to the how stop and not really carry any of the load.
 

budski

Lieutenant Commander
Joined
Sep 12, 2012
Messages
1,845
Wow really nice job on the trailer will compliment the boat nicely
 

knezzer

Petty Officer 1st Class
Joined
Apr 8, 2012
Messages
214
Super Awesome trailer ! I really like how this all turned out for you. You've put some nice touches on there
 
Top