1981 Starcraft Super Sport 180 - Gonna try a Restore

Candutch

Chief Petty Officer
Joined
May 8, 2015
Messages
637
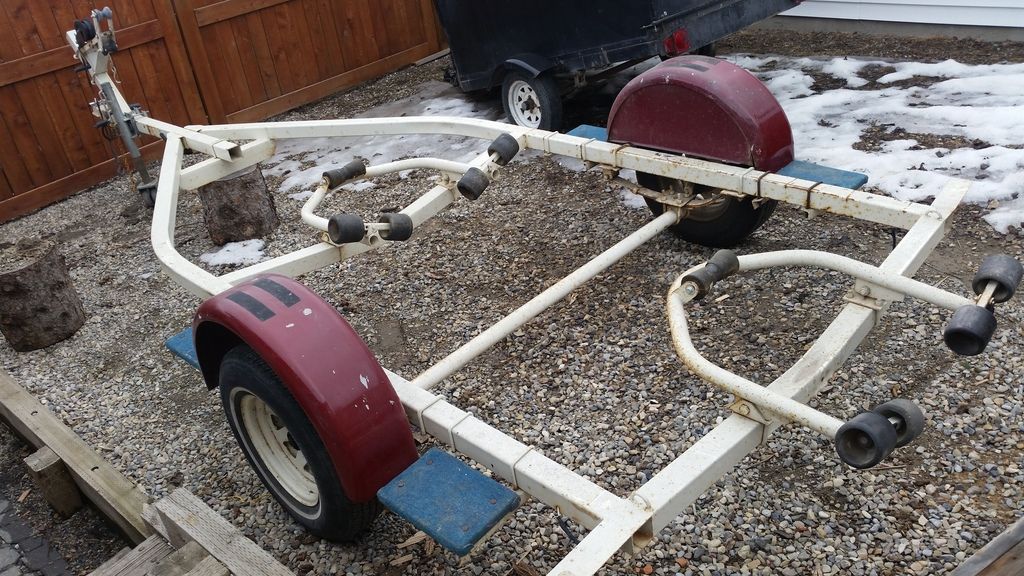
Thanks John and Knezzer. I'm really happy with how it turned out. It was a huge transformation. Not sure if I had posted any pics of the old trailer so here is the before.
 

Watermann

Starmada Splash of the Year 2014
Joined
Jan 12, 2013
Messages
13,798
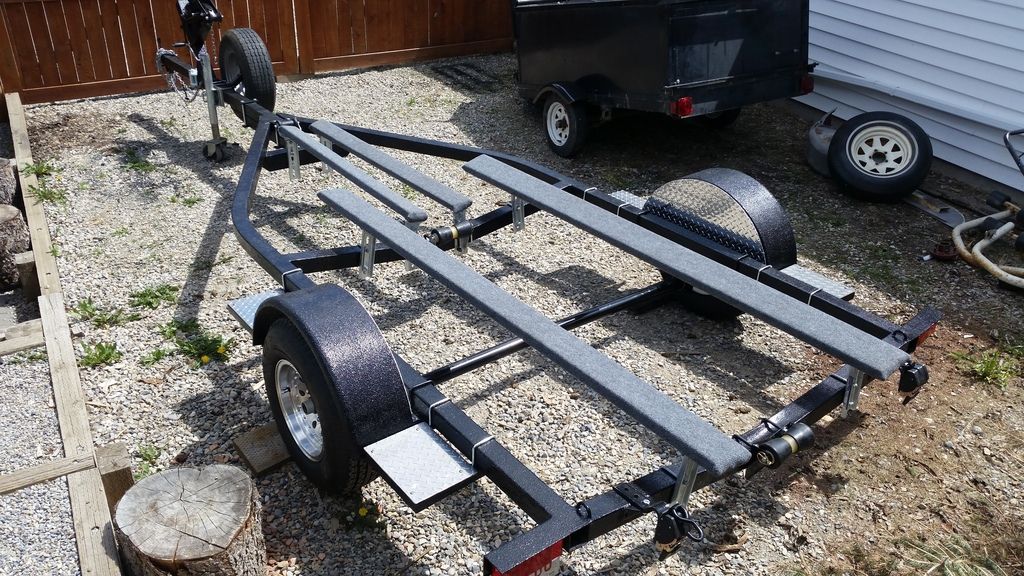
Finally done the trailer! Thank goodness that is over with.

20170521_142516.jpg

Nice to have that trailer work finished alright, I sure do know the feeling. I forced myself to do it first so I would not have to dread it later on in the rebuild. Looks great and you got the boat buckles on, you won't be sorry you spent on those. Oh hey I think I see some nice alloy wheels on that new axle too :thumb:

With the rough finish will SC decals stick to the frame?
 

Candutch

Chief Petty Officer
Joined
May 8, 2015
Messages
637
Ya Rob I wish I would have tackled the trailer 2 years ago, lesson learned, next time trailer work is first. I'm not sure if decals will stick, probably have to paint the SC on if I want it. It sure is nice and grippy to walk on though.
 

Watermann

Starmada Splash of the Year 2014
Joined
Jan 12, 2013
Messages
13,798
Yeah I added non-skid poly bead paint to the tops of the fenders and tongue for that reason.

Just an idea if it means that much to put our the effort, do you have any scrap AL laying about you could cut to the right length/width drill 2 holes, prime, paint and rivet it to the frame and then apply the decal on that nice smooth strip. I think that would look kinda cool.
 

Candutch

Chief Petty Officer
Joined
May 8, 2015
Messages
637
Yeah I added non-skid poly bead paint to the tops of the fenders and tongue for that reason.

Just an idea if it means that much to put our the effort, do you have any scrap AL laying about you could cut to the right length/width drill 2 holes, prime, paint and rivet it to the frame and then apply the decal on that nice smooth strip. I think that would look kinda cool.

That's a good idea actually but maybe once I've splashed I'll look at doing something like that. I do have some scrap decal laying around that I should try to see how it works. It may work, here is a close up of the texture, it's not too bad.

View attachment y4mYDU4mn3Qoma-DViN-TOQUpBKdY9WNF5wydGhp0Pobm6ykhMAxPqxpMzJCNAuanwyPjHDa4-K6Qs80xwGgO3VxPpEaLyK0Pp4n
 
Last edited:

Watermann

Starmada Splash of the Year 2014
Joined
Jan 12, 2013
Messages
13,798
Not too bumpy :lol: I'm thinking that the decal would have a problem staying on and using a paddle to smooth out bubbles would be a huge problem.
 

Candutch

Chief Petty Officer
Joined
May 8, 2015
Messages
637
Definately couldn't use a paddle, would have to be thumb pressure to get it to mold over the bumps but getting the air bubbles out would be difficult if not impossible.
 

Candutch

Chief Petty Officer
Joined
May 8, 2015
Messages
637
Yesterday I figured out how I was going to close up the back of the bow deck where it was open to the fuel tank. I figured with all my practice with aluminum framing I would build a box to give some more storage. It's all aluminum except for the top which was a piece of leftover ply from the floor. The front panel screws are tapped so it can be removed easily just in case it need to come out and that is a vent on it since the fuel tank is up there.
View attachment y4mEIw4WxbCftegub3VeElSUK6tAjmb3xwlq7GbLwxRgouD5_1e6q_QsjOlE0IihH3CtDf3wFbIrVAIff7qLLXszJhHjwCKRkTQTView attachment y4man81Px__YwaAsEbMLHwsAlQ3CP0RdaJVciNwTG4DBGzKAkSn0aTvdGxb16gfZ7FuVzXe4vJ87KXu5MlNNkJYuSCC7Bm8TwuvC


Now I just have to make a cover for the fuel fill hose and drill the bolt holes to tie the transom to the deck aND I'll be ready to get the motor back on and hook up all the wiring. It's getting so close now but still no deadline, I don't want to jinx it.
 
Last edited:

Watermann

Starmada Splash of the Year 2014
Joined
Jan 12, 2013
Messages
13,798
I like the addition of the box between the consoles, I debated doing that on my SS and I guess I still could. Yours looks good and makes me think of adding one now.
 

Candutch

Chief Petty Officer
Joined
May 8, 2015
Messages
637
Thanks Rob, it was a quick job as far as jobs go, a couple hours and it was done.
 

budski

Lieutenant Commander
Joined
Sep 12, 2012
Messages
1,845
Looks like you're almost ready to splash, I like your idea of that storage as well very nice.
 

Candutch

Chief Petty Officer
Joined
May 8, 2015
Messages
637
Thanks John. Yes the splash is geting close but I fear the wiring may take me awhile to figure out.
 

MNhunter1

Lieutenant Junior Grade
Joined
May 12, 2014
Messages
1,059
Great work! I too have found my progress paralyzed by the wiring...outta my comfort zone and want a nice neat layout, not some birds nest of wires running everywhere.
 

Watermann

Starmada Splash of the Year 2014
Joined
Jan 12, 2013
Messages
13,798
I'm thinking if I add anything there it will be a step with a 7" rise. I noticed it was a bit tough to take the step up & down to the top deck 12" high while walking sideways through the center windshield. It makes people use the windshield as a crutch which is not good after a while.
 

Candutch

Chief Petty Officer
Joined
May 8, 2015
Messages
637
I'm thinking if I add anything there it will be a step with a 7" rise. I noticed it was a bit tough to take the step up & down to the top deck 12" high while walking sideways through the center windshield. It makes people use the windshield as a crutch which is not good after a while.

Thanks for that insight, i never even thought of that but it makes total sense. If I find it a problem down the road then I can modify it but for now I'll leave it as I have other things to get done. It's those little things that you learn when using the boat and can improve upon next time.
 

Candutch

Chief Petty Officer
Joined
May 8, 2015
Messages
637
Great work! I too have found my progress paralyzed by the wiring...outta my comfort zone and want a nice neat layout, not some birds nest of wires running everywhere.

Ya MN, I'm not very comfortable with it either. I figured out all the wire sizing and ran everything in the fall but now I have to hook it all up. I'm mostly worried about the wiring for the controls and guages, I don't have a clue where any of that goes.
 

Watermann

Starmada Splash of the Year 2014
Joined
Jan 12, 2013
Messages
13,798
The gauges are super easy, you just have to set them up in the dash panel before installing them into the boat. Make your 2 daisy chains for pos(lights) / neg and then once installed in the boat all you do is add the sender wire to the appropriate gauge. Tach, volt meter and fuel gauge need to have an additional switched power so that's the only issue since it needs to come from the control box ignition switch. You want to have a nightmare, try rewiring a complete motor!

Looks like this, nice and simple.

IMAG2648.jpg
 

Candutch

Chief Petty Officer
Joined
May 8, 2015
Messages
637
Thanks Rob, yes I feel for ya having to rewire that motor. Are the lights on the guages fused? If so can I just use the nav light fuse? I was thinking that would make a good switch for the guage lights since I don't need them until it's dark anyways.
 

Watermann

Starmada Splash of the Year 2014
Joined
Jan 12, 2013
Messages
13,798
That's exactly what I did, added the gauge lights power daisy chain to the nav light toggle.
 
Top