1981 Springbok 18' Restoration/Renovation

SlipperyOar

Petty Officer 3rd Class
Joined
Apr 12, 2024
Messages
92
The gluvit on all the seams cured nicely, I riveted the stringers back into the boat.

There was a few spots with some signs of corrosion so I cleaned with soap and water, then wire brushed away any of the corrosion, then acid etched and primed each spot. I then used 2 part epoxy to fill any small corrosion pitting spots and allowed that to cure.

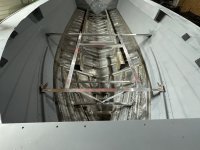
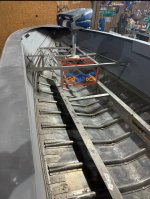
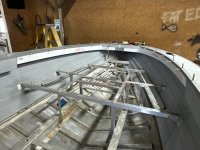
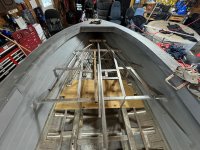
I then began building the front casting deck framing. Using 1/8” thick angled aluminum varying between 1-1/2” and 1-1/4” leg lengths, the longer leg lengths in the middle and the shorter lengths towards the front as I plan on having a pedestal base for a seat. Have a few more pieces to add in tomorrow to tie into the hull between the front and rear cross beams. I opted to use solid rivets where I could access both sides for added strength and the resistance to vibrations possibly loosening them.

Coming together nicely!
 

Attachments

  • IMG_9896.jpeg
    4.7 MB · Views: 4
  • IMG_9901.jpeg
    IMG_9901.jpeg
    2 MB · Views: 4

SlipperyOar

Petty Officer 3rd Class
Joined
Apr 12, 2024
Messages
92
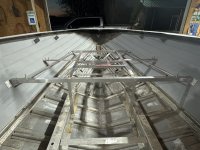
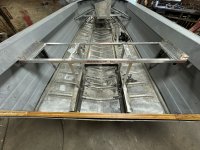
Continued on with framing the casting deck. I’ve got 4 vertical supports still needed and 1 more horizontal brace at the very front to allow to fore-most part of the future deck to be secured and be a meeting spot where the deck will connect perpendicularly to a cover beneath the cap. Hoping to have some time tomorrow or Sunday to finish these last bits up!

Back to work next week and likely won’t get any work done on it for the next 2 weeks with my busy schedule so this has been a nice productive stretch!
 

Attachments

  • IMG_9903.jpeg
    4.5 MB · Views: 2
  • IMG_9904.jpeg
    IMG_9904.jpeg
    2.3 MB · Views: 4

SlipperyOar

Petty Officer 3rd Class
Joined
Apr 12, 2024
Messages
92
One thing i noticed last night as i cleaned my workspace, i may have slightly miscalculated the dimensions of my splashwell. The splashwell fits perfectly from gunnel to gunnel in the boat, but the two pieces of aluminum that were supposed to rivet to the side of the hull and join with the side storage pieces may not fit in there now. Doesnt seem like too large of an issue, i'll likely need to cut back on the side piece and fold tabs on it to reattach and just use solid rivets with 5200 on any unused holes. Minor mistake made by me but shouldnt hold me back
 

airshot

Vice Admiral
Joined
Jul 22, 2008
Messages
5,084
One thing i noticed last night as i cleaned my workspace, i may have slightly miscalculated the dimensions of my splashwell. The splashwell fits perfectly from gunnel to gunnel in the boat, but the two pieces of aluminum that were supposed to rivet to the side of the hull and join with the side storage pieces may not fit in there now. Doesnt seem like too large of an issue, i'll likely need to cut back on the side piece and fold tabs on it to reattach and just use solid rivets with 5200 on any unused holes. Minor mistake made by me but shouldnt hold me back
We call that an engineering design change, very common !
 

SlipperyOar

Petty Officer 3rd Class
Joined
Apr 12, 2024
Messages
92
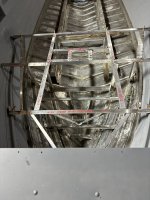
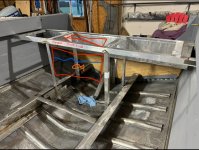
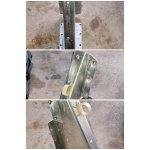
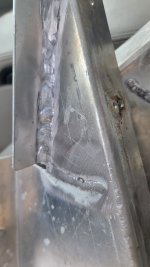
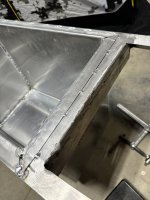
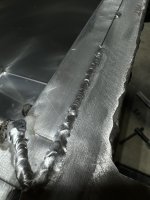
Welded some 2” flat bars onto the bow casting deck framing. Added it to the 3/4” leg sections to add some area needed when I have storage compartments and need the area to support the hatches. Everything went well with the welding; 110 amps, 30% AC balance, grey tungsten, 3/32” 5356 filler.

Also did some welding after the initial fit up was perfect for the aft deck. It’ll tie in to both sides of the hull with angled pieces of aluminum riveted to the hull, as well as being riveted to the gunnels for rigidity. Tied into the stringers with 1-1/4” leg angled aluminum. Tied into the splashwell as well. Not quite done yes as I’d like to reinforce it a bit more to add some more lateral strength along the bottom.

Next up will be adding a few more 2” strips to the bow framing for another storage hatch, and finishing up with the bracing for the aft deck.

Thinking about running some rectangular or angle aluminum parallel with the stringers along the sides of the hull to give the floor more locations where it can be tied it, as well as adding additional strength.

Happy with what it’s come to so far, hoping to be done all the structural framing shortly and begin measuring out all the wooden flooring and getting that cut and fit up.
 

Attachments

  • IMG_9960.jpeg
    IMG_9960.jpeg
    1.6 MB · Views: 3
  • IMG_9961.jpeg
    5 MB · Views: 3
  • IMG_9962.jpeg
    5 MB · Views: 2

SlipperyOar

Petty Officer 3rd Class
Joined
Apr 12, 2024
Messages
92
Upon getting the main frame of the rear decking in, I kept on looking at it for a while and thought how much of a pain in the a$$ it always is to bring a big cooler in my other boat whenever I’m fishing to hold the catch of the day.

With all of the scrap aluminum I’ve got from other things I’ve fabricated I’ve got roughy enough for 4/5 of the panels to fabricate a livewell to go beneath the two angled pieces and fit within the 4 vertical beams. Roughly 24” wide, 13” deep, and up to 22” of height from the stringers to the top. I don’t plan on going all of the way to the bottom to give me some space for the drain tubing to run off but I really like the idea of having a livewell.

I’ve seen lots of boats with the aft mounted livewell, and lots with the bow mounted livewell. I do have a spot in the bow where I could mount a livewell as well, with slightly smaller capacity. If anyone could chime in on what’s best for weight distribution it would be great. Both would be directly in the middle along the keep so it shouldn’t cause any excess weight to either side. Regardless if they become livewells. Having two aluminum boxes for storage could be amazing and eventually transforming 1 or both into a livewell would surely open up deck space to eliminate the need for bringing a cooler or bucket for fish.

I looked into it lots at these Flow-Rite systems and the V3 looks really appealing. I like the functionality of them with limited holes through the hull and of course adding a seacock to any ports to add leak prevention redundancy.
 

Attachments

  • IMG_0005.jpeg
    IMG_0005.jpeg
    312.3 KB · Views: 0
  • IMG_0020.jpeg
    IMG_0020.jpeg
    443.3 KB · Views: 0
Top